
Introduction
The Pawfly Automatic Fish Feeder is designed to provide convenient and reliable feeding for your aquarium fish. This USB rechargeable device features a 320 ml capacity, adjustable feeding times, and portion control, ensuring your fish are fed consistently even when you are away. It is suitable for dispensing dry food such as powder, pellets, and granules.
Product Components
- Automatic Fish Feeder Unit (with 320 ml food container)
- USB-C Charging Cable (Wall adapter not included)
- Fixation Clamp for tank wall mounting
- U-shaped Base and Sticker for tank lid attachment
- Three interchangeable dispensing ports (various sizes)
Setup
1. Charging the Feeder
Before initial use, fully charge the feeder. Connect the provided USB-C charging cable to the feeder's charging port and a standard USB power adapter (not included). The battery indicator on the display will show charging status. A full charge typically lasts 3-6 months.

Image: The feeder's USB-C port and internal rechargeable battery. Connect the USB-C cable to charge the device.
2. Installing the Feeder
The feeder offers two installation methods:
- Tank Wall Mounting (Fixation Clamp): Attach the fixation clamp to the back of the feeder. Securely mount the clamp onto the edge of your aquarium wall. Ensure it is stable and the feeder is positioned correctly over the water surface.
- Tank Lid Attachment (U-shaped Base and Sticker): Attach the U-shaped base to the bottom of the feeder. Use the provided sticker to adhere the U-shaped base to a clean, dry surface on your aquarium lid. Ensure the feeder's dispensing port is directly above the water.

Image: Visual representation of mounting the feeder on the tank wall using the clamp and attaching it to the tank lid with the U-shaped base.
3. Filling the Food Container
Open the lid of the 320 ml food container. Fill it with dry fish food such as granules, pellets, or powder. Do not use flakes or sticks as they may clog the dispensing mechanism. Close the lid securely to maintain food freshness.

Image: The feeder's food container and the types of food it can dispense. Note the three interchangeable dispensing ports.
Operating Instructions
1. Understanding the Control Panel
The feeder features a digital display and several buttons for control:
- Power Button (U): Turns the device on/off.
- Setting Button (Gear Icon): Enters and confirms settings.
- Up/Down Buttons (Triangles): Adjust values (hour, minute, portion).
- Manual Feed Button (Hand Icon): Dispenses food instantly.
2. Setting the Current Time
- Press the Setting Button once. The hour display will flash.
- Use the Up/Down Buttons to adjust the hour.
- Press the Setting Button again. The minute display will flash.
- Use the Up/Down Buttons to adjust the minute.
- Press the Setting Button a third time to confirm the current time.
3. Setting Automatic Feeding Times and Portions
The feeder supports up to 3 feeding times per day, with up to 3 portions per feeding.
- After setting the current time, press the Setting Button again to enter the first feeding time setting. The hour for the first feeding will flash.
- Use the Up/Down Buttons to set the desired hour for the first feeding.
- Press the Setting Button. The minute for the first feeding will flash. Use Up/Down Buttons to set the minute.
- Press the Setting Button. The portion number (e.g., '1P') will flash. Use Up/Down Buttons to select the number of portions (1, 2, or 3) for this feeding.
- Press the Setting Button to confirm the first feeding time and portion.
- Repeat steps 1-5 for the second and third feeding times if desired. If you do not wish to set a second or third feeding, simply press the Setting Button to cycle through and exit the setting mode.

Image: Step-by-step guide for setting the feeder's timer and portion sizes.
4. Adjusting Dispensing Ports
The feeder comes with three interchangeable dispensing ports to control the amount of food released. Select the port size that best suits your fish food type and desired portion size. To change, simply slide out the current port and insert the new one.
5. Manual Feeding
To dispense food instantly, press the Manual Feed Button (Hand Icon) once. This will release one portion of food without affecting the programmed automatic feeding schedule.
Maintenance
1. Cleaning the Feeder
Regular cleaning is essential to prevent food buildup and ensure proper operation. Disassemble the food container from the main unit. Wash the food container and dispensing ports with warm water and a mild detergent. Rinse thoroughly and ensure all parts are completely dry before reassembling. Do not submerge the main electronic unit in water. Wipe the main unit with a damp cloth if needed.
2. Battery Care
Recharge the feeder when the battery indicator shows low power. Avoid completely draining the battery frequently to prolong its lifespan. Use only the provided USB-C cable for charging.
3. Ensuring Food Freshness
The feeder features a moisture-proof design with a retractable dispensing port and rubber stopper to keep food dry and prevent clogging. Always ensure the food container lid is securely closed after refilling. Check the food regularly for any signs of moisture or clumping.

Image: The feeder's moisture-proof design with a retractable outlet and anti-clogging rubber stopper.
Troubleshooting
- Feeder not dispensing food:
- Check if the food container is empty.
- Ensure the dispensing port is not clogged. Clean if necessary.
- Verify that the feeder is powered on and the battery is charged.
- Confirm that feeding times are correctly programmed.
- Display not working:
- Ensure the feeder is powered on.
- Charge the battery. If the display remains blank after charging, contact customer support.
- Food getting wet or clumping:
- Ensure the food container lid is securely closed.
- Check if the feeder is positioned too close to the water surface, allowing humidity to enter.
- Verify that the retractable dispensing port is functioning correctly.
- Inaccurate portion dispensing:
- Ensure you are using the correct dispensing port for your food type.
- Avoid using flakes or sticks, as they can cause inconsistent dispensing.
- Test the feeder over a piece of paper to observe actual portion sizes and adjust settings or port size as needed.
Specifications
| Brand | Pawfly |
| Model Number | Pawfly-CW2857-BK |
| Capacity | 320 ml |
| Dimensions (L x W x H) | 8L x 7.5W x 13H centimeters |
| Color | Black |
| Power Source | USB Rechargeable (Internal Battery) |
| Feeding Frequency | Up to 3 times per day |
| Portion Control | Up to 3 portions per feeding, 3 interchangeable dispensing ports |
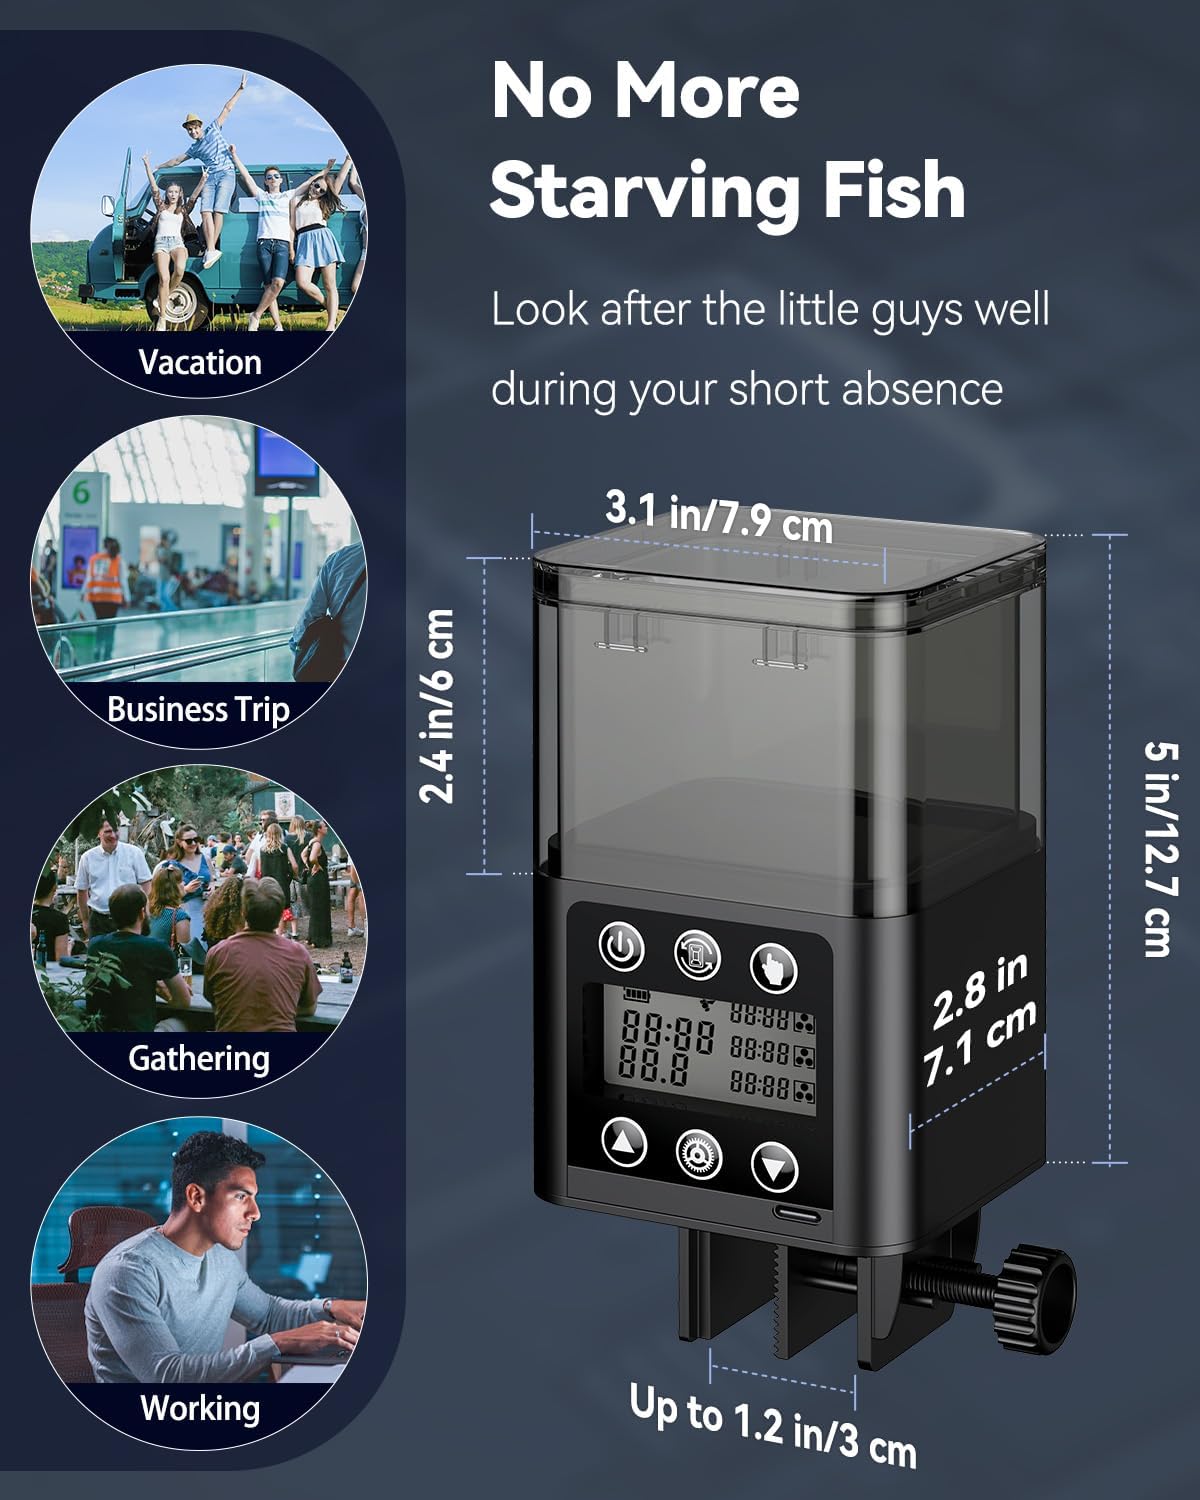
Image: Dimensions of the Pawfly Automatic Fish Feeder.
Warranty and Support
For warranty information, technical support, or any inquiries regarding your Pawfly Automatic Fish Feeder, please refer to the product packaging or contact Pawfly customer service directly. Contact details can typically be found on the manufacturer's official website or through your purchase platform.