
1. Important Safety Instructions
Please read all instructions carefully before using the OSTBA FD-1019 Food Dehydrator. Retain this manual for future reference.
- Always ensure the appliance is unplugged from the power outlet before assembly, disassembly, or cleaning.
- Do not immerse the motor base in water or any other liquid.
- This appliance is not intended for use by persons with reduced physical, sensory, or mental capabilities, or lack of experience and knowledge, unless they have been given supervision or instruction concerning use of the appliance by a person responsible for their safety.
- Close supervision is necessary when any appliance is used by or near children.
- Do not operate any appliance with a damaged cord or plug, or after the appliance malfunctions or has been damaged in any manner.
- For household use only. Do not use outdoors.
- Do not let the cord hang over the edge of a table or counter, or touch hot surfaces.
- Always place the dehydrator on a stable, heat-resistant surface.
- Ensure proper ventilation around the dehydrator during operation.
- Do not use abrasive cleaners or scouring pads when cleaning.
2. Product Components
The OSTBA FD-1019 Food Dehydrator includes the following parts:
- Motor Base: Contains the heating element, fan, and control panel.
- Drying Trays (5x): Stainless steel mesh trays for holding food.
- Lid: Transparent lid to cover the top tray.
- User Manual: This document.
- Recipe Book: A guide for various dehydration recipes.
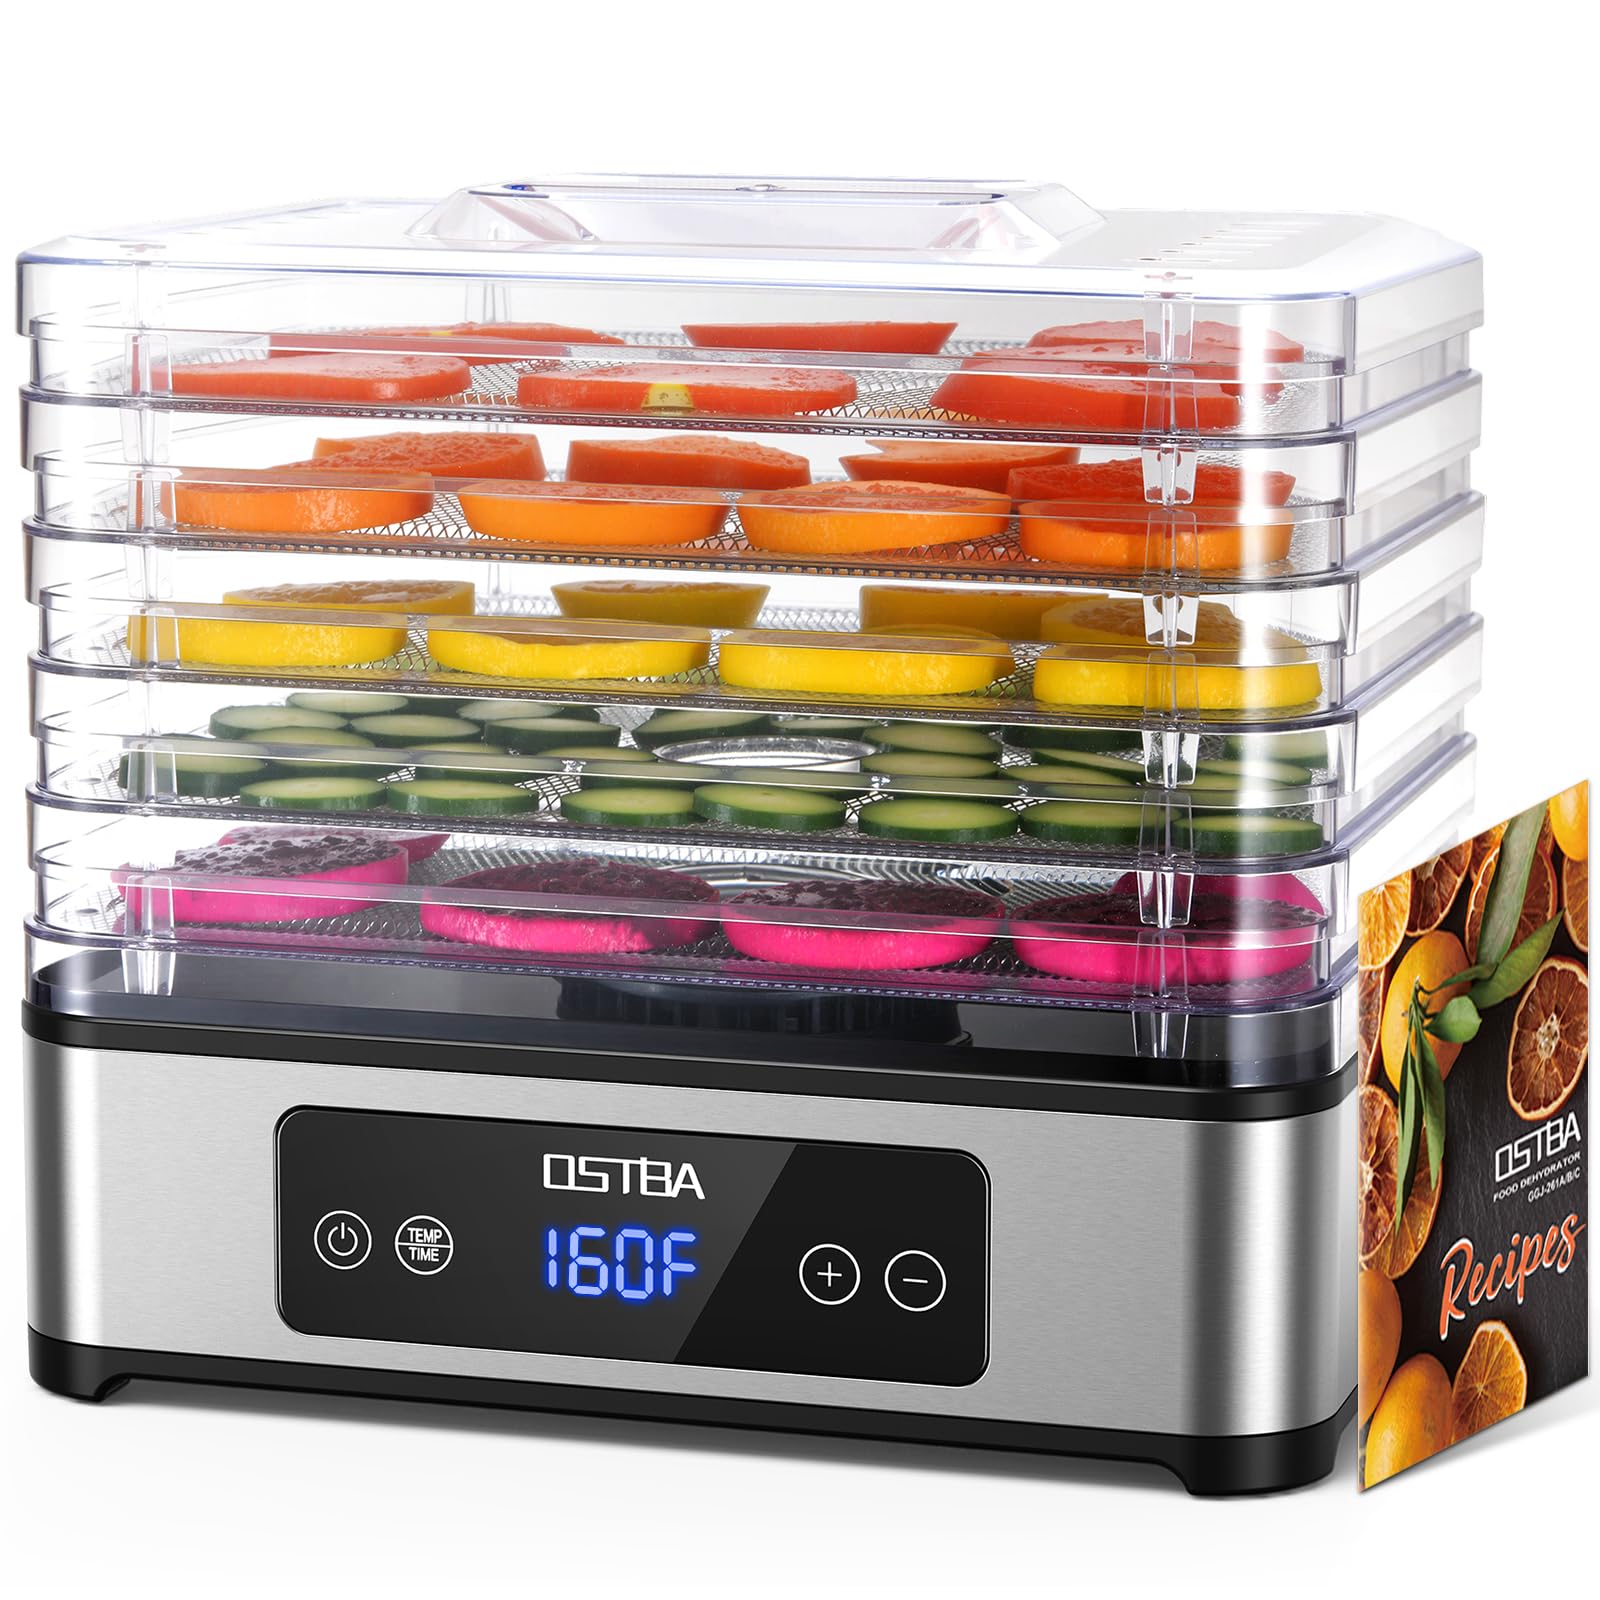
Image: The OSTBA FD-1019 Food Dehydrator fully assembled with its five transparent trays and digital control panel.

Image: Close-up view of the durable stainless steel mesh trays, highlighting their dense mesh design to prevent small pieces from falling through.
3. Setup Instructions
- Unpack: Carefully remove all components from the packaging.
- Clean: Wash the drying trays and lid with warm, soapy water. Rinse thoroughly and dry completely before first use. The trays are dishwasher safe (max 70°C/160°F).
- Position: Place the motor base on a clean, dry, stable, and heat-resistant surface. Ensure there is adequate space around the unit for proper ventilation.
- Assemble Trays: Stack the desired number of drying trays onto the motor base. The trays can be rotated 90 degrees to adjust the height between them, allowing for more space for thicker items or compact storage.

Image: Diagram illustrating how to adjust the height of the drying trays by rotating them 180 degrees, showing minimum 0.55 inch and maximum 1.02 inch spacing.
- Connect Power: Plug the power cord into a standard 120V AC electrical outlet. The unit features convenient bottom cord storage for tidy organization.
Video: Official OSTBA video demonstrating the assembly and use of the 5-tray food dehydrator, including how to adjust tray height and load food.
4. Operating Instructions
The OSTBA FD-1019 Food Dehydrator features a smart LED control panel for easy operation.

Image: Close-up of the control panel showing Power On/Off, Temp/Time button, and +/- buttons for adjustment.
- Prepare Food: Wash and slice food items evenly. For best results, ensure slices are uniform in thickness.
- Load Trays: Arrange food in a single layer on the drying trays, ensuring there is space between pieces for optimal airflow. Do not overload the trays.
- Stack Trays: Place the loaded trays onto the motor base, ensuring they are correctly aligned. Place the lid on top.
- Power On: Press the Power On/Off button to turn on the dehydrator.
- Set Temperature: Press the Temp/Time button once to select temperature adjustment. Use the + and - buttons to set the desired temperature (95°F to 160°F).
- Set Timer: Press the Temp/Time button again to select time adjustment. Use the + and - buttons to set the desired drying time (1 to 48 hours).
- Start Dehydration: The dehydrator will automatically begin operation after a few seconds of setting the time.
- Monitor Progress: Periodically check the food's dryness. Drying times can vary based on food type, thickness, and moisture content.
- Completion: Once the set time elapses, the dehydrator will automatically shut off and beep to indicate completion.

Image: Visual guide showing the four simple steps to dehydrate food: wash and slice, place evenly on trays, set time and temperature, and wait for dried food.
5. Maintenance & Cleaning
Regular cleaning and maintenance will ensure the longevity and optimal performance of your dehydrator.
- Unplug: Always unplug the appliance from the power outlet and allow it to cool completely before cleaning.
- Clean Trays & Lid: The stainless steel trays and lid are dishwasher safe. Alternatively, wash them with warm, soapy water and a soft cloth or sponge. Rinse thoroughly and dry completely.
- Clean Motor Base: Wipe the motor base with a damp cloth. Do not immerse the motor base in water or any other liquid.
- Storage: Store the dehydrator in a clean, dry place. The trays can be stacked in a compact configuration for space-saving storage.

Image: The stainless steel drying trays placed inside a dishwasher, demonstrating their dishwasher-safe feature for easy cleaning.
6. Troubleshooting Guide
| Problem | Possible Cause | Solution |
|---|---|---|
| Dehydrator does not turn on. | Not plugged in; power outlet malfunction; unit not powered on. | Ensure the power cord is securely plugged into a working outlet. Press the Power On/Off button. |
| Food not drying evenly. | Overloaded trays; unevenly sliced food; insufficient airflow. | Ensure food is in a single layer with space between pieces. Slice food uniformly. Rotate trays periodically during drying. |
| Dehydrator stops unexpectedly. | Timer elapsed; overheating protection activated. | Check the set timer. If the unit overheats, it will automatically shut off. Allow it to cool down before restarting. |
7. Product Specifications
- Model: FD-1019
- Brand: OSTBA
- Wattage: 400 watts
- Voltage: 120V
- Material: Acrylonitrile Butadiene Styrene (ABS), Stainless Steel
- Color: Silver, Clear, Black
- Product Dimensions (D x W x H): 8.26" x 11.41" x 8.18"
- Number of Trays: 5
- Temperature Range: 95-160°F (35-71°C)
- Timer: 1-48 hours
- Material Features: Food Safe, BPA-Free
- Dishwasher Safe: Yes (trays and lid)
8. Warranty & Support
The OSTBA FD-1019 Food Dehydrator comes with a 12-month warranty from the date of purchase.
For warranty claims, technical support, or any questions regarding your product, please contact OSTBA customer service through the official website or your retailer.
Please have your model number (FD-1019) and proof of purchase ready when contacting support.


