
Introduction
Thank you for purchasing the Maxax 4-Light Black Linear Chandelier. This manual provides essential information for the safe installation, operation, and maintenance of your new light fixture. Please read these instructions thoroughly before beginning installation and retain them for future reference.
Safety Information
- Always turn off the main power supply at the circuit breaker before installing, servicing, or cleaning the fixture.
- Consult a qualified electrician if you are unsure about the installation process.
- Ensure all electrical connections comply with local codes and ordinances.
- Use only the specified bulb type and wattage to avoid fire hazards.
- Handle glass components with care to prevent breakage.
Package Contents
Carefully unpack your fixture and check that all parts are included. If any parts are missing or damaged, do not attempt to assemble or install the fixture. Contact customer support for assistance.
- Chandelier Body with 4 Light Sockets
- Glass Shades (4 pieces)
- Adjustable Rods (3 x 12-inch, 1 x 6-inch)
- Mounting Hardware (Canopy, Mounting Plate, Screws, Wire Nuts)
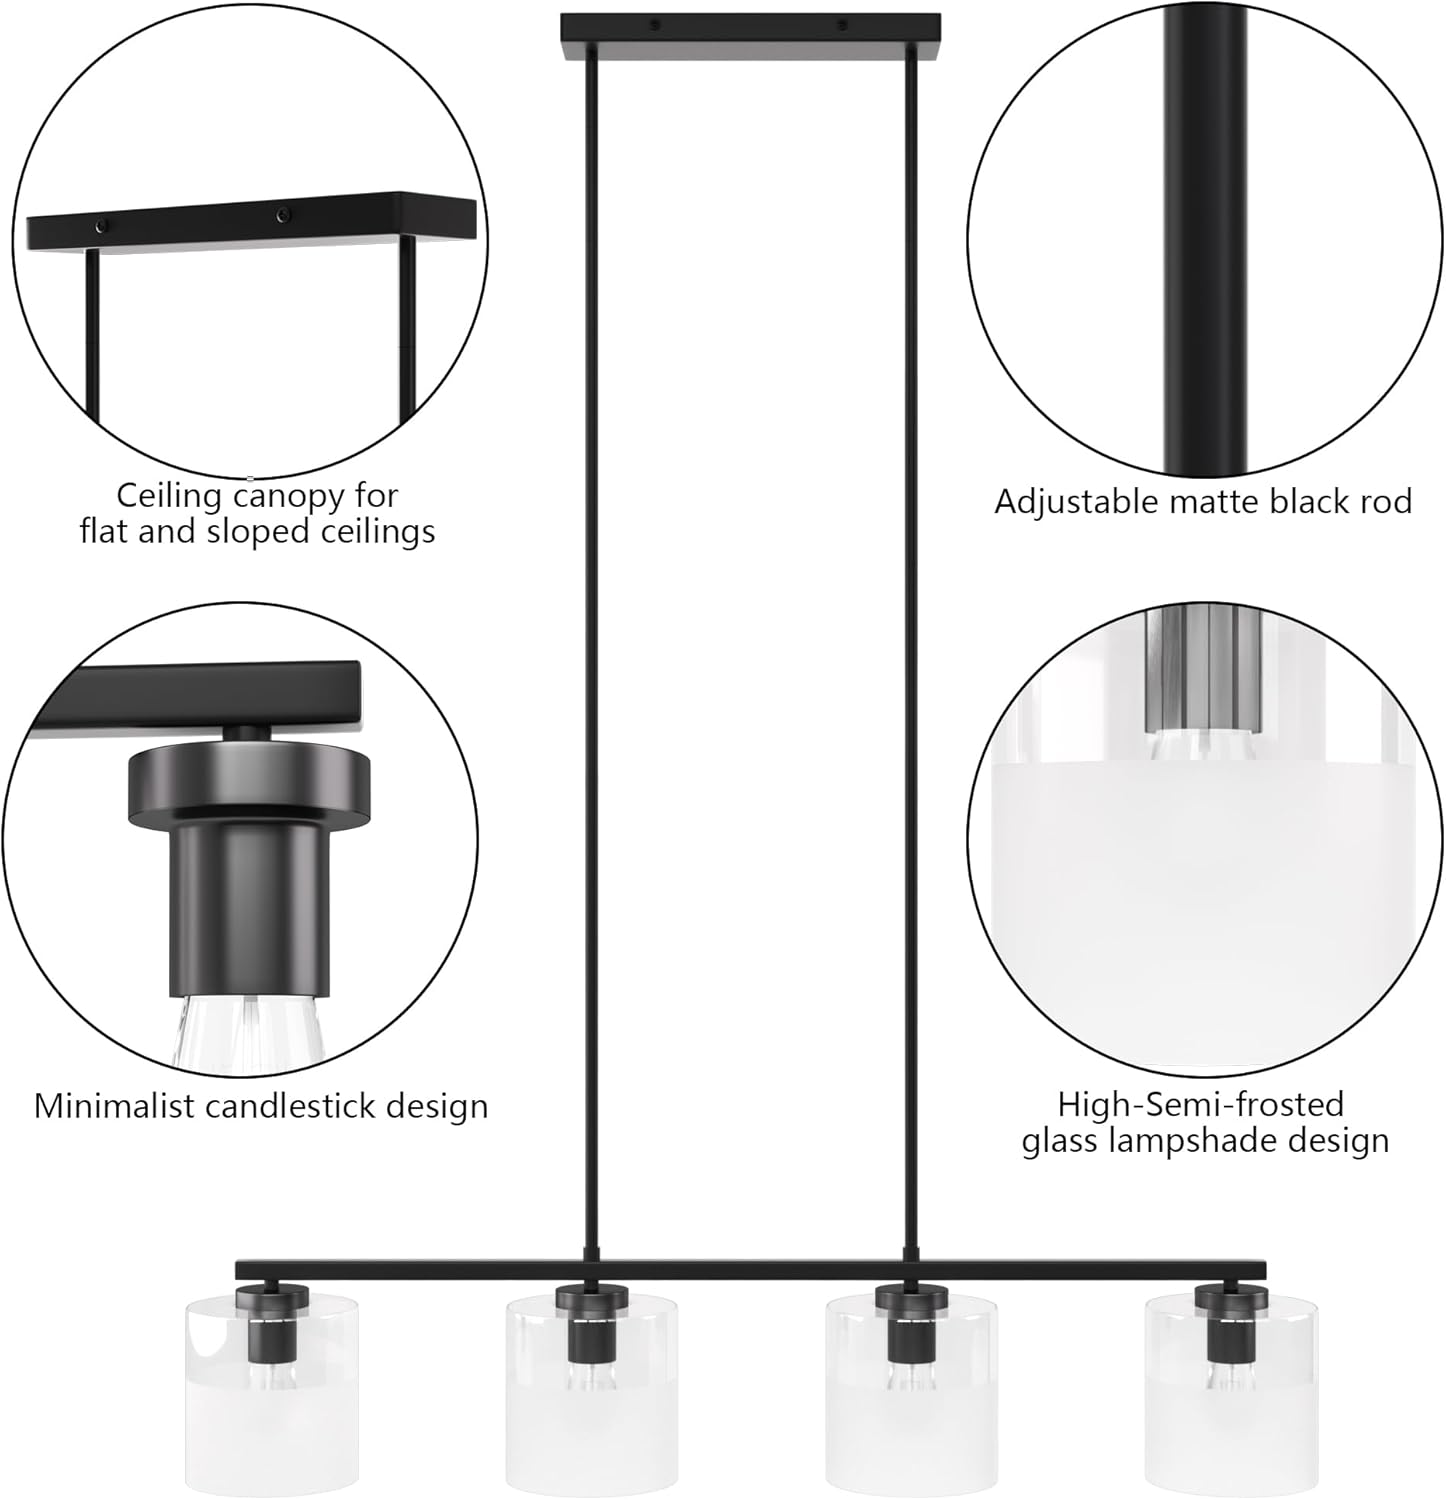
Image: Detailed view of chandelier components including ceiling canopy, adjustable rod, minimalist candlestick design, and high-semi-frosted glass lampshade.
Specifications
| Brand | Maxax |
| Model Name | 29025A-P4BK |
| Color | Black |
| Material | Glass, Metal |
| Product Dimensions | 39"L x 39"W x 7.5"H |
| Adjustable Height | Max 42 inches (using 12-inch and 6-inch rods) |
| Number of Lights | 4 |
| Bulb Base | E26 Standard Socket |
| Max Wattage per Bulb | 60W (Incandescent) |
| Voltage | 110 Volts |
| Dimmable | Yes (with dimmable bulbs and compatible dimmer switch, not included) |
| Installation Type | Flush Mount (Ceiling Mount) |
| Special Feature | Anti-Rust |

Image: Product dimension diagram showing the chandelier's length of 39 inches, width of 7.5 inches, and adjustable cord length up to 42 inches.
Setup and Installation
This fixture requires assembly and installation. It is recommended to have two people for installation. Ensure you have all necessary tools (screwdriver, wire strippers, electrical tape, ladder) before starting.
Step-by-Step Installation
- Turn off Power: Locate the circuit breaker for the area where you are installing the fixture and turn off the power.
- Prepare Mounting Plate: Attach the mounting plate to the junction box in the ceiling using the provided screws. Ensure it is securely fastened.
- Adjust Height: Determine the desired hanging height for your chandelier. The fixture comes with adjustable rods (3 x 12-inch and 1 x 6-inch) that can be combined to achieve various lengths. Thread the chosen rods onto the fixture body.
- Wire Connections: Carefully connect the fixture's wires to the corresponding house wires. Connect the black wire (live) to the black wire, the white wire (neutral) to the white wire, and the ground wire to the ground wire. Secure connections with wire nuts.
- Mount Fixture: Carefully lift the fixture and align the canopy with the mounting plate. Secure the canopy to the mounting plate using the provided screws.
- Install Bulbs: Screw E26 base bulbs (not included) into each of the four sockets. Do not exceed 60W per bulb.
- Attach Glass Shades: Carefully place each glass shade over its respective socket and secure it according to the fixture design.
- Restore Power: Once installation is complete and all components are secure, turn the power back on at the circuit breaker.

Image: Diagram illustrating bulb requirements (E26 base, max 60W incandescent or equivalent LED/CFL/Halogen), easy installation, 110V AC, and the 4-light configuration.
Operating Instructions
Powering On/Off
The chandelier is operated via a standard wall switch (not included). Ensure the switch is in the 'ON' position for the fixture to receive power.
Dimmable Functionality
This fixture is fully dimmable when used with dimmable E26 bulbs and a compatible dimmer switch (both sold separately). Install a compatible dimmer switch in place of your standard wall switch to utilize this feature. Follow the dimmer switch manufacturer's instructions for installation and operation.

Image: Visual representation of the chandelier in both off and illuminated states, highlighting its dimmable functionality when paired with appropriate bulbs and a dimmer switch.
Maintenance
Regular maintenance will help preserve the appearance and functionality of your chandelier.
Cleaning
- Always turn off power to the fixture before cleaning.
- Wipe the fixture with a soft, dry cloth.
- Do not use abrasive cleaners, solvents, or polishes as they may damage the finish or glass.
- For glass shades, a mild glass cleaner can be used, applied to a cloth first, not directly to the fixture.
Bulb Replacement
- Turn off power before replacing bulbs.
- Allow bulbs to cool completely before touching them.
- Unscrew the old bulb and replace it with a new E26 base bulb, not exceeding 60W.
Troubleshooting
If you experience issues with your chandelier, refer to the following common problems and solutions:
- Fixture does not light up:
- Check that the power supply is on at the circuit breaker.
- Ensure the wall switch is in the 'ON' position.
- Verify that bulbs are screwed in correctly and are not burnt out. Replace if necessary.
- Check wire connections for proper contact. (If unsure, consult a qualified electrician).
- Lights flicker or dim unexpectedly:
- Ensure bulbs are fully screwed into sockets.
- If using dimmable bulbs, confirm they are compatible with your dimmer switch.
- Check for loose wire connections.
- Glass shade is broken or damaged:
- Contact customer support for a replacement. Do not attempt to use a damaged shade.
Warranty and Support
Limited Warranty
This Maxax product comes with a limited warranty. Please refer to the warranty documentation included with your purchase for specific terms and conditions. The warranty typically covers defects in materials and workmanship under normal use.
Customer Support
For technical assistance, missing parts, or warranty claims, please contact the retailer or manufacturer directly. Provide your model number (29025A-P4BK) and purchase date when contacting support for faster service.


