
1. Important Safety Information
Please read and understand all instructions before beginning assembly and installation. Failure to do so could lead to fire, electric shock, or other injuries.
- WARNING: To avoid electric shock, ensure power is turned off at the circuit breaker or fuse box before installation.
- All electrical connections must be in accordance with local codes, ordinances, or the National Electric Code (NEC). Consult a qualified electrician if you are unfamiliar with proper electrical wiring connections.
- This fixture is designed for indoor use only. Do not expose to water or moisture.
- Use only the specified bulb type and wattage. Exceeding the maximum wattage may cause overheating.
- Handle glass components with care to prevent breakage.
2. Included Components
Carefully unpack the fixture and check that all parts are present. If any parts are missing or damaged, do not attempt to assemble or install the product. Contact customer service for assistance.
- Fixture Body (with arms and canopy)
- Glass Shades (4)
- Mounting Hardware (Crossbar, mounting screws, wire nuts, ground screw)
- Socket Rings (4)
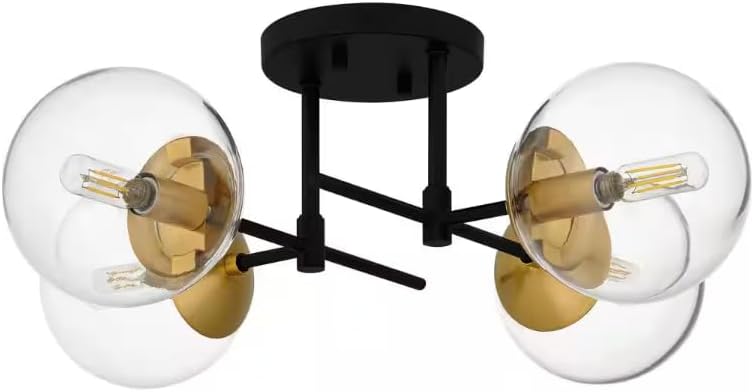
Figure 1: Front view of the DSI-Lighting DSHD7892A1 4-Light Semi-Flush Mount Ceiling Light, showing the matte black frame, nouveau gold accents, and clear glass globe shades.
3. Setup and Installation
Tools Required (Not Included): Phillips screwdriver, flathead screwdriver, wire strippers, electrical tape, safety glasses, ladder.
- Turn Off Power: Before starting, ensure the power to the junction box is turned off at the circuit breaker or fuse box.
- Install Mounting Crossbar: Attach the mounting crossbar to the junction box using the provided mounting screws. Ensure the crossbar is securely fastened.
- Wire Connections: Connect the fixture's wires to the corresponding wires from the junction box using the provided wire nuts.
- Connect the black wire (live) from the fixture to the black wire (live) from the junction box.
- Connect the white wire (neutral) from the fixture to the white wire (neutral) from the junction box.
- Connect the bare copper or green wire (ground) from the fixture to the ground wire from the junction box or the ground screw on the mounting crossbar.
- Mount Fixture Canopy: Carefully push the wired fixture up to the ceiling, aligning the mounting holes on the canopy with the screws on the mounting crossbar. Secure the canopy to the crossbar using the decorative nuts or screws provided.
- Install Glass Shades: For each light socket, remove the pre-installed socket ring. Place a clear glass globe shade over the socket and secure it by screwing the socket ring back into place. Do not overtighten.
- Install Light Bulbs: Screw the recommended E26 base light bulbs (not included) into each socket. Do not exceed the maximum wattage of 60 watts per bulb.
- Restore Power: Once installation is complete, turn the power back on at the circuit breaker or fuse box.
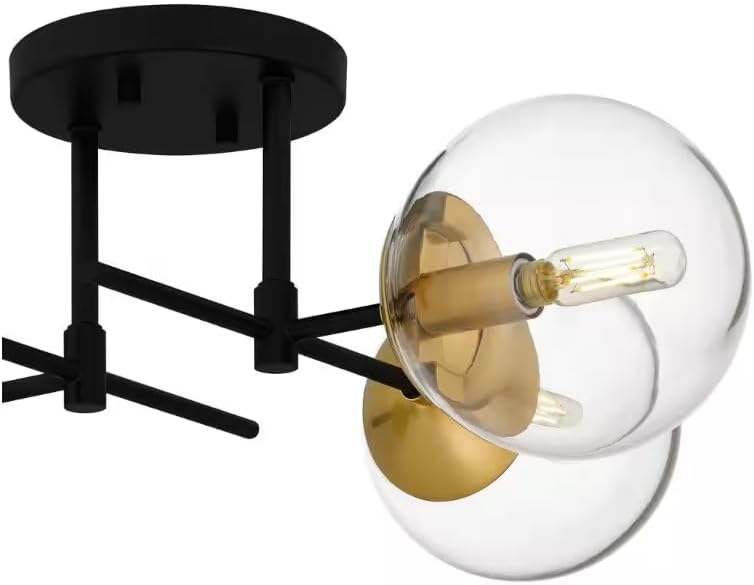
Figure 2: Close-up view of the fixture's matte black base and arm structure, illustrating the connection points for the glass shades and the ceiling mount.
4. Operating Instructions
This semi-flush mount ceiling light is designed to be operated via a standard wall switch (not included). Once installed and powered, simply use the wall switch connected to the fixture's circuit to turn the lights on or off.
- Bulb Type: Uses 4 x E26 Medium base bulbs.
- Max Wattage: 60 watts per bulb.
- Recommended: LED bulbs for energy efficiency and longer lifespan.
5. Maintenance
Regular maintenance will help preserve the appearance and functionality of your light fixture.
- Cleaning: To clean the fixture, turn off the power and allow it to cool. Wipe the fixture with a soft, dry cloth. Do not use abrasive cleaners, solvents, or polishes as they may damage the finish.
- Glass Shades: The clear glass shades can be gently wiped with a damp cloth and then dried with a lint-free cloth.
- Bulb Replacement: Ensure the power is off and the bulbs have cooled before attempting to replace them. Unscrew the old bulb and screw in a new E26 base bulb of the correct wattage.
6. Troubleshooting
If you experience issues with your light fixture, refer to the following common problems and solutions:
| Problem | Possible Cause | Solution |
|---|---|---|
| Light does not turn on | No power to the fixture Loose wire connection Faulty bulb | Check circuit breaker/fuse. Ensure all wire connections are secure (with power off). Replace bulb with a new one. |
| Light flickers | Loose bulb Loose wire connection Incompatible dimmer switch (if applicable) | Tighten bulb. Check wire connections (with power off). Ensure dimmer switch is compatible with LED bulbs if using LED. |
| Glass shade is loose | Socket ring not tightened | Gently tighten the socket ring until the shade is secure. |
If the problem persists after attempting these solutions, please contact a qualified electrician or customer support.
7. Specifications
| Feature | Detail |
|---|---|
| Model Number | DSHD7892A1 |
| Brand | DSI-Lighting |
| Fixture Type | Semi-Flush Mount |
| Number of Lights | 4 |
| Dimensions (L x W x H) | 21.88"L x 5"W x 8.25"H |
| Material | Aluminum (Fixture Body), Glass (Shades) |
| Finish | Matte Black & Nouveau Gold |
| Shade Color | Clear |
| Bulb Base | E26 Medium |
| Max Wattage per Bulb | 60 watts |
| Voltage | 120 Volts |
| Indoor/Outdoor Usage | Indoor |
| Assembly Required | Yes |
| Certifications | ETL, UL Listed |
8. Warranty Information
This DSI-Lighting fixture is covered by a Limited Manufacturer Warranty. The warranty covers defects in materials and workmanship under normal use and service. Specific terms and duration of the warranty may vary. Please retain your proof of purchase for any warranty claims.
For detailed warranty information or to make a claim, please refer to the documentation included with your purchase or contact the manufacturer directly.
9. Customer Support
If you have any questions regarding the assembly, installation, operation, or parts of your DSI-Lighting fixture, please contact the retailer or manufacturer's customer support for assistance.
When contacting support, please have your model number (DSHD7892A1) and proof of purchase readily available.