Introduction
This manual provides comprehensive instructions for the CVLIFE 6-24x50 FFP Rifle Scope. Designed for precision and durability, this first focal plane riflescope offers variable 6-24x magnification, an illuminated reticle, zero stop, and parallax adjustment. Please read these instructions carefully to ensure proper setup, operation, and maintenance for optimal performance.
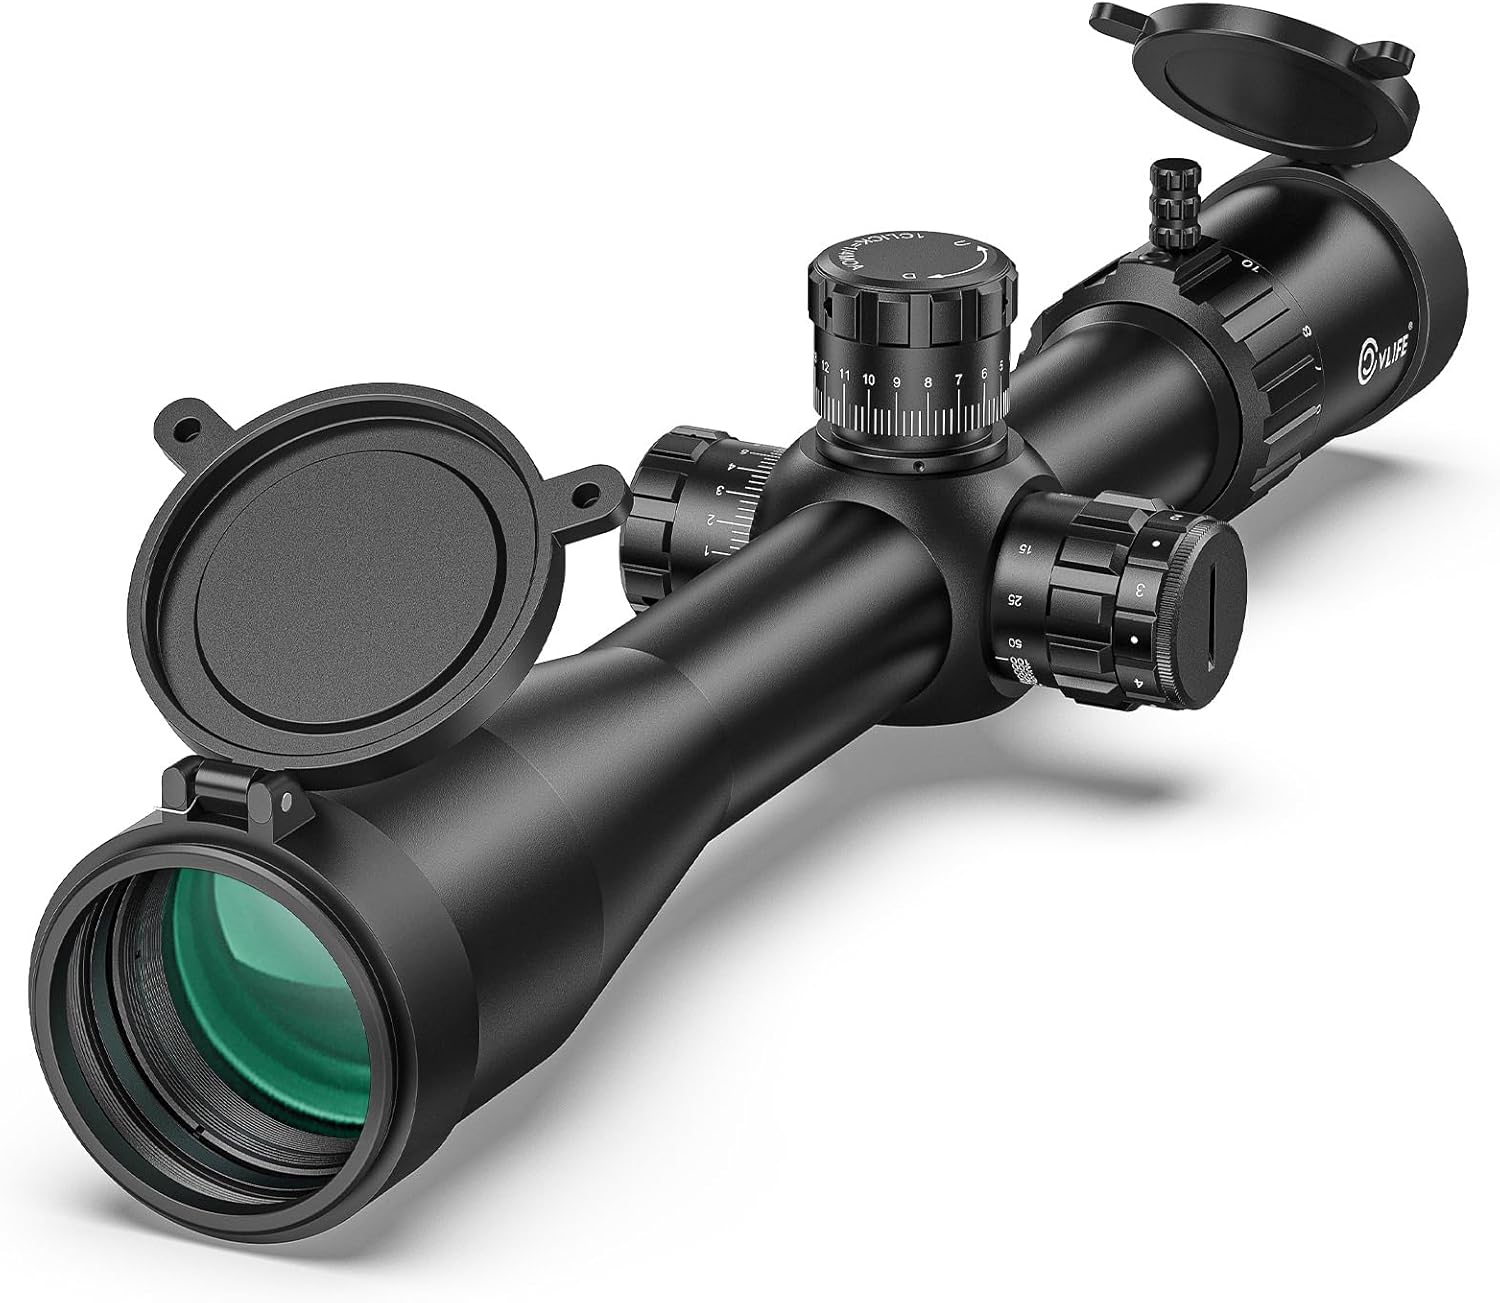
Image: The CVLIFE 6-24x50 FFP Rifle Scope, showcasing its main body, objective lens, eyepiece, and control turrets, along with included flip-up lens caps.
Included Components
The following items are included with your CVLIFE 6-24x50 FFP Rifle Scope:
- 6-24x50 FFP 34mm tube riflescope x1
- Flip-up lens caps x2
- Scope rings x2
- Wrenches x2
- Throw lever x1
- Sunshade tube x1
- CR2032 batteries x2
- Lens cloth x1
- Instruction manual x1
Specifications

Image: A detailed diagram illustrating the dimensions and key specifications of the CVLIFE 6-24x50 FFP Scope.
| Feature | Detail |
|---|---|
| Magnification | 6-24x |
| Reticle Type | MOA Reticle (First Focal Plane) |
| Objective Lens Diameter | 50 mm |
| Eyepiece Diameter | 35 mm |
| Tube Diameter | 34 mm |
| Eye Relief | 4.13"-3.93" |
| Field of View @ 100 yards | 18.3'-4.6' |
| Diopter Adjustment | ±2.5 |
| Click Value | 1/4 MOA |
| Windage Adjustment Range | 50 MOA |
| Elevation Adjustment Range | 80 MOA |
| Parallax Adjustment | 10 yds - ∞ |
| Body Material | 6061 Aircraft Grade Aluminum |
| Weight | 29.0 oz |
| Coating | Fully Multi-coated |
| Durability | Waterproof, Shockproof, Fogproof |
Setup
1. Mounting the Scope
Mount the scope onto your rifle using the provided 34mm scope rings. Ensure the rings are securely tightened to prevent movement during use. Proper mounting is crucial for maintaining accuracy and preventing injury from recoil. Refer to your rifle's manual for specific mounting base requirements.
2. Eye Relief and Reticle Alignment
Adjust the fast-focus eyepiece until the reticle appears sharp. Position your eye at a comfortable distance from the eyepiece (eye relief) to see a full, clear field of view. This helps establish a steady shooting stance and promotes fast target acquisition.
3. Bore Sighting
Initial bore sighting can save time and ammunition. This can be done using a mechanical bore sighter or by visually bore sighting. Place the rifle solidly on a rest and remove the bolt. Look through the bore at a target approximately 100 yards away. Adjust the rifle until the target is visually centered within the barrel. Then, adjust the scope's windage and elevation turrets until the reticle crosshair aligns with the center of the target.
4. Zero Reset and Zero Stop
The elevation turret features a zero stop mechanism for quick and reliable return to your zero setting. To set the zero stop:
- After sighting in your rifle, loosen the three retaining screws on the elevation turret cap using the provided wrench.
- Rotate the turret until the '0' mark aligns with the reference point on the scope body.
- Tighten the three retaining screws to secure the zero stop.

Image: Detailed view of the elevation turret, highlighting the zero stop ring and the '0' mark for precise zeroing.

Image: A hand adjusting the zero stop ring on the elevation turret of the rifle scope.
Video: CVLIFE FFP Scope Operating Instructions. This video demonstrates the basic operational adjustments of an FFP scope, including turret and parallax adjustments.
Operating the Scope
1. Magnification Adjustment
The scope features a variable 6-24x magnification range. Rotate the magnification adjustment ring (located near the eyepiece) to increase or decrease the magnification. As a First Focal Plane (FFP) scope, the reticle scales with magnification, ensuring accurate holdovers at any range.

Image: Comparison of the field of view at 6x and 24x magnification at 100 yards, demonstrating the FFP reticle scaling.
2. Parallax Adjustment
The side parallax adjustment knob (located on the left side of the scope) allows you to eliminate parallax error and improve image clarity. Rotate the knob to match the approximate distance to your target. This ensures the target image is sharp and the reticle remains stationary relative to the target, even with slight head movement.

Image: A hand adjusting the side parallax knob on the rifle scope, with distance markings from 10 yards to infinity.
3. Illuminated Reticle Adjustment
The reticle features 6 levels of red illumination to enhance visibility in low-light conditions. Rotate the illumination adjustment knob (located on the side parallax turret) to select the desired brightness level. Intermediate 'off' settings are present between each brightness level to conserve battery life.
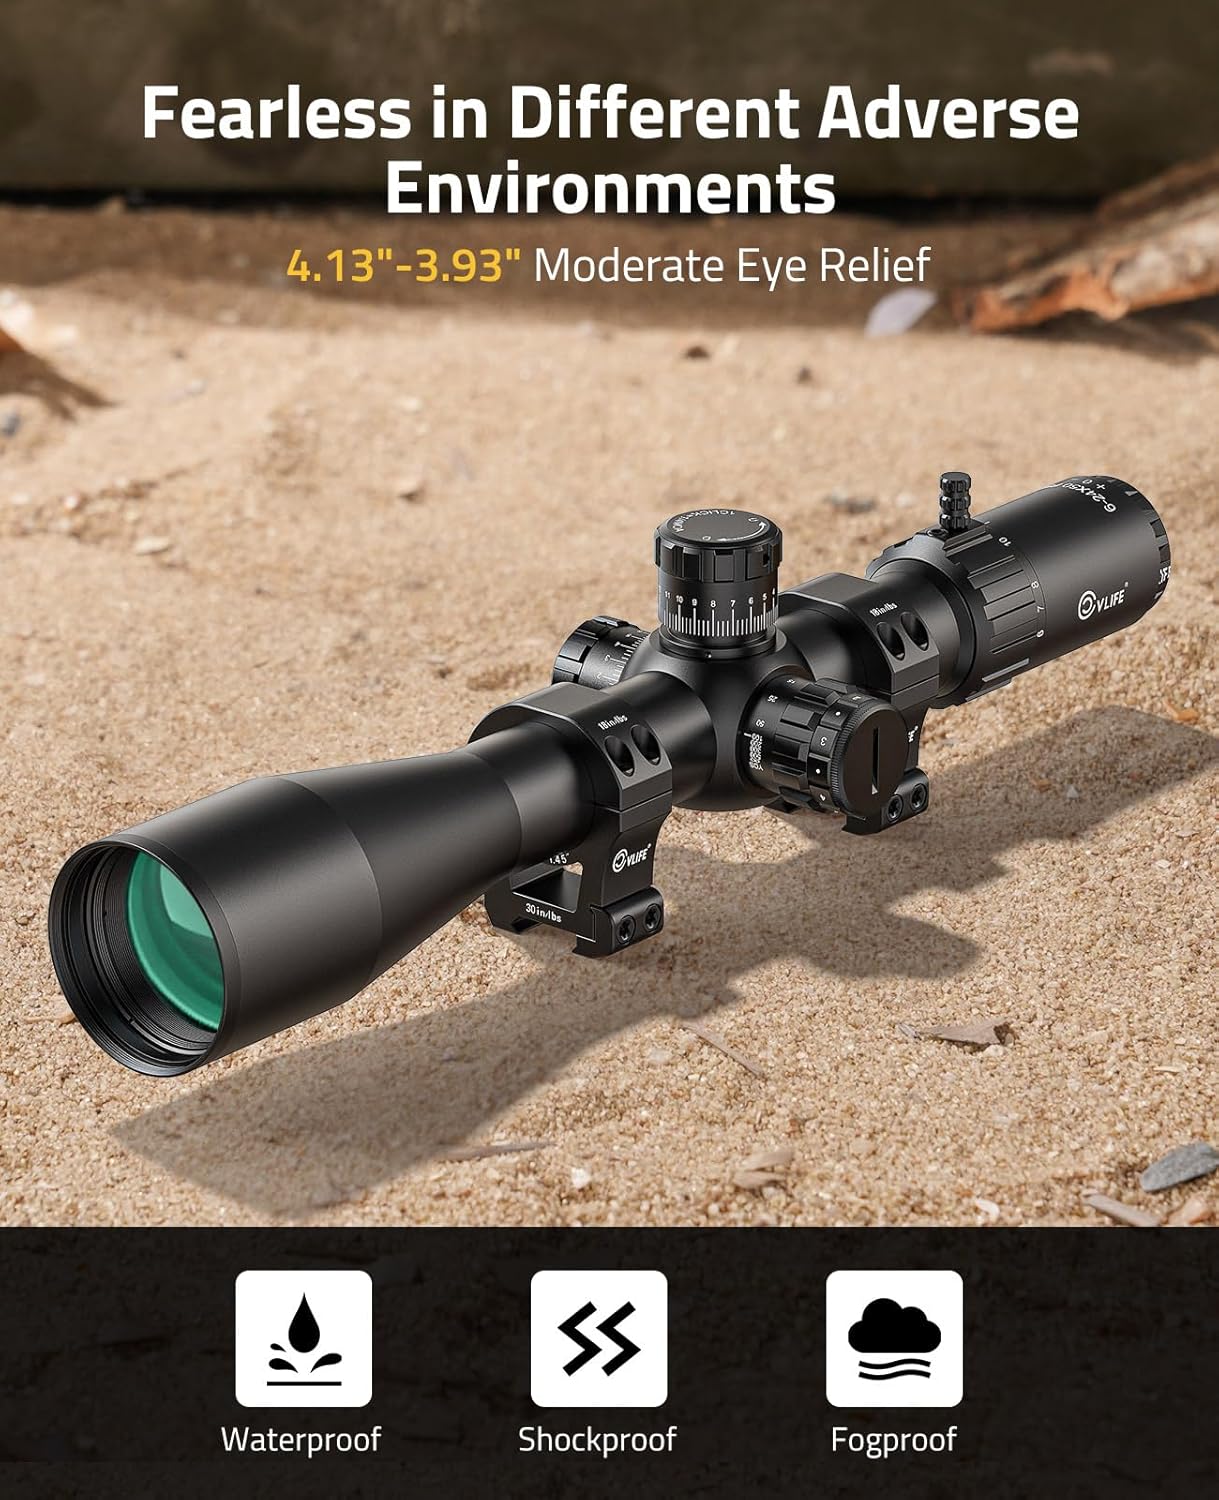
Image: The MOA reticle with various markings, demonstrating the 6 levels of red illumination.
4. Windage and Elevation Adjustments
The scope is equipped with finger-adjustable windage and elevation turrets with audible 1/4 MOA clicks. The elevation turret has a zero stop feature. To make adjustments, lift the turret cap to unlock it, rotate to the desired setting, and then press it down to lock. Turning the adjustment knob Up/Down or Left/Right will move the reticle crosshair in the indicated direction.
Image: Detailed view of the elevation turret, highlighting the zero stop ring and the '0' mark for precise zeroing.
Maintenance
1. Cleaning
Wipe the exterior of the scope with a soft, dry cloth. Blow away any dust or grit on the lenses before wiping the surfaces. Use a very small amount of water or pure alcohol on a lens cloth to gently clean the lenses if needed. Avoid harsh chemicals.
2. Lubrication
All components of the riflescope are permanently lubricated. No additional lubricant should be applied. Do not attempt to disassemble any components of the riflescope, as doing so may void the warranty.
3. Storage
Store the riflescope in a cool, dry place, away from direct sunlight or high temperatures, for an extended period of time.
Troubleshooting
Frequently, sighting-in issues related to scope mounting are actually due to mounting problems. Make sure that you are using the correct base and rings in the proper orientation, and that the base screws and rings are securely tightened. Insufficient windage or elevation adjustment range may indicate problems with the rings, base, base alignment, base mount holes drilled in the rifle's receiver, or barrel/receiver alignment. If issues persist, please contact customer support.
Durability Features
The CVLIFE 6-24x50 FFP Rifle Scope is built to withstand various environmental conditions:
- Waterproof: Designed to prevent moisture ingress, ensuring functionality in wet conditions.
- Shockproof: Constructed to maintain zero even under heavy recoil.
- Fogproof: Nitrogen purged to prevent internal fogging in varying temperatures and humidity.
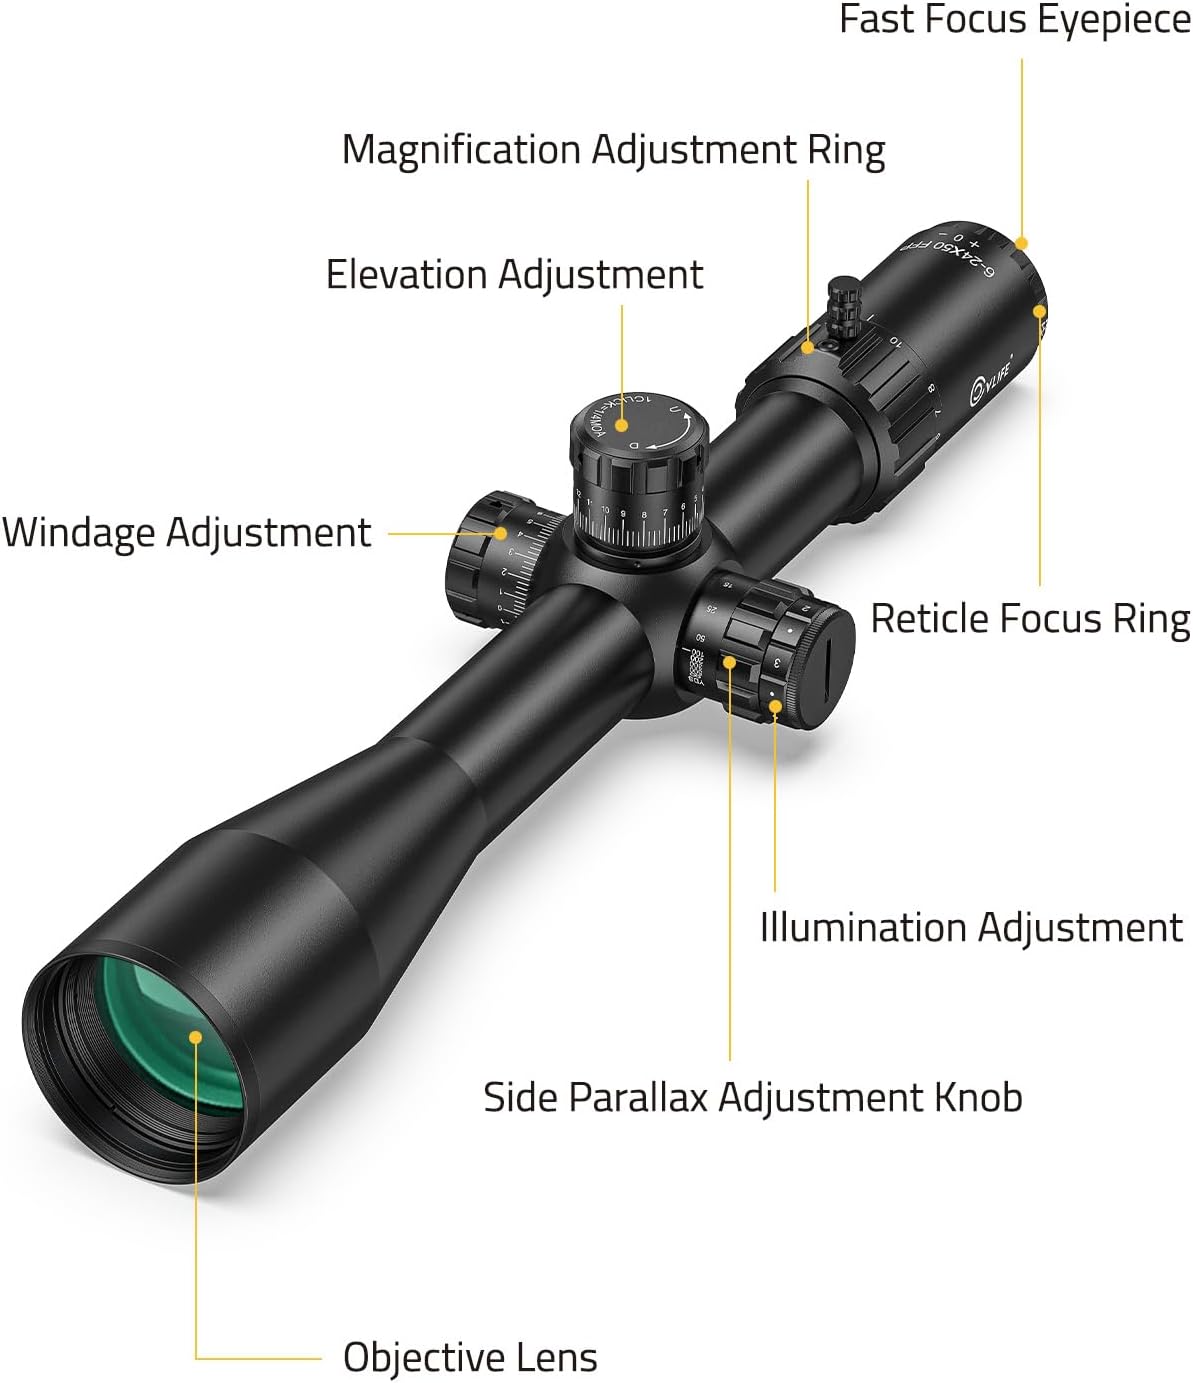
Image: The CVLIFE 6-24x50 FFP Rifle Scope highlighting its waterproof, shockproof, and fogproof capabilities.
Warranty & Support
CVLIFE guarantees the highest quality service and peace of mind. Every customer who purchases the 6-24x50 FFP Scope will receive a 1-year warranty provided by CVLIFE. However, the warranty does not cover loss, theft, intentional damage, or minor blemishes that do not affect the product's functionality. If you experience any product problems, you can contact our customer service team, and we will work to resolve the issue to your satisfaction.


