1. Introduction
This manual provides detailed instructions for the assembly, operation, and maintenance of your VEVOR 2-in-1 Punching Bag & Speed Bag Stand. This freestanding equipment is designed for boxing, martial arts, and general fitness training, accommodating both heavy punching bags and speed bags. Please read this manual thoroughly before assembly and use to ensure proper function and safety.

Figure 1: VEVOR 2-in-1 Punching Bag and Speed Bag Stand, shown without a heavy punching bag.
2. Safety Information
To prevent injury and damage to the equipment, adhere to the following safety guidelines:
- Consult a physician before beginning any exercise program.
- Ensure all components are securely fastened before each use. Regularly check bolts and connections for tightness.
- Place the stand on a flat, stable surface.
- Maintain a clear area around the stand during use to avoid collisions.
- Do not exceed the maximum load capacity of 140 lbs (65 kg) for the punching bag hook.
- Children should only use the equipment under adult supervision.
- Do not modify the equipment. Use only manufacturer-approved replacement parts.
3. Package Contents
Verify that all components listed below are present and undamaged before beginning assembly. If any parts are missing or damaged, contact VEVOR customer support.
- 1 x Punching Bag Stand Frame
- 1 x Speed Bag Platform
- 1 x Speed Bag Swivel
- 1 x Set of Assembly Accessories (bolts, washers, nuts, wrenches)
- 4 x Weight Plate Pins

Figure 2: Included assembly accessories and components.
4. Setup and Assembly Instructions
Assembly of the VEVOR 2-in-1 Punching Bag & Speed Bag Stand is designed to be straightforward. Follow these steps carefully:
- Unpack Components: Carefully remove all parts from the packaging and lay them out. Refer to the package contents list to ensure all items are present.
- Assemble the Base: Connect the base frame components using the provided bolts and wrenches. Ensure all connections are tight and stable. The Y-shaped frame design provides a stable foundation.
- Attach Main Vertical Post: Secure the main vertical post to the assembled base. Use the appropriate bolts and ensure it is firmly attached.
- Install Speed Bag Platform: Attach the speed bag platform to the upper section of the main vertical post. Ensure it is level and securely fastened.
- Install Speed Bag Swivel: Mount the speed bag swivel to the underside of the speed bag platform.
- Attach Punching Bag Arm: Secure the curved arm for the punching bag to the top of the main vertical post. This arm includes the heavy-duty hook.
- Insert Weight Plate Pins: Insert the four weight plate pins into the designated slots on the base. These pins are designed to hold standard weight plates (not included) for added stability.
- Final Check: Before use, double-check all bolts and connections to ensure they are tight and the stand is stable.

Figure 3: Simplified assembly overview.
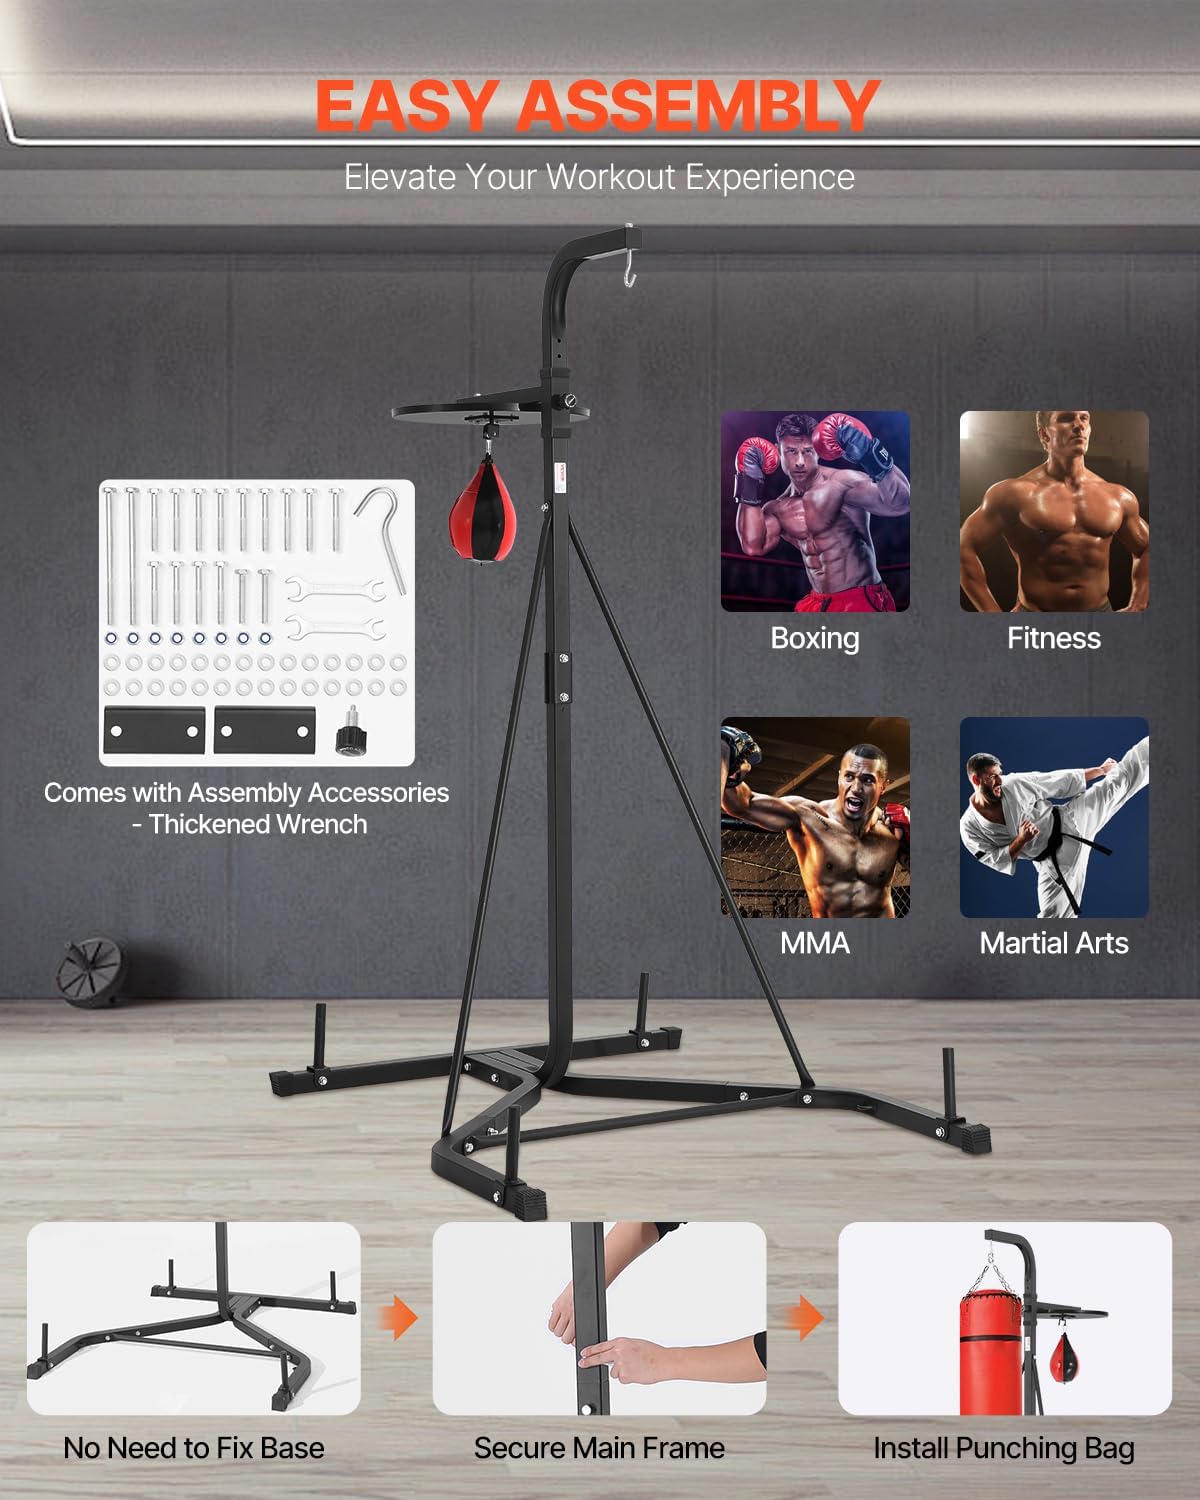
Figure 4: Stability features including silicone foot covers and weight plate pins.
5. Operating Instructions
The VEVOR 2-in-1 Punching Bag & Speed Bag Stand offers versatile training options:
5.1. Attaching a Punching Bag
- Hang your heavy punching bag (not included) onto the robust hook located on the curved arm.
- Ensure the bag's weight does not exceed 140 lbs (65 kg).
- For optimal stability during intense training, place weight plates (not included) onto the four pins at the base of the stand.
5.2. Using the Speed Bag
- Attach your speed bag (often included with the stand, or purchased separately) to the swivel mechanism beneath the speed bag platform.
- The speed bag platform allows for practicing quick reflexes and hand-eye coordination.
5.3. Adjusting Height
The height of the punching bag stand can be adjusted to suit different users and training needs. The adjustable range is typically from 159 cm (62.6 inches) to 173 cm (68.1 inches). Locate the adjustment knob on the main vertical post, loosen it, set the desired height, and then securely tighten the knob.

Figure 5: User engaging with a heavy punching bag on the stand.
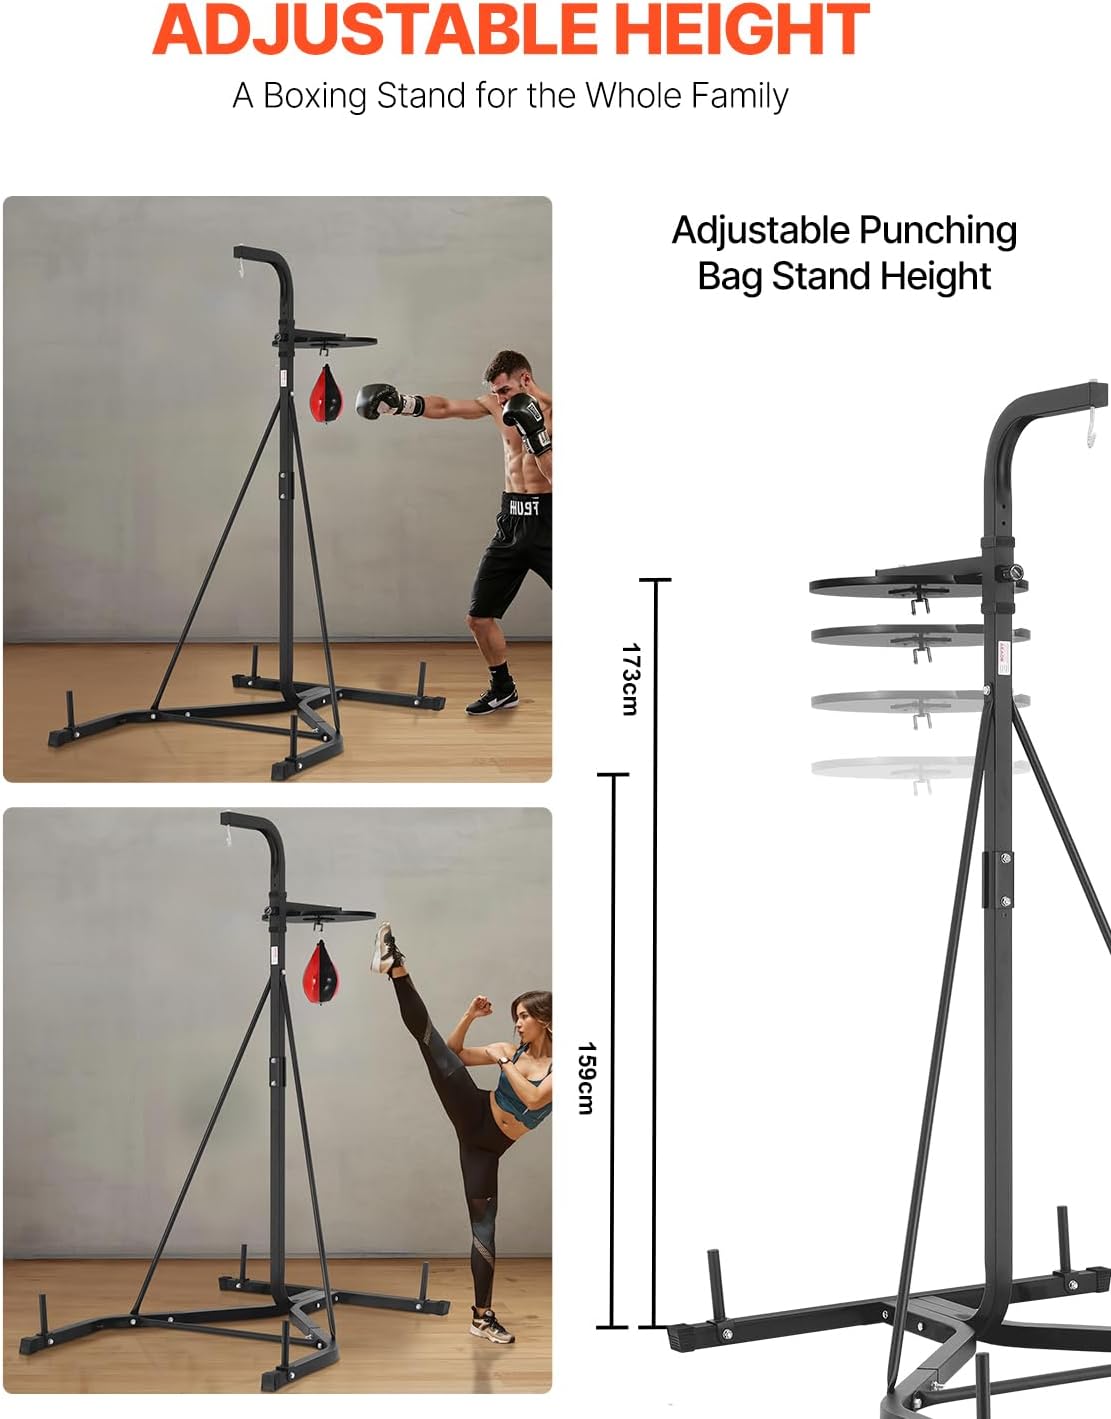
Figure 6: User performing a kick on the heavy punching bag.
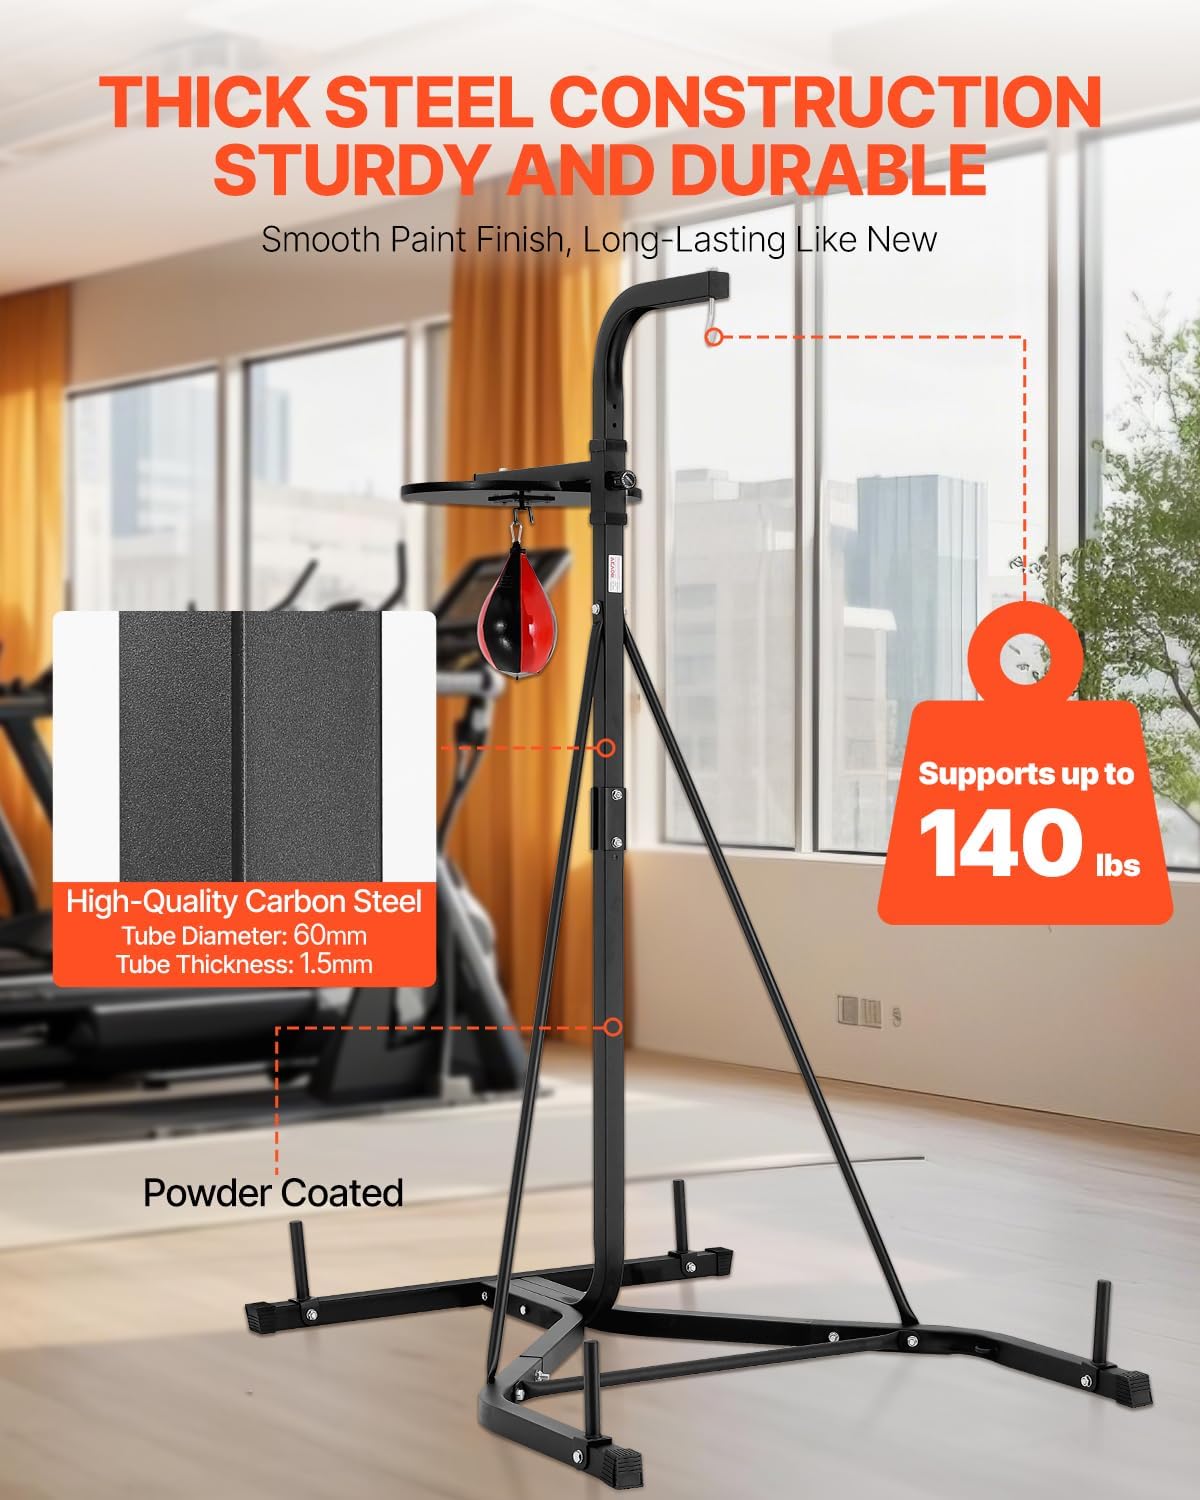
Figure 7: Adjustable height range of the stand.
6. Maintenance
Regular maintenance ensures the longevity and safe operation of your punching bag stand:
- Cleaning: Wipe down the steel frame with a damp cloth to remove dust and sweat. Avoid abrasive cleaners that could damage the powder coating.
- Bolt Check: Periodically inspect all bolts and connections. Tighten any loose fasteners to maintain stability and prevent wobbling.
- Surface Inspection: Check the silicone foot covers for wear and tear. Replace if necessary to maintain floor protection and grip.
- Storage: If storing the stand for an extended period, ensure it is clean and dry. Store in a cool, dry place.
7. Troubleshooting
If you encounter issues with your VEVOR Punching Bag Stand, refer to the following common problems and solutions:
- Stand Wobbles During Use:
- Ensure all assembly bolts are securely tightened.
- Verify the stand is placed on a completely flat and level surface.
- Add weight plates (not included) to the four base pins to increase stability.
- Check that the silicone foot covers are intact and providing adequate grip.
- Difficulty Adjusting Height:
- Ensure the adjustment knob is fully loosened before attempting to change the height.
- Check for any obstructions or debris in the adjustment mechanism.
- Speed Bag Not Rebounding Properly:
- Inspect the speed bag swivel for proper function and ensure it is securely attached.
- Check the inflation of the speed bag (if applicable).
8. Specifications
| Feature | Specification |
|---|---|
| Model Number | ssshksdj-e |
| Color | Black |
| Maximum Load (Punching Bag) | ≤140 lbs / 65 kg |
| Product Dimensions (L x W x H) | 46.5 x 46.5 x 91 inches / 118 x 118 x 232 cm |
| Product Net Weight | 41 lbs / 18.5 kg ±3% |
| Material | Carbon Steel |
| Adjustable Height Range | 159 cm - 173 cm (62.6 in - 68.1 in) |

Figure 8: Product dimensions and specifications overview.
9. Warranty and Support
For warranty information, technical support, or to order replacement parts, please contact VEVOR customer service. Refer to your purchase documentation or the official VEVOR website for contact details.


