
1. Product Overview
The LYONGTECH 230W Multifunction Battery Charger is designed for DJI Mavic 4 Pro drone batteries. This charging hub offers multiple functionalities including full charge, quick charge, storage charge, discharge, and the ability to use a Mavic 4 battery as a power bank for other devices.
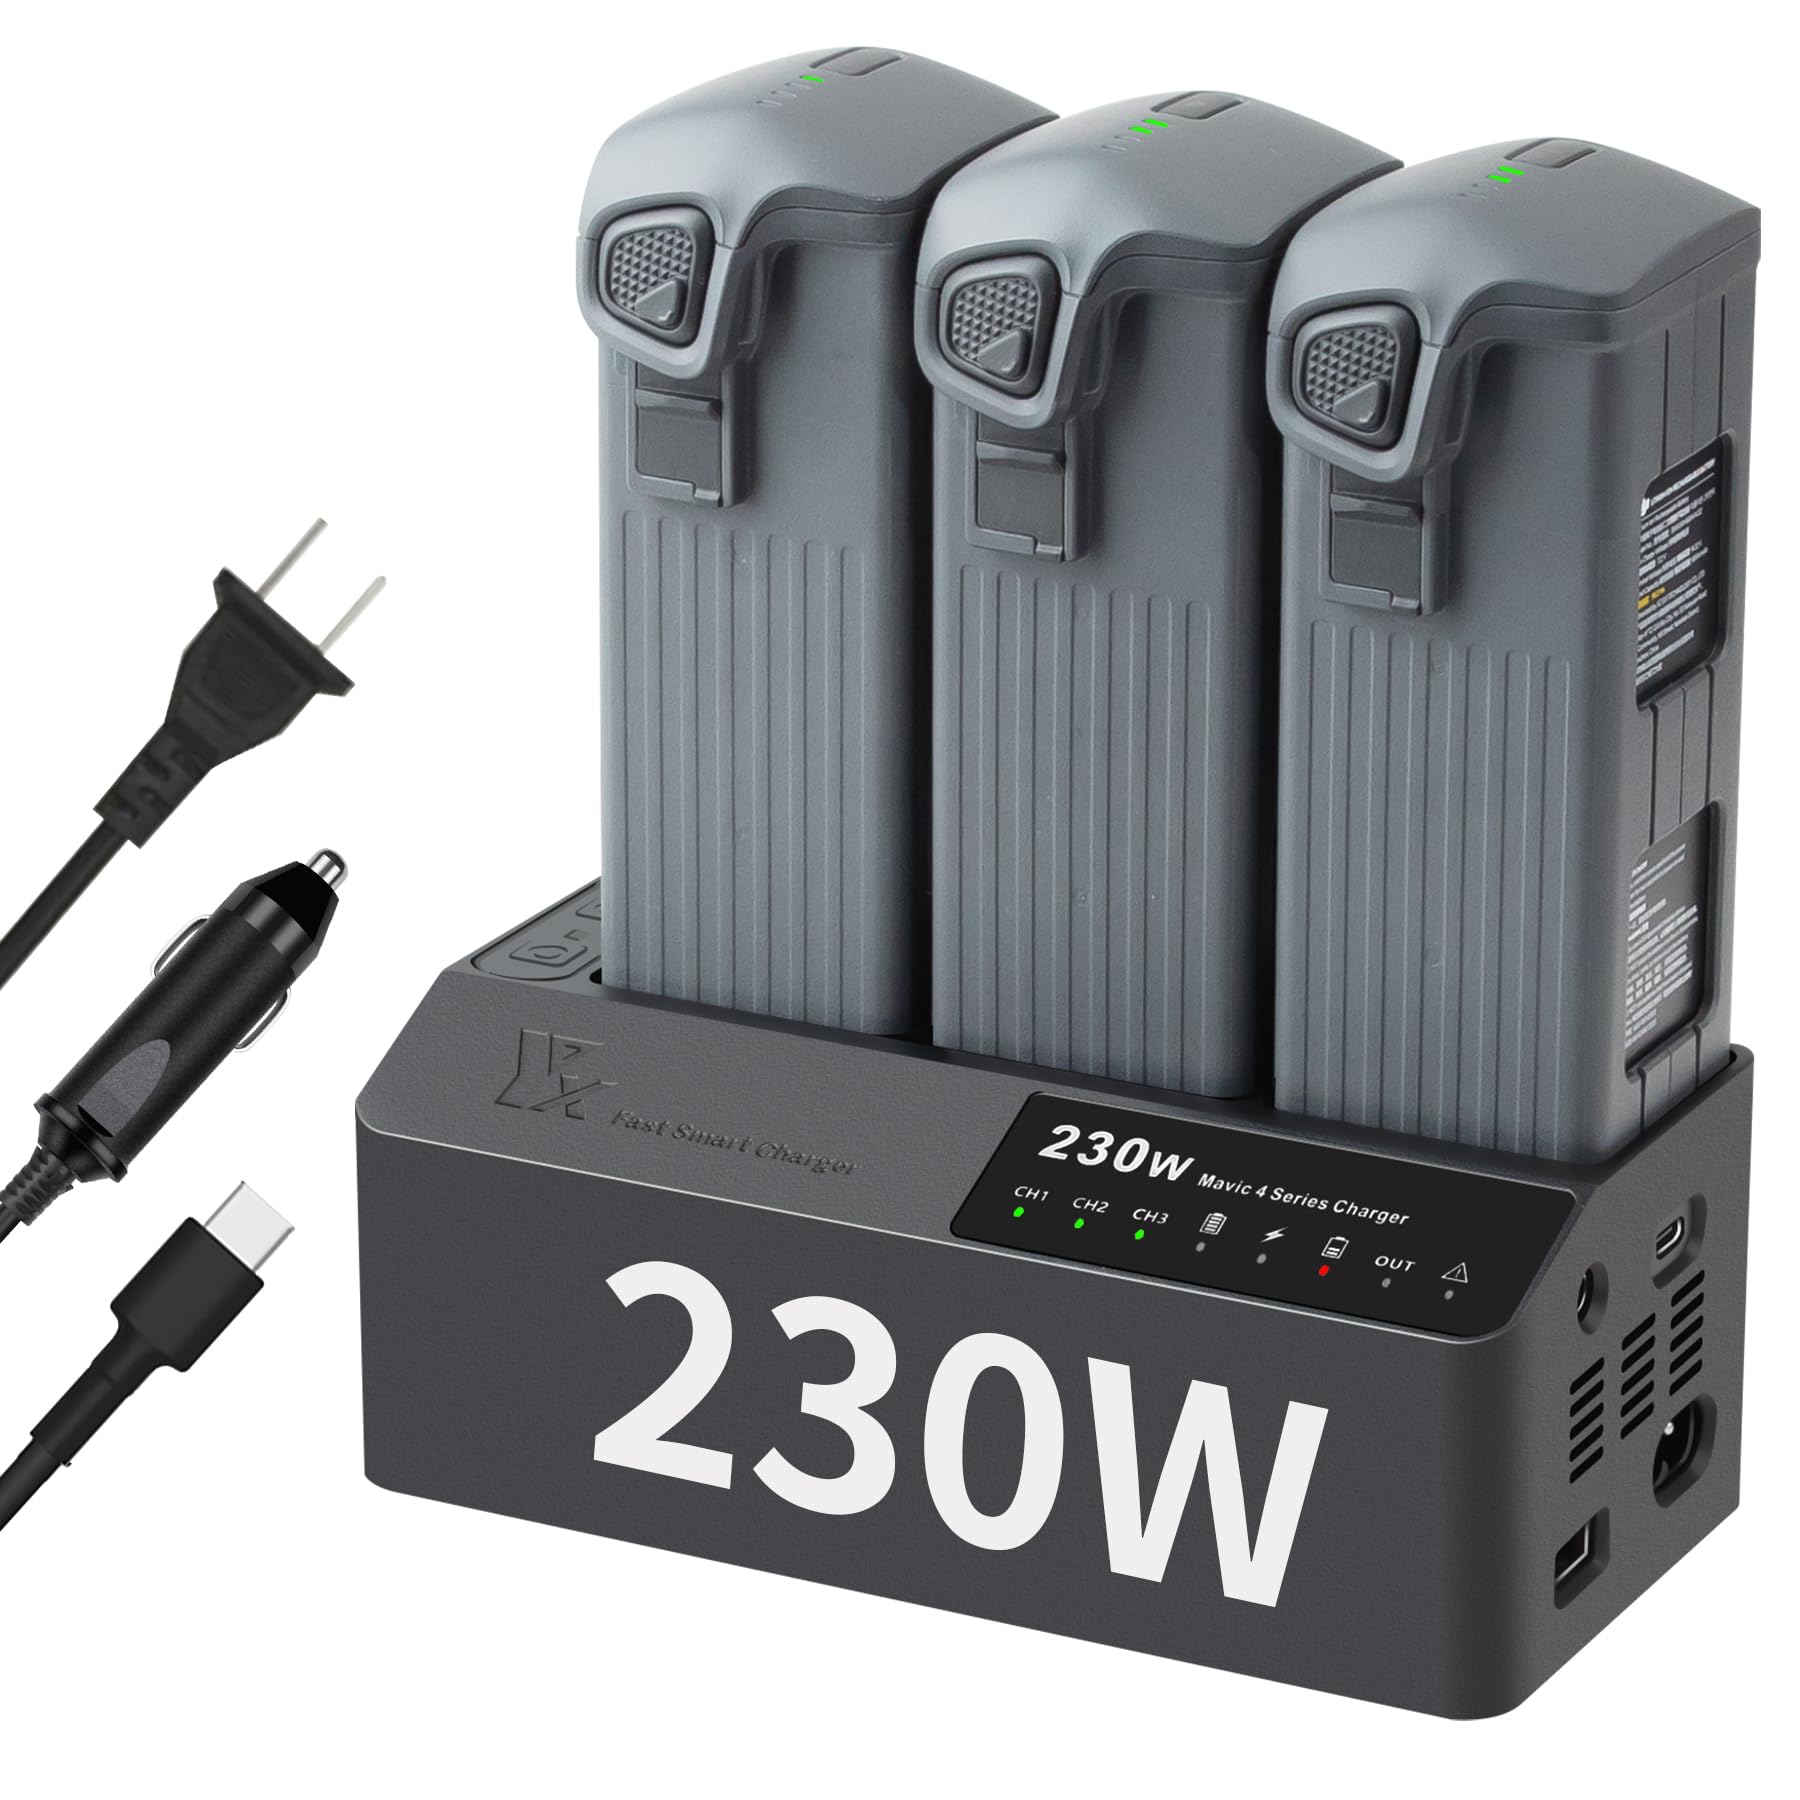
Figure 1: LYONGTECH 230W Multifunction Battery Charger.
2. Package Contents
Verify that all items listed below are included in your package:
- 1 x Charger Unit
- 1 x AC Power Cable
- 1 x DC Power Cable (Car Charger)
- 1 x Discharger Unit
- 1 x USB-C to USB-C Cable
- 1 x USB-A to USB-C Cable
Note: DJI Mavic 4 Pro batteries are not included with this charger.

Figure 2: Package Contents.
3. Setup and Connection
The charger supports three input modes: AC, DC, and PD (Type-C). Select the appropriate cable for your power source.
- Connect Power Source:
- For AC power (home/wall outlet): Connect the AC power cable to the charger's AC input port and then to a wall outlet (100-240V).
- For DC power (car): Connect the DC power cable to the charger's DC input port and then to your vehicle's 12V power socket (11-14V/10A Max).
- For PD power (Type-C): Connect a Type-C cable to the charger's Type-C input port and to a compatible PD power source (5-20V/100W Max).
- Insert Batteries: Carefully insert up to three DJI Mavic 4 Pro batteries into the designated charging slots on the charger.
- Connect Remote Controller (Optional): If charging the remote controller simultaneously, connect it to one of the USB output ports on the charger using the appropriate USB cable.

Figure 3: Three Input Modes (AC, DC, PD).
4. Operating Modes
The charger offers five distinct operating modes to manage your DJI Mavic 4 Pro batteries.
4.1. Full Charge Mode
In Full Charge Mode, batteries are charged to 100% capacity. This mode is suitable for immediate use of your drone.
- Charging time for 2 batteries: Approximately 55 minutes.
- Charging time for 3 batteries: Approximately 75 minutes.
4.2. Quick Charge Mode
Quick Charge Mode charges batteries to approximately 95% capacity. This mode prioritizes speed for rapid deployment.
- Charging time for 3 batteries: Approximately 70 minutes.

Figure 4: Fast Charging in Full and Quick Charge Modes.
4.3. Storage Charge Mode
This mode is designed for long-term battery health. Batteries with more than 60% charge will discharge, while batteries with less than 60% charge will be charged. The process automatically stops when the battery reaches 60% power, which is the recommended level for extended storage.

Figure 5: Storage Charge Mode operation.
4.4. Discharge Mode
The Discharge Mode allows you to reduce the battery's charge level to either 10% or 60%. This can be useful for specific maintenance procedures or preparing batteries for transport.

Figure 6: Discharge Mode in action.
4.5. Power Bank Function
The charger can utilize a DJI Mavic 4 Pro battery as a power bank to charge other USB devices, such as a remote controller or a smartphone. Connect your USB device to the charger's USB output port.

Figure 7: Using the Charger as a Power Bank.
4.6. LED Indicators
The charger features 8 LED lights that provide comprehensive information on its operational status, input power level, and battery temperature protection warnings (low/high temperature).

Figure 8: LED Indicator Guide.
5. Technical Specifications
| Feature | Specification |
|---|---|
| Brand | LYONGTECH |
| Product Dimensions (D x W x H) | 1.3" x 2.99" x 2.91" |
| Input Voltage | AC 100-240V (230W MAX), DC 11-14V/10A (Max), Type-C 5-20V (100W MAX) |
| Output Voltage | 17.2V/4.5A x 3 or 7.5A x 2 |
| Output Total Power | 230W (Max) |
| USB Output | 5V 3A |
| Number of Ports | 7 (3 battery slots, AC, DC, Type-C, USB-A) |
| Battery Charge Time (Full Charge Mode) | 2 batteries: ~55 minutes; 3 batteries: ~75 minutes |
| Battery Charge Time (Quick Charge Mode) | 3 batteries: ~70 minutes (to 95%) |
| Color | Grey |
6. Maintenance
- Cleaning: Use a soft, dry cloth to clean the charger. Do not use liquid cleaners or solvents.
- Storage: Store the charger in a cool, dry place away from direct sunlight and extreme temperatures.
- Battery Care: For long-term storage of batteries, utilize the Storage Charge Mode to maintain battery health.
- Inspection: Regularly inspect cables and connectors for any signs of damage. Discontinue use if damage is observed.
7. Troubleshooting
| Problem | Possible Cause | Solution |
|---|---|---|
| Charger not powering on. | No power supply, loose connection, faulty cable. | Ensure power cable is securely connected to both charger and power source. Try a different outlet or cable. |
| Batteries not charging. | Battery not inserted correctly, faulty battery, incorrect mode. | Re-insert batteries firmly. Check LED indicators for error codes. Ensure charger is in a charging mode (Full or Quick Charge). |
| Slow charging. | Low power input, multiple devices charging simultaneously. | Ensure power source meets required wattage (e.g., 230W for AC). Disconnect other devices if faster charging is needed for batteries. |
| Temperature warning LED active. | Battery or charger operating outside optimal temperature range. | Move charger and batteries to a cooler or warmer environment. Allow components to reach room temperature before resuming operation. |
8. Video Demonstration
Video 1: Official demonstration of the LYONGTECH 230W Fast Charger for Mavic 4 Pro battery, showcasing its features and operation.
9. Warranty and Support
This LYONGTECH product comes with a 1 Year Manufacturer Warranty.
For technical support, warranty claims, or further inquiries, please contact LYONGTECH customer service through their official channels or the retailer where the product was purchased.