
1. Introduction
This manual provides essential instructions for the safe and effective use of your Saker Aluminum Telescoping Extension Ladder. Designed for versatility and portability, this 12.5-foot ladder features a robust aluminum construction, dual safety hooks, and non-slip feet, supporting a maximum load capacity of 330 pounds. Please read this manual thoroughly before initial use and retain it for future reference.
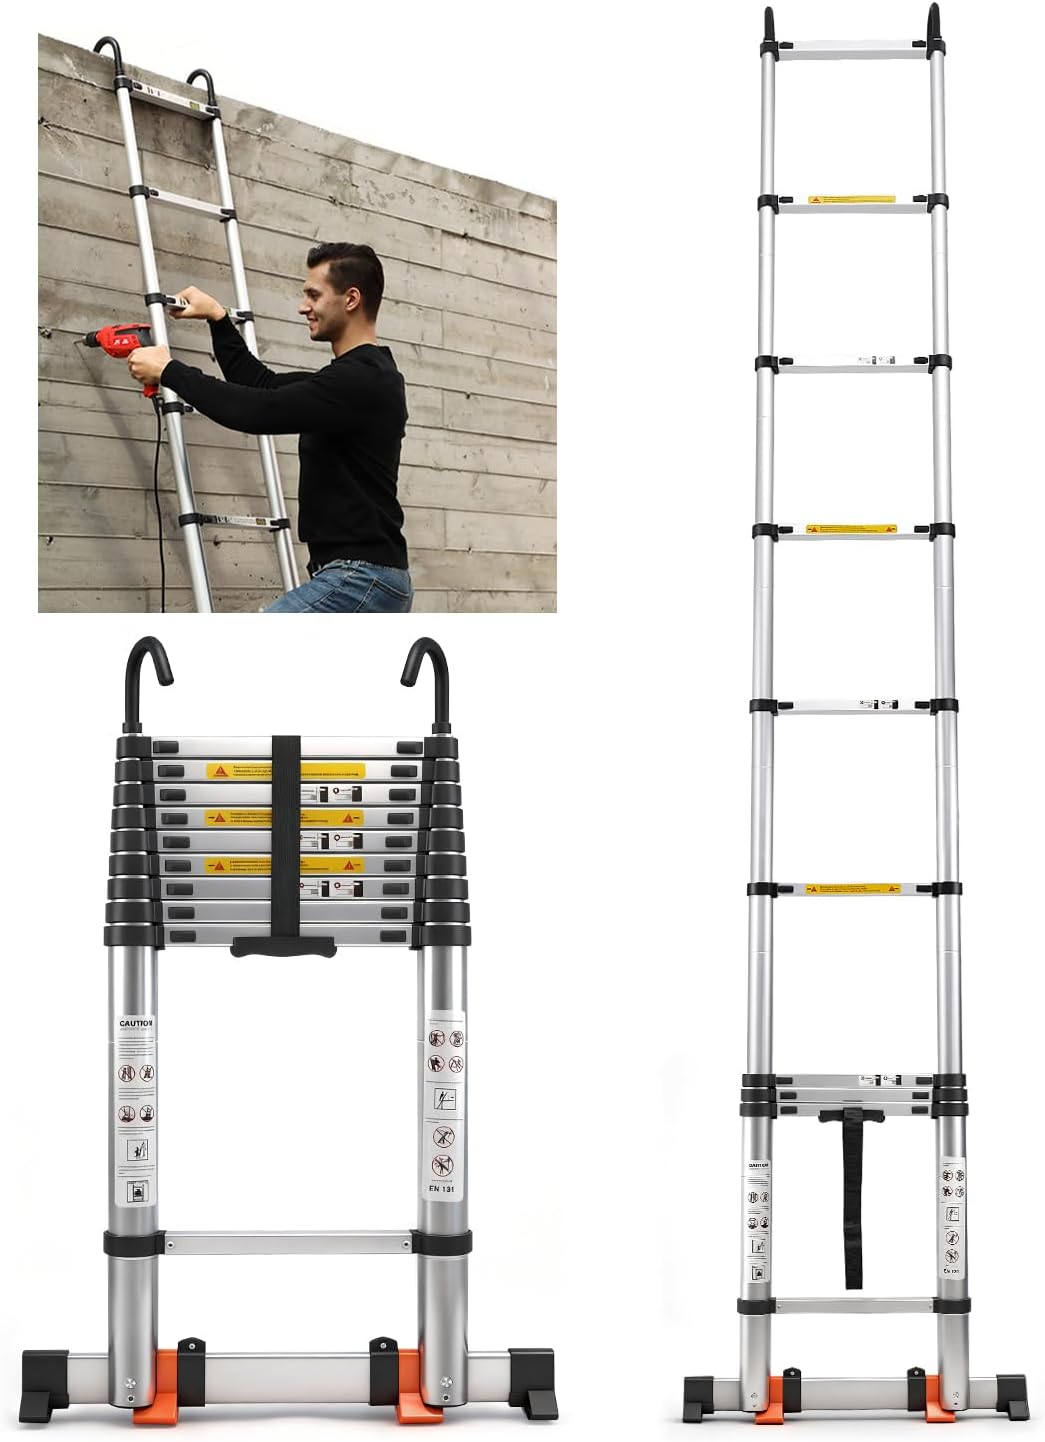
Image: The Saker 12.5FT Telescoping Extension Ladder in use, demonstrating its extended height and stability for home maintenance tasks.
2. Safety Information
Your safety is paramount. Adhere to all warnings and instructions to prevent injury or damage.
- Load Capacity: Do not exceed the maximum load capacity of 330 pounds (150 kg). This includes the user and any tools or materials.
- Inspection: Before each use, inspect the ladder for any damage, loose parts, or wear. Ensure all locking mechanisms are functional. Do not use a damaged ladder.
- Stable Surface: Always place the ladder on a firm, level, and non-slippery surface. Ensure the feet are fully engaged with the ground.
- Angle of Use: Position the ladder at an angle of approximately 75 degrees from the horizontal. The base should be one-quarter of the working length of the ladder away from the wall or support structure.
- Extension and Retraction: Operate the extension and retraction mechanisms carefully to avoid pinching fingers. Ensure all rungs are securely locked before climbing.
- Safety Hooks: When using the ladder as a straight ladder against a structure, utilize the J-type safety hooks for enhanced stability. Secure them over a stable edge.
- Three Points of Contact: Maintain three points of contact (two hands and one foot, or two feet and one hand) with the ladder at all times while climbing or descending.
- Overreaching: Never overreach. Keep your body centered between the side rails. Move the ladder if necessary.
- Electrical Hazards: Avoid using the ladder near electrical wires or equipment. Aluminum conducts electricity.
- Weather Conditions: Do not use the ladder in strong winds, rain, or icy conditions.

Image: Detail of the ladder's anti-slip rungs and reinforced non-slip feet, designed for maximum safety and stability.
3. Components List
Your Saker Telescoping Extension Ladder includes the following main components:
- Aluminum Telescoping Ladder Body
- J-Type Safety Hooks (detachable)
- Non-Slip Feet with Reinforcement Pads
- Independent Locking Buttons (on each rung)
4. Setup
Before using the ladder, ensure it is properly set up for your task.
- Unpack: Carefully remove the ladder from its packaging.
- Attach Hooks (Optional): If using the J-type safety hooks, ensure they are securely attached to the top rung of the ladder.
- Positioning: Place the ladder on a stable, level surface. Verify that the non-slip feet are fully in contact with the ground and will not slide.

Image: Instructions for attaching and adjusting the J-type safety hooks for secure ladder placement.
5. Operating Instructions
5.1. Extending the Ladder
- Place the ladder on a stable surface.
- Starting from the bottom, unlock the left button on the first rung.
- Hold the rung and pull it upwards until it fully extends and locks into place. You will hear an audible click.
- Repeat this process for each subsequent rung until the desired height is reached. Ensure all extended rungs are securely locked before climbing.
5.2. Retracting the Ladder
- Ensure no one is on the ladder and it is clear of obstructions.
- Starting from the top rung, unlock the right button.
- Gently press down on the rung. The rung will retract smoothly.
- Repeat for each rung until the ladder is fully retracted. Exercise caution to prevent finger pinching during retraction.

Image: Visual guide for extending and retracting the ladder, highlighting the button release and controlled movement.
5.3. Using Safety Hooks
- Outdoor Use: For maximum stability when leaning against a roof edge or similar structure, secure the J-type hooks over the edge.
- Indoor Use: The hooks can be rotated inwards to latch onto door frames or beams, providing additional support.
6. Maintenance
Proper maintenance ensures the longevity and safe operation of your ladder.
- Cleaning: Clean the ladder regularly with a damp cloth and mild detergent. Avoid abrasive cleaners or solvents that could damage the aluminum or plastic components.
- Lubrication: Periodically check the locking mechanisms and moving parts. Apply a silicone-based lubricant if any stiffness is observed.
- Storage: Store the ladder in a dry, cool place, away from direct sunlight and extreme temperatures. Its compact, retracted form allows for easy storage in tight spaces like under beds or in car trunks.
- Damage: If any part of the ladder becomes damaged, do not attempt to repair it yourself. Contact customer support for assistance.

Image: The ladder's compact design facilitates easy carrying and storage in various locations, including a car trunk.
7. Troubleshooting
If you encounter issues with your Saker Telescoping Extension Ladder, refer to the following common solutions:
| Problem | Possible Cause | Solution |
|---|---|---|
| Ladder does not extend/retract smoothly. | Dirt or debris in mechanisms; lack of lubrication. | Clean the rungs and locking buttons. Apply a silicone-based lubricant to moving parts. |
| Rungs do not lock securely. | Mechanism obstructed or damaged; not fully extended. | Ensure each rung is pulled up completely until it clicks. Inspect for debris. If damaged, discontinue use. |
| Ladder feels unstable. | Uneven ground; improper angle; feet not fully engaged. | Relocate the ladder to a firm, level surface. Adjust the angle to approximately 75 degrees. Ensure non-slip feet are flat on the ground. |
8. Specifications
- Material: Premium Grade Aluminum Alloy
- Maximum Height: 12.5 Feet (149.6 inches / 381 cm)
- Minimum Retracted Size: Approximately 33.62 inches (85.4 cm)
- Width (Base): Approximately 17.87 inches (45.4 cm)
- Load Capacity: 330 lbs (150 kg)
- Special Features: Anti-Slip Rungs, Extendable, Foldable, Portable, Dual Safety Hooks

Image: Detailed dimensions of the telescoping ladder, showing its compact retracted size and full extension.
9. Warranty and Support
For warranty information or technical support, please refer to the product packaging or contact Saker customer service directly. Keep your purchase receipt as proof of purchase.
Customer Service: Please visit the official Saker website or contact your retailer for support options.