
1. Introduction
This manual provides detailed instructions for the safe and effective use of your MESTEK IR02C Infrared Thermometer and MESTEK CM87C Digital Clamp Meter. Please read this manual thoroughly before operation and retain it for future reference.

Image 1.1: The MESTEK IR02C Infrared Thermometer (orange) and CM87C Digital Clamp Meter (blue).
2. Safety Information
Always observe basic safety precautions when using electrical testing equipment and infrared thermometers to reduce the risk of fire, electric shock, or personal injury.
- Do not operate the devices if they appear damaged or are not functioning properly.
- For the clamp meter, ensure to clamp around a single live wire when measuring current, not the entire power cable.
- The infrared thermometer uses a laser. Do not stare into the laser beam or direct it at people or animals.
- Observe all local and national safety codes.
- The CM87C clamp meter features 600V overload protection. If the voltage exceeds 600V, the LCD backlight will turn red and an alarm will sound.
3. Package Contents
Verify that all items are present in your package:
- MESTEK IR02C Infrared Thermometer
- MESTEK CM87C Digital Clamp Meter
- K-Type Thermocouple Probe (for IR02C)
- Test Leads (for CM87C)
- Carrying Case (for CM87C)
- AAA Batteries (2 for IR02C, 2 for CM87C)
- User Manual (this document)

Image 3.1: Contents for the MESTEK IR02C Infrared Thermometer, including the device, K-Type probe, batteries, and a protective pouch.

Image 3.2: Contents for the MESTEK CM87C Digital Clamp Meter, including the device, test leads, batteries, and a zippered carrying case.
4. Setup
4.1 Battery Installation
Both the IR02C Infrared Thermometer and CM87C Digital Clamp Meter require two 1.5V AAA batteries for operation. To install:
- Locate the battery compartment on the back of each device.
- Open the battery cover.
- Insert two AAA batteries, observing the correct polarity (+/-).
- Close the battery cover securely.
4.2 Connecting Test Leads (CM87C Clamp Meter)
For voltage, resistance, capacitance, diode, and continuity measurements, connect the test leads:
- Insert the red test lead into the 'INPUT' jack.
- Insert the black test lead into the 'COM' jack.
4.3 Connecting K-Type Thermocouple Probe (IR02C Thermometer)
For contact temperature measurements, connect the K-Type probe:
- Locate the input jack on the side of the IR02C thermometer.
- Insert the K-Type thermocouple probe into the jack.
5. Operating Instructions
5.1 MESTEK IR02C Infrared Thermometer
The IR02C is designed for non-contact temperature measurement, humidity measurement, and contact temperature measurement using a K-Type probe.
5.1.1 Power On/Off
Press the trigger to power on the device. It will automatically power off after a period of inactivity to conserve battery.
5.1.2 Non-Contact Temperature Measurement
- Point the thermometer at the target surface.
- Press and hold the trigger. The laser pointers will indicate the measurement area.
- The temperature reading will be displayed on the color LCD.

Image 5.1: The IR02C thermometer features 13 laser points for precise targeting and a color LCD displaying temperature, humidity, and other parameters.
5.1.3 K-Type Thermocouple Measurement
- Ensure the K-Type probe is connected to the device.
- Insert the probe into the substance or area to be measured.
- The display will show the contact temperature reading.
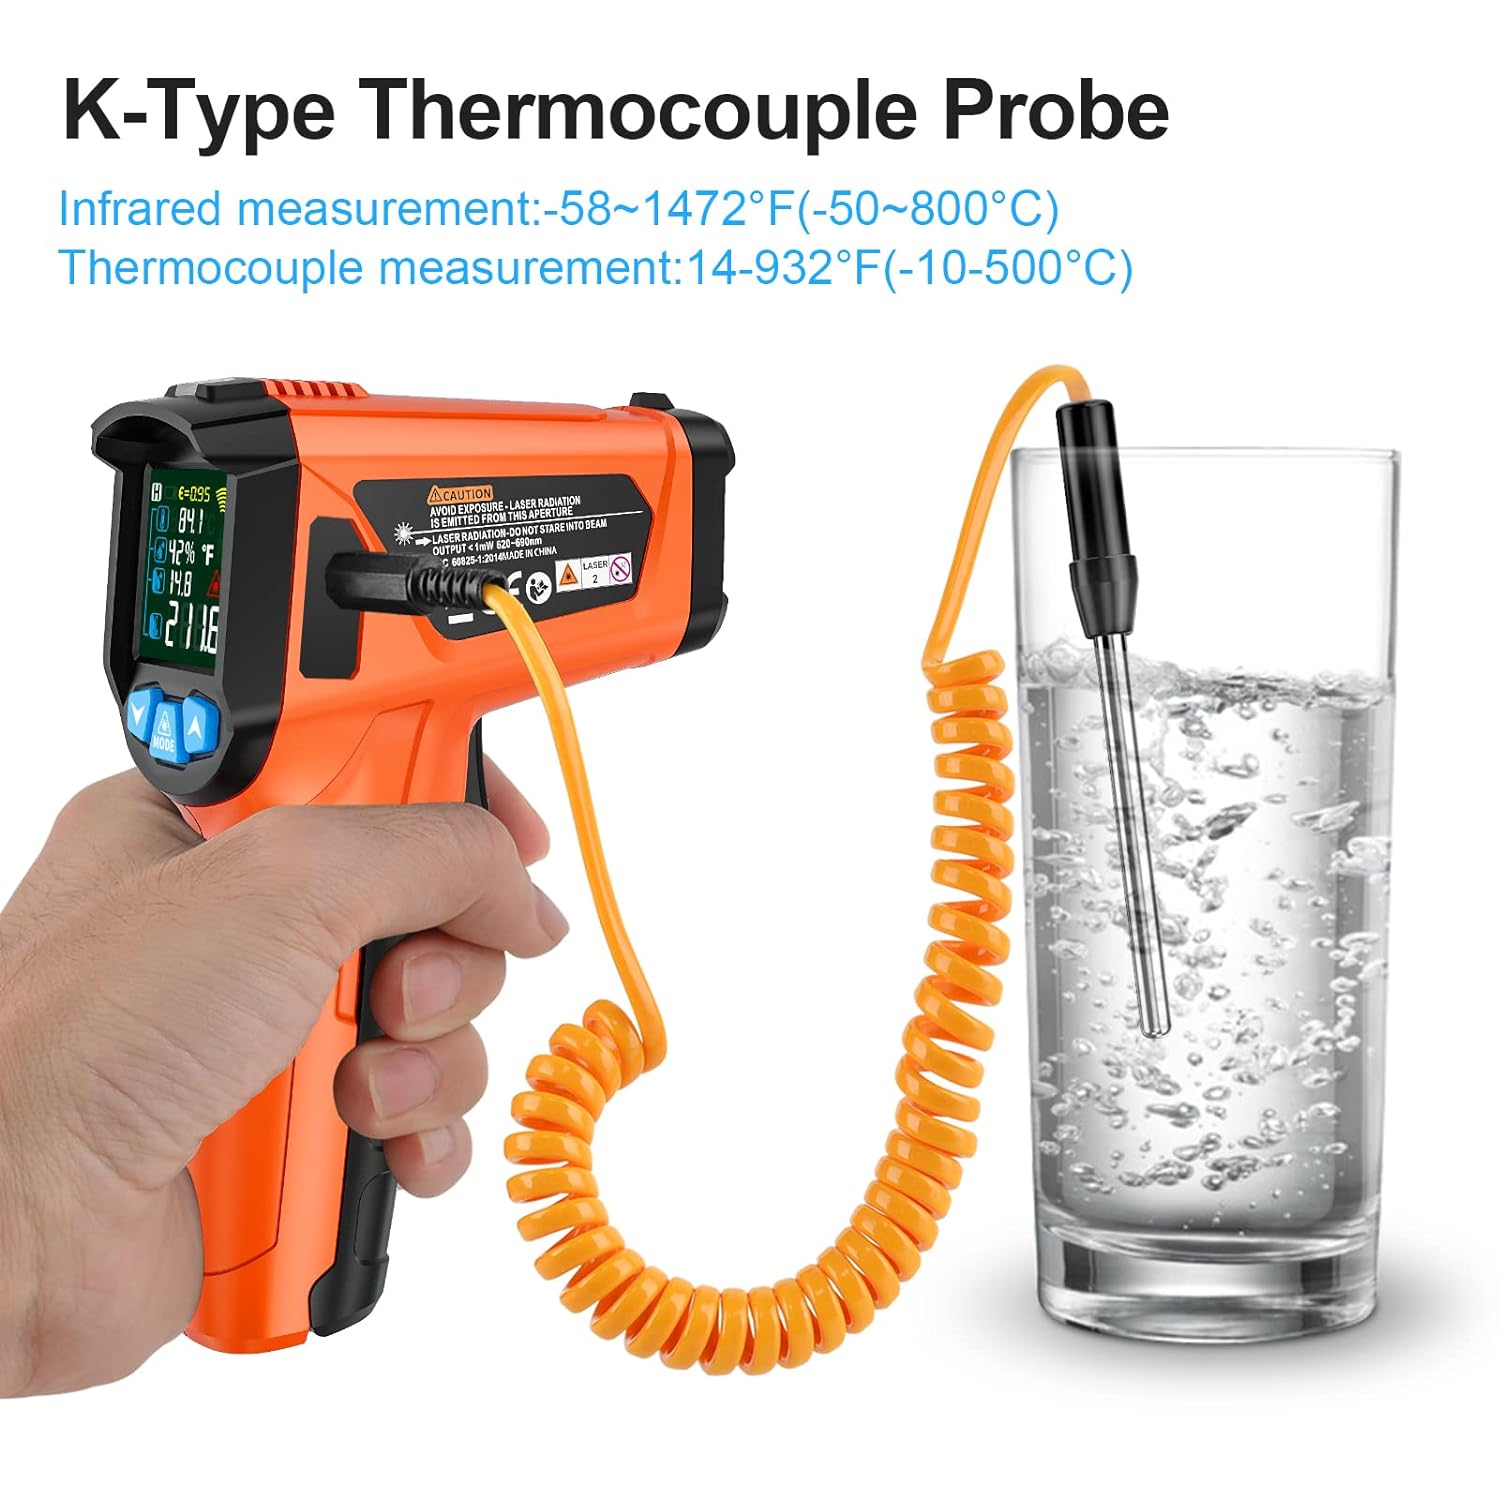
Image 5.2: Measuring liquid temperature using the K-Type Thermocouple Probe with the IR02C thermometer.
5.1.4 Unit Conversion (°C/°F)
Use the dedicated button (often labeled 'MODE' or with temperature units) to switch between Celsius and Fahrenheit.
5.1.5 Emissivity Adjustment
Emissivity (0.10 to 1.00) can be adjusted for different surface types to improve measurement accuracy. Refer to the device's menu for adjustment options.
5.1.6 High/Low Temperature Alarms
The device supports setting high and low temperature alarm thresholds. Consult the device menu for configuration.

Image 5.3: The IR02C thermometer is capable of measuring a wide range of temperatures, from hot frying oil to cold freezer environments.
5.2 MESTEK CM87C Digital Clamp Meter
The CM87C is a True-RMS 6000 counts clamp meter for measuring AC/DC current, voltage, resistance, capacitance, frequency, and more.
5.2.1 Power On/Off and Function Selection
Turn the rotary dial to the desired measurement function to power on the device. Turn to 'OFF' to power off. The device also features automatic shutdown after inactivity.

Image 5.4: The CM87C clamp meter's rotary dial allows selection of various functions including AC/DC current, voltage, resistance, capacitance, and more.
5.2.2 AC/DC Current Measurement (Clamp Jaw)
- Select the AC or DC current function on the rotary dial.
- Open the clamp jaw and encircle a single live wire. Do not clamp around the entire power cable.
- Read the current value on the display.
- For DC current, press the 'ZERO' button to clear any offset before measurement.

Image 5.5: The CM87C clamp meter in use, demonstrating AC current measurement on a circuit and DC current measurement on a vehicle's electrical system.
5.2.3 AC/DC Voltage Measurement
- Select the AC or DC voltage function.
- Connect the test leads to the circuit in parallel.
- Read the voltage value on the display.
5.2.4 Resistance, Capacitance, Diode, Continuity
Select the corresponding function on the rotary dial and connect the test leads to the component being measured.
- Continuity: A buzzer will sound if the resistance is below a certain threshold.
5.2.5 NCV (Non-Contact Voltage) and Live Wire Detection
Select the NCV or Live function. Bring the top of the clamp meter near a conductor. The device will indicate the presence of voltage or live wire through visual and/or audible alerts.
5.2.6 Inrush Current Measurement
The Inrush function measures the maximum current at the moment a machine starts (AC Inrush only). This helps diagnose startup problems in motors or circuits.
5.2.7 LoZ (Low Input Impedance) and VFD (Variable Frequency Drive) Modes
These modes provide higher accuracy readings, especially in circuits with ghost voltages or variable frequency drives.
5.2.8 Data Hold, Min/Max, Backlight, Flashlight
- HOLD: Freezes the current reading on the display.
- MIN/MAX: Records the minimum and maximum values during a measurement session.
- Backlight: Illuminates the LCD for better visibility in low light.
- Flashlight: Provides illumination for the work area.

Image 5.6: The CM87C clamp meter's integrated flashlight provides illumination for working in dimly lit environments.
6. Maintenance
6.1 Cleaning
Wipe the devices with a dry, soft cloth. Do not use abrasive cleaners or solvents. Ensure the devices are powered off before cleaning.
6.2 Battery Replacement
When the low battery indicator appears on the display, replace the batteries promptly to ensure accurate readings. Refer to Section 4.1 for battery installation instructions.
6.3 Storage
Store the devices in a cool, dry place, away from direct sunlight and extreme temperatures. If storing for extended periods, remove the batteries to prevent leakage.
7. Troubleshooting
If you encounter issues with your MESTEK devices, refer to the following common problems and solutions:
- Device does not power on: Check battery installation and ensure batteries are not depleted. Replace if necessary.
- Inaccurate temperature reading (IR02C): Ensure correct emissivity setting for the target surface. Check distance to spot ratio. Ensure the lens is clean.
- No current reading (CM87C): Ensure the clamp jaw is closed around a single live wire, not the entire cable. Verify the function dial is set correctly.
- Inaccurate voltage/resistance reading (CM87C): Ensure test leads are properly connected and making good contact with the circuit.
- Display shows 'OL' (Overload): The measured value exceeds the device's range for the selected function. Select a higher range if available, or ensure the measurement is within the device's specifications.
8. Specifications
8.1 MESTEK IR02C Infrared Thermometer
- Infrared Temperature Range: -58°F to 1472°F (-50°C to 800°C)
- K-Type Temperature Range: 14°F to 932°F (-10°C to 500°C)
- Distance to Spot Ratio (D:S): 12:1
- Response Time: <0.5 seconds
- Emissivity: Adjustable (0.10 - 1.00)
- Display: Color LCD
- Power: 2 x 1.5V AAA Batteries
8.2 MESTEK CM87C Digital Clamp Meter
- Display: 6000 Counts, True-RMS
- AC/DC Current: Max 600A
- AC/DC Voltage: Yes
- Resistance: Yes
- Capacitance: Yes
- Frequency: Yes
- Diode/Continuity: Yes
- Special Features: NCV, Live Wire Detection, Inrush Current (AC only), LoZ, VFD, Max/Min, Data Hold, Flashlight, Backlight
- Jaw Opening: 30mm
- Overload Protection: 600V
- Power: 2 x 1.5V AAA Batteries
9. Support
For technical assistance, warranty information, or service inquiries, please contact MESTEK customer support through the official website or your purchase platform.