1. Safety Information
Important: Please read and understand all instructions before assembly and use. Failure to follow these instructions may result in injury or property damage.
- Check local HOA policy to ensure that the shed can be built in your area before beginning assembly.
- Keep the shed locked when not in use to ensure the safety of your belongings and prevent unauthorized access.
- Ensure a level surface for installation to maintain structural integrity and stability.
- Assembly is recommended on a nice day without strong winds.
- Teamwork is suggested; 3 people will make the assembly easier.
- Wear appropriate safety gear, including gloves and eye protection, during assembly.
2. Parts List
Before beginning assembly, verify that all parts are present and undamaged. Refer to the detailed parts list in the included manual for specific component identification.
Key Components:
- Floor Panels
- Wall Panels (Side, Back, Front)
- Roof Panels
- Door Panels
- Window Panels
- Frame Components (Vertical and Horizontal Supports)
- Hardware (Screws, Hinges, Latches, Corner Brackets)
- Ventilation Grille
Note: A detailed list with part numbers and quantities is provided in your physical instruction manual.
3. Setup and Assembly
Follow these steps carefully for proper assembly. It is highly recommended to watch the assembly video for visual guidance.
3.1. Preparations Before You Start
- Area: A level surface is highly required for stable installation.
- Weather: Choose a nice day without wind for assembly.
- Teamwork: Suggest 3 people for easier assembly.
- Tools (Not Included): Ladder, power drill, gloves, knife, tape measure.
3.2. Assembly Steps
- Floor Assembly: Connect the floor panels according to the manual, ensuring they interlock securely.
- Wall Pre-assembly: Assemble the side, back, and front wall panels individually, attaching any windows or specific frame pieces as instructed.
- Door Pre-assembly: Assemble the door panels, attaching hinges and any necessary reinforcements.
- Roof Pre-assembly: Assemble the roof panels, ensuring all connecting pieces are in place.
- Erecting Walls: Carefully raise and connect the pre-assembled wall sections to the floor base, securing them with the provided connectors and screws.
- Attaching Roof: With assistance, carefully place the pre-assembled roof onto the wall structure, aligning all edges and securing it with screws.
- Installing Doors: Attach the pre-assembled doors to the designated openings, ensuring smooth operation.
- Final Securing: Install all remaining screws and corner brackets to ensure the shed is stable and secure.
Assembly Video Guide
For a detailed visual guide on the assembly process, please watch the video below:
Video: Devoko 4x8 FT Resin Shed Assembly Guide. This video provides step-by-step instructions for assembling your shed, including floor, wall, roof, and door installation.
4. Operating Instructions
4.1. Door Operation and Locking
The shed is equipped with a lockable door for security. To open, disengage the latch and pull the door outwards. To close, push the door firmly until it aligns with the frame, then engage the latch. For added security, a padlock (not included) can be used with the sturdy mechanism.
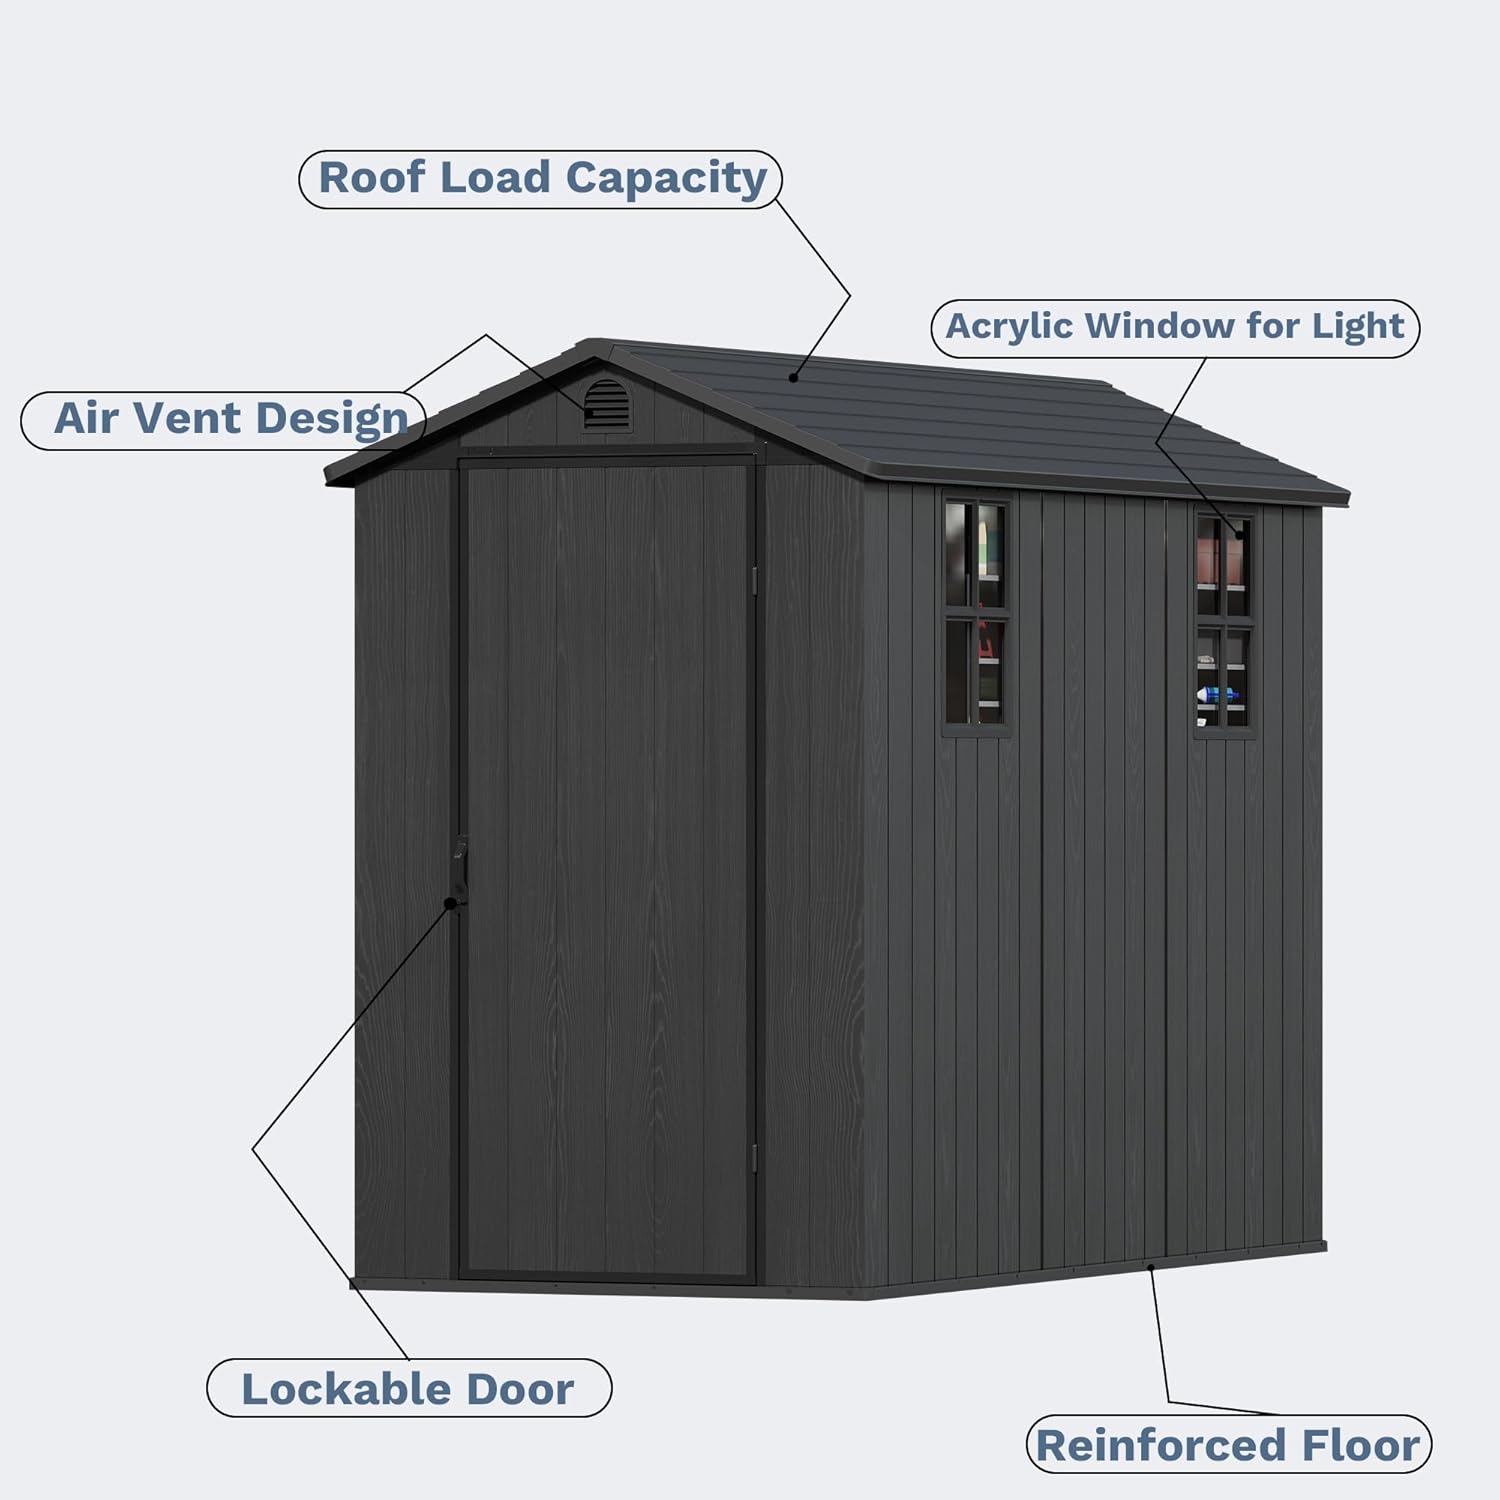
Image: Close-up view of the shed's lockable door, air vent, and reinforced floor, highlighting key features.
4.2. Ventilation
The shed features an air vent to ensure proper air circulation, which helps prevent mildew and maintains a comfortable environment inside. The two windows also allow natural light to enter, keeping the interior bright.
Video: CDCASA 8X4 FT Upgrade Resin Shed with Openable Windows. This video demonstrates the functionality of the shed's windows, which can be opened for ventilation and light.
5. Maintenance
Regular maintenance will prolong the life and appearance of your shed.
- Cleaning: Clean the shed periodically with mild soap and water. Avoid abrasive cleaners or harsh chemicals that could damage the resin material.
- Inspection: Periodically check all screws and connections to ensure they remain tight. Tighten any loose fasteners.
- Drainage: Ensure the area around the shed is clear of debris to allow for proper water drainage and prevent moisture buildup.
- Weather Resistance: The shed is designed to be waterproof and rust-proof. However, extreme weather conditions may require additional precautions.
6. Troubleshooting
If you encounter any issues with your Devoko storage shed, please refer to the following common solutions:
- Difficulty during assembly: Ensure all parts are correctly oriented and aligned as per the manual. Do not force components. If screws are difficult to install, ensure pre-drilled holes are clear.
- Shed instability: Verify that the shed is placed on a completely level surface. Ensure all screws and connectors are fully tightened. Ground-mounted screws are provided for additional stability if needed.
- Door not closing properly: Check for any obstructions in the door frame or hinges. Ensure the shed is level, as an uneven base can affect door alignment.
- Water leakage: Confirm that all roof and wall panels are securely interlocked and all screws are tightened. Ensure the roof joints are properly adjusted.
If problems persist, please contact customer support for assistance.
7. Specifications
| Feature | Detail |
|---|---|
| Brand | Devoko |
| Model Number | PS0436-DGY |
| Color | Deep Gray |
| Material | Plastic, Resin |
| Product Dimensions | 100.4"D x 45.3"W x 76.8"H |
| Item Weight | 170 Pounds |
| Weight Limit | 550 Pounds |
| Door Style | Single Hinged Door |
| Door Width | 26 Inches |
| Door Height | 67 Inches |
| Water Resistance Level | Water Resistant |
| Assembly Required | Yes |
8. Warranty and Customer Support
Your Devoko storage shed comes with a 30-day easy return policy. For any questions, missing parts, or assistance with assembly, please contact customer support.
- Returns: 30-day easy returns.
- Customer Support: Refer to your purchase documentation or the included manual for specific contact information.