1. Introduction
This manual provides detailed instructions for the safe and efficient operation of your LSA Apparel Food Vacuum Sealer Machine, Model rxzer23. This appliance is designed to remove air from specially designed bags, creating an airtight seal to preserve food freshness for extended periods. Please read this manual thoroughly before first use and retain it for future reference.
2. Important Safety Instructions
To reduce the risk of fire, electric shock, or injury, always follow these basic safety precautions:
- Read all instructions before using the appliance.
- Do not immerse the appliance, power cord, or plug in water or other liquids.
- Close supervision is necessary when any appliance is used by or near children.
- Unplug from outlet when not in use and before cleaning.
- Do not operate any appliance with a damaged cord or plug, or after the appliance malfunctions or has been damaged in any manner.
- Use only manufacturer-recommended attachments.
- Do not use outdoors.
- Do not place on or near a hot gas or electric burner, or in a heated oven.
- Always place the appliance on a stable, heat-resistant surface.
- This appliance is for household use only.
3. Package Contents
Upon unpacking, please ensure all items listed below are present and in good condition:
- LSA Apparel Food Vacuum Sealer Machine (Model rxzer23)
- 20 x Vacuum Seal Bags (9.84" x 6.69")
- Power Cord
- User Manual (This document)
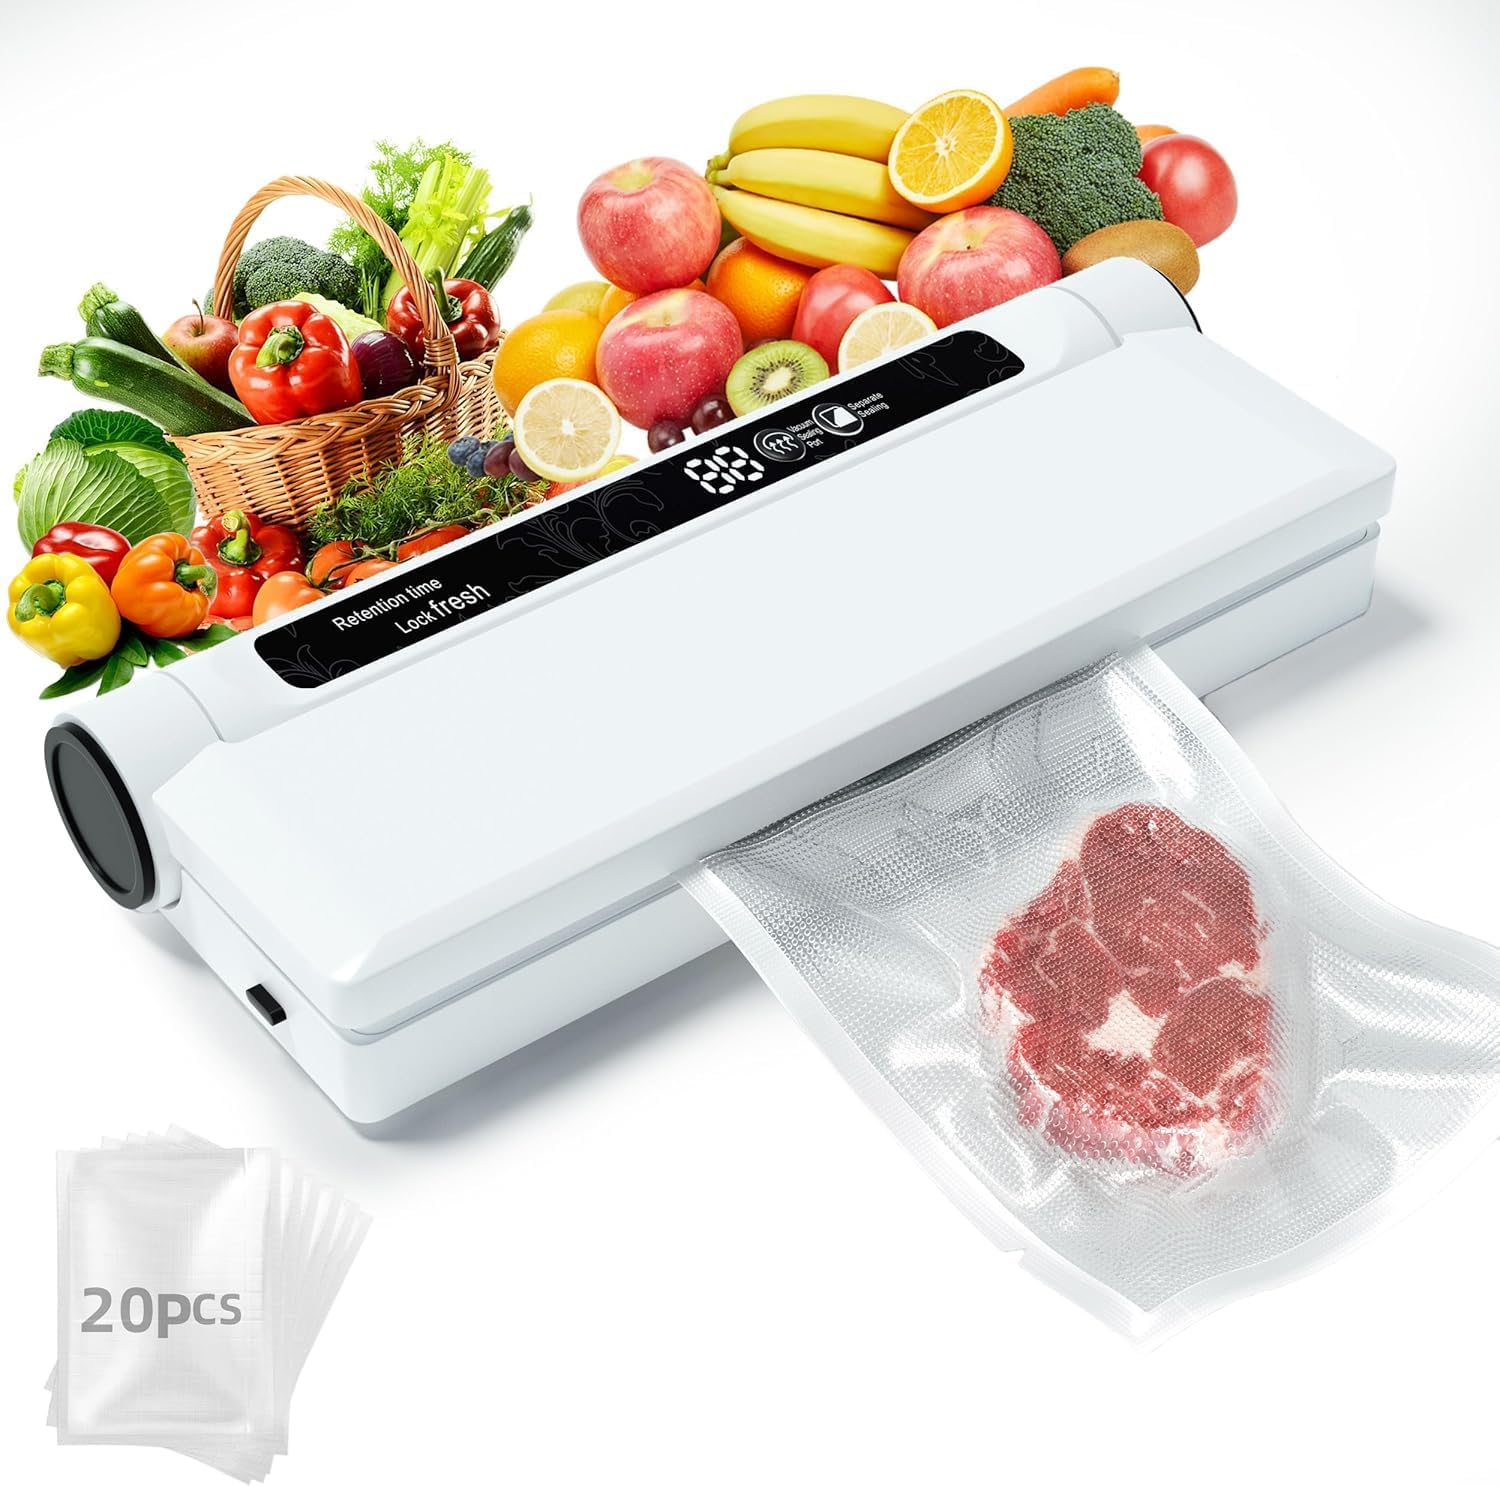
Image 3.1: LSA Apparel Food Vacuum Sealer Machine with included bags and examples of food it can preserve.
4. Product Overview
The LSA Apparel Food Vacuum Sealer Machine features a compact design and intuitive controls for efficient food preservation.

Image 4.1: Detailed view of the vacuum sealer's control panel and sealing mechanism.
Key Features:
- 75KPA Strong Suction: Ensures efficient air removal for optimal sealing.
- Dry/Wet Modes: Adaptable for various food types, from dry goods to moist items.
- Digital Countdown Timer: Provides clear indication of sealing progress.
- One-Touch Auto Operation: Simplifies the vacuum sealing process.
- Compact and Lightweight Design: Easy to store and portable.
5. Setup
- Unpack the vacuum sealer and all accessories.
- Place the machine on a flat, stable, and dry surface.
- Ensure the power cord is securely plugged into the machine and a compatible electrical outlet.
- Familiarize yourself with the control panel and sealing area.
6. Operating Instructions
6.1 Preparing Bags for Sealing
Use only LSA Apparel vacuum sealer bags or other compatible textured vacuum sealer bags. Ensure the bag is clean and dry inside the sealing area.
6.2 Vacuum Sealing Process (Dry Foods)
- Place the food item into a vacuum sealer bag, leaving at least 2-3 inches of space between the food and the top edge of the bag.
- Open the lid of the vacuum sealer.
- Position the open end of the bag into the vacuum channel, ensuring it lies flat and smooth across the sealing strip.
- Close the lid firmly until both side latches click into place.
- Press the 'Vacuum Seal' button. The machine will automatically remove air and then seal the bag. The digital countdown timer will display the progress.
- Once the indicator light turns off and the countdown finishes, press the side release buttons to open the lid.
- Remove the sealed bag. Check the seal for any imperfections.

Image 6.1: Step-by-step guide for vacuum sealing, demonstrating bag placement, lid closure, operation, and release.
6.3 Vacuum Sealing Process (Wet/Moist Foods)
For wet or moist foods, select the 'Wet Mode' if available, or ensure there is no liquid near the sealing area. Pre-freezing moist foods for a short period can help prevent liquids from being drawn into the vacuum channel.
6.4 Sealing Only (Without Vacuum)
To seal a bag without vacuuming, place the bag's open end on the sealing strip, close the lid, and press the 'Seal Only' button. The machine will create a seal without removing air.

Image 6.2: Examples of various foods that can be preserved using the vacuum sealer, highlighting its versatility.
7. Maintenance and Cleaning
Regular cleaning ensures optimal performance and extends the lifespan of your vacuum sealer.
- Always unplug the appliance before cleaning.
- Wipe the exterior of the machine with a damp cloth and mild soap. Do not use abrasive cleaners.
- Clean the vacuum channel and sealing strip with a damp cloth to remove any food residue. Ensure these areas are completely dry before next use.
- Do not immerse the machine in water.
8. Troubleshooting
| Problem | Possible Cause | Solution |
|---|---|---|
| Machine does not turn on. | Power cord not properly connected. | Ensure the power cord is securely plugged into the machine and a working electrical outlet. |
| Bag does not vacuum properly. | Bag not correctly placed in vacuum channel; bag is damaged; food too close to bag opening. | Reposition the bag; check for holes or tears and use a new bag if necessary; ensure 2-3 inches of space from food to bag opening. |
| Bag does not seal. | Sealing strip is dirty or wet; lid not properly latched. | Clean and dry the sealing strip; ensure both side latches click firmly into place. |
| Air leaks into sealed bag. | Bag is punctured; seal is incomplete; food with sharp edges. | Use a new bag; re-seal the bag; use a container or extra padding for sharp items. |
9. Specifications
- Brand: LSA Apparel
- Model: rxzer23
- Material: Plastic
- Color: WHITE
- Item Weight: 1.52 pounds (0.69 Kilograms)
- Operation Mode: Semi-Automatic
- Package Dimensions: 11.69 x 5.16 x 2.83 inches
- UPC: 710917178043
- Suction Power: 75KPA
10. Warranty and Support
For warranty information or technical support, please refer to the contact details provided with your purchase or visit the official LSA Apparel website. Keep your proof of purchase for warranty claims.


