1. Introduction
Welcome to the Saker X9 Retro Handheld Game Console user manual. This guide provides essential information for setting up, operating, and maintaining your device. Please read this manual thoroughly to ensure proper use and to maximize your gaming experience.
2. Product Overview
The Saker X9 is a portable retro game console designed for entertainment. It features a 5.5-inch IPS screen, integrated controls, and the ability to connect to a television for a larger display. The console comes with 64GB of internal storage for pre-loaded games.
2.1 Console Components
- 5.5-inch IPS Screen: High-definition display for clear visuals.
- Directional Pad (D-pad): For navigation in games and menus.
- Analog Sticks: Two analog sticks for precise control.
- Action Buttons (A, B, X, Y): Standard gaming input buttons.
- SELECT/START Buttons: For in-game functions and menu selections.
- Shoulder Buttons: L1, L2, R1, R2 buttons located on the top of the console.
- Type-C Port: For charging the console.
- HDMI Output: For connecting to external displays.

Figure 1: Front view of the Saker X9 Retro Handheld Game Console, showing the 5.5-inch screen, D-pad, analog sticks, and action buttons.
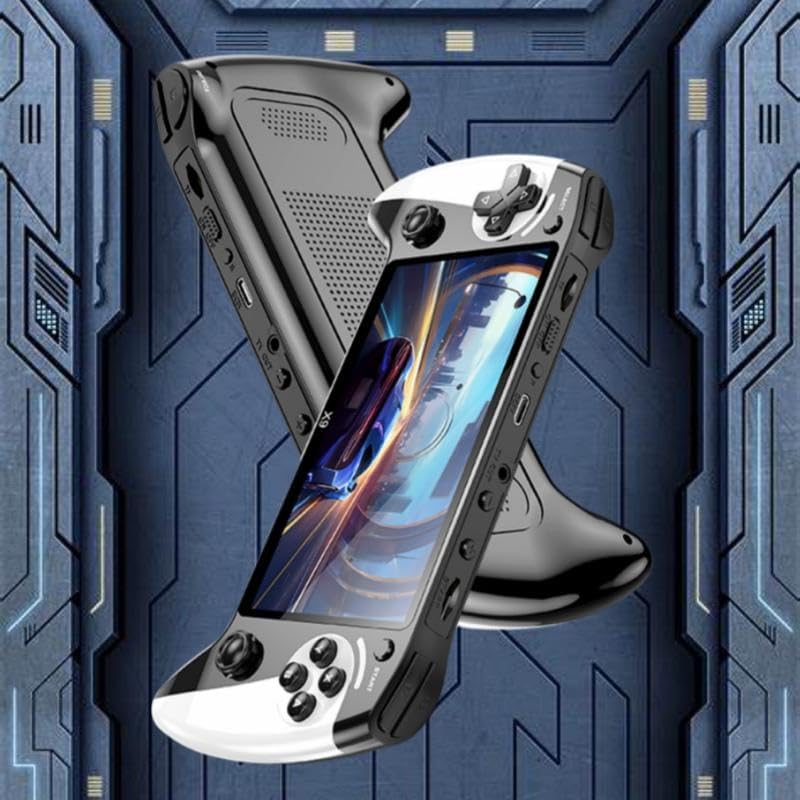
Figure 2: Side view of the Saker X9 console, highlighting its ergonomic design and accessible ports.
3. Setup
3.1 Initial Charging
- Locate the Type-C charging port on the console.
- Connect the provided Type-C charging cable to the console and a compatible USB power adapter (not included).
- Allow the console to charge fully before first use. The charging indicator light will typically change color or turn off when charging is complete.
3.2 Powering On/Off
- To Power On: Press and hold the Power button (usually located on the top or side) for a few seconds until the screen illuminates.
- To Power Off: Press and hold the Power button until a power-off option appears on the screen, then select it. Alternatively, hold the Power button for an extended period (e.g., 5-10 seconds) for a forced shutdown if the system is unresponsive.
4. Operating Instructions
4.1 Basic Navigation
Use the D-pad or analog sticks to navigate through the console's menus. The 'A' button typically confirms selections, while the 'B' button usually acts as a back or cancel function.
4.2 Game Play
- From the main menu, select the 'Games' or 'Emulator' section.
- Browse the list of available games using the D-pad or analog sticks.
- Press the 'A' button to select and launch a game.
- Follow on-screen instructions or in-game tutorials for specific game controls.

Figure 3: The console features a 5.5-inch HD screen for an immersive gaming experience.
4.3 TV Output
The Saker X9 console supports connecting to a television for a larger display experience.
- Ensure the console is powered off.
- Connect an HDMI cable (not included) from the console's HDMI output port to an available HDMI input port on your television.
- Power on your television and select the correct HDMI input source.
- Power on the Saker X9 console. The display should automatically switch to your television.

Figure 4: Connect the Saker X9 console to a television to play games on a larger screen.

Figure 5: The Saker X9 console supports TV output, allowing for an enhanced gaming experience on a larger display.
4.4 Wireless Controller Connection
The Saker X9 console supports connecting external wireless controllers for multi-player gaming or preferred control schemes.
- Ensure your wireless controllers are charged and in pairing mode (refer to your controller's manual for specific pairing instructions).
- Navigate to the console's settings menu and look for 'Bluetooth' or 'Controller Settings'.
- Select 'Scan for Devices' or a similar option.
- Once your controller appears in the list, select it to pair.

Figure 6: The Saker X9 console supports connection with external wireless controllers for multi-player gaming.
5. Maintenance
5.1 Cleaning the Console
- Use a soft, dry, lint-free cloth to wipe the console's exterior.
- For stubborn marks, slightly dampen the cloth with water, then wipe dry immediately.
- Do not use harsh chemicals, abrasive cleaners, or solvents.
5.2 Battery Care
- Avoid fully discharging the battery frequently.
- Charge the console regularly, even if not in use, to maintain battery health.
- Do not expose the console to extreme temperatures.
5.3 Storage
- Store the console in a cool, dry place away from direct sunlight and moisture.
- Keep the console away from dust and debris.
6. Troubleshooting
If you encounter issues with your Saker X9 console, please refer to the following common solutions:
- Console Will Not Power On: Ensure the battery is charged. Connect the console to a power source and try again. If unresponsive, perform a hard reset by holding the power button for 10-15 seconds.
- No Display on TV: Verify the HDMI cable is securely connected to both the console and the TV. Ensure the correct HDMI input source is selected on your television. Try a different HDMI cable or TV port.
- Games Not Loading/Freezing: Restart the console. Ensure there is sufficient storage space if attempting to add new games (though the console comes with pre-loaded games).
- Controller Connection Issues: Ensure wireless controllers are fully charged and in pairing mode. Re-attempt the pairing process as described in Section 4.4.
7. Specifications
| Feature | Specification |
|---|---|
| Screen Size | 5.5 Inches |
| Display Type | LCD |
| Memory Storage Capacity | 64 GB |
| Power Source | Battery Powered |
| Battery Description | Lithium-Ion |
| Form Factor | Handheld |
| Material | Plastic |
| Product Dimensions | 9.85 x 5.52 x 1.18 inches |

Figure 7: The Saker X9 console is powered by a high-performance gaming chip designed for smooth gameplay.
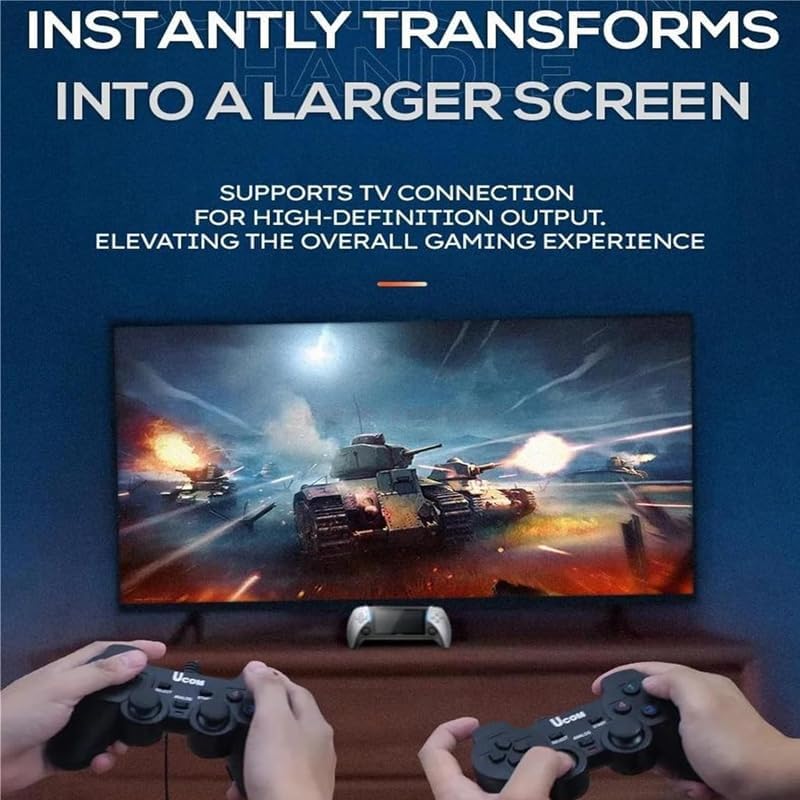
Figure 8: The portable design of the Saker X9 allows for gaming enjoyment anytime, anywhere.
8. Safety Information
Please observe the following safety guidelines to prevent damage to the device or personal injury:
- This product is for external use only.
- Do not expose the console to water, moisture, or extreme temperatures.
- Avoid dropping or subjecting the console to severe impacts.
- Do not attempt to disassemble or repair the console yourself. Refer to qualified service personnel.
- Keep the console away from young children to prevent choking hazards from small parts.
- Use only the specified charging cable and compatible power adapters.
9. Warranty and Support
For warranty information or technical support, please refer to the documentation included with your purchase or contact the retailer where the product was acquired. Keep your proof of purchase for any warranty claims.


