1. Introduction
This manual provides detailed instructions for setting up, operating, and maintaining your BMAX Mini PC B2 Power. Please read this manual thoroughly before using the device to ensure proper functionality and to prevent damage.
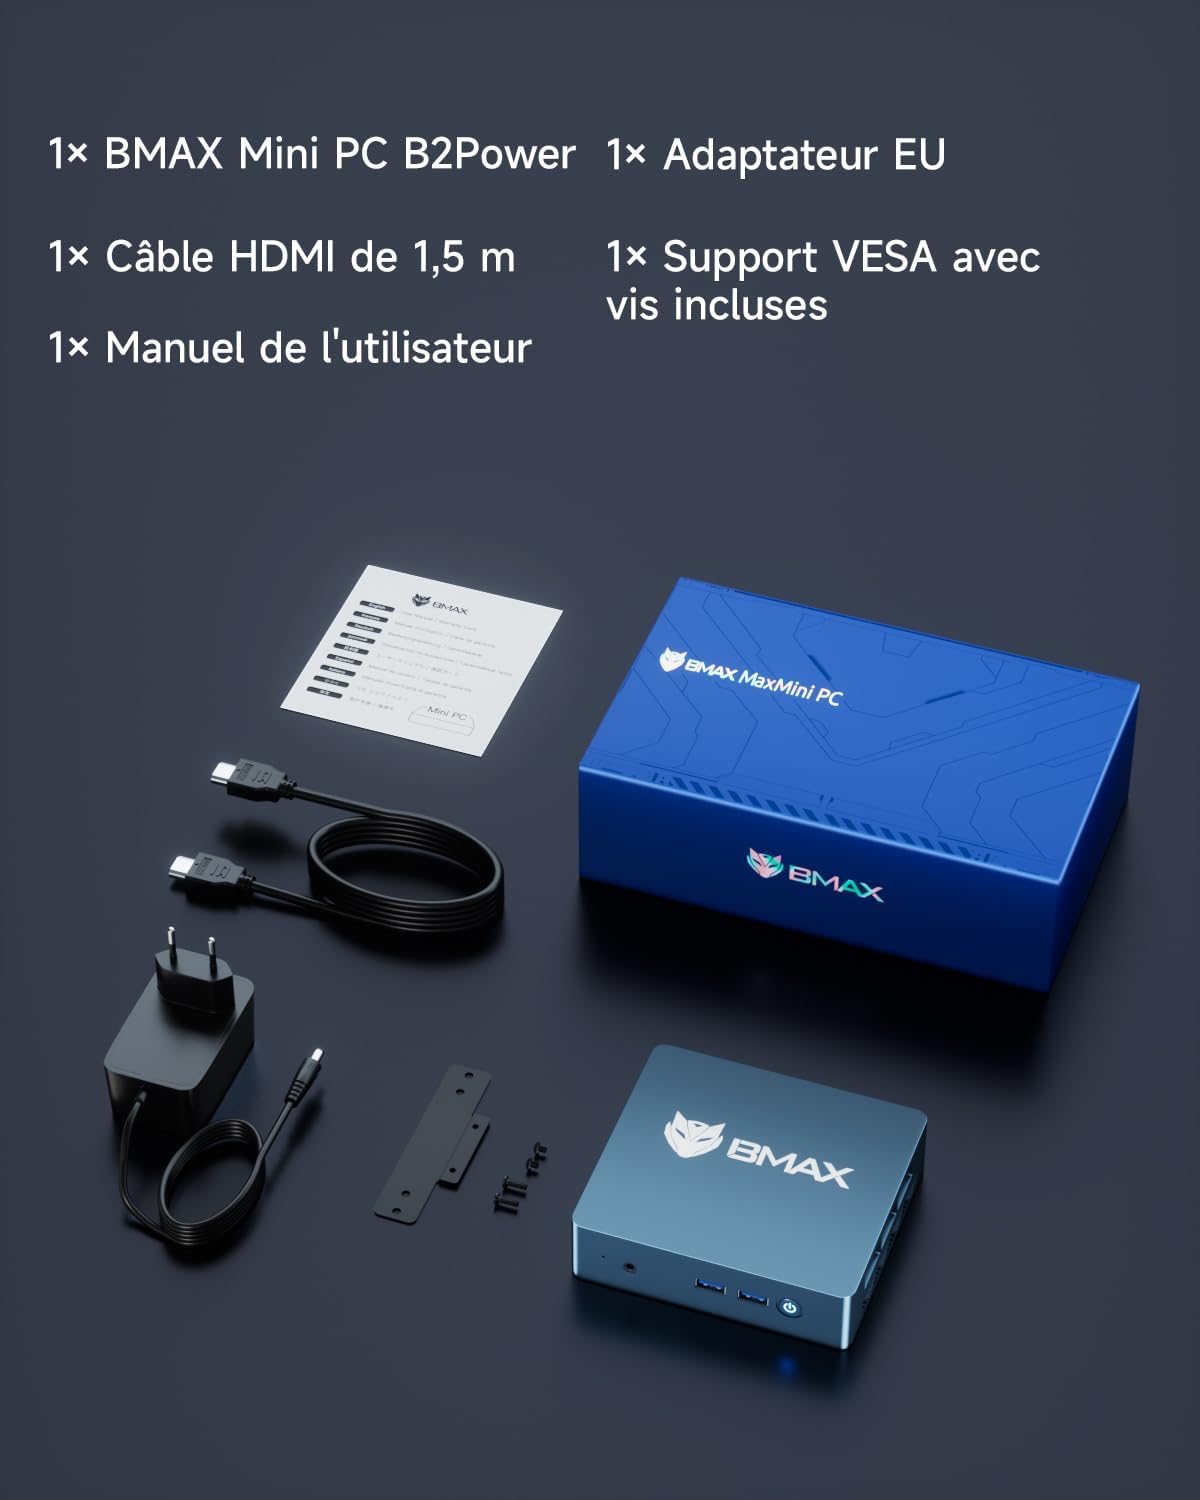
2. Package Contents
Verify that all items listed below are included in your package:
- 1x BMAX Mini PC B2 Power
- 1x EU Power Adapter
- 1x 1.5m HDMI Cable
- 1x VESA Mount with Screws
- 1x User Manual
3. Product Overview
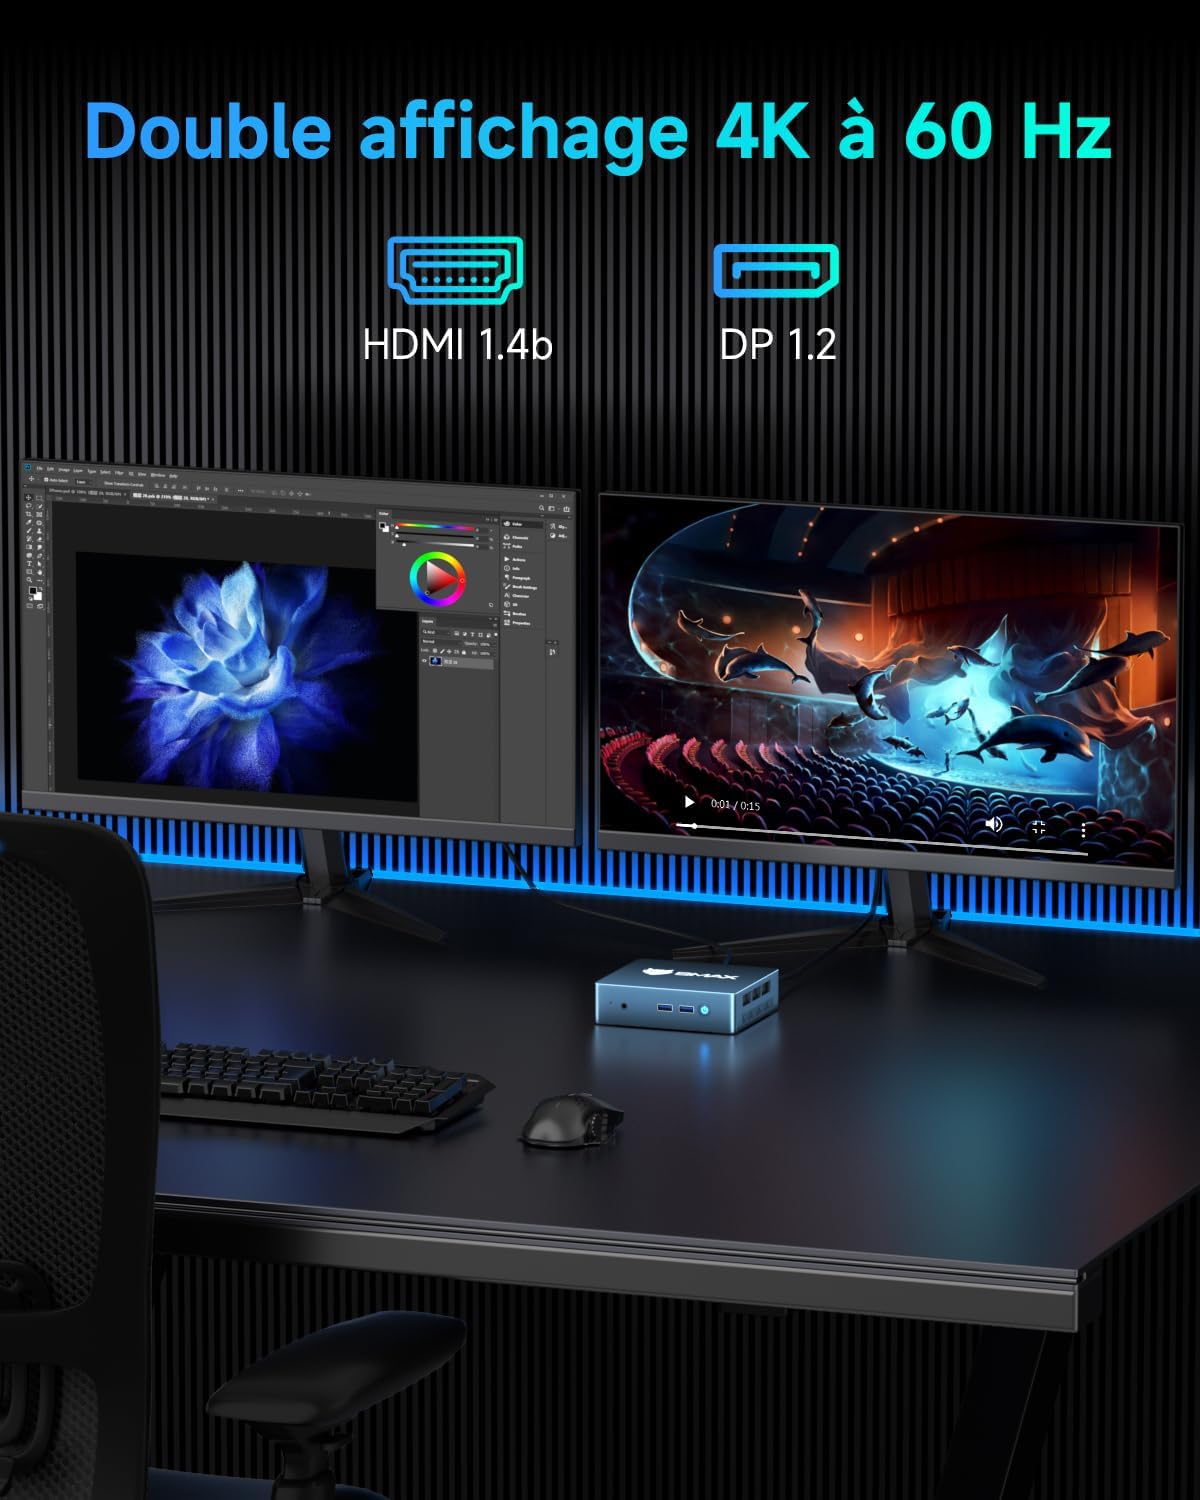
The BMAX Mini PC B2 Power is a compact and efficient desktop computer designed for various applications, from office work to home entertainment. It features an Intel Celeron 5205U processor, 8GB DDR4 RAM, and a 256GB NVMe SSD, with support for dual 4K 60Hz displays.
3.1 Key Features
- Processor: Intel Celeron 5205U (2C/2T, 3MB Cache, up to 1.9 GHz, 15W TDP)
- Operating System: Pre-installed Windows 11 Pro, supports Linux and Ubuntu
- Memory: 8GB DDR4 RAM (expandable up to 64GB)
- Storage: 256GB M.2 NVMe SSD (expandable up to 2TB via two M.2 slots)
- Graphics: Intel UHD Graphics, supports dual 4K 60Hz display output via HDMI and DP
- Connectivity: Gigabit Ethernet, Wi-Fi 5, Bluetooth 5.0
- Ports: 2x USB 3.2, 2x USB 2.0, 1x HDMI, 1x DP, 1x RJ45, 1x DC, 1x Microphone port
- Compact Design: Measures 12.5 cm x 11.2 cm x 3.3 cm, VESA mount compatible


4. Setup Guide
4.1 Connecting Peripherals
Before powering on your Mini PC, connect all necessary peripherals:
- Display: Connect your monitor(s) to the HDMI or DisplayPort (DP) outputs using the provided HDMI cable or a compatible DP cable. The Mini PC supports dual 4K 60Hz displays.
- Keyboard and Mouse: Connect your USB keyboard and mouse to the available USB 2.0 or USB 3.2 ports.
- Network: For a wired connection, connect an Ethernet cable to the RJ45 port. For wireless, ensure your Wi-Fi network is available.
- Audio: If using external speakers or headphones, connect them to the 3.5mm audio jack.
- Power: Connect the power adapter to the DC port on the Mini PC, then plug the adapter into a power outlet.

4.2 First Power On
After connecting all peripherals, press the power button on the front of the Mini PC. The system will boot up, and you will see the Windows 11 Pro setup screen (if it's the first use) or the login screen.
5. Operating Instructions
5.1 Basic Operation
- Power On/Off: Press the power button to turn on. To turn off, use the Windows shutdown option or press and hold the power button for 5 seconds.
- Restart: Use the Windows restart option.
- Sleep Mode: Use the Windows sleep option.
5.2 Dual Display Setup
The BMAX Mini PC supports connecting two monitors simultaneously for an extended desktop experience. Connect one monitor to the HDMI port and another to the DisplayPort (DP). Windows will automatically detect both displays. You can configure display settings (extend, duplicate, primary display) via the Windows Display Settings.
5.3 Wireless Connectivity
- Wi-Fi: The Mini PC supports Wi-Fi 5 (802.11ac) dual-band (2.4GHz/5GHz). To connect, go to Windows Settings > Network & Internet > Wi-Fi, select your network, and enter the password.
- Bluetooth: Bluetooth 5.0 is integrated. To pair devices, go to Windows Settings > Devices > Bluetooth & other devices, turn on Bluetooth, and select "Add Bluetooth or other device."

6. Storage and Memory Expansion
The BMAX Mini PC B2 Power offers flexible options for upgrading its RAM and storage capacity.
6.1 RAM Upgrade
- The Mini PC has two DDR4 SODIMM slots and supports up to 64GB of RAM.
- To upgrade, carefully open the chassis, locate the SODIMM slots, and insert compatible DDR4 memory modules.
6.2 SSD Expansion
- The device includes two M.2 slots: one NVMe PCIe 3.0x2 and one SATA/NVMe PCIe 3.0x4.
- Storage can be expanded up to 2TB using compatible M.2 SSDs.
- To install or upgrade an SSD, open the chassis, locate the M.2 slots, and secure the new SSD.
Note: Opening the chassis for upgrades should be done carefully to avoid damaging internal components. If you are unsure, seek professional assistance.

7. Maintenance
7.1 Cleaning
- Keep the Mini PC clean and free from dust. Use a soft, dry cloth for external surfaces.
- For internal cleaning (e.g., fan and vents), use compressed air. Ensure the device is powered off and unplugged before cleaning.
7.2 Software Updates
- Regularly update your operating system (Windows 11 Pro) and drivers to ensure optimal performance and security.
- Check the BMAX official website for any specific driver updates for your model.
7.3 Environmental Conditions
- Operate the Mini PC in a well-ventilated area to prevent overheating.
- Avoid exposing the device to extreme temperatures, humidity, or direct sunlight.
8. Troubleshooting
If you encounter issues with your BMAX Mini PC, refer to the following common problems and solutions:
| Problem | Possible Cause | Solution |
|---|---|---|
| No power | Power adapter not connected, faulty outlet, power button issue. | Ensure power adapter is securely connected to both the Mini PC and a working power outlet. Try a different outlet. |
| No display on monitor | Incorrect cable connection, monitor input not selected, faulty cable/monitor. | Check HDMI/DP cable connections. Ensure monitor is set to the correct input source. Test with a different cable or monitor if possible. |
| Wi-Fi/Bluetooth not working | Drivers not installed, Wi-Fi/Bluetooth turned off in OS, hardware issue. | Check Windows settings to ensure Wi-Fi/Bluetooth is enabled. Update network drivers. Restart the Mini PC. |
| Slow performance | Too many applications running, insufficient RAM, full storage, overheating. | Close unnecessary applications. Check task manager for resource usage. Consider upgrading RAM/SSD. Ensure proper ventilation. |
If the problem persists, please contact BMAX customer support.
9. Specifications
| Feature | Detail |
|---|---|
| Brand | BMAX |
| Model Number | B2 Power |
| Operating System | Windows 11 Pro, supports Linux, Ubuntu |
| Processor Brand | Intel |
| Processor Type | Celeron 5205U |
| Processor Speed | 1.9 GHz |
| Number of Cores | 2 |
| RAM | 8 GB DDR4 |
| Maximum Memory | 64 GB |
| Hard Drive Size | 256 GB |
| Hard Drive Technology | SSD (M.2 NVMe) |
| Graphics Coprocessor | Intel UHD Graphics |
| Graphics Card Description | Integrated |
| Resolution | 3840x2160 (4K) |
| Connectivity Type | Bluetooth, Wi-Fi, Ethernet |
| Wireless Technology Type | 802.11a/b/g/n/ac (Wi-Fi 5) |
| USB Ports | 2x USB 3.2, 2x USB 2.0 |
| HDMI Ports | 1 |
| DisplayPort (DP) | 1 |
| RJ45 Port | 1 |
| Audio Interface | 3.5mm Audio Jack |
| Item Dimensions (L x W x H) | 12.5 x 11.2 x 3.3 cm |
| Product Weight | 300 Grams |
| Specific Uses | Education, Business, Gaming, Photo Editing, Video Editing, Multimedia, Daily Use |
10. Warranty and Support
10.1 Limited Warranty
BMAX offers a limited 12-month warranty for each Mini PC, effective from the date of purchase. This warranty covers any defects in design or manufacturing. Please retain your proof of purchase for warranty claims.
10.2 Customer Support
For technical assistance, updates, or troubleshooting beyond this manual, please contact BMAX customer support. You can typically find support contact information on the official BMAX website or through your purchase platform.
For Amazon purchases, you can access support via: Amazon Account → Your Orders → "Ask a product question".
BMAX provides a professional after-sales team ready to assist with your needs, including a 30-day free return policy and lifetime technical assistance.


