
1. Introduction
Thank you for choosing the AZZUNO MIG-135F 3-in-1 Welder. This versatile machine combines Flux-Cored MIG, Lift TIG, and Stick (MMA) welding capabilities, offering powerful and stable performance for various welding tasks. This manual provides essential information for safe operation, setup, maintenance, and troubleshooting to ensure optimal use of your welding machine and the included auto-darkening welding helmet.
2. Safety Instructions
Welding can be dangerous. Always follow safety precautions to prevent injury or damage.
- Electric Shock Can Kill: Ensure proper grounding. Do not touch live electrical parts. Wear dry welding gloves.
- Fumes and Gases Can Be Dangerous: Keep your head out of the fumes. Use ventilation or exhaust to remove fumes from the breathing zone.
- Arc Rays Can Burn Eyes and Skin: Wear a welding helmet with a proper shade filter. Wear appropriate welding clothing to protect skin.
- Fire and Explosion Hazard: Remove all flammables from the welding area. Have a fire extinguisher readily available.
- Hot Parts Can Cause Severe Burns: Allow welded materials to cool before handling.
- Read the Entire Manual: Understand all instructions and warnings before operating the equipment.
- Advanced Safety Protection System: The welder features built-in overheat protection, overload protection, and a cooling fan system to ensure stable and safe operation during long welding sessions.
3. Package Contents
Verify that all items are present in your package:
- AZZUNO MIG-135F 3-in-1 Welder
- Auto-darkening welding helmet (headband requires assembly)
- .030" Flux-cored wire
- Electrode holder
- Ground clamp
- MIG Torch (14AK)
- Contact tips (2 pieces)
- Nozzle (1 piece)
- Brush and hammer
- Additional spare outer/inner lens for helmet
- Battery for helmet (CR2, 2 pieces required, included)

Figure 1: AZZUNO MIG-135F Welder and included accessories. This image displays the main welding unit along with all components listed in the package contents, including the electrode holder, ground clamp, MIG torch, contact tips, nozzle, a spool of flux wire, a hammer, helmet headgear, and the auto-darkening welding helmet.
4. Product Overview and Features
4.1. 3-in-1 Welding Capabilities
The AZZUNO MIG-135F is a versatile welding machine offering three distinct welding processes:
- Flux-Cored MIG Welding: Gasless MIG welding with flux-cored wire, ideal for outdoor use and welding mild steel.
- Lift TIG Welding: Provides reliable TIG welding for precise applications. (Note: WP-17V 10-25 TIG torch is compatible but not included). Welding range for Lift TIG is 0.5 to 3.0 mm.
- Stick (MMA) Welding: Compatible with E6013 electrodes, offering stable arc performance for general repairs, maintenance, and fabrication.

Figure 2: The AZZUNO MIG-135F supports Flux MIG, Lift TIG (torch not included), and Stick welding. This image visually represents the three welding modes the machine is capable of, showing examples of each process.
4.2. Synergic Control
The SYN control feature automatically adjusts the welding current and voltage based on the selected wire diameter. This ensures optimal settings for consistent and high-quality welds, making it user-friendly for both beginners and experienced welders.
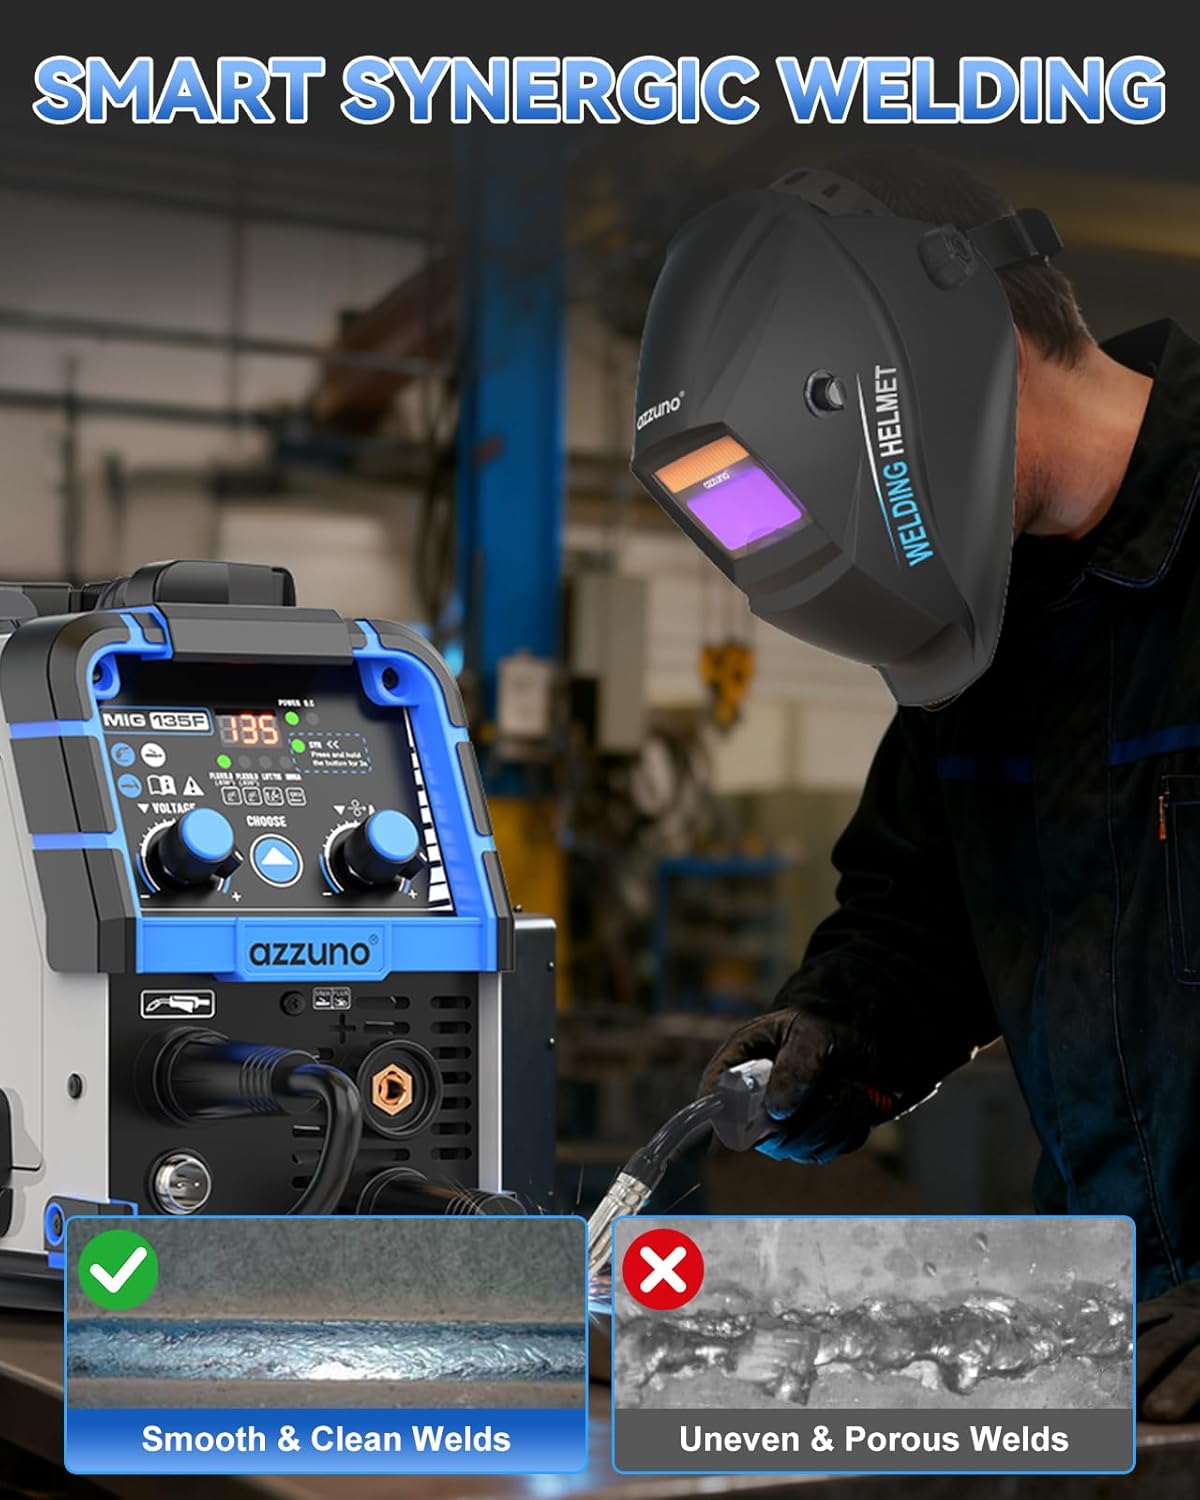
Figure 3: Smart Synergic Welding. This image shows the AZZUNO MIG-135F welder in operation with a user wearing the auto-darkening helmet. It highlights the benefit of synergic control by contrasting a "Smooth & Clean Weld" with an "Uneven & Porous Weld," illustrating the quality achieved with proper settings.
4.3. Auto-Darkening Welding Helmet (AZNH-2001)
The included AZNH-2001 auto-darkening welding helmet provides essential eye and face protection during welding operations. It features a true color lens, 9-13/GRIND dark shade adjustment, 3/10000s auto-darkening speed, and a large viewing area of 3.66" x 1.69". The helmet is powered by a solar cell and two CR2 lithium-metal batteries.

Figure 4: Auto-Darkening Welding Helmet. This image provides a detailed view of the AZZUNO auto-darkening welding helmet, showcasing its key features such as the true color lens, auto-darkening speed, and large viewing area.
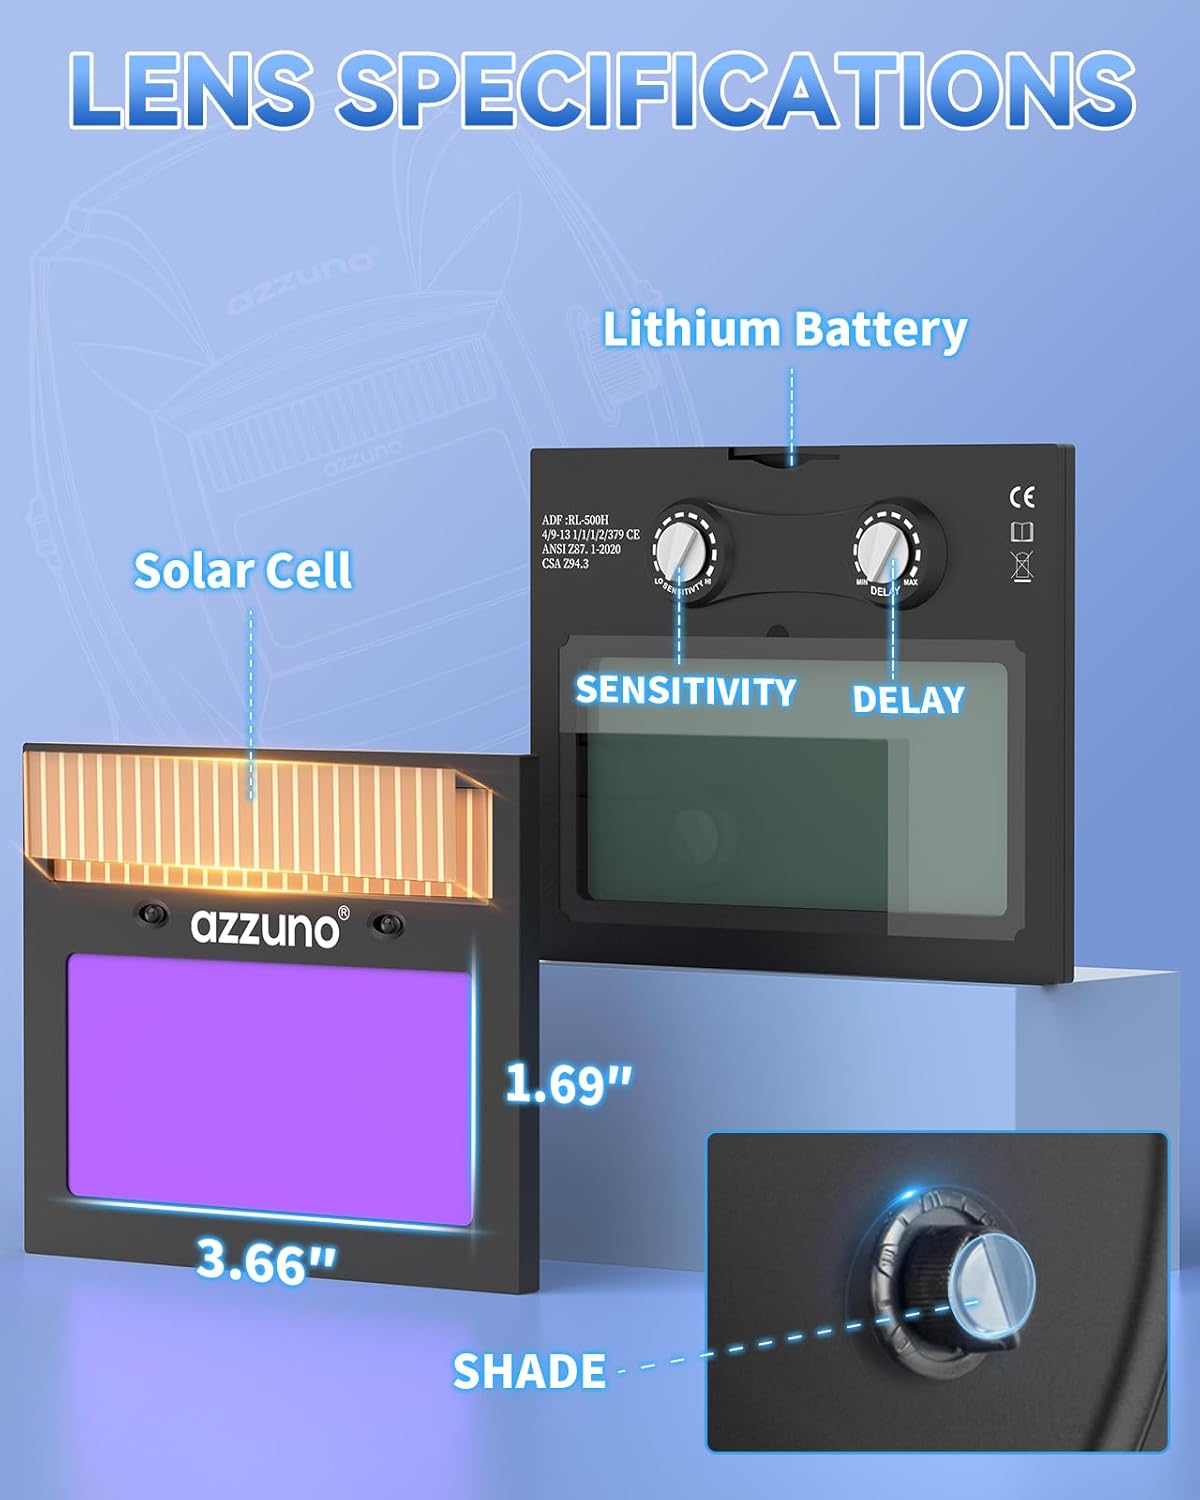
Figure 5: Lens Specifications. This image illustrates the internal components and adjustable settings of the welding helmet's auto-darkening lens, including controls for sensitivity, delay, and shade, as well as the solar cell and battery compartment.
5. Setup
5.1. Welder Connection
- Ensure the welder is turned off and unplugged from the power source.
- Connect the ground clamp cable to the appropriate terminal on the welder. Secure the ground clamp to the workpiece or welding table, ensuring good electrical contact.
- For Flux-Cored MIG welding, connect the MIG torch to the designated port. Install the flux-cored wire spool into the wire feeder compartment, ensuring the wire feeds smoothly through the torch liner.
- For Stick (MMA) welding, connect the electrode holder cable to the positive (+) terminal and the ground clamp cable to the negative (-) terminal (or vice-versa, depending on electrode polarity requirements). Insert an E6013 electrode into the holder.
- For Lift TIG welding, connect the ground clamp. A compatible WP-17V 10-25 TIG torch (not included) would connect to the appropriate terminal.
- Plug the welder into a 110V power outlet.
5.2. Auto-Darkening Helmet Assembly
- Assemble the headband according to the instructions provided with the helmet.
- Install the CR2 batteries into the helmet's lens unit if not already installed.
- Adjust the headband for a comfortable and secure fit.
- Test the auto-darkening function by exposing the sensor to a bright light source (not direct sunlight or welding arc) and observing the lens darkening.
- Adjust sensitivity and delay settings on the helmet as needed for your welding environment.
6. Operating Instructions
Always wear appropriate personal protective equipment (PPE), including the auto-darkening helmet, welding gloves, and protective clothing, before starting any welding operation.
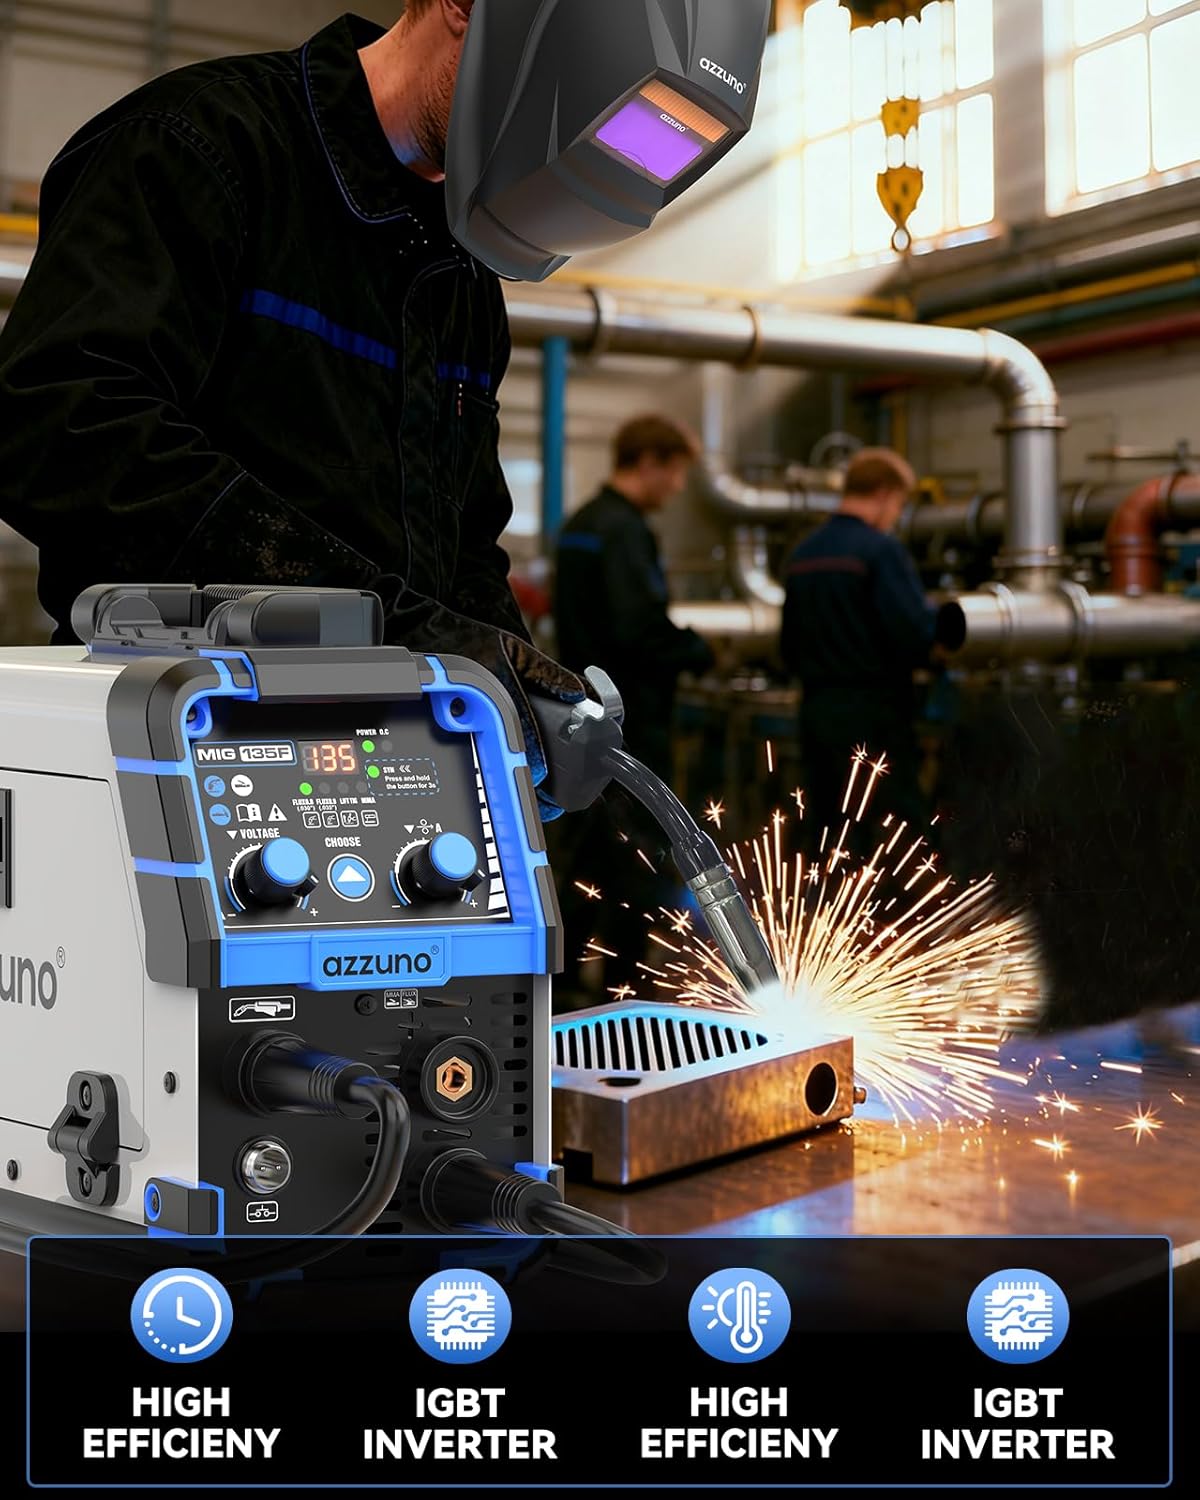
Figure 6: Welder in use. This image shows a person actively welding with the AZZUNO MIG-135F, highlighting the machine's compact design and the sparks generated during the welding process. It also features icons indicating "High Efficiency" and "IGBT Inverter" technology.
6.1. General Operation
- Turn on the welder using the power switch.
- Select the desired welding mode (MIG, TIG, or MMA) using the control panel.
- Adjust the current and voltage settings. For MIG, utilize the synergic control by selecting the wire diameter, and the machine will suggest optimal settings. Fine-tune as necessary.
- Ensure the workpiece is clean and properly grounded.
6.2. Flux-Cored MIG Welding
- Ensure the MIG torch is connected and flux-cored wire is loaded.
- Select MIG mode.
- Set wire diameter for synergic control.
- Position the MIG torch nozzle approximately 1/2 inch from the workpiece.
- Press the trigger on the MIG torch to start the arc and wire feed. Maintain a consistent travel speed and arc length.
- Release the trigger to stop welding.
6.3. Lift TIG Welding (Torch Not Included)
- Connect a compatible WP-17V 10-25 TIG torch (not included) and ensure the ground clamp is attached.
- Select TIG mode.
- Set the desired welding current.
- Touch the tungsten electrode lightly to the workpiece to initiate the arc (Lift Arc).
- Lift the torch slightly to establish the arc and begin welding.
- Maintain a consistent arc length and travel speed.
6.4. Stick (MMA) Welding
- Ensure the electrode holder and ground clamp are correctly connected.
- Select MMA mode.
- Set the desired welding current based on the electrode type and thickness.
- Strike the electrode against the workpiece to initiate the arc.
- Maintain a consistent arc length and travel speed, moving the electrode along the joint.
- When finished, break the arc by quickly pulling the electrode away.
7. Maintenance
Regular maintenance ensures the longevity and safe operation of your welder. Always disconnect the power before performing any maintenance.
- Cleaning: Periodically clean the welder's exterior with a dry cloth. Use compressed air to blow out dust from inside the machine, especially around cooling vents.
- MIG Torch: Regularly check and clean the MIG torch nozzle and contact tip. Replace worn contact tips and nozzles as needed to ensure consistent wire feed and arc stability.
- Wire Spool: Replace the wire spool when it runs out. Ensure the new spool is correctly seated and the wire feeds smoothly.
- Cables: Inspect all cables (power, ground, electrode holder, MIG torch) for damage, cuts, or frayed insulation. Replace damaged cables immediately.
- Helmet: Clean the helmet's outer and inner lenses with a soft cloth. Replace scratched or damaged lenses. Check helmet batteries periodically.
8. Troubleshooting
If you encounter issues, refer to the following common problems and solutions:
| Problem | Possible Cause | Solution |
|---|---|---|
| Welder does not power on | No power supply; Power switch off; Internal fuse blown | Check power cord and outlet; Turn on power switch; Contact service for fuse replacement |
| No arc/Weak arc | Poor ground connection; Incorrect settings; Damaged cable/torch; Wire feed issue (MIG) | Ensure good ground contact; Adjust current/voltage; Inspect and replace damaged parts; Check wire spool and feed path |
| Wire feed issues (MIG) | Kinked wire; Clogged contact tip/nozzle; Incorrect drive roller tension; Empty spool | Straighten wire; Clean/replace tip/nozzle; Adjust drive roller tension; Replace wire spool |
| Helmet not darkening | Low/dead batteries; Sensors blocked; Incorrect sensitivity setting | Replace CR2 batteries; Clean sensors; Adjust sensitivity dial |
| Overheat protection activated | Extended use; Blocked cooling vents | Allow welder to cool down; Ensure vents are clear and fan is operating |
9. Specifications
| Feature | Detail |
|---|---|
| Manufacturer | AZZUNO |
| Part Number | MIG-135F-AZNH-2001 |
| Style | MIG-135F+AZNH-2001 |
| Input Voltage | 110V |
| Output Current | 135A (Max) |
| Welding Processes | Flux-Cored MIG, Lift TIG, Stick (MMA) |
| Max Material Thickness (Welder) | Up to 5/32" (approx. 4mm) |
| Lift TIG Welding Range | 0.5 to 3.0 mm |
| Compatible Electrodes (Stick) | E6013 |
| Welder Weight | Approx. 9 lbs (4.08 kg) |
| Package Dimensions | 42.67 x 31.75 x 27.18 cm |
| Helmet Auto-Darkening Speed | 3/10000s |
| Helmet Viewing Area | 3.66" x 1.69" |
| Helmet Battery Type | Lithium-metal (CR2) |
10. Warranty and Support
For warranty information or technical support, please refer to the documentation included with your purchase or contact AZZUNO customer service directly. Keep your purchase receipt as proof of purchase.

