Introduction
Thank you for choosing the KEMEI 8559 Professional Hair Clippers and Trimmers Set. This comprehensive grooming kit is designed for precise hair cutting, beard trimming, and close shaving. This manual provides detailed instructions for safe and effective use, maintenance, and troubleshooting.
Important Safety Information
- Avoid use on infants. This product is not intended for use on infants.
- Keep away from water sources. Do not use this appliance near bathtubs, showers, basins, or other vessels containing water. If the appliance falls into water, unplug it immediately. Do not reach into the water.
- Exercise caution with sharp blades. Blades are sharp; handle with care to prevent injury.
- Power source. Only use the provided charging cable and dock. Ensure the voltage is compatible with your power supply.
- Cleaning. Always turn off and unplug the device before cleaning.
What's Included
Your KEMEI 8559 Professional Hair Clippers and Trimmers Set includes the following components:
- 1 Hair Clipper
- 1 Hair Trimmer
- 1 Electric Foil Shaver
- 1 Charging Dock
- 2 Replaceable Lithium-Ion Batteries
- 1 USB Charging Cable
- 6 Hair Clipper Limit Combs (1.5mm, 3mm, 4.5mm, 6mm, 10mm, 13mm)
- 5 Hair Trimmer Limit Combs (1mm, 2mm, 3mm, 4mm, 5mm)
- Cleaning Brush
- Lubricating Oil
- User Manual (this document)

Image: All components included in the KEMEI 8559 Professional Hair Clippers and Trimmers Set.
Setup
1. Battery Installation and Charging
The KEMEI 8559 set features removable and replaceable lithium batteries. Ensure batteries are charged before first use.
- To install or remove a battery, rotate the bottom cap of the hair clipper or trimmer counter-clockwise to unlock and remove it. Insert a charged battery, then replace the cap and rotate clockwise to lock.
- For charging, you have two options:
- Using the Charging Dock: Place up to two removable batteries into the charging dock. Connect the USB charging cable to the dock and a suitable power adapter (not included). The LED display on the dock will indicate charging status.
- Direct Type-C Charging: Connect the Type-C USB charging cable directly to the charging port on the bottom of the hair clipper, trimmer, or shaver.
- A full charge takes approximately 3.5 hours. The large hair clipper provides about 160 minutes of runtime, the small hair trimmer about 250 minutes, and the foil shaver about 200 minutes.
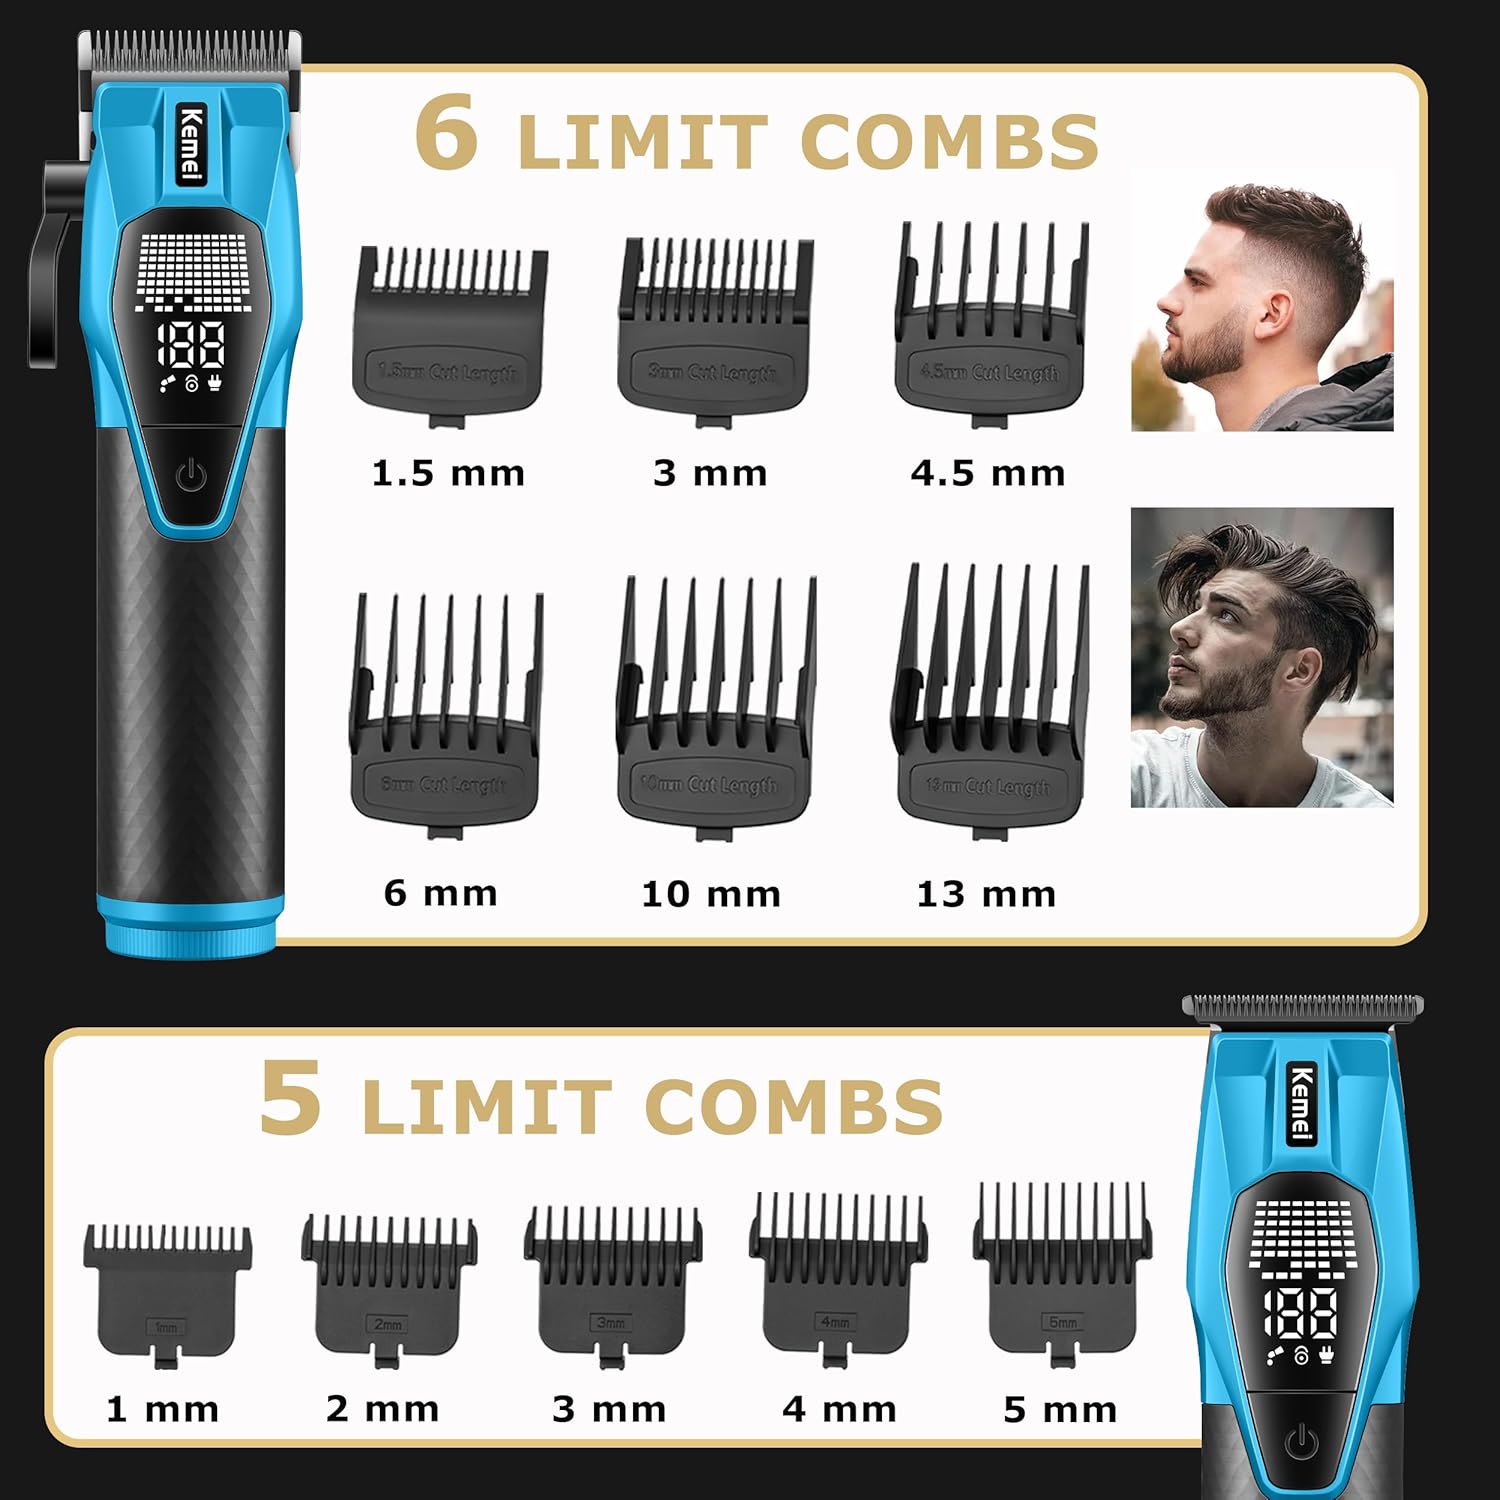
Image: Modular quick-release battery design showing the Type-C charging port and removable battery.

Image: Dual-battery charging dock with two batteries inserted, showing the LED digital display.
2. Attaching Guide Combs
Guide combs are used to achieve desired hair lengths. Each comb is marked with its cutting length.
- Select the appropriate guide comb for your desired length.
- Align the comb with the blade of the hair clipper or trimmer and push it firmly until it clicks into place.
- To remove, gently pull the comb away from the blade.

Image: Illustration of the 6 hair clipper limit combs (1.5mm to 13mm) and 5 hair trimmer limit combs (1mm to 5mm).
Operating Instructions
1. Power On/Off and LED Display
Press the power button to turn the device on or off. The integrated LED display provides important information:
- Battery Level: Shows the remaining battery percentage.
- Charging Status: Indicates when the device is charging.
- Lubrication Reminder: Prompts you to oil the blades for optimal performance.
- Travel Lock Indicator: Shows if the travel lock is active.
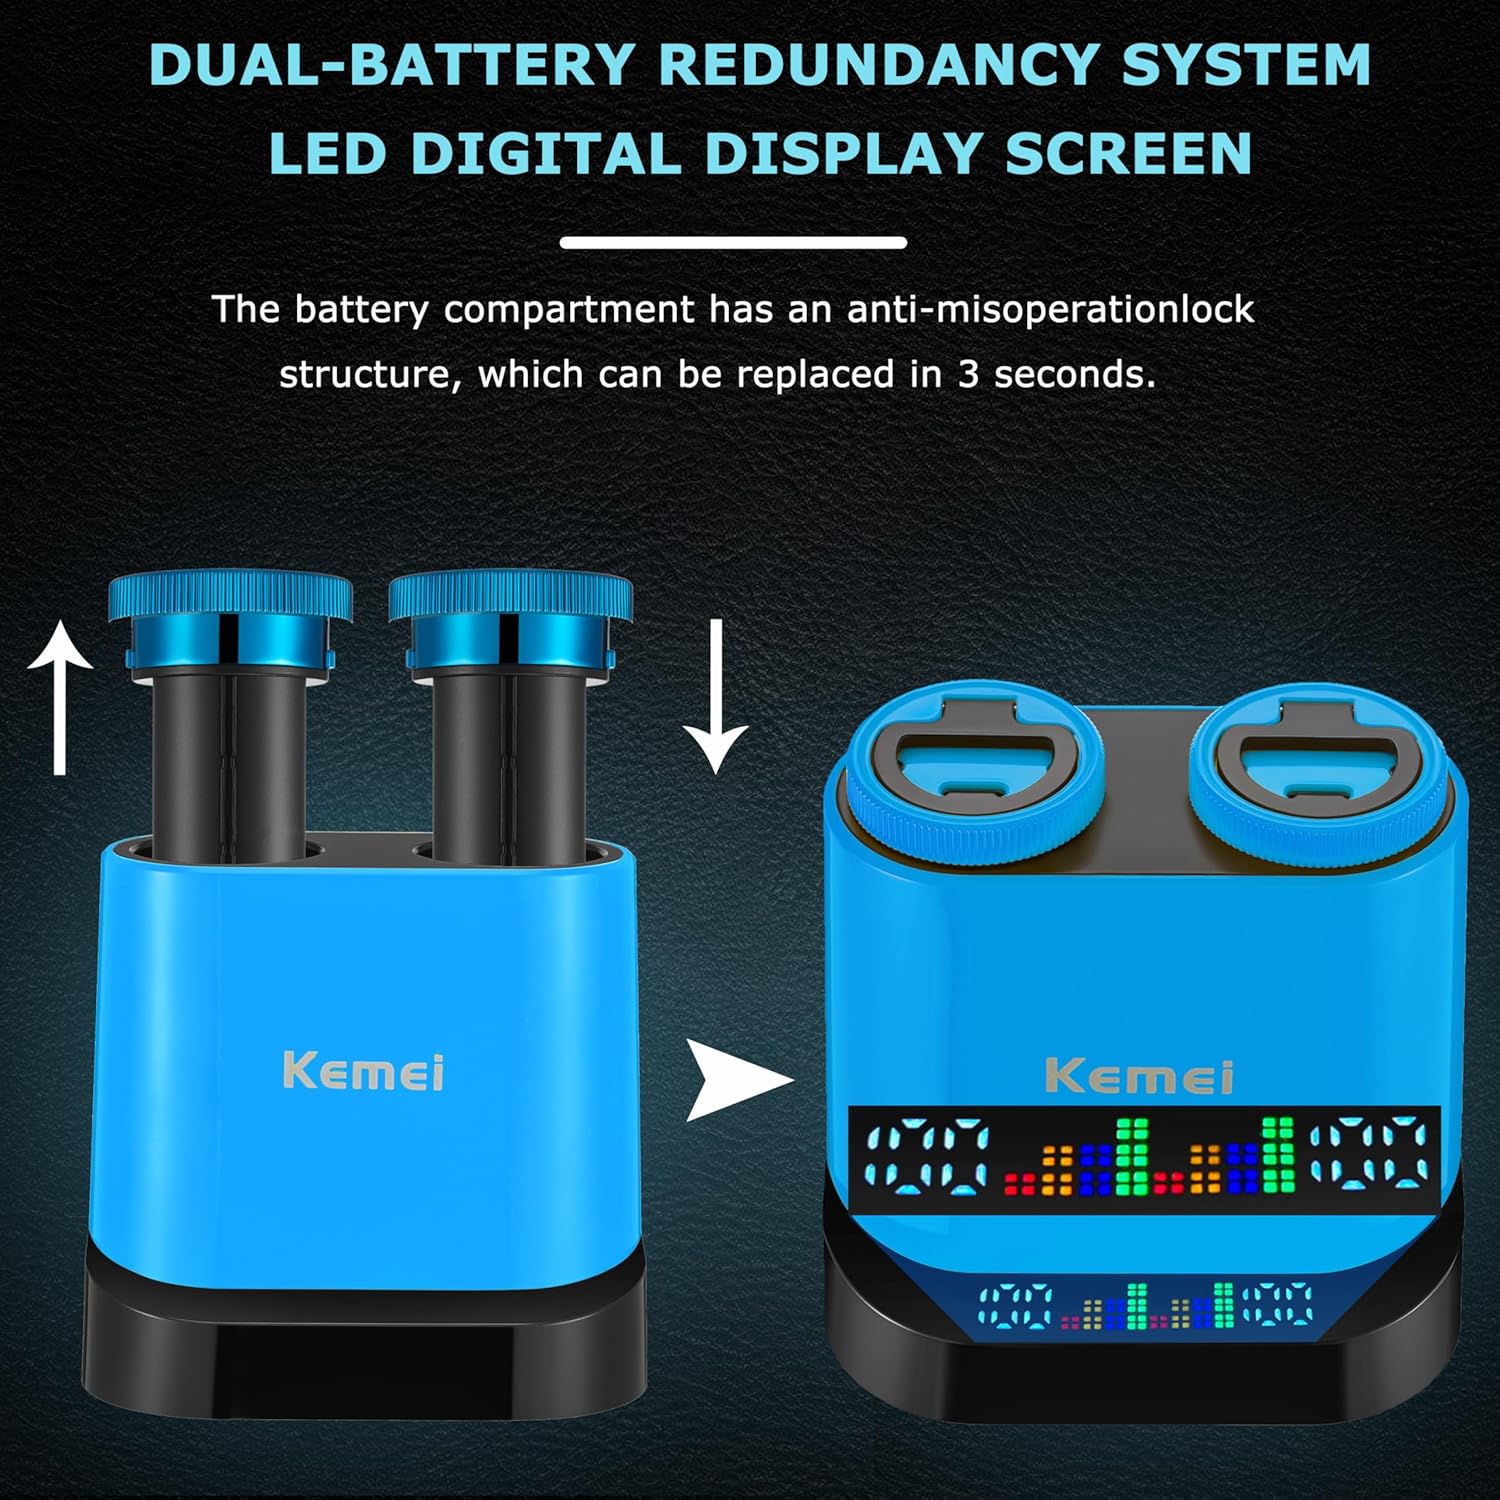
Image: Close-up of the hair clipper showing the adjustable lever and the LED display with battery and lock indicators.
2. Using the Adjustable Lever (Hair Clipper)
The hair clipper features a four-position adjustable lever to fine-tune cutting length without changing guide combs. Adjust as needed based on hair type and desired precision.
3. Hair Cutting and Trimming
For best results, ensure hair is clean and dry before cutting. Use the hair clipper for bulk removal and longer styles, and the hair trimmer for detailing and shorter lengths.
- Attach the desired guide comb to the hair clipper or trimmer.
- Turn on the device.
- Start cutting from the bottom of the head, moving upwards against the direction of hair growth.
- For beard trimming, use the trimmer with or without a guide comb to shape and define.

Image: Demonstrations of using the foil shaver, hair clipper, and hair trimmer for various grooming tasks.
4. Using the Electric Foil Shaver
The electric foil shaver is designed for a smooth, close shave, targeting all types of facial hair.
- Ensure your skin is clean and dry.
- Turn on the shaver.
- Hold the shaver at a right angle to your skin and move it in short, circular motions or straight strokes against the direction of hair growth.
- The reciprocating triple-blade system includes a long-beard cutting blade and two short-beard shaving heads for efficient removal of stubble.
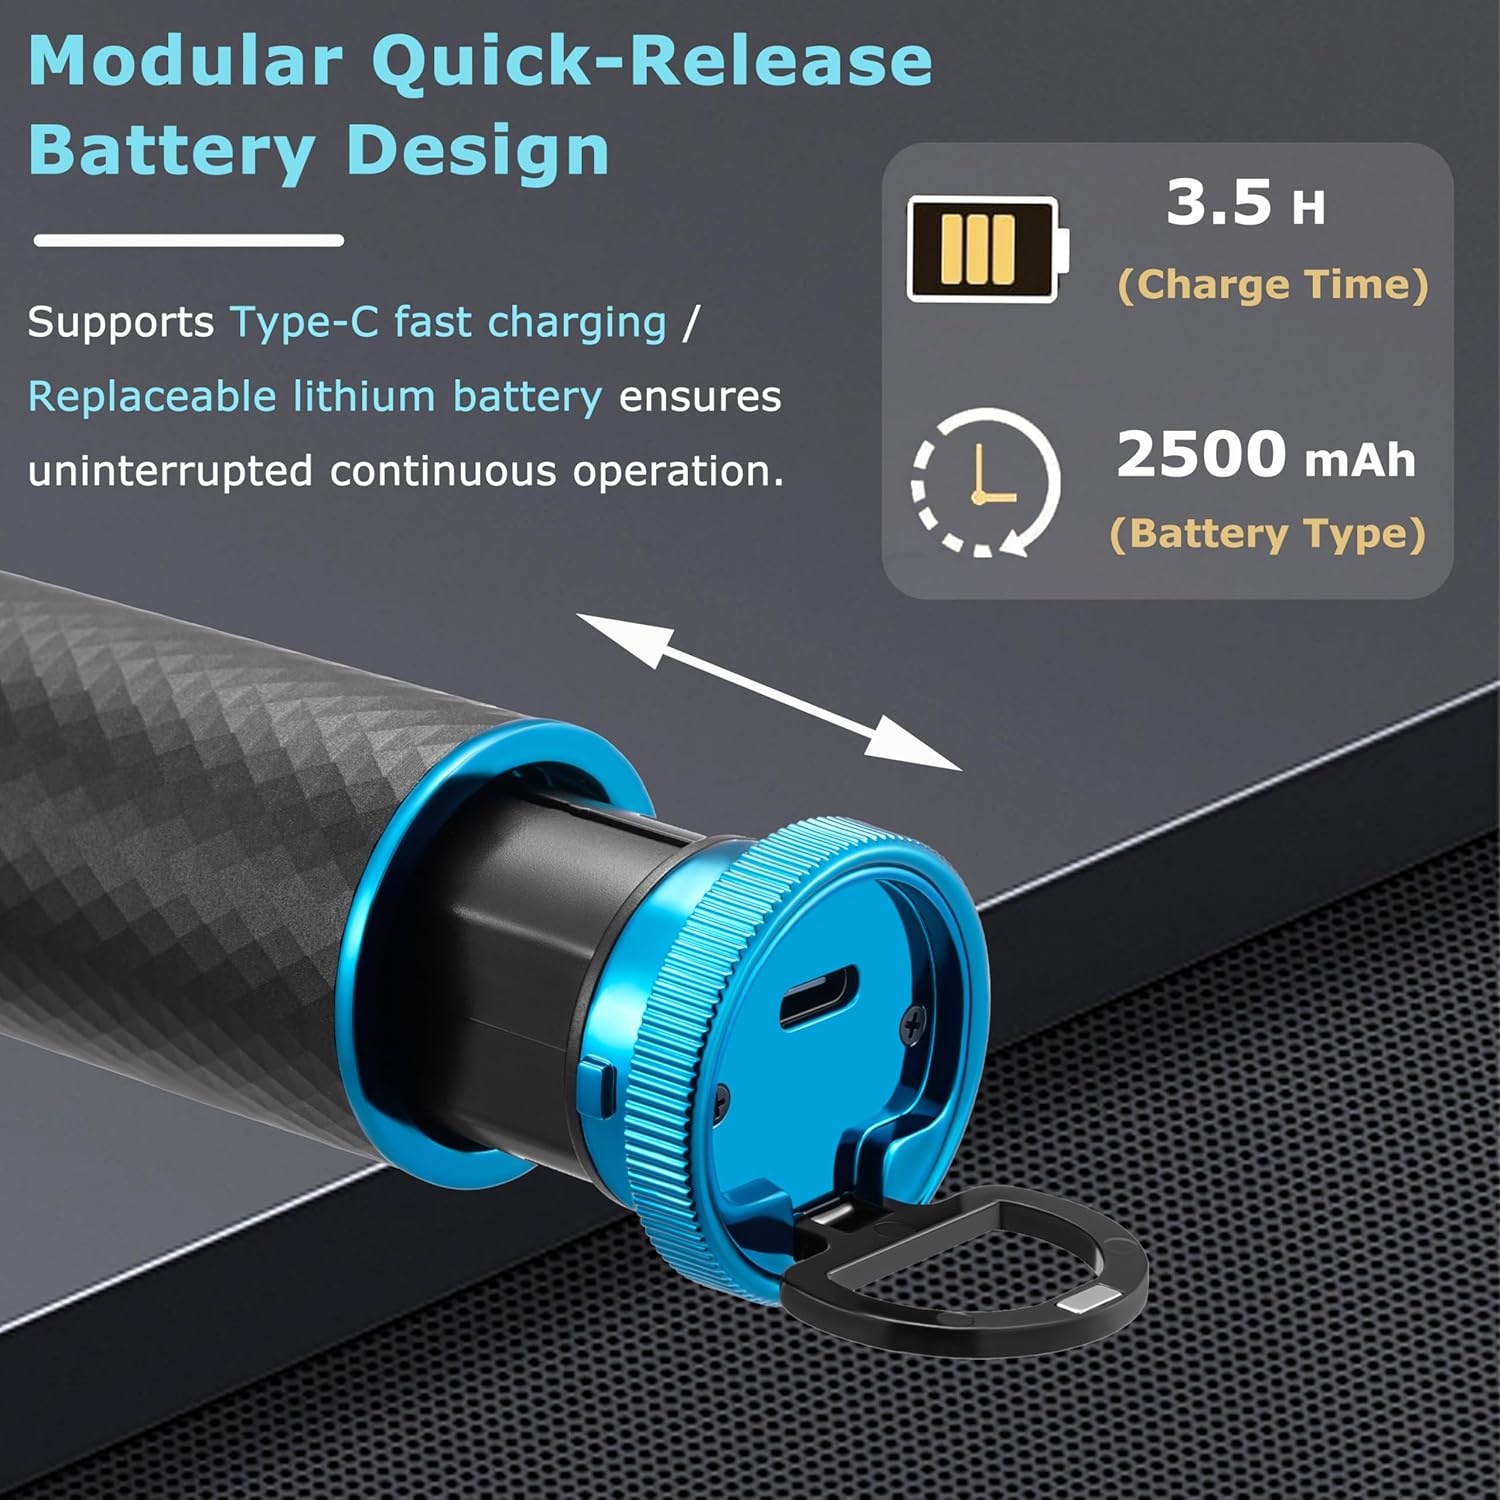
Image: Close-up view of the electric foil shaver's reciprocating triple-blade system, highlighting the long-beard cutting blade and short-beard shaving heads.
5. Travel Lock Function
To prevent accidental activation during travel, the devices feature a travel lock function.
- To activate the travel lock, press and hold the power button for 3 seconds. The LED display will show a lock icon.
- To deactivate, press and hold the power button for 3 seconds again. The lock icon will disappear.
Maintenance
1. Cleaning the Blades
Regular cleaning ensures optimal performance and hygiene.
- Turn off and unplug the device.
- For the hair clipper and trimmer, remove any attached guide comb. Use the cleaning brush to brush away loose hairs from the blades.
- For the foil shaver, the cutter head is detachable for easy cleaning. Gently remove the shaver head and brush away any trapped hairs. Reattach securely after cleaning.
- Do not rinse the main body of the devices under water unless specified as waterproof.

Image: The reciprocating triple-blade shaver with its detachable cutter head removed for cleaning.
2. Lubricating the Blades
Apply a few drops of the provided lubricating oil to the blades after every few uses, or when the lubrication reminder appears on the LED display. This helps maintain blade sharpness and smooth operation.
- Ensure the device is clean and dry.
- Apply 1-2 drops of oil evenly across the top of the blades.
- Turn on the device for a few seconds to distribute the oil.
- Wipe off any excess oil with a soft cloth.
3. Battery Care
- Store the devices and batteries in a cool, dry place.
- Avoid fully discharging the batteries frequently to prolong their lifespan.
- If storing for an extended period, charge the batteries to about 50% capacity.
Troubleshooting
| Problem | Possible Cause | Solution |
|---|---|---|
| Device does not turn on. | Battery is discharged or not properly installed. Travel lock is active. | Charge the battery. Ensure battery is correctly installed. Deactivate travel lock by holding the power button for 3 seconds. |
| Poor cutting performance. | Blades are dull, dirty, or not lubricated. Hair is too thick or wet. | Clean and lubricate the blades. Ensure hair is dry. Consider replacing blades if excessively dull. |
| Device gets hot during use. | Extended continuous use. Blades are dirty or not lubricated, causing friction. | Allow the device to cool down. Clean and lubricate blades. Avoid prolonged continuous operation. |
| LED display not working. | Device is off or battery is completely drained. | Turn on the device. Charge the battery. |
If you encounter issues not listed here or if solutions do not resolve the problem, please contact customer support.
Specifications
- Model: KM-8559
- Power Source: Battery Powered
- Battery Type: Lithium Ion (2500 mAh)
- Charging Time: Approximately 3.5 hours
- Runtime (Hair Clipper): Approximately 160 minutes
- Runtime (Hair Trimmer): Approximately 250 minutes
- Runtime (Foil Shaver): Approximately 200 minutes
- Minimum Cutting Length: 0.5mm (without comb), 1mm (with smallest trimmer comb)
- Maximum Cutting Length: 13mm (with largest clipper comb)
- Blade Material: Metal
- Connector Type: USB Type-C
- Special Features: LED Display, Charging Dock, Replaceable Battery, Travel Lock Design
Warranty and Support
For warranty information and customer support, please refer to the official KEMEI website or contact the retailer from whom you purchased the product. Keep your purchase receipt as proof of purchase.
Manufacturer: KEMEI