1. Introduction
Thank you for purchasing the VANBAR DC509 4K Digital Inner Mirror Drive Recorder. This manual provides detailed instructions for installation, operation, and maintenance to ensure optimal performance and longevity of your device. Please read this manual thoroughly before use and keep it for future reference.
2. Product Features
- Genuine Mirror Replacement Design: Replaces your vehicle's original rearview mirror for a seamless, integrated look and eliminates shaking during driving.
- 4K Ultra HD Recording: Captures clear and detailed footage with a high-resolution IMX415 sensor.
- Split Camera System: Front and rear cameras are separate, allowing flexible positioning for optimal viewing angles and preventing obstruction of the driver's view.
- Automatic Brightness Adjustment: Equipped with a light sensor to automatically adjust screen brightness for clear visibility in various lighting conditions, day or night.
- HDR/WDR Technology: Enhances image quality in high-contrast environments, reducing overexposure and underexposure.
- Built-in GPS: Records driving route, speed, and location data.
- Parking Monitoring: Provides 24-hour surveillance with impact detection and time-lapse recording, featuring battery protection.
- Electromagnetic Interference (EMI) Countermeasures: Designed to minimize interference with other vehicle electronics.
- LED Signal Light Compatible: Ensures proper recording of LED traffic signals.
- Anti-Glare Film & Anti-Dazzle Glass: Reduces reflections and glare for improved visibility.
- Waterproof Rear Camera: Durable design for outdoor use.
3. Package Contents
Please check that all items are present and in good condition:
- VANBAR DC509 Digital Inner Mirror Unit
- Front Camera (Split Type)
- Rear Camera
- Dedicated Mount (Type 1, compatible with 90%+ Japanese car models)
- Power Cable with Built-in GPS Antenna
- Rear Camera Cable
- Parking Monitoring Power Cable (with battery protection)
- 64GB microSD Card
- Anti-Glare Film
- User Manual (this document)
Note: If a different mount is required for your specific car model, please contact VANBAR customer support.
4. Setup and Installation
4.1. Mirror Unit Installation
- Carefully remove your vehicle's original rearview mirror from its base.
- Align the dedicated mount with the mirror unit.
- Insert the screw from the mirror unit into the hole of the mounting bracket.
- Secure the mirror unit to the bracket using the provided fixing screw.
- Insert the screw into the bracket and fix it to the edge mount on your vehicle's windshield.

Image: Step-by-step guide for installing the main mirror unit.
The genuine mirror replacement design ensures a stable installation, eliminating vibrations during driving for clear recording.
4.2. Front Camera Installation
- Attach the split front camera directly to the front windshield in an optimal position that does not obstruct your view.
- Adjust the camera angle as needed. The split design allows for flexible positioning.

Image: Illustrates the flexible installation of the split front camera, showing adjustable lens and stable image recording.
4.3. Rear Camera Installation
- Mount the waterproof rear camera at the rear of your vehicle, typically above the license plate or on the rear window.
- Route the rear camera cable discreetly to the main mirror unit.
4.4. Wiring and Power Connection
- Connect the power cable (with built-in GPS antenna) to the mirror unit and route it to your vehicle's power source (e.g., cigarette lighter socket or fuse box).
- For parking monitoring, connect the dedicated parking monitoring power cable to the vehicle's fuse box (ACC, constant power, and ground). This cable includes battery protection to prevent discharge.
- Ensure all wiring is hidden for a clean installation and to prevent interference with driving.

Image: Comparison of traditional wiring vs. hidden wiring design for a neat setup.
4.5. MicroSD Card Insertion
- Insert the provided 64GB microSD card into the designated slot on the mirror unit. Ensure it is inserted correctly until it clicks into place.
5. Operating Instructions
5.1. Power On/Off
- The device will automatically power on and begin recording when your vehicle's ignition is turned on.
- It will automatically power off when the ignition is turned off.
5.2. Screen Operation
- The 10-inch IPS touch screen allows for intuitive control.
- Swipe left or right to switch between front and rear camera views.
- Tap on the screen to access menu options and settings.
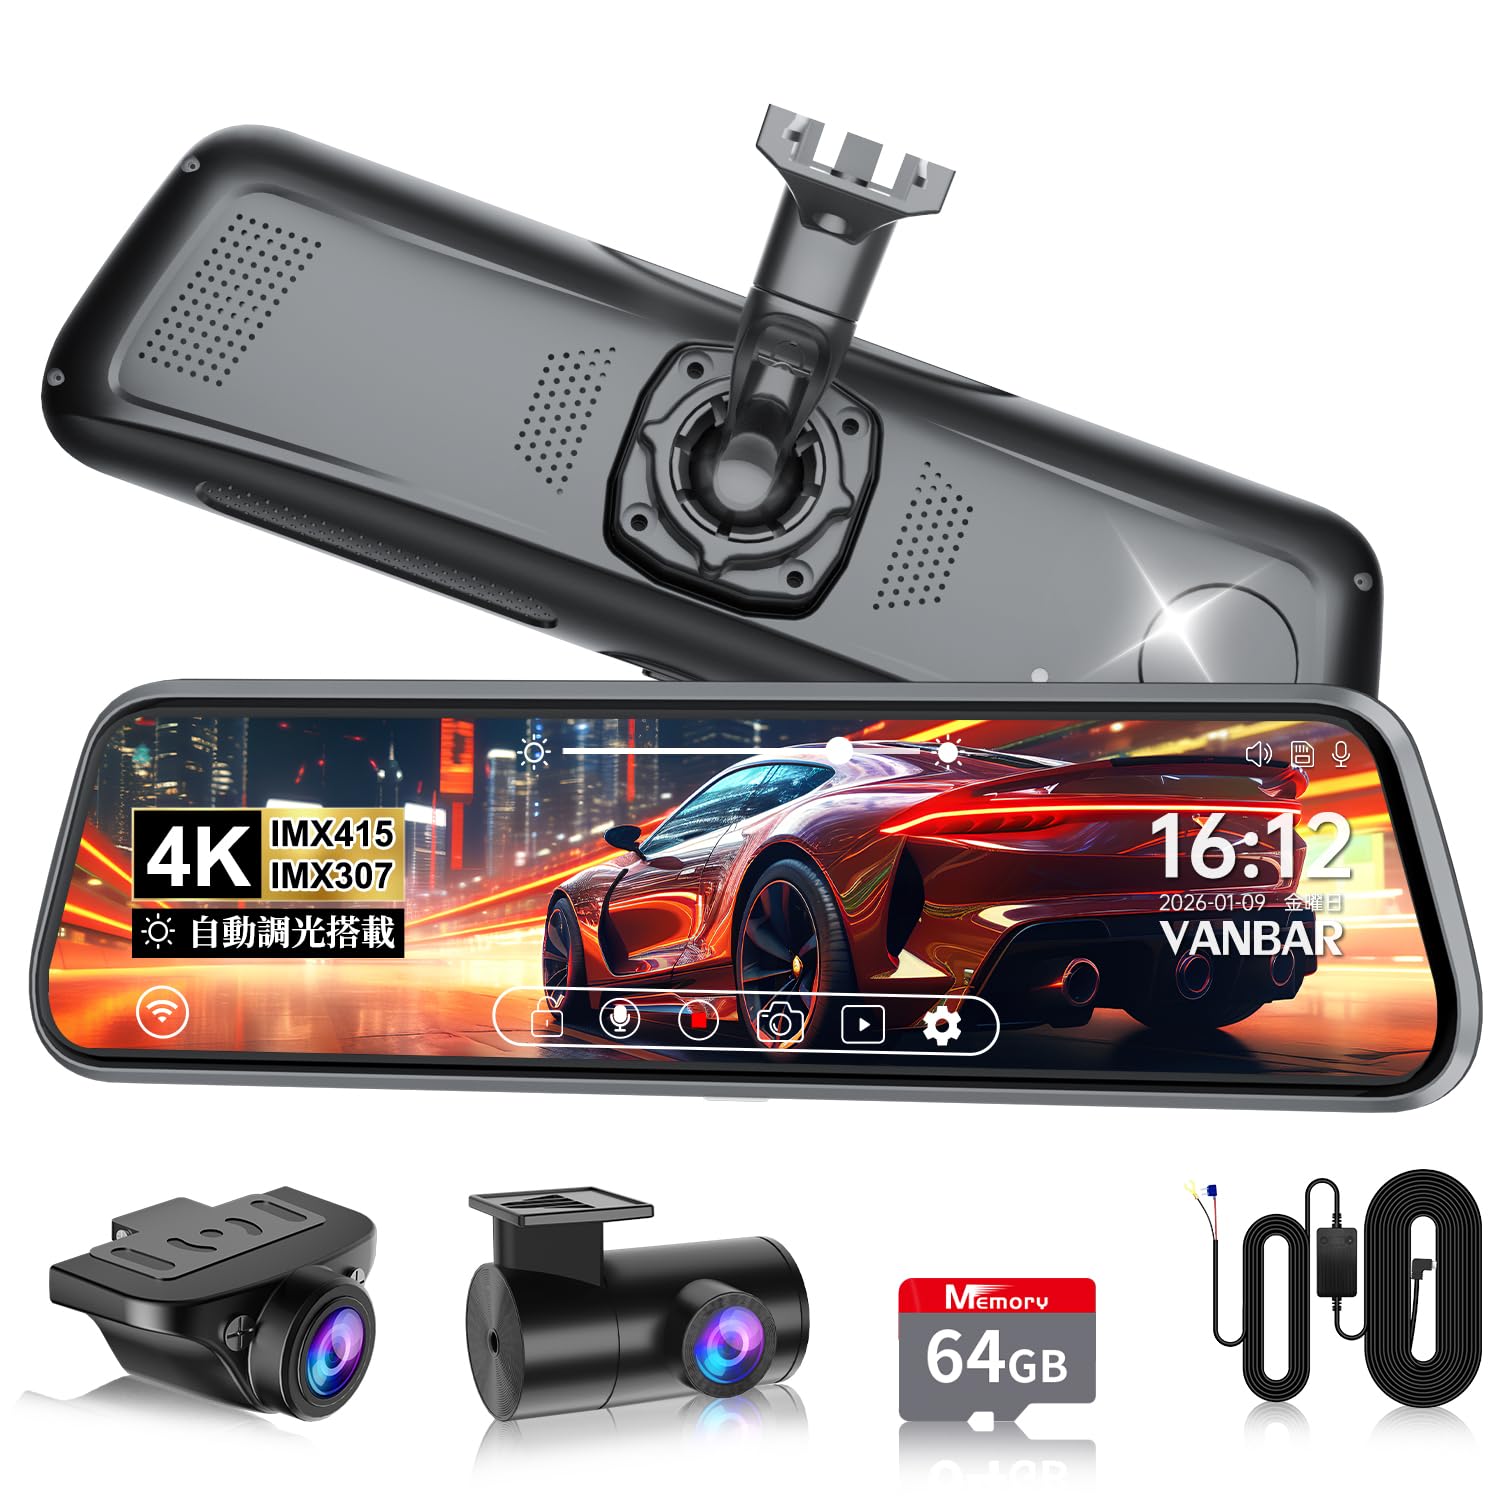
Image: The main display of the VANBAR DC509 showing the digital rearview mirror function.
5.3. Automatic Brightness Adjustment
- The built-in light sensor automatically adjusts the screen brightness based on ambient light conditions. No manual adjustment is typically needed.
- This feature ensures clear visibility during bright daylight and prevents glare in tunnels or at night.

Image: Demonstrates the automatic brightness adjustment feature of the display.
5.4. Recording Modes
- Loop Recording: The device continuously records, overwriting the oldest files when the memory card is full.
- G-Sensor (Emergency Recording): In case of a sudden impact or collision, the built-in 3-axis G-sensor detects the event and automatically locks the current recording file to prevent it from being overwritten. Sensitivity is 10-level adjustable.
- Parking Monitoring: When the vehicle is parked, the device can record impacts (impact detection) or use time-lapse recording for extended surveillance. The parking monitoring cable protects your car battery.

Image: Explains the 72-hour parking monitoring function with impact detection, time-lapse recording, and low voltage protection.
5.5. GPS Functionality
- The built-in GPS antenna records your vehicle's location, speed, and driving route.
- This data can be viewed using a dedicated player software on a computer, providing crucial evidence in case of an incident.

Image: Illustrates the GPS tracking feature, showing route and speed data on a map interface.
5.6. Reverse Assist
- When the vehicle is put into reverse gear, the screen automatically displays the rear camera view with adjustable guide lines to assist with parking.

Image: Shows the adjustable back guide lines feature for safe reversing.
6. Maintenance
- Cleaning the Lens: Use a soft, lint-free cloth to gently wipe the camera lenses. Avoid using abrasive cleaners or solvents.
- Cleaning the Screen: Use a microfiber cloth specifically designed for electronic screens. Do not spray cleaning solutions directly onto the screen.
- MicroSD Card Maintenance: Regularly format the microSD card (at least once a month) through the device's settings to ensure optimal recording performance and prevent data corruption. Back up any important files before formatting.
- Firmware Updates: Check the official VANBAR website periodically for firmware updates. Keeping your device's firmware up-to-date can improve performance and add new features.
7. Troubleshooting
| Problem | Possible Cause | Solution |
|---|---|---|
| Device does not power on. | No power supply; loose connection. | Check power cable connection. Ensure vehicle ignition is on. |
| Recording stops or freezes. | MicroSD card error; card full; low-quality card. | Format the microSD card. Replace with a high-speed, reputable brand microSD card if issues persist. |
| Image is blurry or unclear. | Dirty lens; protective film still on lens. | Clean camera lenses. Remove any protective films. |
| GPS signal not acquired. | Poor satellite reception; device not positioned correctly. | Ensure the GPS antenna (integrated into the power cable) has a clear view of the sky. Avoid metallic obstructions. |
| Interference with radio/other electronics. | Electromagnetic interference. | The DC509 has EMI countermeasures. If interference occurs, try rerouting cables away from sensitive electronics or using ferrite cores. |
If you encounter problems not listed here or if solutions do not resolve the issue, please contact VANBAR customer support.
8. Specifications
| Feature | Detail |
|---|---|
| Model Number | DC509 |
| Screen Size | 10 inches IPS |
| Screen Brightness | 1200 cd/m² |
| Front Camera Sensor | Sony IMX415 |
| Video Resolution | 4K (Front), Full HD (Rear) |
| Lens Aperture | F1.8 |
| Viewing Angle | Front 170°, Rear 150° |
| GPS | Built-in |
| G-Sensor | 3-axis, 10-level adjustable |
| Parking Monitoring | Impact Detection, Time-lapse, Battery Protection |
| Storage | Supports microSD card (64GB included) |
| Special Features | HDR/WDR, Automatic Brightness Adjustment, LED Signal Compatible, Electromagnetic Interference Countermeasures, Waterproof Rear Camera |
| Dimensions | 29.2 x 11 x 9.8 cm; 1.17 kg (Package Size) |
9. Warranty and Support
The VANBAR DC509 Digital Inner Mirror Drive Recorder comes with a 3-year warranty from the date of purchase. This warranty covers manufacturing defects and malfunctions under normal use.
For technical support, warranty claims, or inquiries regarding mount compatibility for your vehicle, please contact VANBAR customer support through the retailer where you purchased the product or visit the official VANBAR website.
Please have your purchase receipt and product model number (DC509) ready when contacting support.


