
1. Introduction
Thank you for choosing the VONROC Smart Electric Convector Heater. This manual provides essential information for the safe and efficient operation, installation, and maintenance of your new heater. Please read these instructions carefully before use and retain them for future reference.
This 2500W convector heater features a tempered glass panel, an integrated LED display, and can be controlled via WiFi using the Tuya Smart Life App. It offers a thermostat range of 5-50°C, a timer function, and is rated IP24 for splash resistance. It can be used as a freestanding unit or wall-mounted.
2. Important Safety Instructions
- Read all instructions before using this heater.
- Do not use this heater in the immediate vicinity of a bath, shower, or swimming pool.
- Do not cover the heater. Covering the heater can cause overheating and fire.
- Ensure the voltage indicated on the rating label corresponds to your mains voltage.
- Keep combustible materials such as furniture, curtains, and other flammable items at least 1 meter (3 feet) from the front and sides of the heater.
- This appliance is not intended for use by persons (including children) with reduced physical, sensory or mental capabilities, or lack of experience and knowledge, unless they have been given supervision or instruction concerning use of the appliance by a person responsible for their safety.
- Children should be supervised to ensure that they do not play with the appliance.
- If the supply cord is damaged, it must be replaced by the manufacturer, its service agent, or similarly qualified persons in order to avoid a hazard.
- The heater is equipped with tip-over protection and overheat protection for enhanced safety.
- The appliance is IP24 rated, meaning it is protected against splashing water. However, avoid direct water spray.

Image: The "DO NOT COVER" warning label on the heater, emphasizing a critical safety instruction to prevent overheating.
3. Package Contents
Upon unpacking, ensure all items are present and undamaged. If any parts are missing or damaged, contact VONROC customer service.
- VONROC Smart Electric Convector Heater (Model CH510-12)
- Floor Stands (2 pcs)
- Wall Mounting Kit (screws, wall plugs)
- User Manual
4. Product Overview
Familiarize yourself with the components of your convector heater.
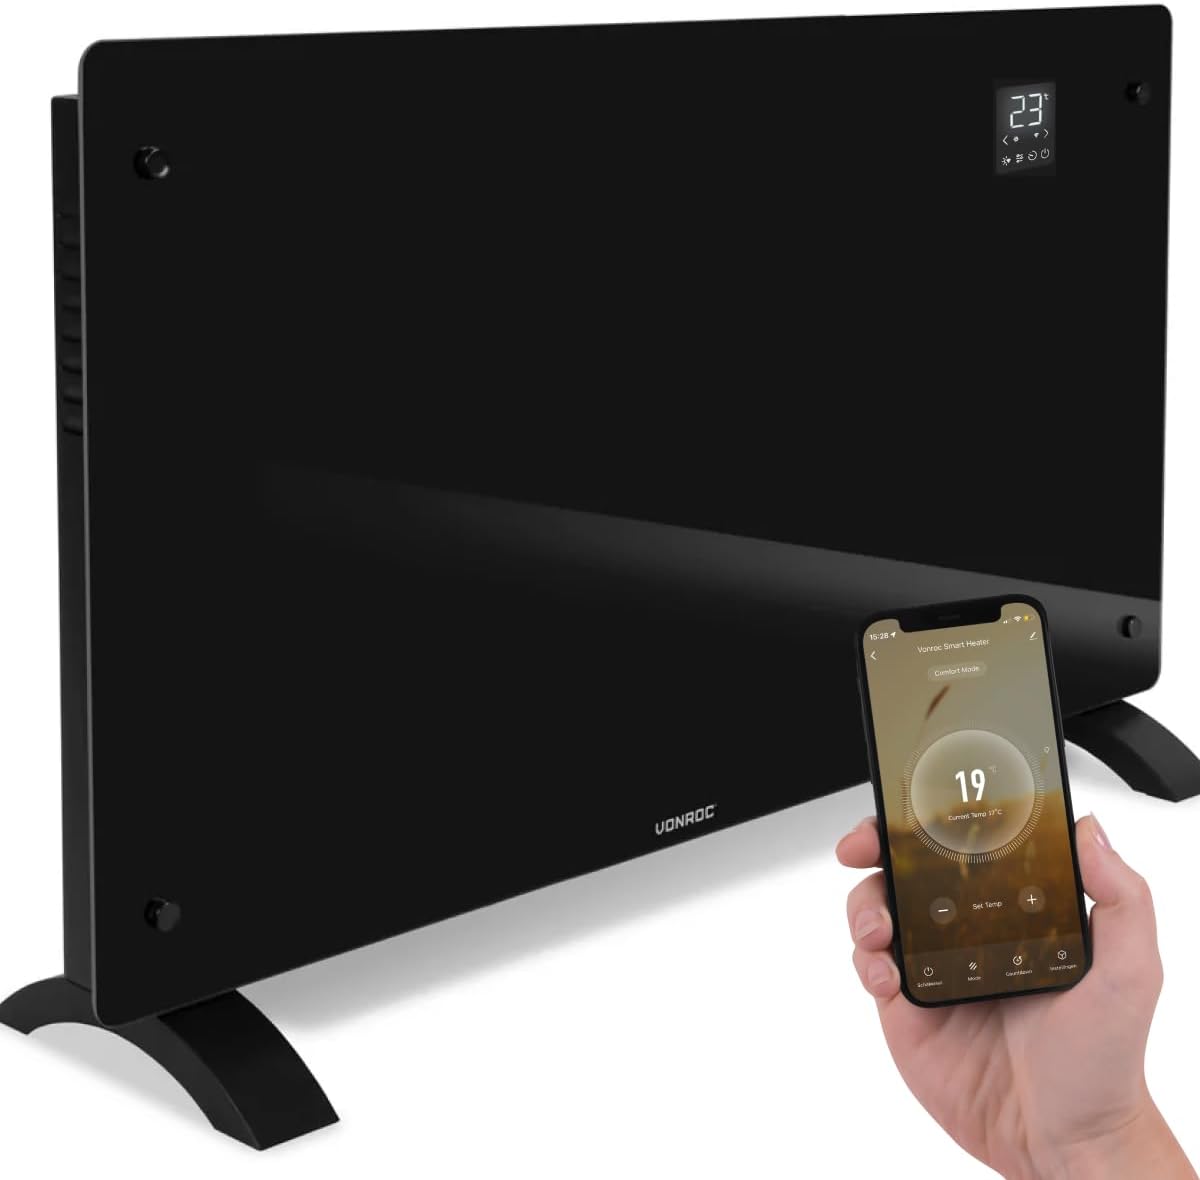
Image: The VONROC Smart Electric Convector Heater, showcasing its sleek design and the accompanying smartphone app for remote control.

Image: Detailed view of the heater's LED display, indicating current temperature and various operational icons for mode, WiFi, and power.
Key Components:
- Tempered Glass Panel
- LED Digital Display
- Control Buttons (Touch sensitive, located near the display)
- Power Cord
- Floor Stands (removable)
- Wall Mounting Brackets (pre-installed or in kit)
5. Installation
The VONROC Smart Electric Convector Heater can be used as a freestanding unit or wall-mounted.
5.1 Freestanding Installation
- Carefully remove the heater from its packaging.
- Attach the two floor stands to the bottom of the heater using the provided screws. Ensure they are securely fastened.
- Place the heater on a flat, stable surface, ensuring it is at least 1 meter (3 feet) away from any combustible materials.
5.2 Wall Mounting Installation
For wall mounting, ensure the wall material is suitable to support the weight of the heater and follow these steps:
- Remove the floor stands if they are already attached.
- Identify the desired location on the wall. Ensure there is sufficient clearance around the heater (minimum 1 meter from combustible materials).
- Mark the positions for drilling holes using the wall mounting bracket as a template.
- Drill the holes and insert the wall plugs.
- Securely attach the wall mounting bracket to the wall using the provided screws.
- Carefully hang the heater onto the wall mounting bracket, ensuring it is firmly seated and level.

Image: The convector heater elegantly mounted on a wall, demonstrating its suitability for fixed installation in a home environment.
6. Operating Instructions
This section details how to operate your heater using both the integrated control panel and the Tuya Smart Life App.
6.1 Initial Power On
- Plug the power cord into a suitable 230V electrical outlet.
- Press the power button on the control panel to turn the heater on. The LED display will illuminate.
6.2 Control Panel Operation
The touch-sensitive control panel allows you to adjust settings directly on the unit.
- Power Button: Turns the heater ON/OFF.
- Temperature Adjustment: Use the '+' and '-' buttons to set the desired temperature between 5°C and 50°C.
- Mode Selection: Cycle through different heating modes (e.g., Eco, Comfort, Anti-frost) or power levels (1250W, 2500W) if available via the mode button.
- Timer Function: Set a timer for automatic shutdown. Refer to the display icons for timer settings.
- WiFi Indicator: Shows the status of the WiFi connection.
6.3 WiFi Control via Tuya Smart Life App
Control your heater remotely using the Tuya Smart Life App on your smartphone (Android/iOS).
- Download the App: Search for "Tuya Smart" or "Smart Life" in your device's app store and install it.
- Register/Log In: Create an account or log in if you already have one.
- Add Device: Follow the in-app instructions to add a new device. Select "Heater" or "Convector Heater" from the device list.
- Pairing Mode: Put your heater into pairing mode (usually by pressing and holding the WiFi button on the control panel until the indicator blinks rapidly).
- Connect to WiFi: Enter your home WiFi network details (2.4GHz network required).
- Control: Once connected, you can remotely turn the heater on/off, adjust temperature, set schedules (daily/weekly programming), and select modes from anywhere.
7. Maintenance
Regular maintenance ensures optimal performance and longevity of your heater.
- Cleaning: Before cleaning, always unplug the heater and allow it to cool down completely. Wipe the exterior surfaces with a soft, damp cloth. Do not use abrasive cleaners or solvents.
- Storage: If storing the heater for an extended period, ensure it is clean and dry. Store it in its original packaging in a cool, dry place.
- Inspection: Periodically check the power cord and plug for any signs of damage. If damaged, contact qualified personnel for repair.
8. Troubleshooting
Refer to this section for common issues and their solutions.
| Problem | Possible Cause | Solution |
|---|---|---|
| Heater does not turn on. | No power supply; Power button not pressed; Overheat protection activated. | Check power plug and outlet; Press power button; Unplug, let cool, then restart. |
| Heater turns off unexpectedly. | Overheat protection activated; Tip-over protection activated; Timer expired. | Ensure proper ventilation, clear obstructions; Place heater on a stable surface; Check timer settings. |
| WiFi connection fails. | Incorrect WiFi password; Heater too far from router; Router is 5GHz only; Heater not in pairing mode. | Verify password; Move heater closer to router; Ensure 2.4GHz WiFi is active; Re-enter pairing mode. |
| Heater not heating effectively. | Temperature setting too low; Low power mode selected; Room size too large for heater capacity. | Increase target temperature; Select 2500W power mode; Ensure heater is appropriate for room size (up to 30m²). |
9. Specifications
| Brand | VONROC |
| Model Number | CH510-12 |
| Power Output | 2500W (selectable 1250W / 2500W) |
| Voltage | 230 Volts |
| Thermostat Range | 5°C - 50°C |
| Max Temperature Setting | 35°C (Note: While the thermostat can detect temperatures up to 50°C, the maximum user-settable temperature is 35°C.) |
| Dimensions (W x D x H) | 85 cm x 7.5 cm x 51 cm |
| Weight | (Information not provided) |
| IP Rating | IP24 (Splash-proof) |
| Special Features | Digital Display, Wi-Fi Compatible, Tip-over Protection, Overheat Protection, Timer, Tuya Smart Life App Control |
| Heating Element | Low consumption aluminum |

Image: Dimensional drawing of the heater, illustrating its length, height, and depth for planning installation space.
10. Warranty and Support
VONROC products are manufactured to the highest quality standards. In the unlikely event of a defect, please contact your retailer or VONROC customer service for assistance. Keep your proof of purchase for warranty claims.
For further support, troubleshooting, or spare parts, please visit the official VONROC website or contact their customer service department.


