Introduction
This manual provides detailed instructions for assembling the AMT Skill 3 Model Kit Diamond REO Truck Tractor, 1/25 Scale Model AMT1500. Designed for advanced builders, this kit offers an authentic and challenging construction experience with highly detailed engine and chassis components. Please read all instructions carefully before beginning assembly.
Note: Paint and cement are required for assembly and are not included in this kit.
Parts Overview
The AMT1500 kit contains 335 detailed parts, including chrome-plated small parts, black vinyl tires, and metal axles. Parts are molded in white unless otherwise indicated. Refer to the parts layout diagram below to identify all components before starting assembly.
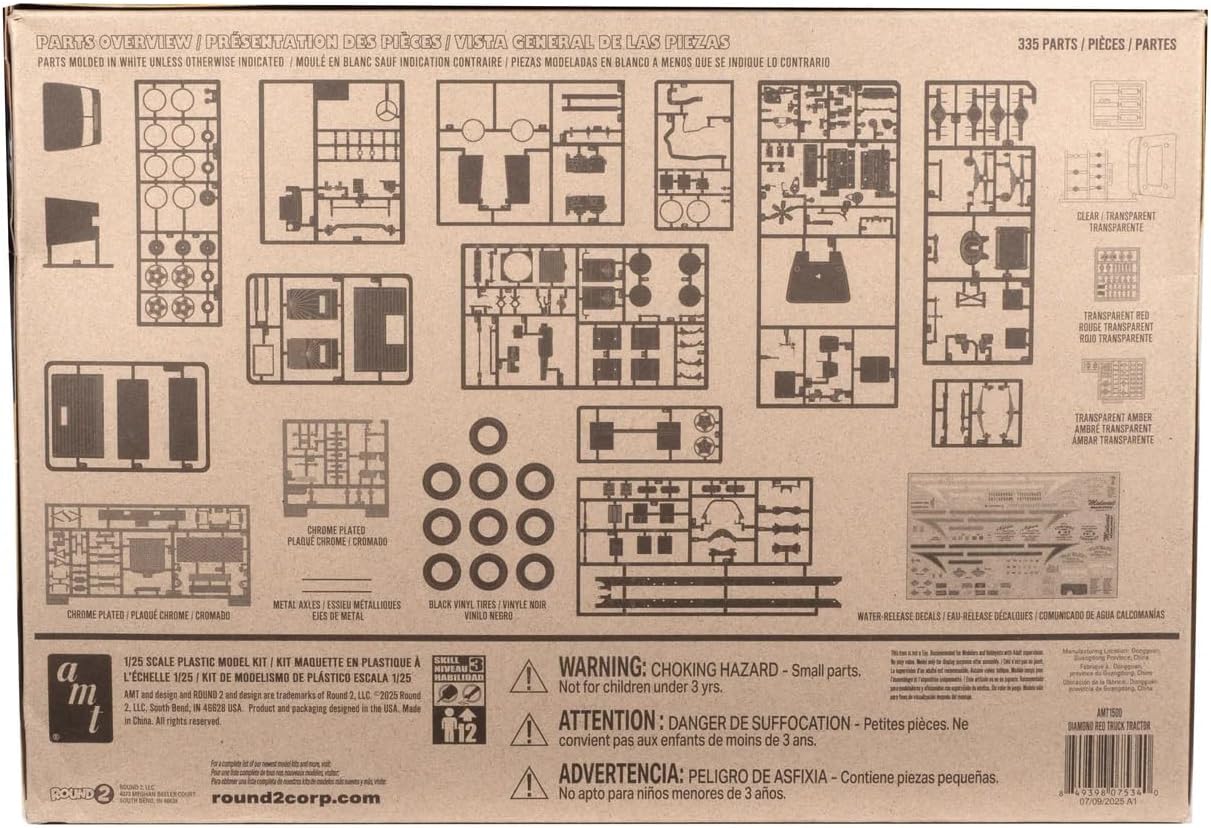
Image: Detailed layout of all 335 parts included in the AMT Diamond REO Truck Tractor model kit, categorized by material and color.
Setup and Assembly
Assembly of this Skill 3 model kit requires precision and attention to detail. Follow the numbered steps provided in the included printed instructions for specific part placement and adhesive application. The following outlines key assembly areas:
- Chassis and Suspension: Begin by assembling the detailed chassis and suspension components. Ensure all parts are securely attached for structural integrity.
- Engine Assembly: Construct the Cummins NTC-350 6-cylinder turbocharged diesel engine. Pay close attention to the placement of all engine components.
- Cab Interior: Assemble the detailed cab interior, including the dashboard, steering wheel, and seating.
- Exterior Components: Attach the tilting hood and fender assembly, plated exhaust stacks, air filter, fuel tanks, and battery boxes with steps.
- Wheels and Tires: Mount the 10 authentic hollow truck tires onto the 5-spoke wheels. Attach these to the chassis.
- Fifth Wheel and Deck Plate: Install the "Holland" fifth wheel and optional deck plate as per your preference.
- Decals: Apply the colorful decal artwork to the finished model according to the provided guide.

Image: An exploded view illustrating the detailed chassis, suspension, and Cummins NTC-350 engine assembly for the model kit.

Image: A side profile view of the assembled Diamond REO Truck Tractor model, showcasing key features and components such as the tilting hood, exhaust stacks, and battery boxes.
Finishing and Display (Operating)
Once assembly is complete, the model can be further enhanced with paint and decals. The "Chrome" trim detail can be striped on with silver paint for added realism. Ensure all decals are properly aligned and sealed for a lasting finish. Display your completed Diamond REO Truck Tractor model on a stable, flat surface away from direct sunlight and excessive heat.
Maintenance
To maintain the appearance of your model, periodically dust it gently with a soft brush or compressed air. Avoid using harsh chemicals or abrasive materials, which can damage the paint and plastic. Store the model in a cool, dry environment to prevent material degradation over time.
Troubleshooting
- Parts Not Fitting: If a part does not fit correctly, carefully inspect for excess plastic flash and trim with a hobby knife. Ensure correct orientation as indicated in the assembly diagrams.
- Decal Issues: If decals do not adhere properly, ensure the surface is clean and smooth. Use a decal setting solution if necessary.
- Paint Adhesion: For optimal paint adhesion, ensure plastic surfaces are clean and free of oils or mold release agents. A light primer coat can improve results.
Specifications
| Model Name | AMT1500 |
| Brand | AMT |
| Scale | 1/25 |
| Skill Level | 3 (Advanced) |
| Part Count | 335 detailed parts |
| Engine Type | Cummins NTC-350 6-cylinder turbocharged diesel engine |
| Material | Plastic (parts molded in white, chrome-plated, clear, transparent red) |
| Dimensions (Product) | 1 x 11 x 1 inches (L x W x H) |
| Item Weight | 1.12 pounds |
| Recommended Age | 16 years and up |
Support
For further assistance or inquiries regarding your AMT Skill 3 Model Kit, please refer to the contact information provided on the product packaging or visit the official AMT website. Specific warranty information is not provided in this manual; please consult the manufacturer's official resources for details.


