
1. Introduction
Thank you for choosing the Samsung 32-inch S3 (S39GD) FHD 100Hz Curved Monitor. This manual provides essential information for setting up, operating, and maintaining your monitor to ensure optimal performance and longevity. Please read this manual thoroughly before using the product.

Image 1.1: Front view of the Samsung 32-inch S3 Curved Monitor, showcasing its sleek design and immersive curve.
2. Key Features
- 1800R Curved Screen: Provides an immersive viewing experience by wrapping around your field of vision, enhancing depth perception and minimizing peripheral distractions.
- 100Hz Refresh Rate: Reduces lag and motion blur, ensuring smooth performance for gaming, video playback, and creative projects.
- Game Mode: Optimizes color and image contrast settings instantly to enhance visibility in gaming scenes, making details clearer.
- Built-in Speakers: Frees up desk space and minimizes cable clutter by providing integrated audio output.
- Eye Saver Mode: TÜV-certified technology reduces irritating screen flicker and minimizes excessive blue light, promoting eye comfort during extended use.
- Multiple Connectivity: Features HDMI and D-Sub ports, along with a headphone output, for versatile device connections.
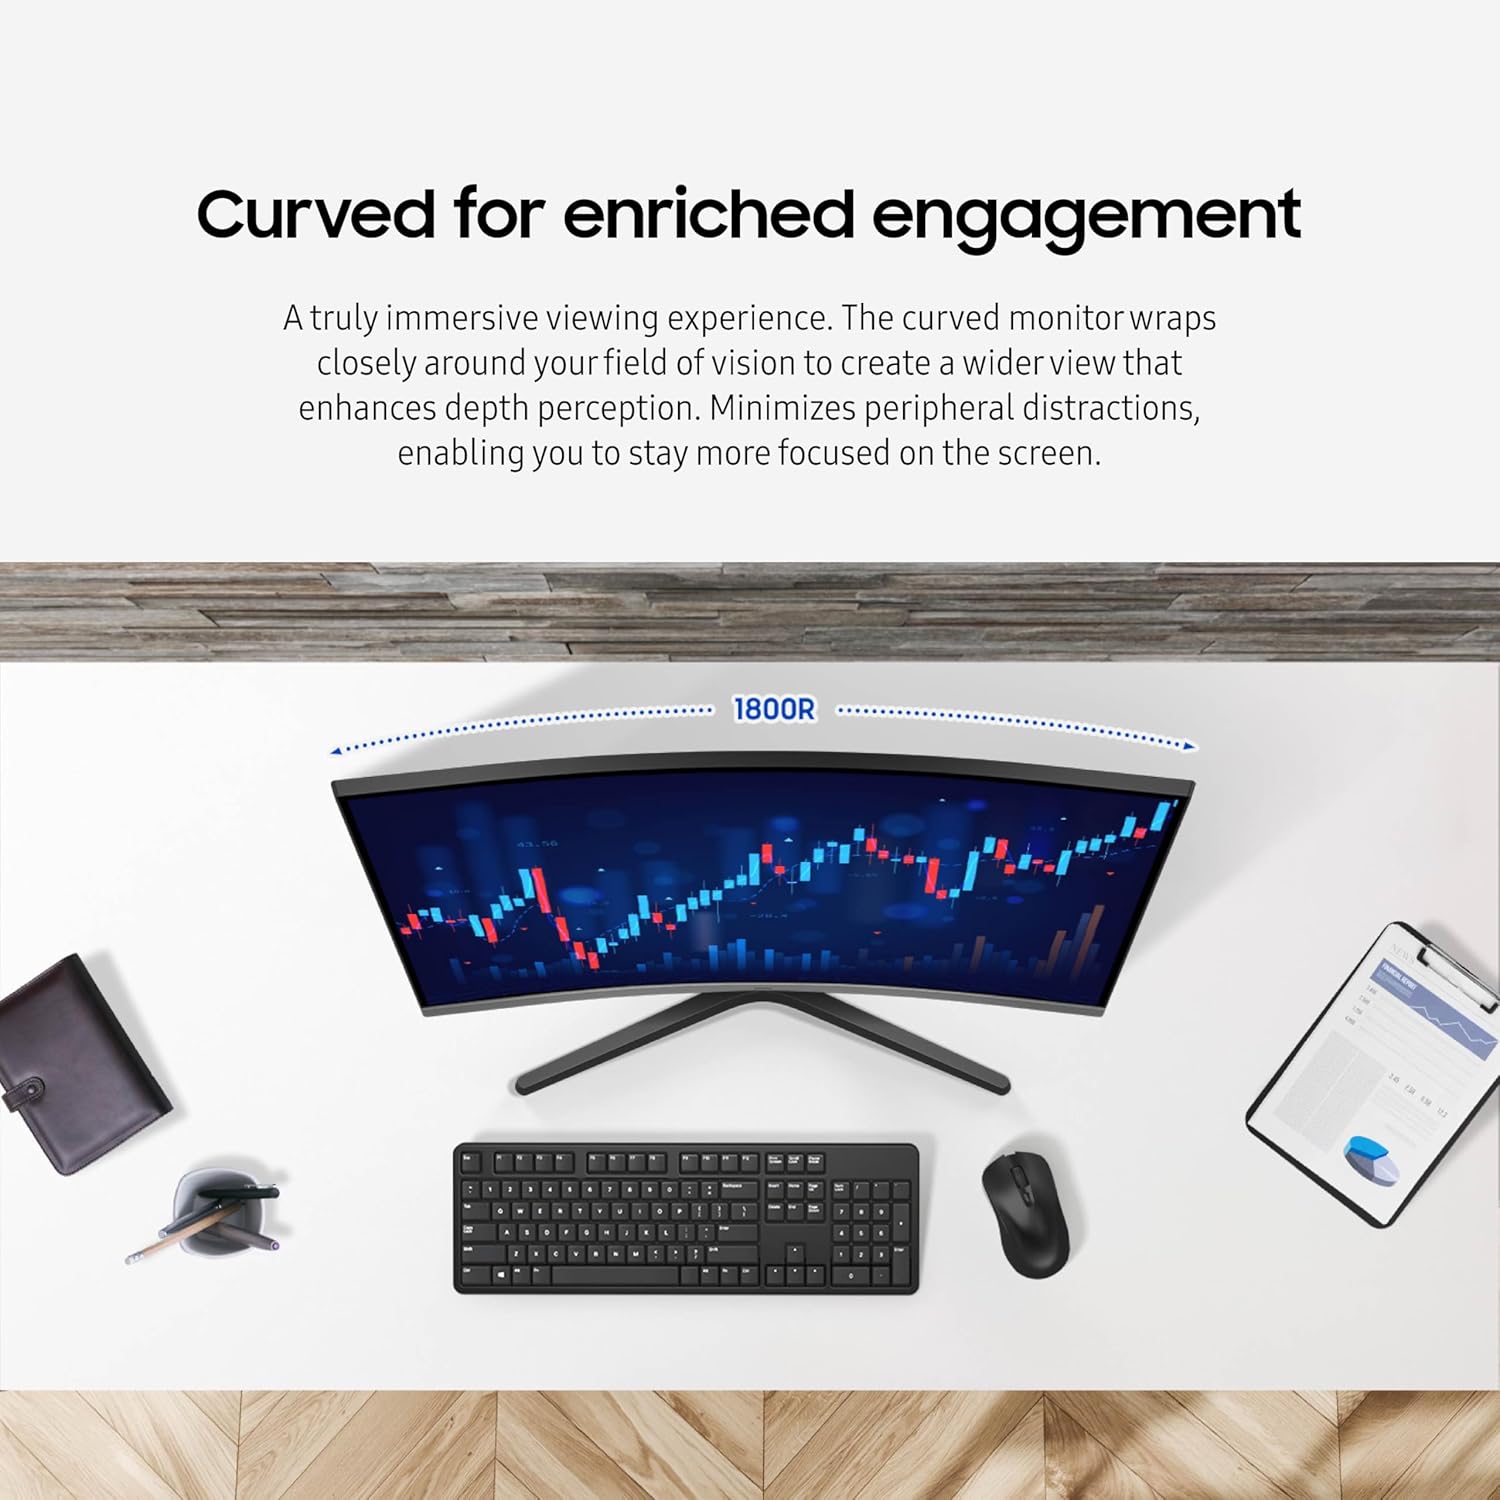
Image 2.1: Visual representation of the 1800R curved screen, designed for an immersive and focused viewing experience.

Image 2.2: A game scene highlighting the smooth performance provided by the 100Hz refresh rate.
3. Setup
3.1 Unpacking the Monitor
Carefully remove the monitor and all components from the packaging. Ensure all items listed below are present:
- Samsung 32-inch S3 Curved Monitor
- Monitor Stand (Base and Neck)
- Power Cable
- HDMI Cable
- Quick Setup Guide
3.2 Assembling the Stand
- Place the monitor face down on a soft, clean cloth to prevent scratches.
- Attach the stand neck to the back of the monitor by aligning the tabs and pushing until it clicks into place.
- Secure the stand base to the neck using the provided screw.

Image 3.1: Rear view of the monitor, showing the stand assembly point.
3.3 Connecting Cables
Connect the necessary cables to the monitor's ports. The monitor includes HDMI and D-Sub inputs, as well as a headphone output.
- Power: Connect the power cable to the monitor's power input and then to a wall outlet.
- Video Input: Connect the HDMI cable from your computer or device to the HDMI port on the monitor. Alternatively, use a D-Sub cable if your device supports it.
- Audio Output: If you wish to use external headphones or speakers, connect them to the headphone output port.

Image 3.2: Detailed view of the monitor's connectivity ports.
4. Operating Instructions
4.1 Power On/Off
Press the power button (usually located on the bottom right or rear of the monitor) to turn the monitor on or off.
4.2 Using the On-Screen Display (OSD) Menu
The monitor features a joystick-style button on the rear for navigating the OSD menu. Push the joystick in to open the menu, then move it up/down/left/right to select options and adjust settings.
4.3 Adjusting Display Settings
- Brightness & Contrast: Navigate to the 'Picture' menu to adjust these settings for your preferred visual comfort.
- Volume: Access the 'Sound' menu to control the volume of the built-in speakers or connected headphones.
- Input Source: Select 'Source' from the OSD menu to switch between HDMI and D-Sub inputs.
4.4 Activating Special Modes
- Game Mode: To enhance your gaming experience, navigate to the 'Picture' menu and select 'Game Mode' to turn it ON. This optimizes color and contrast for clearer game visuals.
- Eye Saver Mode: For reduced eye strain during long sessions, go to the 'Picture' menu and activate 'Eye Saver Mode'. This reduces blue light emissions.
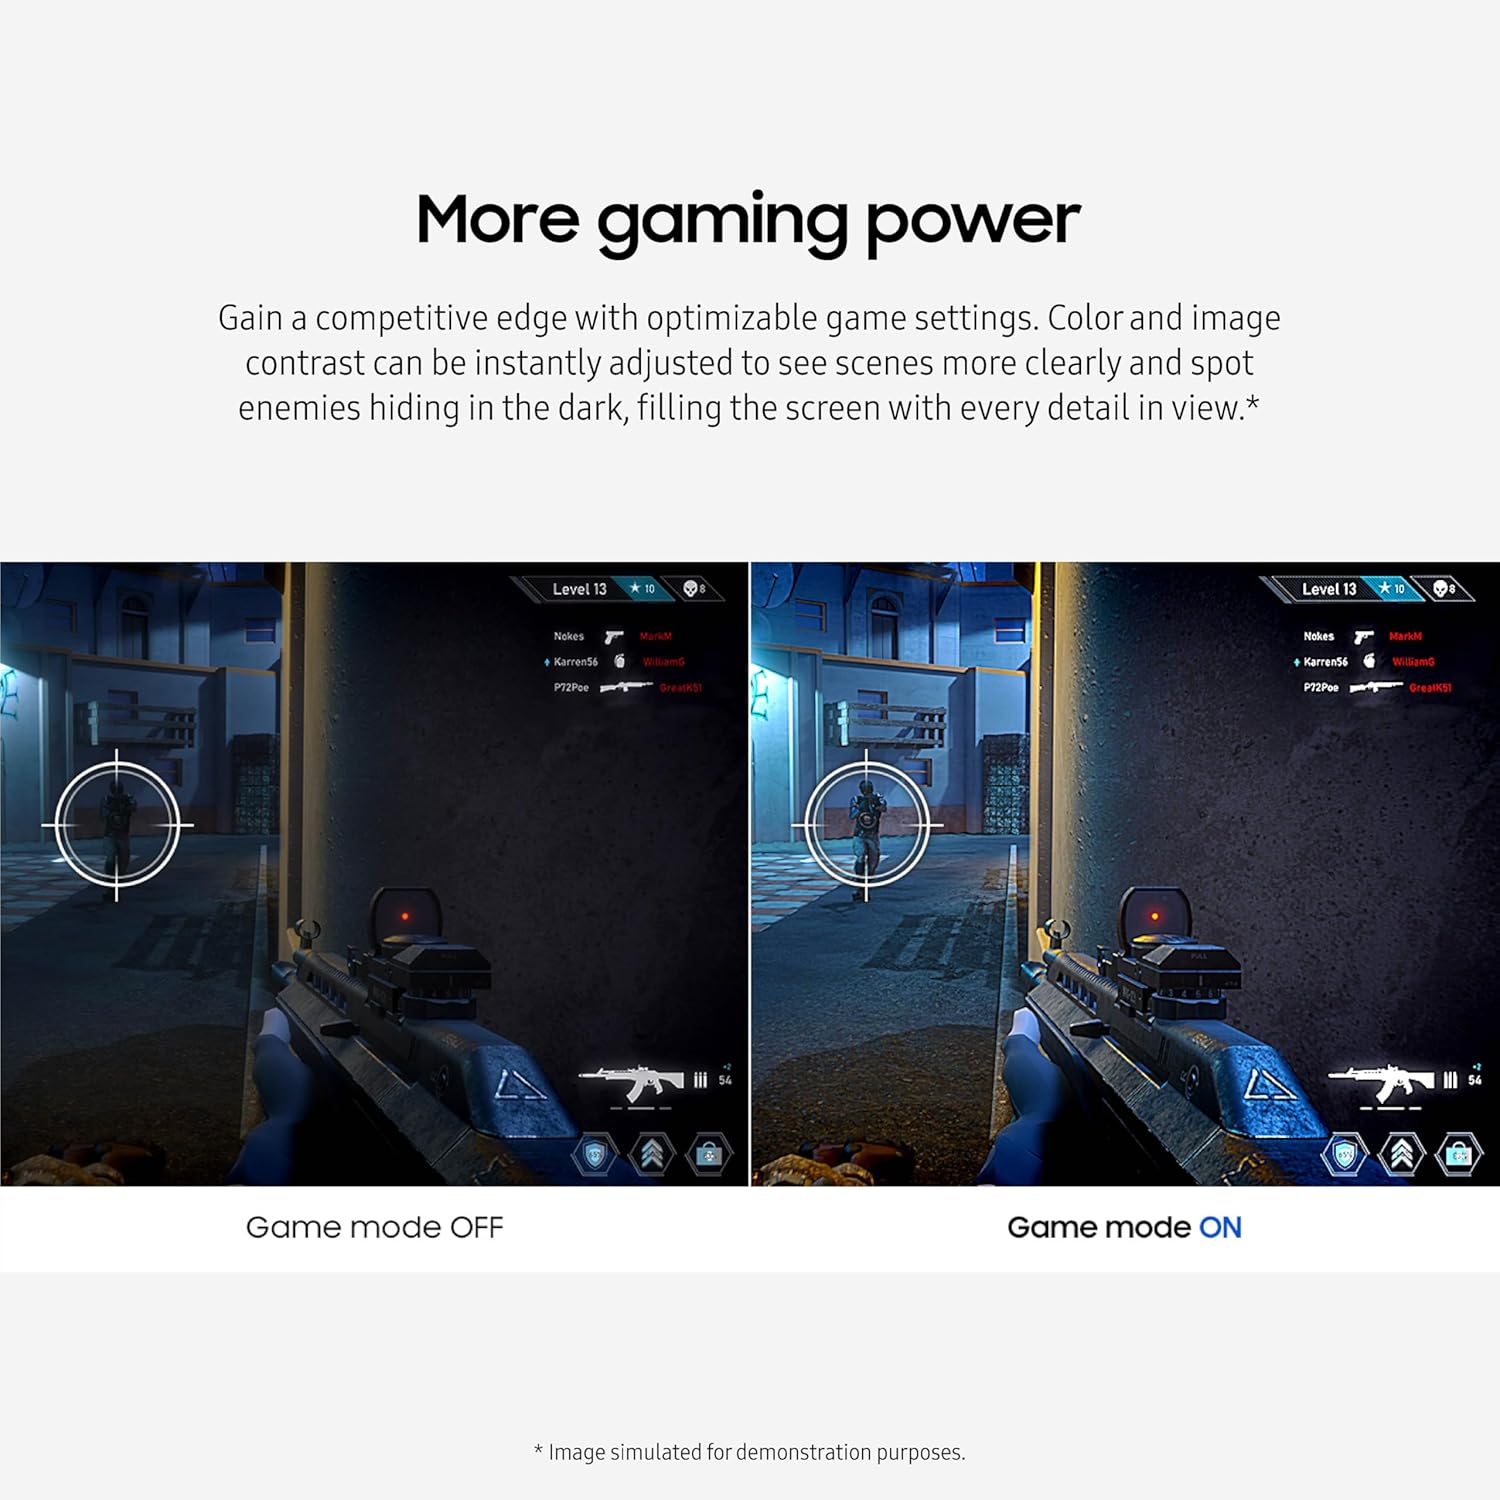
Image 4.1: A side-by-side comparison demonstrating the visual improvements when Game Mode is activated.

Image 4.2: A comparison showing the effect of Eye Saver Mode on screen display, reducing blue light for comfort.
5. Maintenance
5.1 Cleaning the Monitor
To clean the screen, gently wipe it with a soft, lint-free cloth. For stubborn marks, lightly dampen the cloth with water or a specialized screen cleaner. Avoid using harsh chemicals or abrasive materials.
5.2 General Care
- Keep the monitor away from direct sunlight and heat sources.
- Ensure adequate ventilation around the monitor to prevent overheating.
- Avoid placing heavy objects on the monitor or its cables.
6. Troubleshooting
If you encounter issues with your monitor, refer to the following common solutions:
| Problem | Possible Solution |
|---|---|
| No Power | Check if the power cable is securely connected to both the monitor and the power outlet. Ensure the power outlet is functional. |
| No Signal | Verify that the video cable (HDMI/D-Sub) is correctly connected to both the monitor and your computer/device. Select the correct input source via the OSD menu. |
| Distorted Image | Check the display resolution settings on your computer to ensure they match the monitor's native resolution (1920 x 1080). Try updating your graphics card drivers. |
| No Sound | Increase the volume using the OSD menu or your computer's sound settings. Ensure the correct audio output device is selected on your computer. |
7. Specifications
| Feature | Detail |
|---|---|
| Brand | Samsung |
| Model Number | LS32D39DGANXZA |
| Screen Size | 32 Inches |
| Resolution | FHD 1080p (1920 x 1080 Pixels) |
| Aspect Ratio | 16:9 |
| Screen Surface | Matte |
| Refresh Rate | 100 Hz |
| Response Time | 4 Milliseconds |
| Contrast Ratio | 3000:1 |
| Brightness | 250 Candela per Square Meter |
| Viewing Angle | 178 Degrees |
| Connectivity | 1 x HDMI Port, 1 x D-Sub, Headphone Out |
| Additional Features | Adaptive Sync (FreeSync), Built-In Speakers, Curved, Flicker-Free, Eye Comfort Technology |
| Item Dimensions (D x W x H) | 10.3"D x 28.2"W x 20.7"H |
| Item Weight | 11.2 Pounds |
| Mounting Type | Wall Mount (VESA 75mm) |

Image 7.1: Dimensional overview of the Samsung 32-inch S3 Curved Monitor.
8. Warranty and Support
8.1 Manufacturer's Warranty
This Samsung monitor comes with a 1-Year Manufacturer Warranty. Please retain your proof of purchase for warranty claims.
8.2 Technical Support
For technical assistance, troubleshooting beyond this manual, or warranty service, please contact Samsung Customer Support. You can find contact information and additional resources on the official Samsung website: www.samsung.com/us/support/


