
1. Introduction
The Lenovo ThinkCentre M710q Tiny Desktop is a compact and efficient mini desktop PC designed for various computing tasks. This manual provides essential information for the proper setup, operation, maintenance, and troubleshooting of your device. It features a 6th Gen Intel Core i3-6100T processor, 8GB DDR4 RAM, a 256GB Solid State Drive, and runs on Windows 11 Pro.
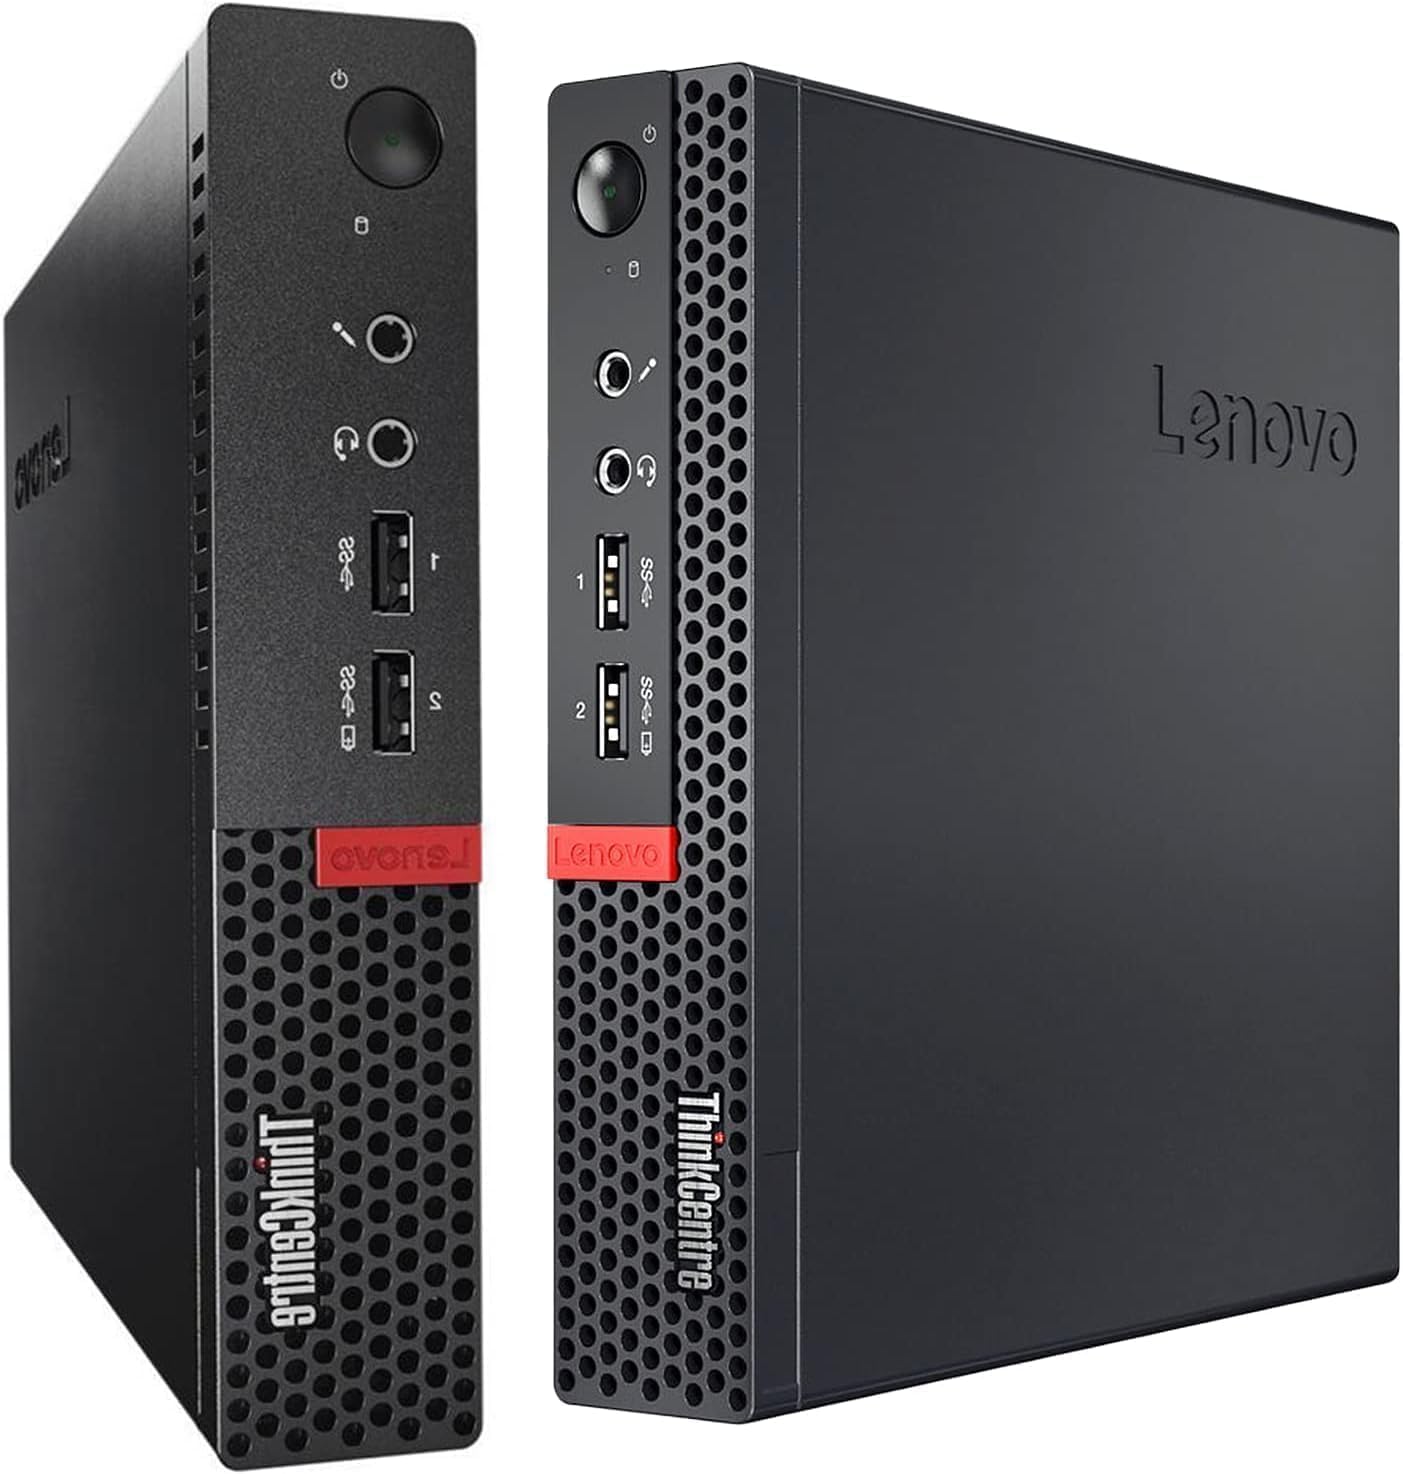
Figure 1: Front view of the Lenovo ThinkCentre M710q Tiny Desktop.
2. Setup Guide
Follow these steps to set up your Lenovo ThinkCentre M710q Tiny Desktop:
- Unpack Components: Carefully remove the desktop PC, power cord, keyboard, mouse, and USB WiFi & Bluetooth adapter from the packaging.
- Connect Power: Plug the power cord into the desktop's power adapter connector and then into a wall outlet.
- Connect Peripherals:
- Monitor: Connect your monitor(s) using the DisplayPort connectors. This model does not feature an HDMI port.
- Keyboard & Mouse: Connect the included keyboard and mouse to any available USB 3.0 ports.
- USB WiFi & Bluetooth Adapter: Insert the USB WiFi & Bluetooth adapter into an available USB 3.0 port for wireless connectivity.
- Ethernet (Optional): For a wired network connection, connect an Ethernet cable to the RJ-45 port.
- Audio: Connect headphones or speakers to the headphone/microphone combo jack if needed.
- Power On: Press the power button located on the front of the desktop. The system will boot into Windows 11 Pro.
- Initial Configuration: Follow the on-screen prompts to complete the Windows 11 Pro setup, including network connection and user account creation.

Figure 2: Front and rear port layout of the ThinkCentre M710q.
3. Operating Instructions
3.1 Power Management
- Power On: Press the power button on the front panel.
- Shut Down: Click the Start button in Windows 11, then select Power > Shut down.
- Restart: Click the Start button, then select Power > Restart.
- Sleep: Click the Start button, then select Power > Sleep.
3.2 Connecting to a Network
Your ThinkCentre M710q supports both wired and wireless network connections.
- Wired Connection: Connect an Ethernet cable to the RJ-45 port on the rear of the device.
- Wireless Connection: Ensure the USB WiFi & Bluetooth adapter is connected. In Windows 11, click the network icon in the taskbar, select your desired Wi-Fi network, and enter the password.
3.3 Display Configuration
The system supports dual monitors via its two DisplayPort outputs. To configure multiple displays:
- Connect both monitors to the DisplayPort outputs.
- Right-click on the desktop and select 'Display settings'.
- From here, you can arrange your displays, change resolution, and select display modes (e.g., Extend, Duplicate).

Figure 3: The ThinkCentre M710q supports dual monitor setups.
4. Maintenance
Regular maintenance helps ensure the longevity and optimal performance of your ThinkCentre M710q.
4.1 Cleaning
- Exterior: Use a soft, lint-free cloth slightly dampened with water or a mild cleaning solution to wipe the exterior surfaces. Avoid harsh chemicals.
- Vents: Periodically check and clean the ventilation grilles to prevent dust buildup, which can impede airflow and cause overheating. Use compressed air to gently clear dust from the vents.
4.2 Software Updates
Keep your Windows 11 Pro operating system and drivers updated to ensure security, stability, and performance.
- Windows Updates: Go to Start > Settings > Windows Update and check for available updates.
- Driver Updates: While Windows Update often handles drivers, you may occasionally need to check the Lenovo support website for the latest drivers for your specific model.
5. Troubleshooting
This section addresses common issues you might encounter with your ThinkCentre M710q.
| Problem | Possible Cause | Solution |
|---|---|---|
| System does not power on | Power cord not connected, faulty power outlet, power supply issue. | Ensure power cord is securely connected to the PC and a working electrical outlet. Test the outlet with another device. |
| No display on monitor | Monitor not connected, incorrect input source, monitor power off. | Verify DisplayPort cables are securely connected to both the PC and monitor. Ensure monitor is powered on and set to the correct input source (DisplayPort). |
| No Wi-Fi or Bluetooth connectivity | USB adapter not connected, drivers not installed, Wi-Fi/Bluetooth turned off in Windows. | Ensure the USB WiFi & Bluetooth adapter is properly inserted. Check Device Manager for driver status. Verify Wi-Fi/Bluetooth is enabled in Windows settings. |
| System is slow or unresponsive | Too many applications running, low disk space, malware, outdated drivers. | Close unnecessary applications. Free up disk space. Run a malware scan. Update Windows and drivers. |
If you continue to experience issues, refer to the Windows 11 Pro help documentation or contact support.
6. Specifications
Key technical specifications for the Lenovo ThinkCentre M710q Tiny Desktop:
- Processor: 6th Gen Intel Core i3-6100T (3.2 GHz)
- Operating System: Windows 11 Pro
- Memory (RAM): 8GB DDR4 RAM (2400 MHz)
- Storage: 256GB Solid State Drive (SSD)
- Graphics: Integrated Intel HD Graphics
- Ports:
- 6 x USB 3.2 Gen 1 (3.1 Gen 1) Type-A ports
- 2 x DisplayPort ports
- 1 x RJ-45 (Ethernet)
- 1 x Headphone/microphone combo jack
- Wireless Connectivity: WiFi, Bluetooth (via included USB adapter)
- Dimensions (Approximate): 1.4 inches (width) x 7.2 inches (depth) x 7 inches (height)
- Weight: Approximately 2.57 kg (5.67 lbs)
- Included Accessories: Keyboard, Mouse, USB WiFi & Bluetooth Adapter, Power Cord

Figure 4: Approximate dimensions of the ThinkCentre M710q.
7. Warranty Information
This Lenovo ThinkCentre M710q Tiny Desktop is a renewed product and comes with a 90-day warranty. This warranty covers defects in materials and workmanship under normal use during the warranty period. Please retain your proof of purchase for warranty claims.
8. Support
For technical assistance or warranty claims, please contact the seller, wolftec inc, through your Amazon purchase history. For general information regarding renewed products, you may visit the Amazon Renewed Store.


