Introduction
This manual provides comprehensive instructions for the safe and efficient operation of your Crosley CR3505A-LN Cruiser Portable CD Player. Please read this manual thoroughly before using the device and retain it for future reference. This portable audio player combines classic design with modern functionality, offering CD playback, Bluetooth connectivity, FM radio, and auxiliary input.
What's in the Box
Verify that all items are present upon unpacking:
- Crosley CR3505A-LN Portable CD Player
- USB-C Cable
Product Features
- Portable Music Player: Equipped with a rechargeable lithium battery, providing up to 4 hours of playback at 50% volume after a 3.5-hour charge.
- Versatile Audio Options: Features built-in stereo speakers and a headphone jack. Supports CD playback, Bluetooth streaming to wireless headphones/speakers, and auxiliary input for other devices.
- Retro Style, Modern Function: Blends nostalgic aesthetics with contemporary features, including a tonearm-inspired power switch and a built-in FM radio.
- Designed for Portability: Lightweight construction with a magnetic lid closure for easy transport.
Component Identification
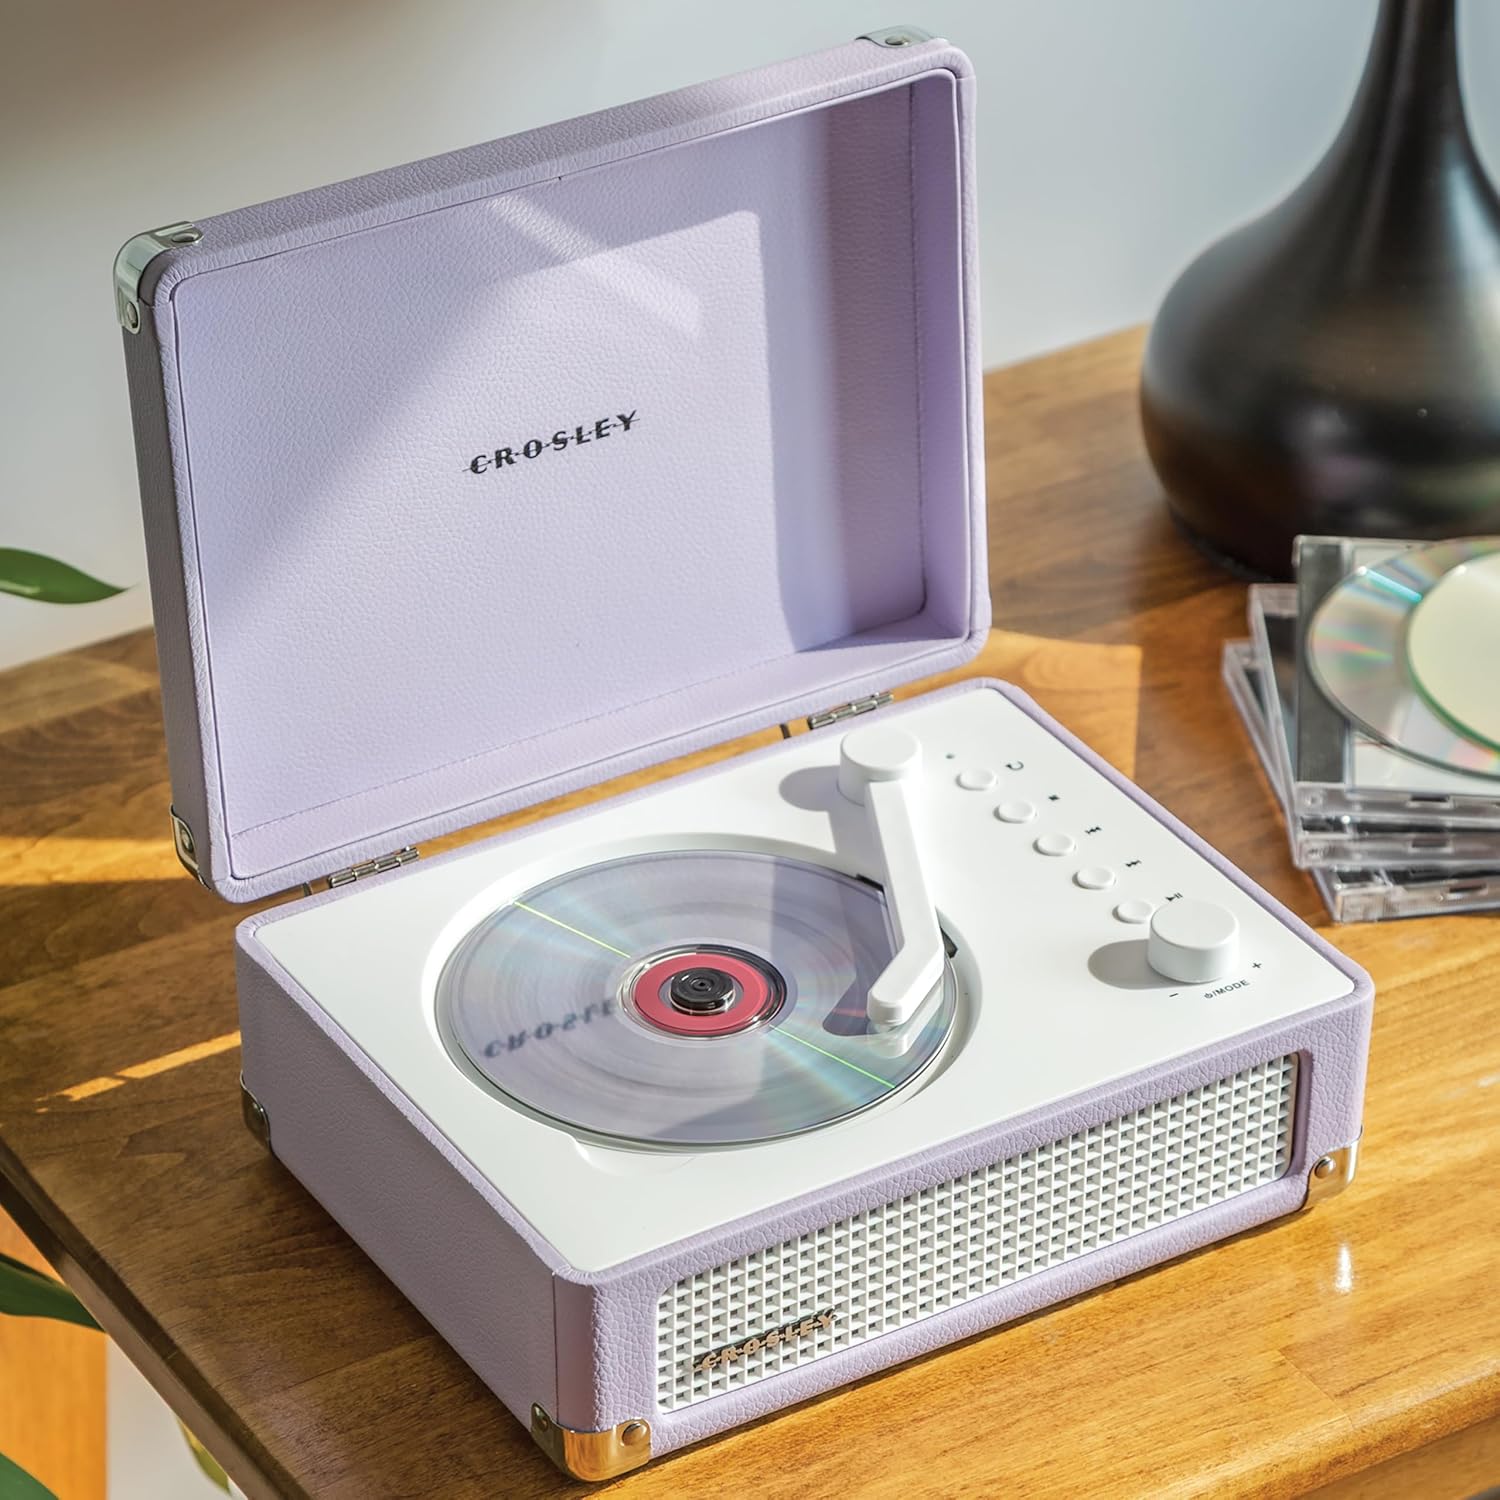
Figure 1: Top view of the Crosley CR3505A-LN with lid open, highlighting the CD compartment and control panel.

Figure 2: Rear view of the unit, displaying the headphone jack, AUX In port, and USB-C charging port.
Control Panel Overview
- Tonearm-inspired Power Switch: Activates/deactivates the unit and initiates CD playback.
- Mode/Power Dial: Rotates to adjust volume. Press to cycle through modes (CD, Bluetooth, FM, AUX).
- Repeat Button: Repeats current track or album.
- Stop Button: Stops CD playback.
- Previous Track/Rewind Button: Skips to the previous track or rewinds during playback.
- Next Track/Fast Forward Button: Skips to the next track or fast forwards during playback.
- Play/Pause Button: Controls playback for CD and Bluetooth.
- Bluetooth/FM Indicator Light: Indicates current mode and pairing status.
Setup
Charging the Battery
- Connect the supplied USB-C cable to the DC 5V port on the rear of the unit (Figure 2).
- Connect the other end of the USB-C cable to a compatible USB power adapter (not included).
- The indicator light will show charging status. A full charge takes approximately 3.5 hours.
Powering On/Off
To power on the unit, move the tonearm-inspired switch over the CD spindle. To power off, move the switch back to its resting position.
Operating Instructions
CD Playback
- Open the lid of the CD player.
- Carefully place a CD onto the spindle in the CD compartment, label side up.
- Close the lid.
- Move the tonearm-inspired switch over the CD spindle to power on and initiate playback.
- Use the Play/Pause, Stop, Previous Track/Rewind, and Next Track/Fast Forward buttons to control playback.
- Press the Repeat button to cycle through repeat modes (repeat one track, repeat all tracks, random play).
Bluetooth Pairing
- Power on the unit.
- Press the Mode/Power dial repeatedly until the Bluetooth indicator light flashes blue, indicating pairing mode.
- On your Bluetooth-enabled device (e.g., smartphone, tablet), search for "Crosley CR3505A-LN" in the Bluetooth settings.
- Select the device to pair. Once connected, the Bluetooth indicator light will turn solid blue.
- You can now stream audio from your device to the CD player.
FM Radio
- Power on the unit.
- Press the Mode/Power dial repeatedly until the FM indicator light illuminates.
- Use the Previous Track/Rewind and Next Track/Fast Forward buttons to tune to desired FM stations.
Auxiliary Input
- Power on the unit.
- Press the Mode/Power dial repeatedly until the AUX indicator light illuminates.
- Connect an external audio device (e.g., MP3 player) to the AUX In port on the rear of the unit (Figure 2) using a 3.5mm audio cable (not included).
- Audio from the external device will now play through the CD player's speakers.
Volume Control
Rotate the Mode/Power dial clockwise to increase volume and counter-clockwise to decrease volume.
Maintenance
Cleaning
- Always unplug the unit from the power source before cleaning.
- Use a soft, dry cloth to wipe the exterior surfaces. Do not use abrasive cleaners, waxes, or solvents.
- For the CD lens, use a specialized CD lens cleaner. Avoid touching the lens directly.
Battery Care
- To prolong battery life, avoid fully discharging the battery frequently.
- If storing the unit for an extended period, charge the battery to approximately 50% every few months.
Troubleshooting
| Problem | Possible Cause | Solution |
|---|---|---|
| No power | Battery is discharged; Unit is not powered on. | Charge the battery using the USB-C cable; Ensure the tonearm-inspired switch is moved to the ON position. |
| CD not playing | CD inserted incorrectly; CD is dirty or scratched; Unit is not in CD mode. | Reinsert CD label side up; Clean or replace CD; Press Mode/Power dial to select CD mode. |
| Bluetooth not connecting | Unit not in pairing mode; Device too far; Previously paired device connected. | Press Mode/Power dial until Bluetooth light flashes; Move device closer; Disconnect from other Bluetooth devices. |
| Poor FM radio reception | Weak signal; Interference. | Adjust the unit's position; Try tuning to a stronger station. |
| No sound | Volume too low; Incorrect mode selected; Headphones connected. | Increase volume; Ensure correct mode (CD, BT, FM, AUX) is selected; Disconnect headphones if using speakers. |
Specifications
- Product Dimensions: 6.75 x 8.75 x 3.75 inches
- Item Weight: 2.54 pounds
- Item Model Number: CR3505A-LN
- Brand: Crosley
- Color: Lavender
- Connectivity Technology: Bluetooth
- Number Of Discs: 1
Safety Information
- Do not expose the unit to extreme temperatures, humidity, or direct sunlight.
- Avoid placing the unit near heat sources or in areas with poor ventilation.
- Do not disassemble or attempt to repair the unit yourself. Refer all servicing to qualified personnel.
- Keep the unit away from water or other liquids.
- Use only the specified charging cable.
Warranty and Support
Crosley products are designed in the USA and come with USA-based customer support. For warranty information or technical assistance, please refer to the official Crosley website or contact their customer service directly. Keep your purchase receipt as proof of purchase for warranty claims.


