Introduction
This manual provides detailed instructions for the setup, operation, maintenance, and troubleshooting of your COOLGEEK M1 Transparent CD Player. Designed to blend modern aesthetics with high-fidelity audio, the M1 offers versatile playback options for your CD collection.
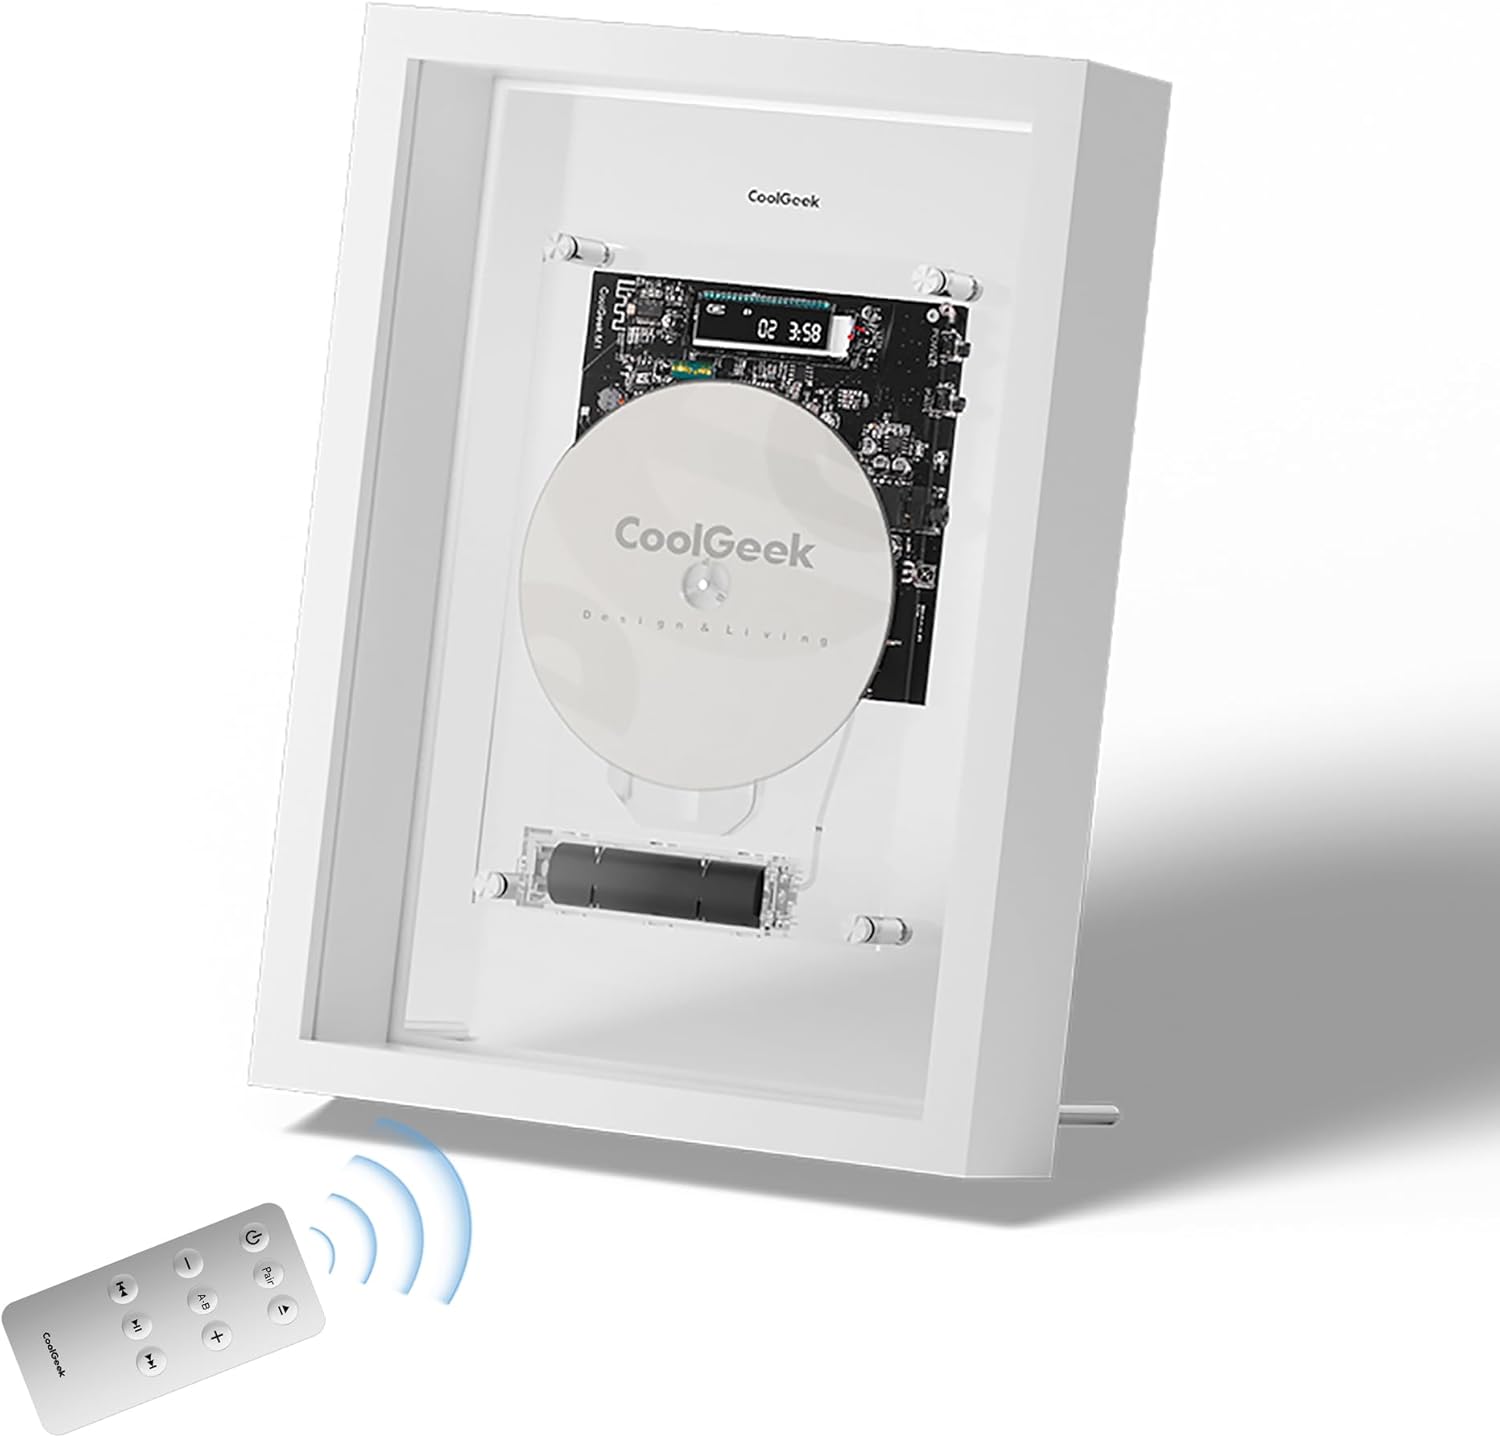
Image: The COOLGEEK M1 Transparent CD Player, showcasing its unique design with a remote control in the foreground.
Setup
1. Unboxing and Initial Inspection
Carefully remove all components from the packaging. Verify that all items listed in the 'What's in the Box' section are present and undamaged. The packaging is designed to protect the unit during transit.
Video: M1 Video Introduction. This video demonstrates the unboxing and initial setup steps for the M1 CD player.
2. Battery Installation and Charging
The M1 CD player includes a removable 18650 lithium battery. Locate the battery compartment, typically at the bottom of the main unit. Insert the battery, ensuring correct polarity. Charge the battery using the provided USB charger before first use. A full charge provides several hours of playback.

Image: A detailed view of the removable 18650 battery within the M1 CD player's transparent casing.
3. Placement Options
The M1 CD player offers flexible placement. It can be wall-mounted using the included bracket or placed on a desk using the supplied stand. Ensure the chosen location is stable and allows for easy access to controls and CD loading.
- Wall-Mount: Attach the bracket securely to a wall. The player magnetically attaches to metal studs on the back panel.
- Desk Stand: Screw the two provided extension legs into the matching nuts on the bottom back of the frame for stable desktop placement.
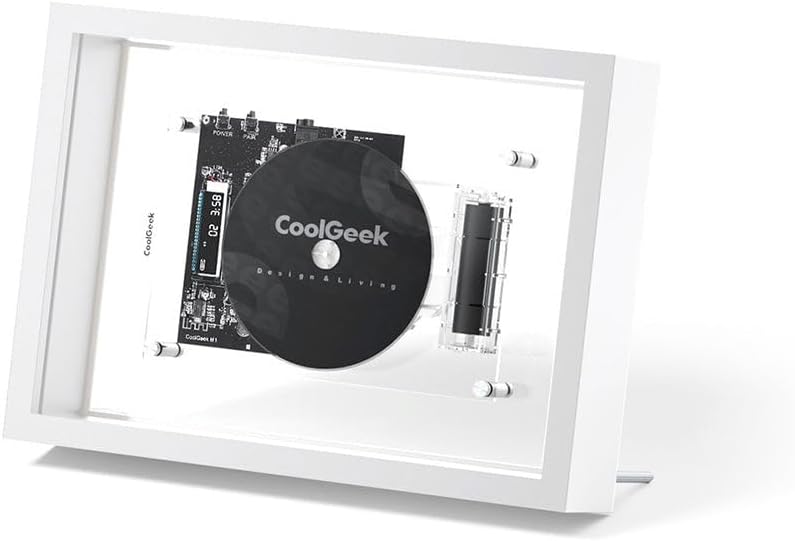
Image: The M1 CD player positioned on a desk, demonstrating its use with the included stand.
Operating Instructions
1. Powering On/Off
Press the power button on the remote control or on the side of the unit to turn the CD player on or off. The digital display will illuminate upon power-on.
2. Loading and Playing a CD
- Gently slide the front panel upwards to open the CD compartment.
- Place a CD onto the spindle, ensuring it is seated correctly.
- Close the front panel by sliding it downwards.
- The CD player will automatically begin playback if a disc is detected. If not, press the Play/Pause button on the remote.
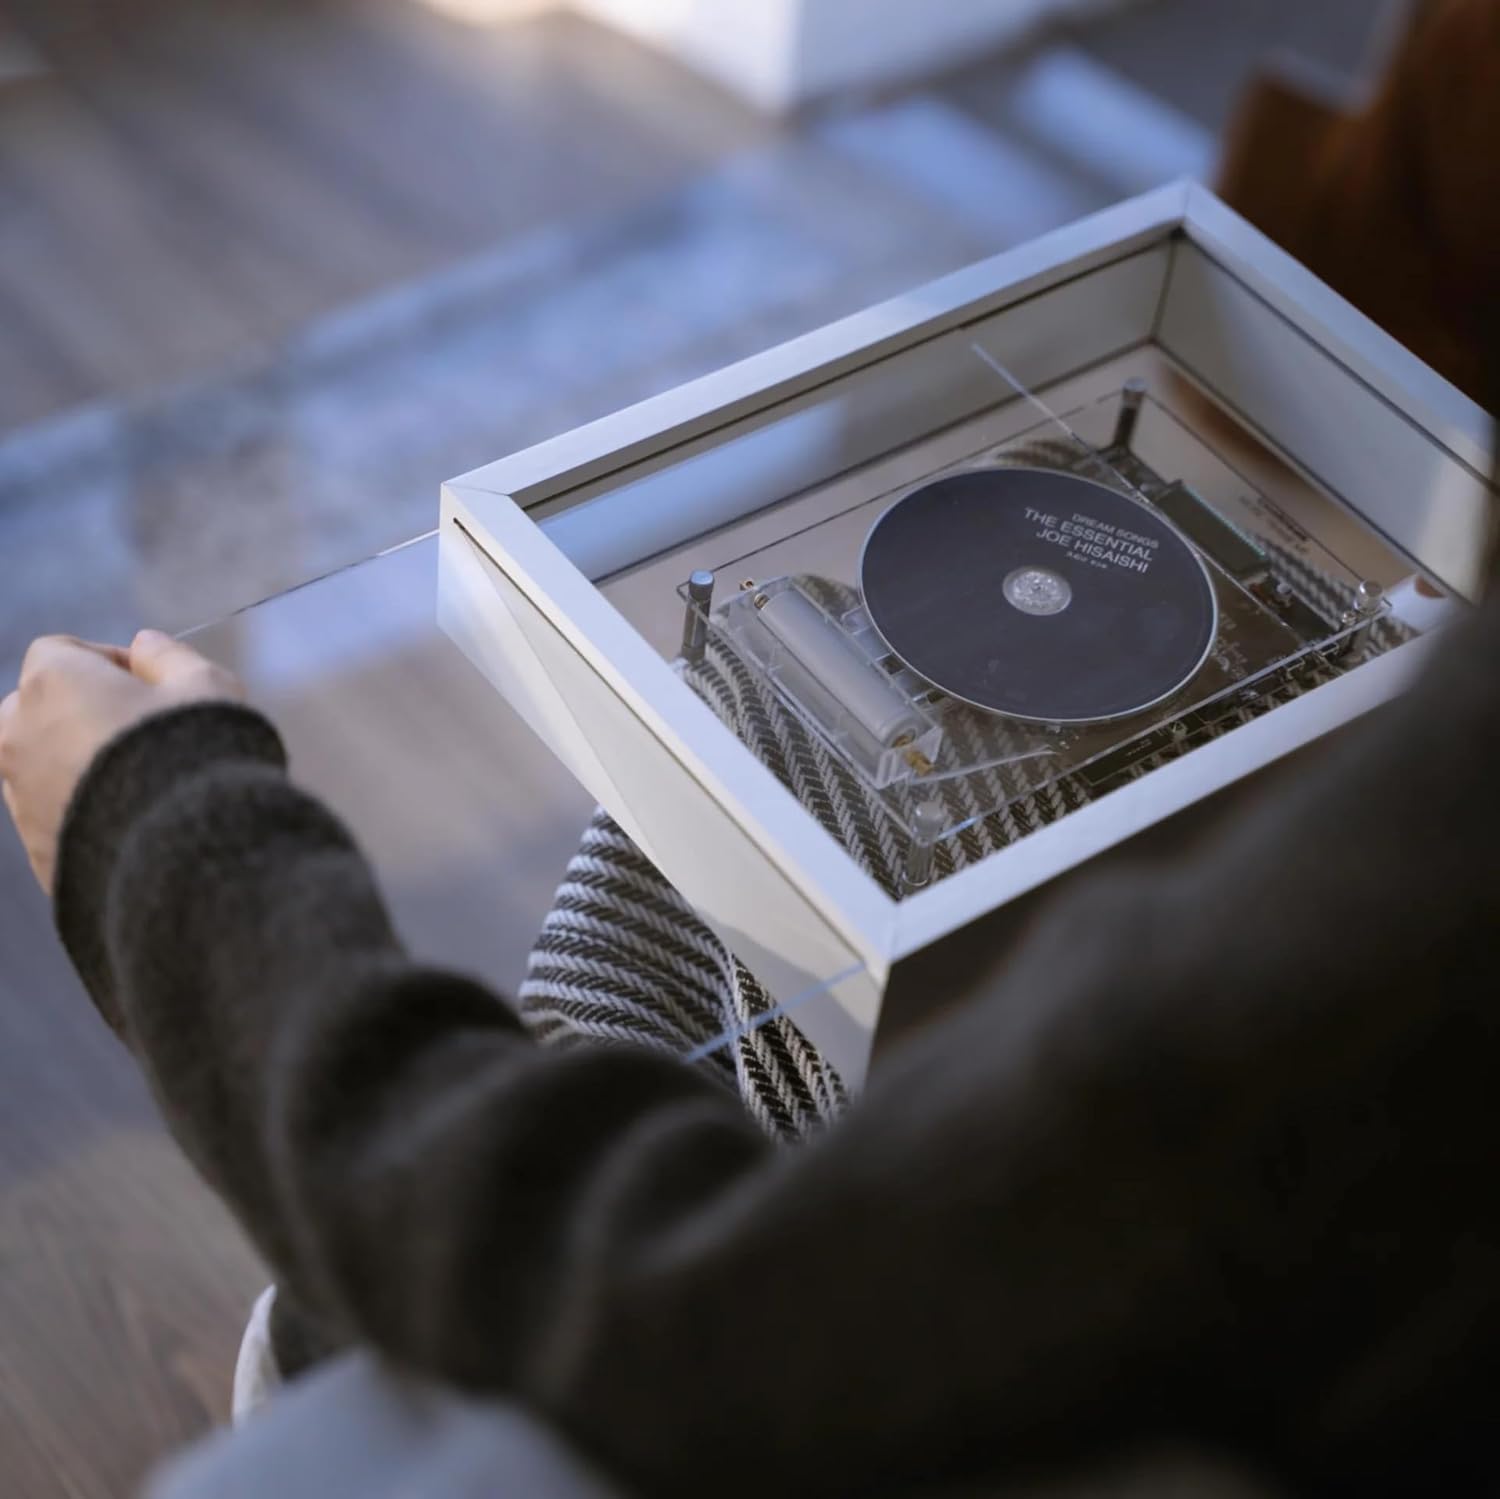
Image: A hand carefully placing a CD into the M1 player's transparent loading mechanism.
Video: Customizable Design Display. This video demonstrates the CD loading process and the player's aesthetic appeal.
3. Remote Control Functions
The included remote control provides full functionality for the CD player.
- Power: Turn the unit on/off.
- Pair: Initiate Bluetooth pairing mode.
- Play/Pause: Start or pause CD playback.
- Next/Previous Track: Skip to the next or previous track.
- Fast Forward/Rewind: Scan through the current track.
- Volume +/-: Adjust the output volume.
- A-B Repeat: Repeat a specific section of a track.

Image: The remote control for the M1 CD player, showing all available buttons and functions.
4. Bluetooth Pairing
The M1 supports Bluetooth 5.0 for wireless audio streaming to compatible speakers or headphones (up to 10 meters range, excluding Sonos models that do not support Bluetooth audio input).
- Ensure the M1 CD player is powered on.
- Press the "Pair" button on the remote control or on the unit. The Bluetooth indicator on the display will flash.
- Activate Bluetooth pairing mode on your external speaker or headphones.
- The M1 will automatically search for and connect to nearby Bluetooth devices. Once connected, the indicator will stop flashing.

Image: The M1's digital display showing track number and elapsed time, along with battery and Bluetooth indicators.
5. AUX Connectivity
For wired connections, use a 3.5mm AUX cable to connect the M1 to an external audio system. This provides a direct, high-quality audio output.
6. Supported Formats
The M1 CD player supports CD-DA, CD-R, MP3, and WMA formats, ensuring compatibility with a wide range of audio discs.
Video: M1 Product Features. This video highlights various features and operational aspects of the M1 CD player.
Maintenance
1. Cleaning
To maintain optimal performance and appearance, regularly clean the unit. Use a soft, dry microfiber cloth to wipe the transparent front panel and frame. Keep the CD lens and loading mechanism free of dust and debris. Avoid using abrasive cleaners or solvents.
2. Battery Care
The removable battery should be charged regularly, especially if the unit is not used for extended periods. If the battery life significantly diminishes over time, it may require replacement. Use only compatible 18650 batteries.
Troubleshooting
1. No Power
- Ensure the battery is correctly installed and fully charged.
- Verify the power button has been pressed firmly.
2. CD Not Playing / Skipping
- Check if the CD is clean and free of scratches or smudges.
- Ensure the CD is correctly seated on the spindle.
- Confirm the disc format is supported (CD-DA, CD-R, MP3, WMA).
3. Bluetooth Connection Issues
- Ensure the M1 is in pairing mode (flashing Bluetooth indicator).
- Verify your external device is in pairing mode and within 10 meters range.
- Note that some devices, like certain Sonos models, may not support Bluetooth audio input from third-party devices.
- Try restarting both the M1 and your Bluetooth device.
4. Remote Control Not Responding
- Ensure there are no obstructions between the remote and the player.
- Replace the remote control battery if necessary.
Specifications
| Product Dimensions | 9 x 2.52 x 12.52 inches |
| Item Weight | 4.86 pounds |
| Model Name | M1 |
| Brand | COOLGEEK |
| Connectivity Technology | Bluetooth 5.0, 3.5mm AUX |
| Supported Disc Formats | CD-DA, CD-R, MP3, WMA |
| Battery | 1 x 18650 battery (included) |
| Special Features | Transparent design, Wall-mount bracket included, Remote control |
Warranty and Support
For any questions regarding your COOLGEEK M1 Transparent CD Player, please contact customer support. We are committed to providing excellent after-sales service and will assist you with any product-related inquiries.
Refer to your purchase documentation for specific warranty details.


