1. Introduction
Thank you for choosing the DEFENTAC DF-1069 HD1080P Camera and 500 Lumens Pistol Light Combo. This device integrates a high-definition camera with a powerful tactical flashlight, designed for various applications. This manual provides detailed instructions for proper installation, operation, and maintenance to ensure optimal performance and longevity of your device.

Figure 1: Package Contents. The DEFENTAC DF-1069 device, USB charging/data cable, hex key for mounting, and the user manual.
2. Product Components and Overview
Familiarize yourself with the various parts of your DEFENTAC DF-1069 device.

Figure 2: Device Components (Side View). Key components include the Flashlight Switch, Charging/Data Port, Power Indicator, Mounting Bolt, Camera On/Off/Pause Switch, Camera Working Indicator, Camera Reset Button, and Microphone.
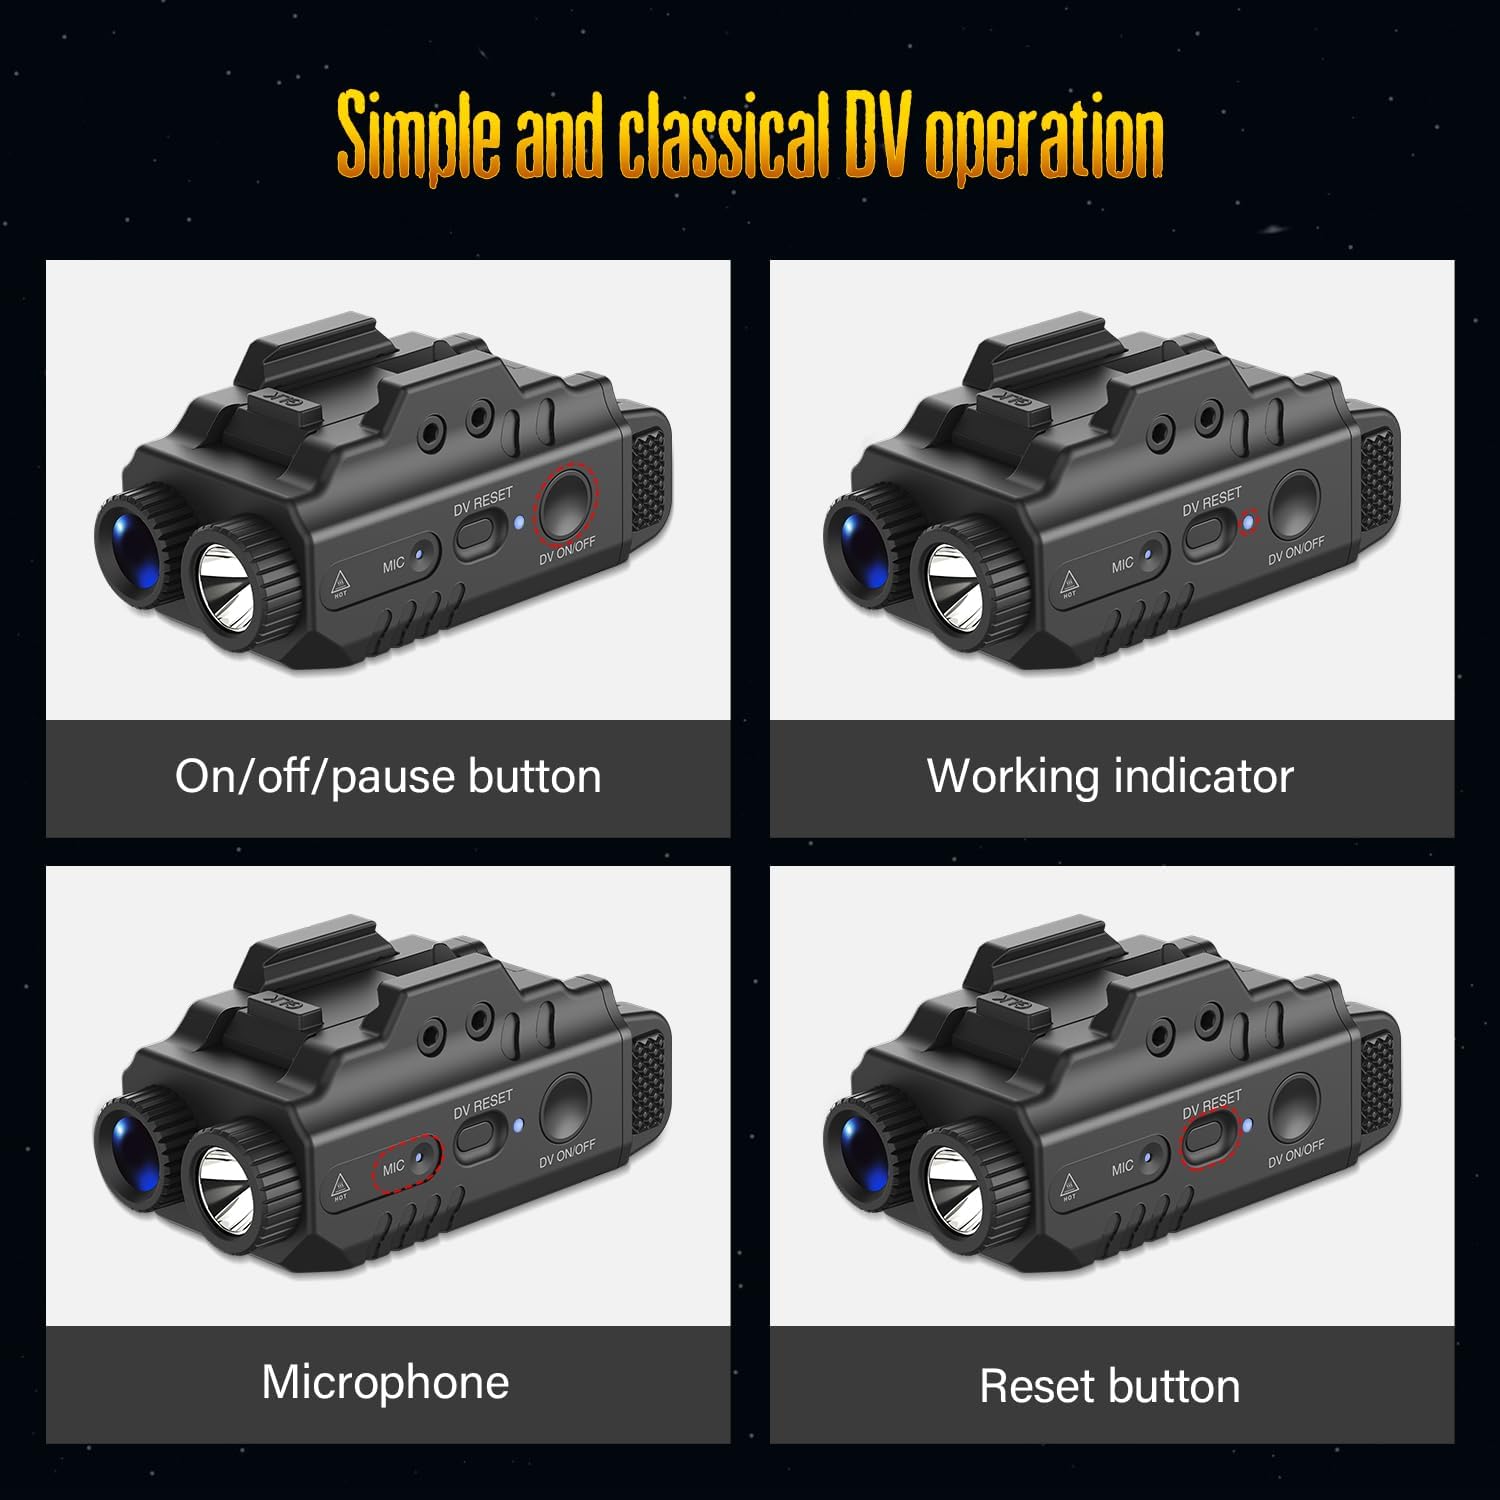
Figure 3: Key Control Elements. Detailed views of the On/off/pause button, Working indicator light, Microphone, and Reset button.
3. Specifications
- Flashlight Output: 500 Lumens (Max)
- Camera Resolution: HD 1080P
- Memory: Built-in 16GB (for video and voice recording)
- Audio: Integrated Microphone for voice recording
- Battery Runtime: Approximately 2 hours (Light only), 2.5 hours (Camera only)
- Weight: 56 grams
- Dimensions: Approximately 70 mm (Length) x 35 mm (Height)
- Mounting: Adjustable rail system
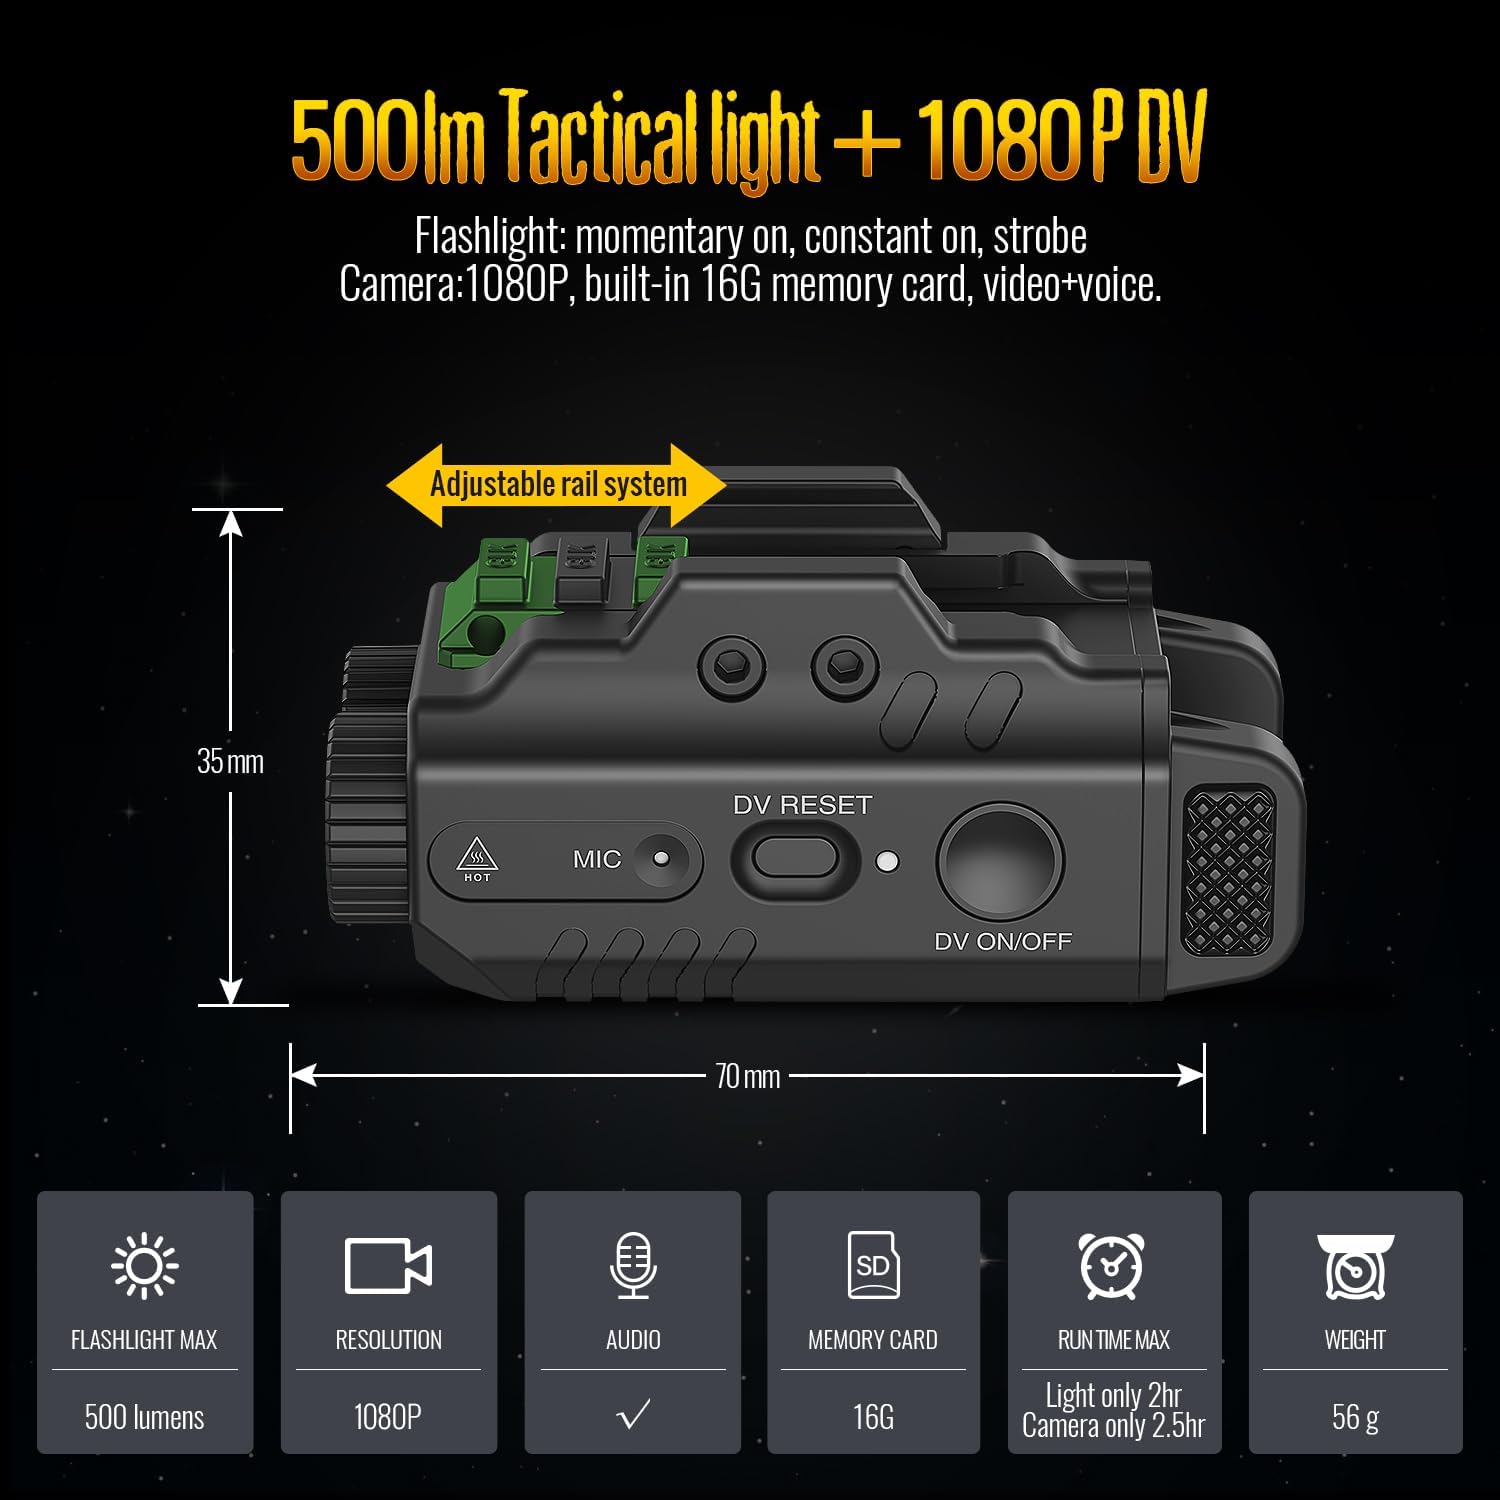
Figure 4: Product Specifications and Dimensions. Visual representation of key technical specifications and physical measurements.
4. Installation
- Identify Mounting Rail: Locate the accessory rail on your compatible equipment.
- Adjust Rail System: The DF-1069 features an adjustable rail system. Loosen the mounting bolt (refer to Figure 2) to adjust the position of the rail clamp.
- Attach Device: Slide the DF-1069 onto the accessory rail until it is securely seated.
- Secure Mounting Bolt: Tighten the mounting bolt using the provided hex key until the device is firmly attached and does not wobble. Do not overtighten.
5. Operation
5.1. Power On/Off
- To Power On: Press and hold the DV ON/OFF button (refer to Figure 2 and 3) for approximately 3 seconds until the camera working indicator illuminates.
- To Power Off: Press and hold the DV ON/OFF button for approximately 3 seconds until the camera working indicator turns off.
5.2. Flashlight Operation
The flashlight offers momentary on, constant on, and strobe modes.
- Momentary On: Press and hold the Flashlight Switch (refer to Figure 2). Release to turn off.
- Constant On: Quickly press and release the Flashlight Switch. Press again to cycle through modes or turn off.
- Strobe Mode: From Constant On, quickly double-press the Flashlight Switch. Press again to return to Constant On or turn off.
5.3. Camera Recording
The device supports video recording with integrated voice.
- Start Recording: With the device powered on, press the DV ON/OFF button briefly. The camera working indicator will flash to indicate recording is in progress.
- Pause Recording: During recording, press the DV ON/OFF button briefly to pause. The indicator will change its flashing pattern or become solid.
- Resume Recording: Press the DV ON/OFF button briefly again to resume recording.
- Stop Recording: Press and hold the DV ON/OFF button for approximately 3 seconds to stop recording and power off the device.
5.4. Operating Modes (Light and Video Combination)
The DF-1069 can operate in several modes:

Figure 5: Operational Modes. The device supports simultaneous Light and Video, Light Only (constant or strobe), and Video Only modes.
- Light and Video: Activate both the flashlight (constant on or strobe) and start camera recording as described above.
- Light Only: Operate the flashlight independently without activating the camera.
- Video Only: Operate the camera independently without activating the flashlight.
6. Charging and Data Transfer
6.1. Charging the Device
- Locate the Charging/Data Port (refer to Figure 2).
- Connect the provided USB cable to the device and to a standard USB power source (e.g., computer USB port, wall adapter).
- The Power Indicator light will show charging status. Refer to the indicator light behavior for full charge indication (typically solid light or off when fully charged).
6.2. Transferring Data
- Ensure the device is powered off.
- Connect the device to your computer using the provided USB cable via the Charging/Data Port.
- Your computer should recognize the device as a removable storage drive.
- Open the drive to access and transfer your recorded video and audio files.
- Safely eject the device from your computer before disconnecting the USB cable.
7. Maintenance
- Cleaning: Use a soft, dry cloth to clean the exterior of the device. Do not use abrasive cleaners or solvents.
- Lens Care: For the camera lens and flashlight lens, use a lens cleaning cloth specifically designed for optics.
- Storage: Store the device in a cool, dry place away from direct sunlight and extreme temperatures.
- Battery: For optimal battery life, charge the device regularly, even if not in frequent use. Avoid fully discharging the battery for extended periods.
8. Troubleshooting
| Problem | Possible Cause | Solution |
|---|---|---|
| Device does not power on. | Low battery. Device malfunction. | Charge the device fully. If problem persists, perform a reset. |
| Camera not recording. | Insufficient power. Memory full. | Ensure device is charged. Transfer files to clear memory. |
| Flashlight not working. | Low battery. Switch malfunction. | Charge the device. Ensure switch is pressed correctly. |
| Computer does not recognize device. | Incorrect connection. Device not powered off. Driver issue. | Ensure device is powered off before connecting. Try a different USB port or cable. |
| Device unresponsive. | Software glitch. | Press the DV RESET button (refer to Figure 2 and 3) using a small, pointed object (e.g., paperclip) to reset the device. |
9. Warranty and Support
DEFENTAC products are manufactured to high-quality standards. For specific warranty information, please refer to the warranty card included in your product packaging or contact DEFENTAC customer support. Keep your purchase receipt as proof of purchase.
For technical assistance or further inquiries, please visit the official DEFENTAC website or contact their customer service department.