1. Product Overview
The Thermalright TL-H12015B-S is a high-performance 120mm slim computer case fan designed for efficient cooling in various PC setups. With a 15mm thin profile, 1900 RPM speed, and 5V Addressable RGB (ARGB) lighting, this fan provides effective heat dissipation while maintaining low noise levels. It is suitable for both case airflow and CPU cooler applications, offering a versatile cooling solution for compact systems.

Image 1.1: The Thermalright TL-H12015B-S fan showcasing its 120mm size, 15mm thickness, and vibrant ARGB lighting.
Key Features:
- Compact Design: Measures 120x120x15mm, making it ideal for space-constrained systems such as Mini-ITX and Small Form Factor (SFF) cases.
- High Performance: Operates at up to 1900 RPM, delivering 56.36 CFM of airflow and 1.58mm H2O static pressure for effective cooling.
- Quiet Operation: Engineered with an 11-blade design and equipped with four soft shock-absorbing corner pads to reduce vibration noise, resulting in a noise level of ≤28.4 dBA.
- Vibrant ARGB Lighting: Features integrated 5V Addressable RGB lighting with atomizing fan blades, providing softer, customizable illumination that can be synchronized via compatible motherboard software.
- Durable Construction: Constructed from industrial-strength PBT+PC material and utilizes a long-lasting S-FDB (Fluid Dynamic Bearing) V2 for enhanced stability and extended operational lifespan.
- Versatile Application: Functions effectively as a chassis fan for general case airflow or can be paired with a CPU cooler to enhance processor heat dissipation.
2. Package Contents
Please verify that all components are present and in good condition upon opening the package.
- Thermalright TL-H12015B-S 120mm Slim ARGB Fan (x1)
- Mounting Screws (x4)
3. Installation Guide
Follow these steps to properly install your Thermalright TL-H12015B-S fan.
3.1. Prepare Your System
- Power off your computer and disconnect it from the power source.
- Open your computer case to access the internal components.
- Identify the desired mounting location for the fan (e.g., case fan mount, CPU cooler radiator). Ensure there is sufficient clearance, especially given the fan's 15mm slim profile.

Image 3.1: The 15mm slim design of the fan, highlighting its suitability for compact systems.
3.2. Mounting the Fan
- Position the fan in the chosen location, ensuring the airflow direction is correct for your cooling needs (typically intake or exhaust for case fans, or pushing/pulling air through a radiator).
- Align the fan's screw holes with the mounting points on your case or cooler.
- Secure the fan using the provided mounting screws. Do not overtighten.

Image 3.2: Examples of fan installation for case heat exhaust and air cooling applications.
3.3. Connecting the Cables
- PWM Fan Connector: Locate the 4-pin PWM fan header on your motherboard. Connect the fan's 4-pin cable to this header. This allows for automatic fan speed control based on system temperature.
- ARGB Lighting Connector: Locate a 5V 3-pin ARGB header on your motherboard. Connect the fan's ARGB cable to this header. Note: This fan supports 5V 3-pin ARGB only. Do NOT connect to a 12V 4-pin RGB header, as this may damage the fan or motherboard.
- Ensure all connections are secure.
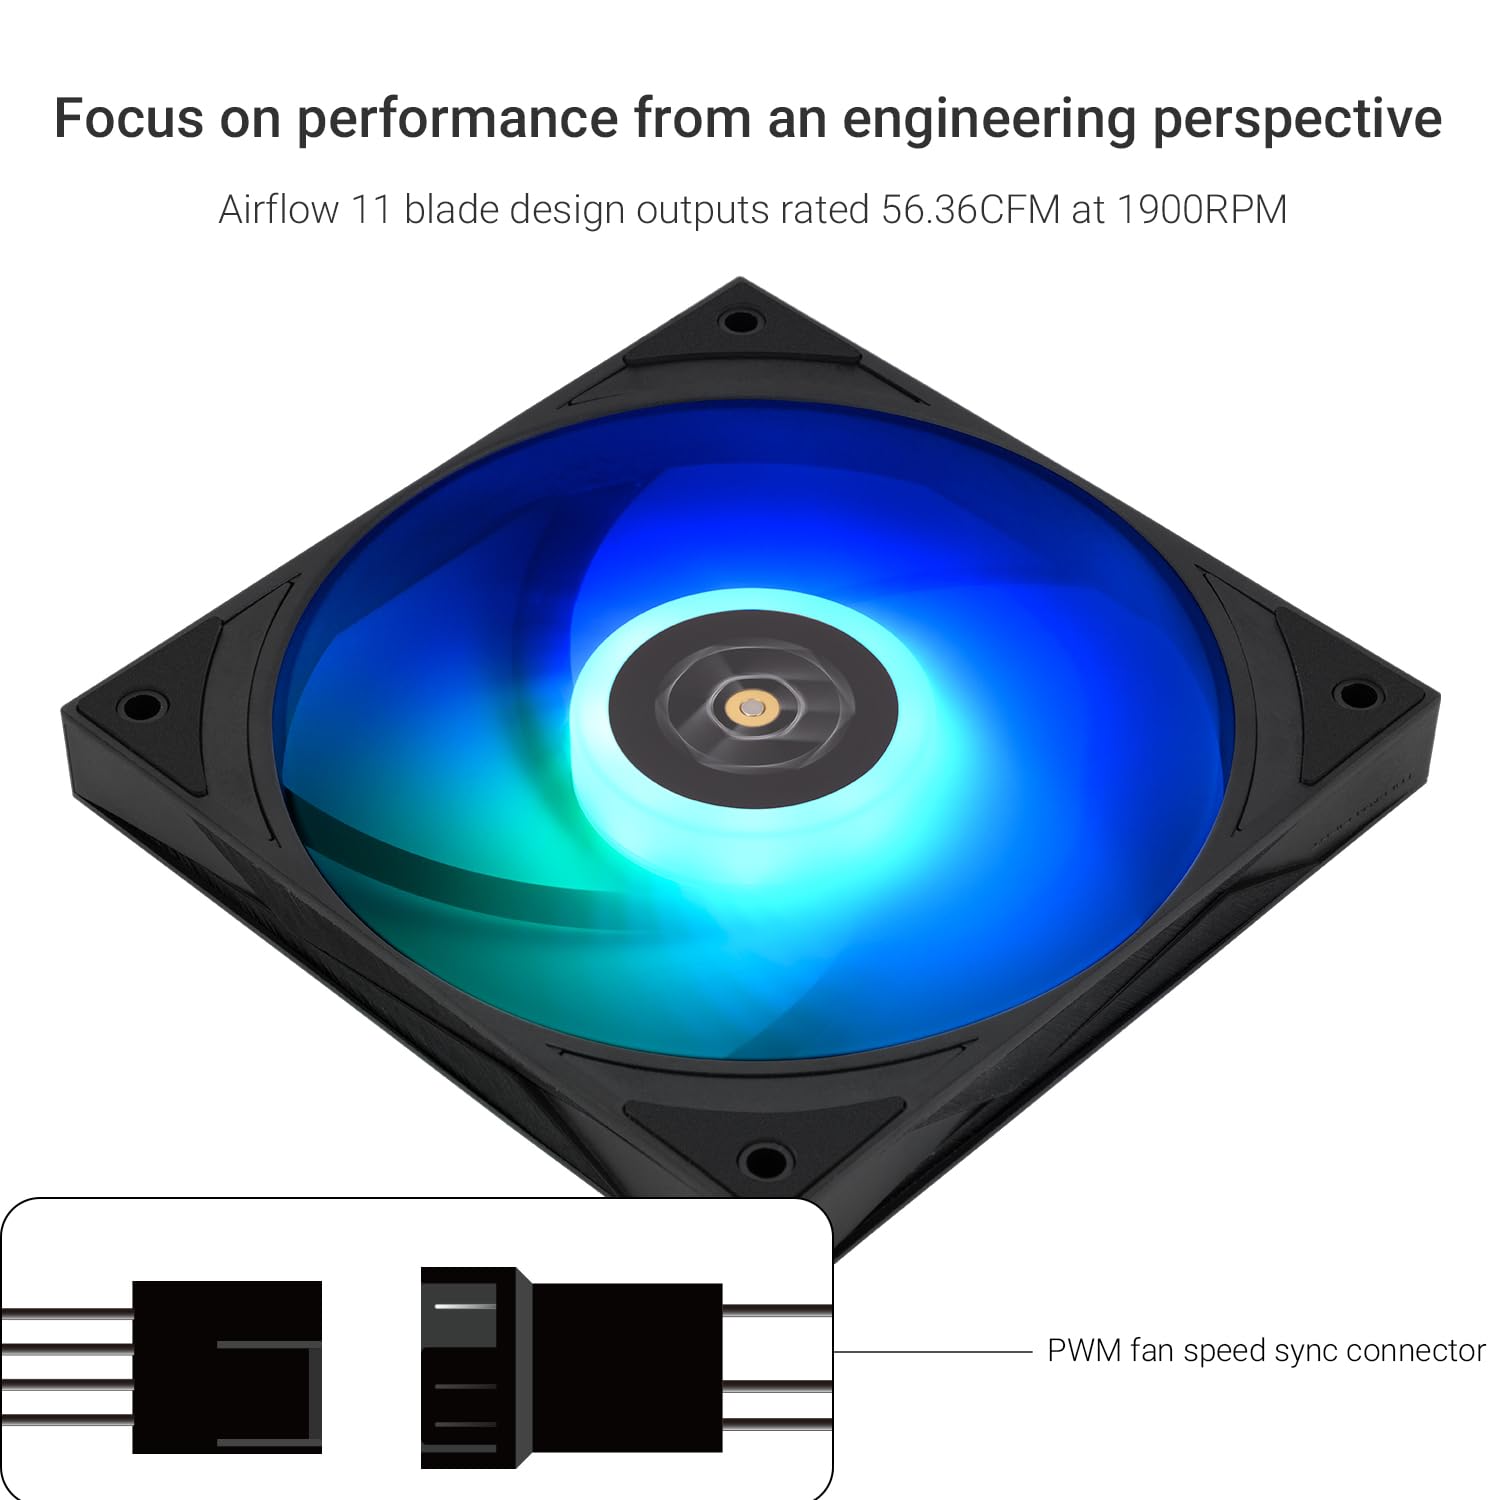
Image 3.3: Illustration of the PWM fan speed sync connector for motherboard connection.
4. Operating Instructions
Once installed, the Thermalright TL-H12015B-S fan operates in conjunction with your computer's power and motherboard settings.
4.1. Fan Speed Control (PWM)
- The fan's speed is automatically regulated by your motherboard's PWM (Pulse Width Modulation) function. This allows the fan to adjust its RPM based on CPU or system temperatures, providing optimal cooling when needed and quieter operation during lighter loads.
- You can typically configure fan speed curves through your motherboard's BIOS/UEFI settings or dedicated software provided by your motherboard manufacturer.
4.2. ARGB Lighting Control
- The 5V ARGB lighting can be controlled and synchronized using your motherboard's ARGB software (e.g., ASUS Aura Sync, MSI Mystic Light Sync, GIGABYTE RGB Fusion, ASRock Polychrome Sync).
- Refer to your motherboard's manual for specific instructions on how to access and customize ARGB lighting effects and colors.

Image 4.1: The fan displaying its customizable ARGB lighting, which can be controlled via motherboard software.
5. Maintenance
Regular maintenance helps ensure optimal performance and extends the lifespan of your fan.
5.1. Cleaning
- Periodically power off your computer and disconnect it from the power source.
- Use compressed air or a soft brush to gently remove dust accumulation from the fan blades and frame. Hold the fan blades to prevent them from spinning rapidly during cleaning, which can damage the bearing.
- Avoid using liquid cleaners directly on the fan.
5.2. Bearing Care
The Thermalright TL-H12015B-S fan is equipped with a maintenance-free S-FDB (Fluid Dynamic Bearing) V2. Do not attempt to disassemble the fan or lubricate the bearing, as this may void the warranty and cause damage.

Image 5.1: The S-FDB Bearing V2, designed for low-friction and low-noise operation, and the soft shock-absorbing corner pads.
6. Troubleshooting
If you encounter issues with your fan, refer to the following common troubleshooting steps.
6.1. Fan Not Spinning
- Check Power Connection: Ensure the 4-pin PWM cable is securely connected to the motherboard's fan header.
- BIOS Settings: Verify that the fan header is enabled in your motherboard's BIOS/UEFI settings and that the fan speed curve is not set to 0 RPM at low temperatures.
- Test Another Header: Try connecting the fan to a different fan header on the motherboard to rule out a faulty header.
6.2. No ARGB Lighting
- Check ARGB Connection: Ensure the 5V 3-pin ARGB cable is securely connected to the correct 5V 3-pin ARGB header on your motherboard. Confirm it is not connected to a 12V 4-pin RGB header.
- Motherboard Software: Open your motherboard's ARGB control software and ensure the ARGB header is enabled and lighting effects are configured.
- Power Cycle: Sometimes a full system shutdown and restart can resolve lighting issues.
6.3. Excessive Noise
- Check Mounting: Ensure the fan is securely mounted and that screws are not overtightened. Loose mounting can cause vibrations.
- Obstructions: Verify that no cables or other components are touching the fan blades.
- Dust Buildup: Clean the fan blades as described in the Maintenance section.
- Fan Speed: Adjust the fan speed curve in your motherboard's BIOS/UEFI or software to a lower RPM if noise is a concern and temperatures allow.
7. Technical Specifications
Detailed specifications for the Thermalright TL-H12015B-S fan.
| Feature | Specification |
|---|---|
| Model | TL-H12015B-S |
| Dimensions | 120mm (L) x 120mm (W) x 15mm (H) |
| Rotational Speed | 1900 RPM ±10% |
| Airflow Capacity | 56.36 CFM (MAX) |
| Air Pressure | 1.58 mm H2O (MAX) |
| Noise Level | ≤28.4 dBA |
| Power Connector | 4-Pin PWM |
| ARGB Connector | 5V 3-Pin ARGB |
| Operating Voltage | 12 Volts (DC) |
| Current | 0.25 A |
| Wattage | 3 Watts |
| Bearing Type | S-FDB (Fluid Dynamic Bearing) V2 |
| Material | Polybutylene Terephthalate (PBT), Polycarbonate (PC) |
| Item Weight | 5.3 ounces |

Image 7.1: Detailed dimensions of the TL-H12015B-S fan, including its 120mm length, 120mm width, and 15mm thickness.
8. Warranty and Support
8.1. Warranty Information
Thermalright products are manufactured to high quality standards. For specific warranty terms and conditions, please refer to the warranty card included with your product or visit the official Thermalright website. Keep your purchase receipt as proof of purchase for warranty claims.
8.2. Customer Support
If you have any questions, require technical assistance, or need to report an issue, please contact Thermalright customer support through their official website. Provide your product model number (TL-H12015B-S) and a detailed description of your inquiry for efficient service.


