1. Introduction
This manual provides detailed instructions for the installation, operation, and maintenance of your mGYDY JN GD02 Smart LCD Display for electric bicycles. Please read this manual thoroughly before using the product to ensure proper function and safety.
2. Product Overview
2.1 Key Features
- Large Display: The LCD-GD02 features a spacious screen that provides clear visibility of important information, making it easy to monitor your ride at a glance.
- User-Friendly Interface: Designed for simplicity, the intuitive controls allow for effortless navigation through the various functions, enhancing your riding experience.
- Smart Chip Technology: Equipped with an advanced smart chip, this device offers precise responsiveness and stable performance, ensuring reliable operation during your adventures.
- Versatile Compatibility: Specifically designed to work with controllers that match the No. 2 OMD communication protocol, making it a perfect upgrade for your electric scooter or mountain bike.
- Enduring Connection: The SM connector ensures a secure and reliable connection, minimizing the risk of disconnection during use and providing peace of mind on every journey.
2.2 Components
The package includes the following items:
- 1x GD02 Ebike Display
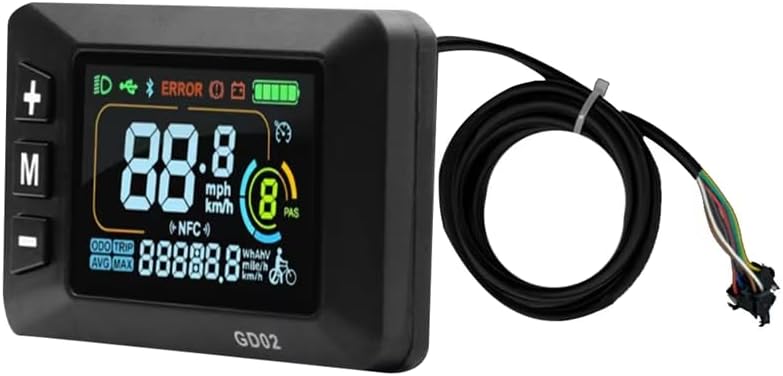
Figure 1: mGYDY JN GD02 Smart LCD Display. This image shows the front view of the display unit with its integrated cable and SM connector.
3. Specifications
| Specification | Value |
|---|---|
| Product Name | GD02 LZD display |
| Material | Plastic (ABS) |
| Color | Black |
| Dimensions (LxWxH) | 82.02mm x 48.02mm x 22.25mm (approx. 4.45" x 2.99" x 2.99") |
| Item Weight | 135.4g (approx. 0.22 Pounds) |
| Core Wire | 5pin + 2pin |
| Connector Type | SM Connector (Ordinary Joint) |
| Cable Length | 1690mm (66.5 - 67 inches) including connector |
| Working Voltage | 24V-60V |
| Working Temperature | -20°C to 60°C |
| Communication Protocol | No. 2 OMD |
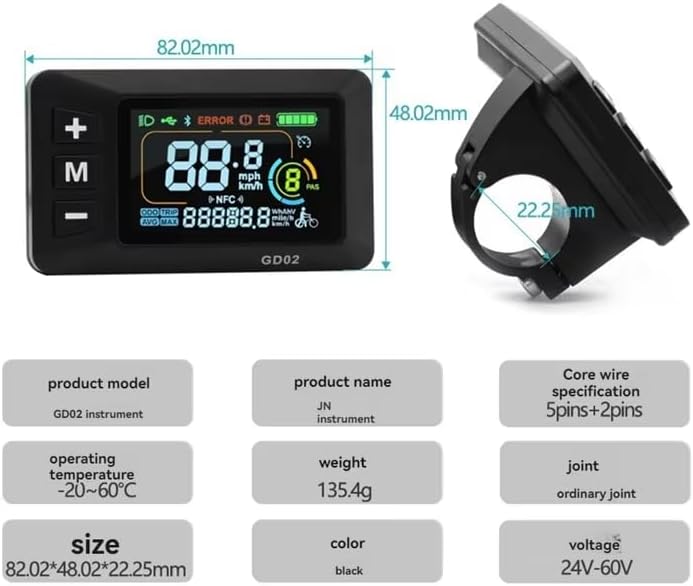
Figure 2: GD02 Display Dimensions. This image illustrates the physical dimensions of the display unit and its integrated handlebar mounting bracket.
4. Setup and Installation
4.1 Mounting the Display
- Identify a suitable location on your electric bicycle's handlebar, typically near the left grip, that allows for clear visibility and easy access to buttons.
- Loosen the screw on the display's mounting bracket.
- Position the display on the handlebar and tighten the screw securely. Ensure the display is stable and does not rotate freely.
4.2 Connecting the Cables
The GD02 display uses a 5-pin main connector and a 2-pin auxiliary connector (for lamp wire) with SM type plugs.
- Locate the corresponding 5-pin and 2-pin SM connectors on your electric bicycle's controller wiring harness.
- Align the pins carefully and firmly push the display's 5-pin male connector into the female connector on the controller harness until it clicks into place.
- If your e-bike system supports it, connect the display's 2-pin lamp wire connector to the appropriate auxiliary port on your controller or wiring harness.
- Ensure all connections are secure to prevent accidental disconnection during operation.

Figure 3: Product Plugs. This image shows the GD02 display, its integrated cable, and a close-up of the 5-pin SM connector, highlighting the connection points.
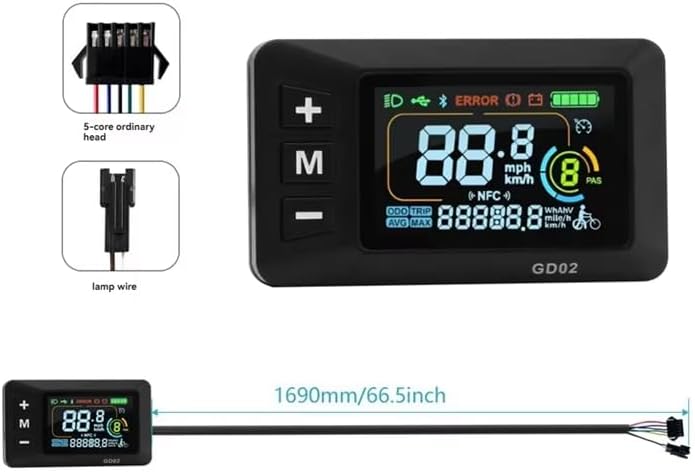
Figure 4: Connector Details. This image provides a closer look at the 5-core main connector and the separate lamp wire connector, along with the overall cable length.
5. Operating Instructions
5.1 Display Interface Overview
The GD02 display provides essential riding information at a glance. Refer to the image below for an explanation of the main display areas.

Figure 5: Cycling Data Display. This image highlights the key data points on the GD02 screen: Speed Display, Battery Display, Gear Display, and Mileage Display.
- Speed Display: Shows current riding speed in mph or km/h.
- Battery Display: Indicates the remaining battery charge level.
- Gear Display (PAS Level): Shows the current pedal-assist level (e.g., 1-9).
- Mileage Display: Can show Odometer (total distance), Trip distance, Average speed, or Maximum speed.
- Error Indicator: An 'ERROR' icon will illuminate if a system fault is detected.
- Headlight Indicator: An icon will show when the headlights are active.
5.2 Button Functions
The display features three buttons: '+', 'M' (Mode), and '-'.
- Power On/Off: Press and hold the 'M' button to turn the display on or off.
- Change PAS Level: Use the '+' and '-' buttons to increase or decrease the pedal-assist level.
- Cycle Display Modes: Short press the 'M' button to cycle through different data displays (e.g., Odometer, Trip, AVG Speed, MAX Speed).
- Headlight Control: (Functionality may vary based on e-bike controller) A long press of the '+' button might activate/deactivate headlights.

Figure 6: Display in Use. This image shows the GD02 display mounted on an electric bicycle handlebar, illustrating its appearance during operation.
6. Maintenance
To ensure the longevity and optimal performance of your GD02 display, follow these maintenance guidelines:
- Cleaning: Wipe the display screen and body with a soft, damp cloth. Avoid using abrasive cleaners or solvents that could damage the plastic or screen.
- Environmental Conditions: Avoid exposing the display to extreme temperatures outside its operating range (-20°C to 60°C) or prolonged direct sunlight when not in use.
- Water Exposure: While designed for outdoor use, avoid submerging the display in water or exposing it to high-pressure water jets.
- Cable Inspection: Periodically check the cables and connectors for any signs of wear, damage, or loose connections.
7. Troubleshooting
If you encounter issues with your GD02 display, refer to the following common problems and solutions:
- Display Does Not Turn On:
- Ensure the battery of your e-bike is charged.
- Check all cable connections, especially the main 5-pin connector, to ensure they are securely seated.
- Verify that the e-bike's main power switch (if applicable) is turned on.
- Display Shows 'ERROR' Icon:
- An 'ERROR' icon indicates a system fault. Consult your e-bike's main controller manual for specific error code interpretations, as the GD02 display typically mirrors these.
- Common causes include motor, controller, or sensor issues.
- Inaccurate Speed/Mileage Readings:
- Ensure the wheel size setting (if configurable via the controller) is correct for your bicycle.
- Check the speed sensor and its magnet for proper alignment and function.
- Buttons Not Responding:
- Ensure the display is powered on.
- Gently clean around the buttons to remove any dirt or debris.
- If the issue persists, a loose internal connection or component failure may be present.
For issues not covered here, or if troubleshooting steps do not resolve the problem, please contact the seller or a qualified e-bike technician.
8. Warranty and Support
8.1 Warranty Information
The mGYDY JN GD02 Smart LCD Display comes with a 1-Year Manufacturer Warranty. This warranty covers defects in materials and workmanship under normal use. It does not cover damage caused by misuse, accidents, unauthorized modifications, or improper installation.
8.2 Customer Support
For technical assistance, warranty claims, or any questions regarding your mGYDY JN GD02 display, please contact the seller or retailer from whom you purchased the product. Please have your purchase information and product model number (GD02) available when contacting support.
