
1. Introduction
This manual provides essential information for the proper installation, operation, and maintenance of your INJORA INJS480 Coreless Micro Servo. Designed for 1/24 scale RC crawlers, particularly the Axial SCX24, this servo offers enhanced performance and durability. Please read these instructions carefully before use to ensure optimal performance and longevity of your product.
2. Package Contents
Verify that all items listed below are included in your package:
- 1 x INJORA INJS480 Coreless Micro Servo
- 1 x 15T Servo Horn

Image 2.1: The INJORA INJS480 Coreless Micro Servo shown with its included 15T servo horn.
3. Specifications
The following table details the technical specifications of the INJORA INJS480 Coreless Micro Servo:
| Parameter | Value | Parameter | Value |
|---|---|---|---|
| Part Number | INJS480 | Operating Voltage | 4.8V-6V |
| Torque (4.8V) | 2.5kg.cm | Speed (4.8V) | 0.069"/60° |
| Torque (6V) | 3.5kg.cm | Speed (6V) | 0.055"/60° |
| RC Angle | 90°±5 | 500-2500µs Angle | 180°± 5 |
| Motor Type | Coreless | Gears | Metal |
| Spline | Φ3.9 15T | Bearing | Ball bearings |
| Size | 21.2 x 11.4 x 20.2mm | Weight | 9.8g |

Image 3.1: Detailed dimensions and specifications of the INJORA INJS480 Micro Servo.
4. Features
- All-Aluminum Case: Features a robust and durable aluminum housing that provides excellent heat dissipation, contributing to the servo's longevity.
- Coreless Motor: Equipped with a coreless motor, this servo delivers faster response times, smoother operation, and enhanced reliability compared to traditional brushed motors.
- High Performance: Offers increased speed and torque, resulting in more precise and powerful steering control for your RC vehicle.
- Stock AS-1 Dimensions Match: Designed to perfectly fit the stock servo mount of the Axial SCX24, and is also compatible with ES08MA II and INS012G mounts for versatile installation.
5. Setup and Installation
Follow these general steps for installing the INJORA INJS480 Coreless Micro Servo into your 1/24 Axial SCX24 RC Crawler. Specific steps may vary slightly depending on your vehicle's configuration.
- Prepare the Vehicle: Disconnect the battery from your RC crawler. Remove the body shell to access the chassis and existing servo.
- Remove Old Servo (if applicable): Carefully disconnect the old servo's wire from the receiver and unmount it from the chassis.
- Attach Servo Horn: Secure the included 15T servo horn to the output shaft of the INJS480 servo. Ensure it is centered before tightening.
- Mount the New Servo: Install the INJS480 servo into the designated servo mount on your SCX24 chassis. The servo is designed to match stock AS-1 dimensions for a direct fit. Secure it using appropriate screws.
- Connect to Receiver: Plug the servo's connector into the steering channel (usually Channel 1) on your RC receiver. Ensure the polarity is correct (signal, positive, negative).
- Test and Adjust: Reconnect the battery and power on your RC system. Test the steering function. If the servo is not centered or moves in the wrong direction, adjust your transmitter's trim and reverse settings as needed.

Image 5.1: The INJORA INJS480 Micro Servo mounted within an Axial SCX24 RC crawler chassis.
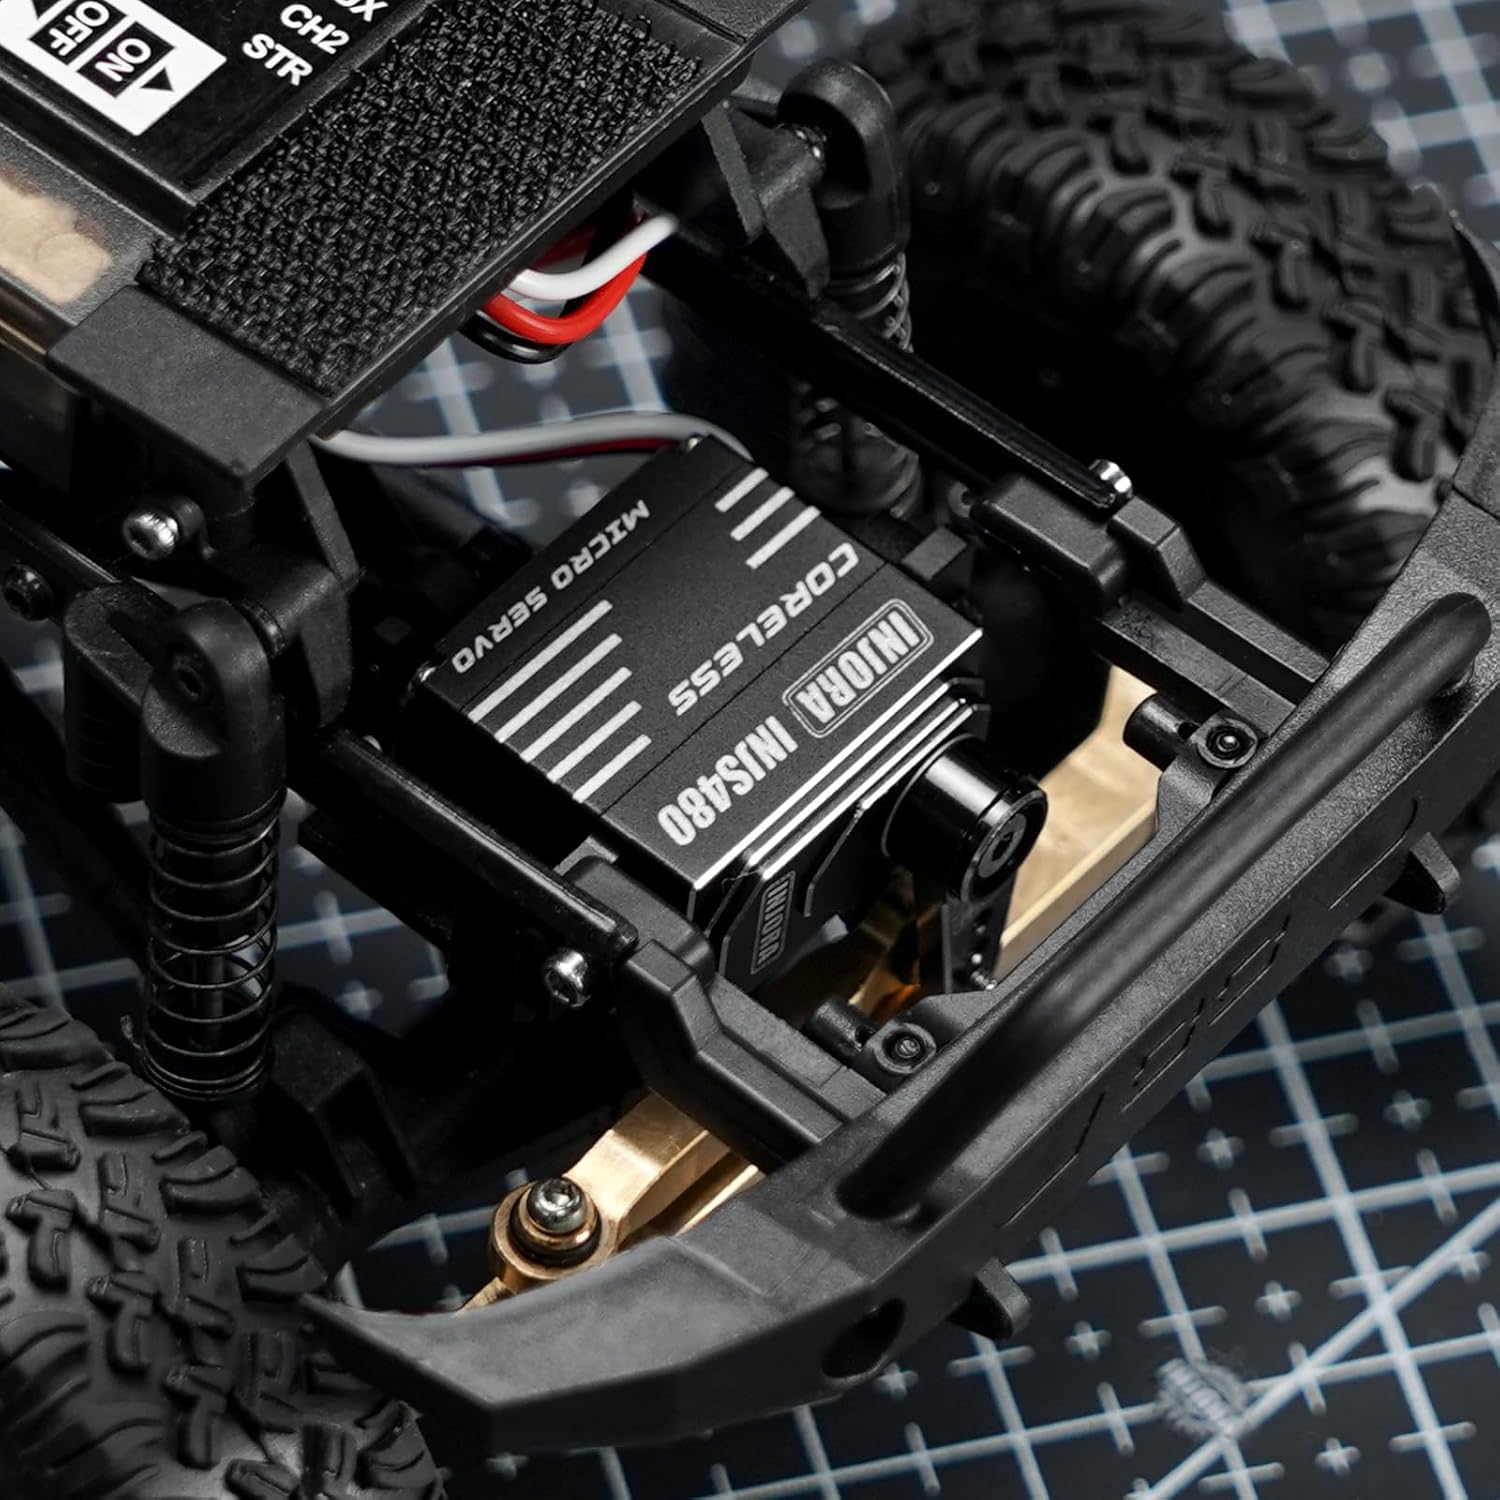
Image 5.2: A closer view of the INJS480 servo installation, highlighting its compact fit and wiring.
Installation Video Guide
Video 5.1: An official INJORA video demonstrating the unboxing and installation of the INJS480 Coreless Micro Servo in an Axial SCX24 RC crawler.
6. Operating Instructions
Once installed and properly calibrated, the INJORA INJS480 Coreless Micro Servo operates in conjunction with your RC transmitter and receiver to control the steering of your vehicle. Ensure your transmitter is powered on before connecting the vehicle's battery.
- Power On Sequence: Always turn on your RC transmitter first, then connect the battery to your RC vehicle.
- Steering Control: Use the steering wheel or stick on your transmitter to control the servo's movement, which in turn steers your RC crawler.
- Power Off Sequence: Disconnect the vehicle's battery first, then turn off your RC transmitter.
7. Maintenance
Proper maintenance will extend the lifespan and performance of your servo:
- Keep Clean: Regularly inspect the servo for dirt, dust, or debris. Use a soft brush or compressed air to clean the exterior.
- Check Connections: Ensure all wiring connections to the receiver are secure and free from damage.
- Avoid Overloading: Do not subject the servo to excessive force or continuous stalling, as this can lead to overheating and damage.
- Inspect Gears: Periodically check the metal gears for any signs of wear or damage. While durable, extreme impacts can affect them.
8. Troubleshooting
If you encounter issues with your INJORA INJS480 servo, refer to the following common problems and solutions:
- Servo Not Responding:
- Check all wiring connections to ensure they are secure and correctly plugged into the receiver.
- Verify that the receiver and transmitter are powered on and properly bound.
- Ensure the vehicle's battery is charged and providing adequate power.
- Test with another servo or receiver if available to isolate the problem.
- Erratic or Weak Movement:
- Check for low battery voltage in the vehicle or transmitter.
- Inspect for any physical obstructions preventing the servo from moving freely.
- Ensure the servo horn is securely attached and not slipping.
- Check for damage to the servo gears or internal components.
- Servo Overheating:
- Reduce continuous load on the servo.
- Ensure proper ventilation around the servo.
- Verify that the servo is not binding or encountering excessive resistance during operation.
9. Warranty and Support
For warranty information or technical support, please refer to the official INJORA website or contact their customer service directly. Keep your purchase receipt as proof of purchase.