
1. Safety Information
Please read and understand all safety instructions before operating this laser level. Failure to follow these instructions may result in laser radiation exposure, electric shock, fire, and/or serious injury.
1.1 Laser Safety
- This product is a Class II laser device. Do not stare directly into the laser beam.
- Avoid direct eye exposure to the laser beam.
- Do not disassemble the laser level. Repairs should only be performed by authorized service personnel.
- Do not operate the laser level in explosive atmospheres, such as in the presence of flammable liquids, gases, or dust.
- Keep the laser level out of reach of children.
1.2 Battery Safety
- Use only the specified rechargeable lithium-ion batteries and charger provided with the device.
- Do not expose batteries to high temperatures or direct sunlight.
- Do not short-circuit the battery terminals.
- Dispose of batteries properly according to local regulations.
2. Package Contents
Verify that all items are present and in good condition upon opening the package:
- Alloyman 16-Line 4D Green Laser Level
- 95 cm Tripod
- Magnetic Bracket
- 2 x 4.0V Lithium-ion Rechargeable Batteries
- Type-C Charger
- Remote Control
- Laser Target Plate
3. Product Overview
The Alloyman 16-Line 4D Green Laser Level is designed for precise alignment in various indoor and outdoor applications. It features four 360-degree laser lines, offering comprehensive coverage for leveling, plumbing, and squaring tasks.

Image: The Alloyman 16-Line 4D Green Laser Level shown with its tripod, magnetic bracket, batteries, charger, remote control, and target plate.
3.1 Key Features
- 4x360° Green Laser Lines: Provides two horizontal and two vertical 360° laser planes for full room coverage.
- High Precision: Vertical and horizontal accuracy of ±1 mm/5 m.
- Self-Leveling Mode: Automatically levels within ±3° tilt.
- Manual Mode: Allows projection of laser lines at any angle.
- Extended Working Range: Up to 45 meters in diameter, with remote control capability.
- Long-Lasting Power: Equipped with 2 x 3600 mAh lithium-ion batteries for up to 12 hours of continuous operation.
- Durable Design: IP54 waterproof and dustproof rating, drop resistance up to 1.2m.
- Versatile Mounting: Includes a 95 cm tripod and a 360° magnetic bracket.
Video: An overview of the Alloyman 4x360° Laser Level, demonstrating its features, accessories, and various operating modes including self-leveling, manual mode, and remote control functionality. It highlights the green laser lines, tripod, magnetic bracket, and durability features.
4. Setup
4.1 Battery Installation and Charging
- Open the battery compartment cover on the side of the laser level.
- Insert the 4.0V lithium-ion battery, ensuring correct polarity. Close the cover securely.
- To charge the battery, connect the Type-C charger to the charging port on the battery or the device, then plug the charger into a power outlet. The battery indicator will show charging status.

Image: The laser level connected to its Type-C charger, with a spare battery also shown. This illustrates the charging process and battery capacity of 3600 mAh, providing up to 12 hours of operation.
4.2 Mounting the Laser Level
The laser level can be mounted using the included tripod or magnetic bracket.
Using the Tripod:
- Extend the tripod legs to the desired height. The tripod can extend up to 95 cm.
- Secure the laser level onto the tripod's 1/4" (6.35 mm) universal thread.
- Adjust the tripod head to achieve the approximate desired angle.

Image: The portable tripod shown at different heights (43 cm, 60 cm, 95 cm), demonstrating its adjustable nature for various home use scenarios. Details of the rotating handle, locking knob, adjustable buckle, and anti-slip feet are also visible.
Using the Magnetic Bracket:
- Attach the magnetic bracket to a metallic surface.
- Mount the laser level onto the bracket's 1/4" (6.35 mm) universal thread.
- The 360° rotating feature of the bracket allows for flexible positioning.

Image: The laser level demonstrating its dual mounting options: a 360° magnetic bracket for attaching to metal surfaces and a universal 1/4" (6.35 mm) thread for tripod mounting. This highlights its versatility for different applications.
5. Operating Instructions
5.1 Powering On/Off
Slide the ON/OFF switch to the 'ON' position to power on the device. Slide it to 'OFF' to power off.
5.2 Self-Leveling Mode
When the pendulum is unlocked (ON position), the device automatically enters self-leveling mode. It will self-level within a 3° range. If the tilt exceeds 3°, the laser lines will flash and an audible alarm will sound, indicating that the device is out of level. Adjust the device's position until it is within the self-leveling range.

Image: A person hanging a picture on a wall, guided by the green laser lines from the Alloyman laser level in self-leveling mode. The image emphasizes the device's ±3° leveling compensation range.
5.3 Manual Mode
To activate manual mode, long-press the mode button (often labeled 'M' or a similar icon) while the device is powered on. In manual mode, the laser lines can be projected at any desired angle, which is useful for tasks like installing handrails on stairs or other non-level applications. The laser lines will not flash in manual mode, even if the device is tilted beyond 3°.

Image: The laser level projecting an angled line along a staircase, demonstrating its manual mode capability. The image also shows a hand pressing the button to switch modes, indicating how to activate this feature.
5.4 Switching Laser Lines
Use the 'V' button to activate/deactivate vertical laser lines and the 'H' button to activate/deactivate horizontal laser lines. You can combine different lines as needed for your project.

Image: Diagrams illustrating the various 4x360° laser line configurations, including vertical (V), horizontal (H), and combinations like H+H, V+V, V+V+H, and V+V+H+H. This shows the multi-mode functionality of the laser level.
5.5 Remote Control Operation
The included remote control allows you to switch laser lines and modes from a distance, up to 33 feet (10 meters), enhancing convenience for large projects.
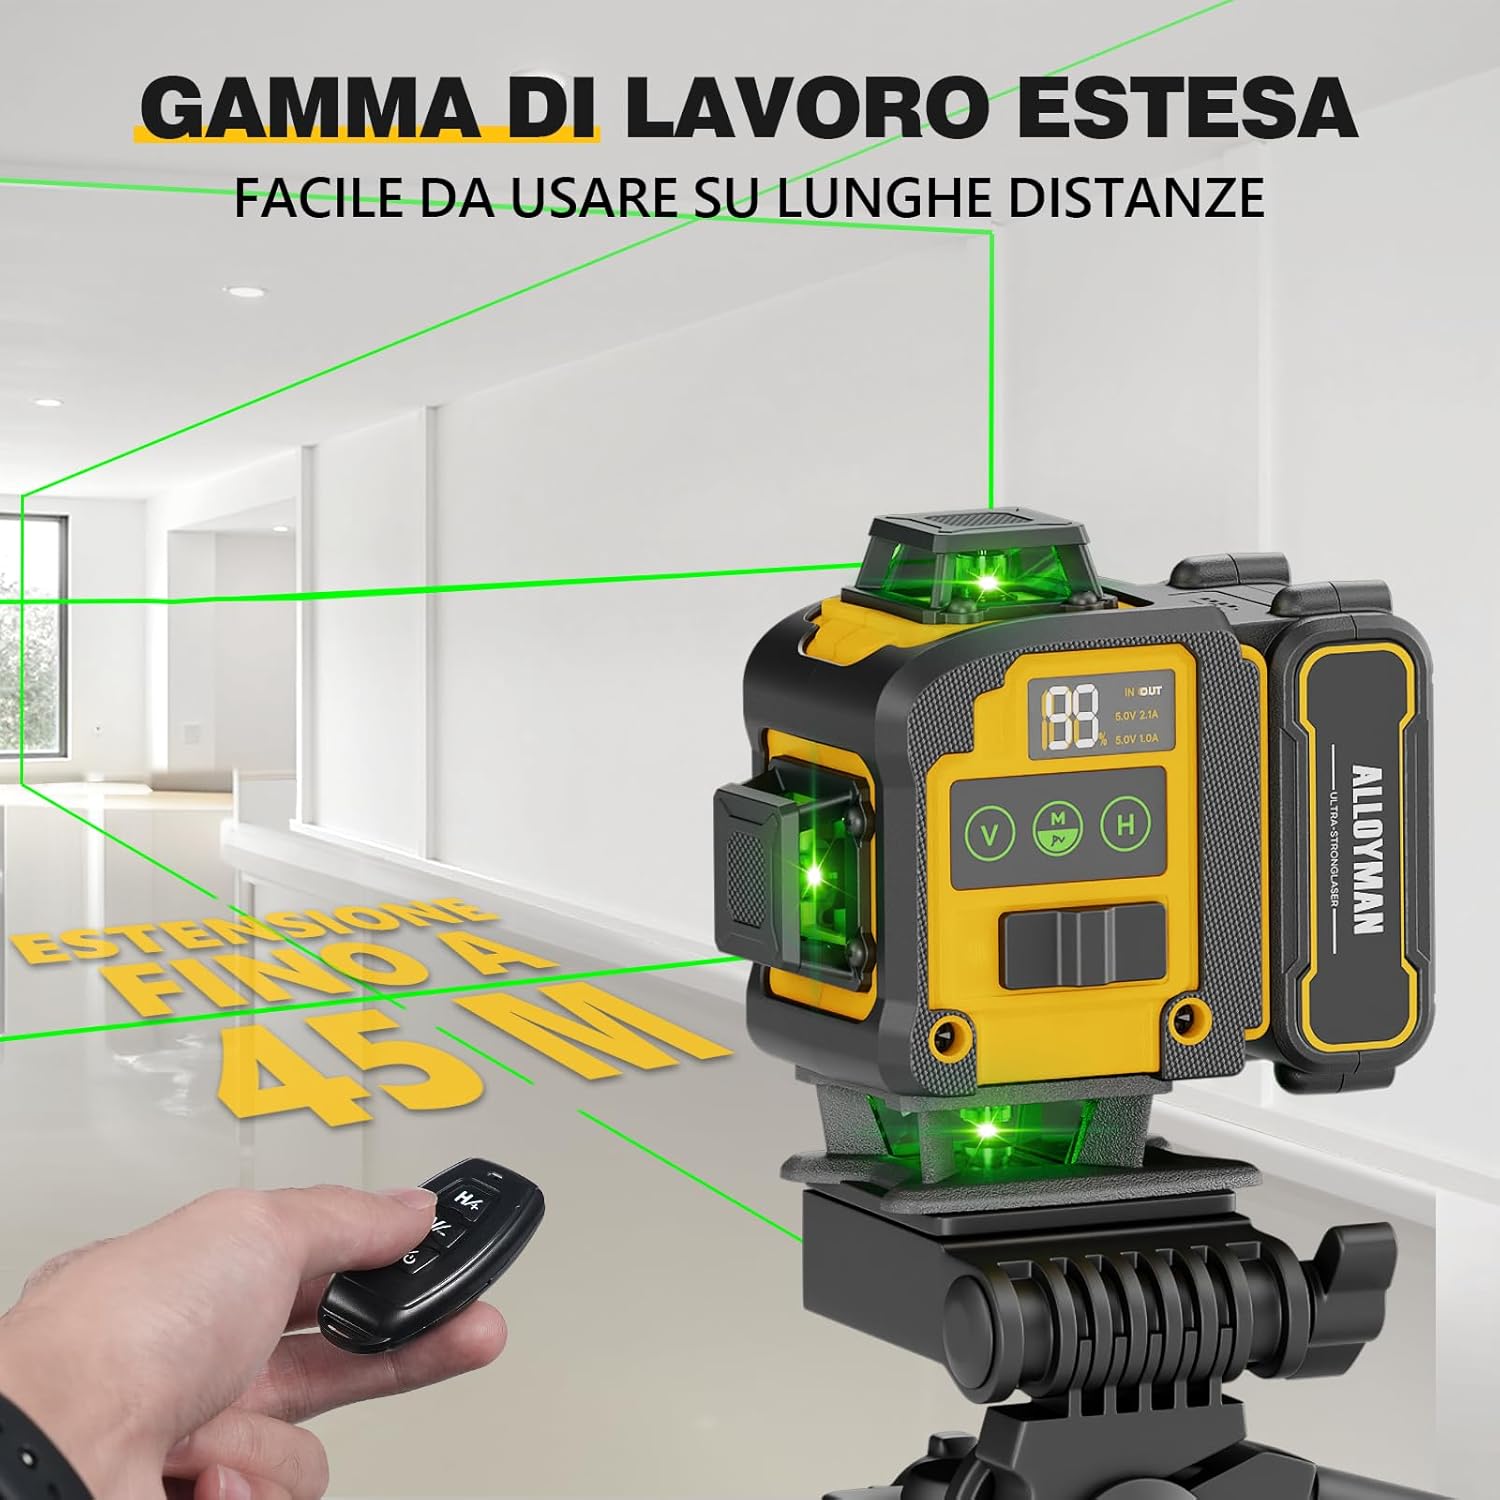
Image: The laser level projecting green lines across a large room, with a hand holding the remote control. This demonstrates the extended working range of up to 45 meters and the convenience of remote operation.
5.6 Pulse Mode
The device features a pulse emission mode, which can be activated for use with a laser receiver (not included) to extend the working range and improve visibility in bright conditions.
6. Maintenance
- Cleaning: Use a soft, damp cloth to clean the device. Do not use abrasive cleaners or solvents.
- Storage: Store the laser level in its carrying case in a dry, dust-free environment when not in use. Remove batteries if storing for extended periods.
- Calibration: Regular calibration checks are recommended to ensure accuracy, especially after drops or impacts.
7. Troubleshooting
- Laser lines are flashing and alarm sounds: The device is likely out of its self-leveling range (more than 3° tilt). Adjust the position of the laser level until it is within the acceptable range.
- No laser lines: Ensure the device is powered on and the battery is charged. Check if the pendulum lock is in the correct position for the desired mode (unlocked for self-leveling, locked for manual).
- Weak laser lines: The battery might be low. Recharge the battery. Also, ensure you are not operating in excessively bright environments without a laser receiver.
- Remote control not working: Check the remote control's battery. Ensure there are no obstructions between the remote and the laser level.
8. Specifications
| Feature | Specification |
|---|---|
| Brand | Alloyman |
| Model Number | JGY |
| Laser Class | Class II |
| Laser Lines | 4 x 360° (2 Horizontal, 2 Vertical) |
| Laser Color | Green |
| Horizontal/Vertical Accuracy | ±1 mm/5 m |
| Self-Leveling Range | ±3° |
| Working Range (Diameter) | Up to 45 m |
| Operating Mode | Self-Leveling, Manual, Pulse |
| Power Supply | 2 x 4.0V Lithium-ion Batteries (3600 mAh each) |
| Operating Time | Up to 12 hours (continuous) |
| IP Rating | IP54 (Waterproof and Dustproof) |
| Drop Resistance | Up to 1.2 m |
| Operating Temperature | -20°C to +50°C |
| Product Dimensions | 42L x 26W cm |
| Material | Metal |

Image: Three panels illustrating the durability of the laser level: IP54 waterproof rating, drop resistance up to 1.2m, and an operating temperature range of -20°C to +50°C.
9. Warranty and Support
Alloyman products are manufactured to high-quality standards. For warranty information, technical support, or service inquiries, please refer to the contact information provided with your purchase or visit the official Alloyman website. Keep your proof of purchase for warranty claims.