
1. Introduction
Thank you for choosing the Vaporesso ECO ONE PRO Kit. This device is designed for an optimal vaping experience, featuring a 1400 mAh integrated battery, a 2ml ECO One 0.8ohm Mesh T-Pod, and a maximum output of 16W, enhanced by COREX SMOOTH Technology. This manual provides essential information for the safe and effective use of your device. Please read it thoroughly before operation.

Image 1: Vaporesso ECO ONE PRO Kit packaging highlighting its main features and design.
2. Package Contents
Ensure all the following items are present in your package:
- 1 x Vaporesso ECO One Pro Device
- 1 x Vaporesso ECO One 0.8Ω Mesh T-Pod (Pre-installed)
- 1 x Cotton Tip
- 1 x Reminder Card
- 1 x User Manual
3. Setup
3.1 Initial Charging
Before first use, fully charge the device. Connect the USB Type-C cable (not included) to the charging port on the device and to a suitable power source (DC 5V/1A adapter recommended). The LED indicator will show charging status and turn off or change color when fully charged.
3.2 Filling the Pod
- Remove the pod from the device.
- Locate the top-fill port on the pod.
- Open the silicone plug.
- Carefully fill the pod with your e-liquid through the filling port. Avoid overfilling.
- Securely close the silicone plug.
- Allow the pod to stand for at least 5 minutes after filling to ensure the coil is fully saturated, preventing dry hits.

Image 2: Demonstrating the easy top-filling mechanism of the ECO ONE PRO pod.
3.3 Installing the Pod
Align the filled pod with the device and push it firmly until it clicks into place. The magnetic connection will secure the pod.
4. Operating Instructions
4.1 Vaping
The Vaporesso ECO ONE PRO Kit features an auto-draw activation. Simply inhale from the mouthpiece to activate the device and produce vapor.
4.2 Adjusting Airflow
The airflow can be adjusted to your preference, from a tighter to a looser draw. To adjust, simply rotate the pod slightly while it is inserted into the device. Experiment with different rotations to find your desired airflow setting.
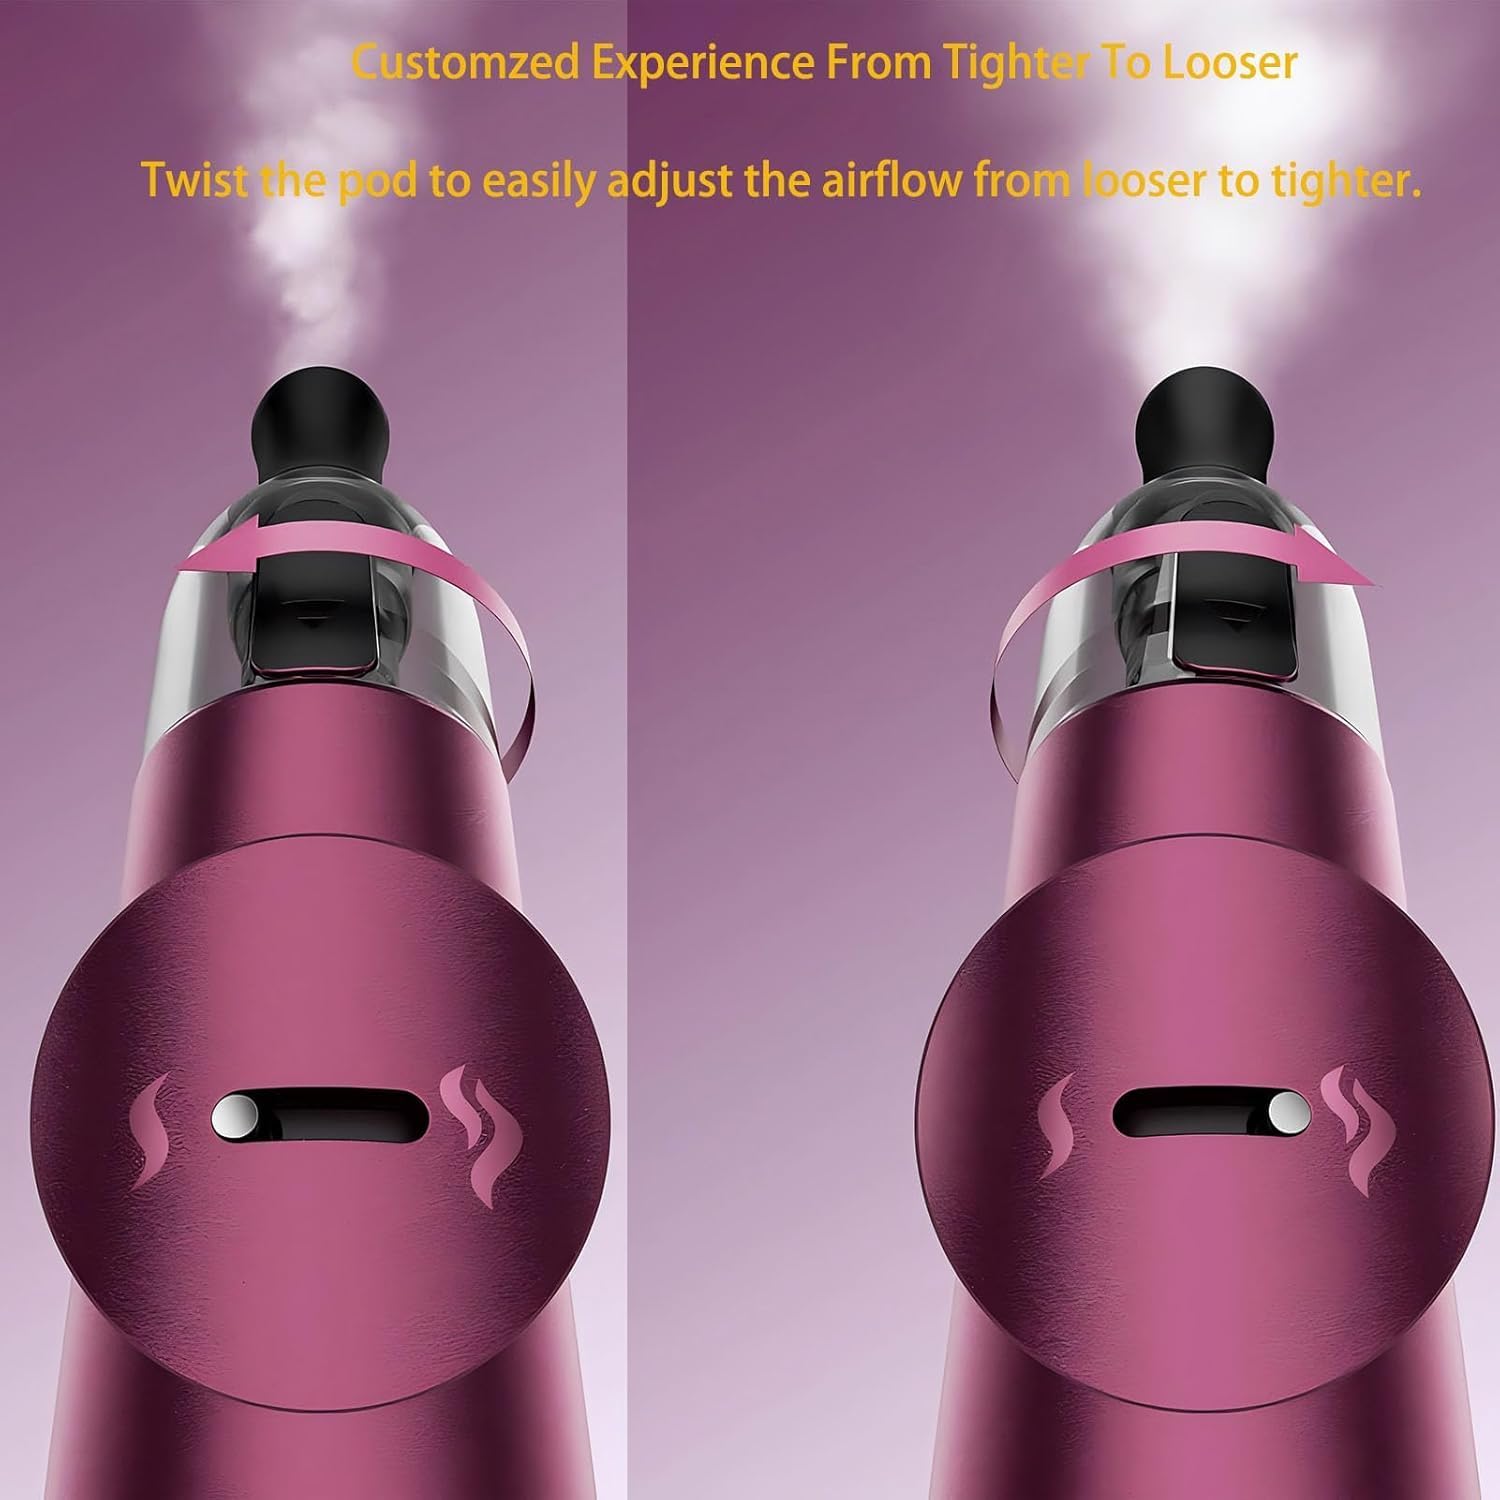
Image 3: Visual guide for adjusting the airflow by twisting the pod.
4.3 Charging the Device
When the battery is low, the LED indicator will signal. Connect the device to a USB Type-C charging cable. The LED will indicate charging status and turn off or change color when fully charged. The device supports pass-through charging, allowing you to use it while it charges.
5. Maintenance
5.1 Cleaning
Regularly clean the device, especially the pod connection area, with a dry cloth or cotton swab to prevent e-liquid buildup and ensure optimal performance.
5.2 Pod Replacement
The ECO ONE T-Pods are consumable components. Replace the pod when you notice a burnt taste, reduced vapor production, or a change in flavor. To replace, simply pull out the old pod and insert a new one after filling it with e-liquid and allowing it to prime.
5.3 Drip Tip and Filter Replacement
The kit includes a silicone drip tip and supports optional cotton filter tips. These can be replaced as needed for hygiene or personal preference. Simply pull off the existing tip and push on the new one.
6. Troubleshooting
- No Vapor Production:
- Check if the battery is charged.
- Ensure the pod is correctly inserted and making contact.
- Verify the pod contains e-liquid.
- The coil in the pod might be burnt; replace the pod.
- Leaking:
- Ensure the silicone plug on the pod is securely closed after filling.
- Avoid overfilling the pod.
- Check for cracks or damage on the pod; replace if necessary.
- Ensure the pod is correctly seated in the device.
- Burnt Taste:
- The coil is likely burnt; replace the pod.
- Ensure the pod was properly primed after filling (wait 5 minutes).
- Check e-liquid level to avoid dry hits.
- Device Not Charging:
- Ensure the USB Type-C cable is fully inserted into both the device and the power source.
- Try a different charging cable or power adapter.
- Clean the charging port on the device for any debris.
7. Specifications
| Dimensions | φ17.3 × 124mm (approx. 12 x 5 x 2 cm) |
| Battery Capacity | 1400 mAh (Integrated) |
| Pod Capacity | 2 ml |
| Resistance | 0.8Ω Mesh T-Pod |
| Max Wattage | 16 W |
| Charging | DC 5V/1A, Type-C |
| Special Features | COREX SMOOTH Technology, Optional Filter Drip Tip, Adjustable Airflow |

Image 4: Detailed specifications and dimensions of the Vaporesso ECO ONE PRO Kit.
8. Safety Information
This product is intended for adult smokers and vapers only. Keep out of reach of children and pets. This product does not contain nicotine or e-liquid. However, when used with nicotine-containing e-liquids, it contains nicotine, which is an addictive chemical. If you are pregnant, breastfeeding, have heart disease, high blood pressure, diabetes, or are taking medication for depression or asthma, consult your doctor before using this product. Discontinue use if you experience symptoms such as nausea, dizziness, weakness, or rapid heart rate.
9. Contact and Support
For further assistance, technical support, or warranty inquiries, please refer to the contact information provided on the Vaporesso official website or contact your local retailer.


