1. Introduction
Thank you for choosing the Aosrioylt Osmo Dashcam Pro. This advanced dual dash cam system is designed to provide comprehensive recording of your journeys, enhancing safety and providing crucial evidence in case of incidents. Featuring 4K front and 1080P rear recording, enhanced night vision, 24/7 parking monitoring, and integrated Wi-Fi and GPS, this manual will guide you through the setup, operation, and maintenance of your device.
2. Package Contents
Please check the package for the following items:
- 1 x Osmo Dashcam Pro Unit
- 1 x Rear Camera (if applicable, based on dual recording feature)
- 1 x Power Cable (Car Charger)
- 1 x Mounting Bracket
- 1 x User Manual (this document)
3. Product Overview
The Osmo Dashcam Pro is equipped with a range of features to ensure optimal recording performance and vehicle security.

Figure 3.1: Front view of the Osmo Dashcam Pro, displaying its compact design and integrated screen.
Key features include:
- Dual Recording: Simultaneous 4K (front) and 1080P (rear) video capture.
- Enhanced Night Vision: Advanced technology for clear recordings in low-light conditions.
- 24-Hour Parking Monitor: Continuous surveillance when parked, with battery protection.
- Integrated Wi-Fi: Connect to a smartphone app for viewing, downloading, and sharing footage.
- GPS Tracking: Records speed, route, and location data.
- Wide Angle Lens: 120-degree field of view to minimize blind spots.
- Loop Recording: Automatically overwrites oldest footage when the memory card is full.
- WDR Technology: Wide Dynamic Range for balanced exposure in varying light.
- F2.0 Large Aperture & 6 Glass Lens: For superior image clarity and light capture.

Figure 3.2: Visual representation of the dashcam's main features, including 4K+1080P recording, wide angle, Wi-Fi, GPS, parking monitor, loop recording, and WDR.
4. Setup
- Insert MicroSD Card: Before first use, insert a high-speed (Class 10 or higher) MicroSD card (not included) into the designated slot. Ensure the card is formatted within the dashcam settings for optimal performance.
- Power Connection: Connect the dashcam to your vehicle's 12V power outlet using the provided car charger. The dashcam will typically power on automatically when the vehicle starts.
5. Installation
Proper installation ensures optimal recording angles and stable operation.
- Mounting Location: Choose a location on your front windshield that does not obstruct your view, typically behind the rearview mirror.
- Attach Mounting Bracket: Secure the mounting bracket to the windshield using its adhesive or suction cup.
- Attach Dashcam: Slide the Osmo Dashcam Pro onto the mounting bracket until it clicks into place.
- Adjust Angle: Adjust the lens angle to ensure the road ahead is clearly visible and centered in the frame.
- Install Rear Camera: If applicable, install the rear camera on your rear windshield. Route the cable discreetly along the vehicle's interior trim to connect it to the main dashcam unit.
- Cable Management: Route the power cable and rear camera cable neatly along the edges of your windshield and dashboard to avoid interference with driving.

Figure 5.1: Illustration of the dual lens system, capturing both the front road view and the vehicle's interior.
6. Operating Instructions
6.1 Basic Recording
Once powered on, the dashcam will automatically begin recording. Video files are saved in segments (e.g., 1, 3, or 5 minutes) due to loop recording. When the memory card is full, the oldest unlocked files will be overwritten.
6.2 4K Front and 1080P Rear Recording
The dashcam simultaneously records in 4K resolution for the front view and 1080P for the rear view, ensuring high-definition capture of events both ahead and behind your vehicle.
6.3 Enhanced Night Vision
The Osmo Dashcam Pro features advanced night vision technology, including WDR (Wide Dynamic Range) and an F2.0 large aperture lens with 6 glass elements. This allows for clear and detailed video recording even in low-light conditions, such as during nighttime driving.
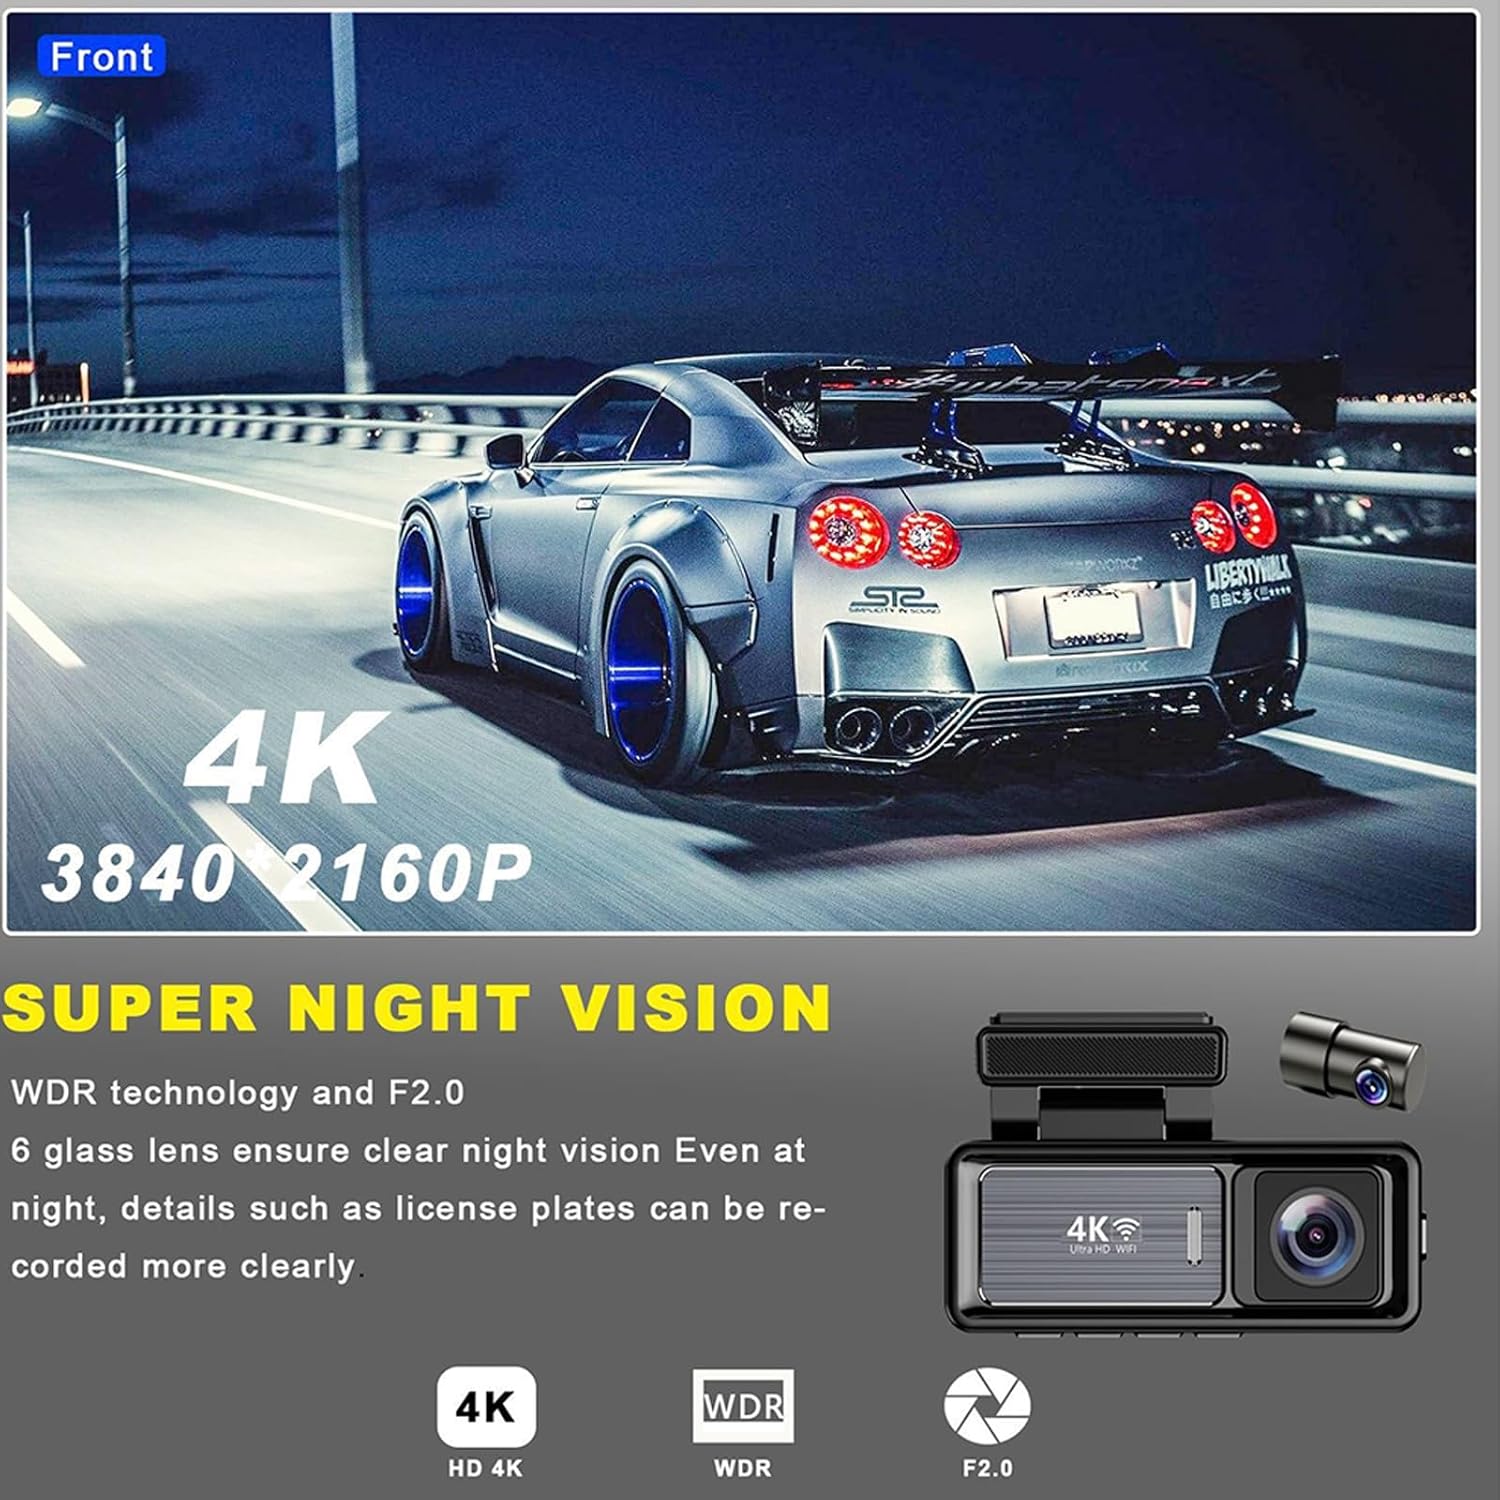
Figure 6.1: Example of 4K Super Night Vision, highlighting clarity in dark environments.
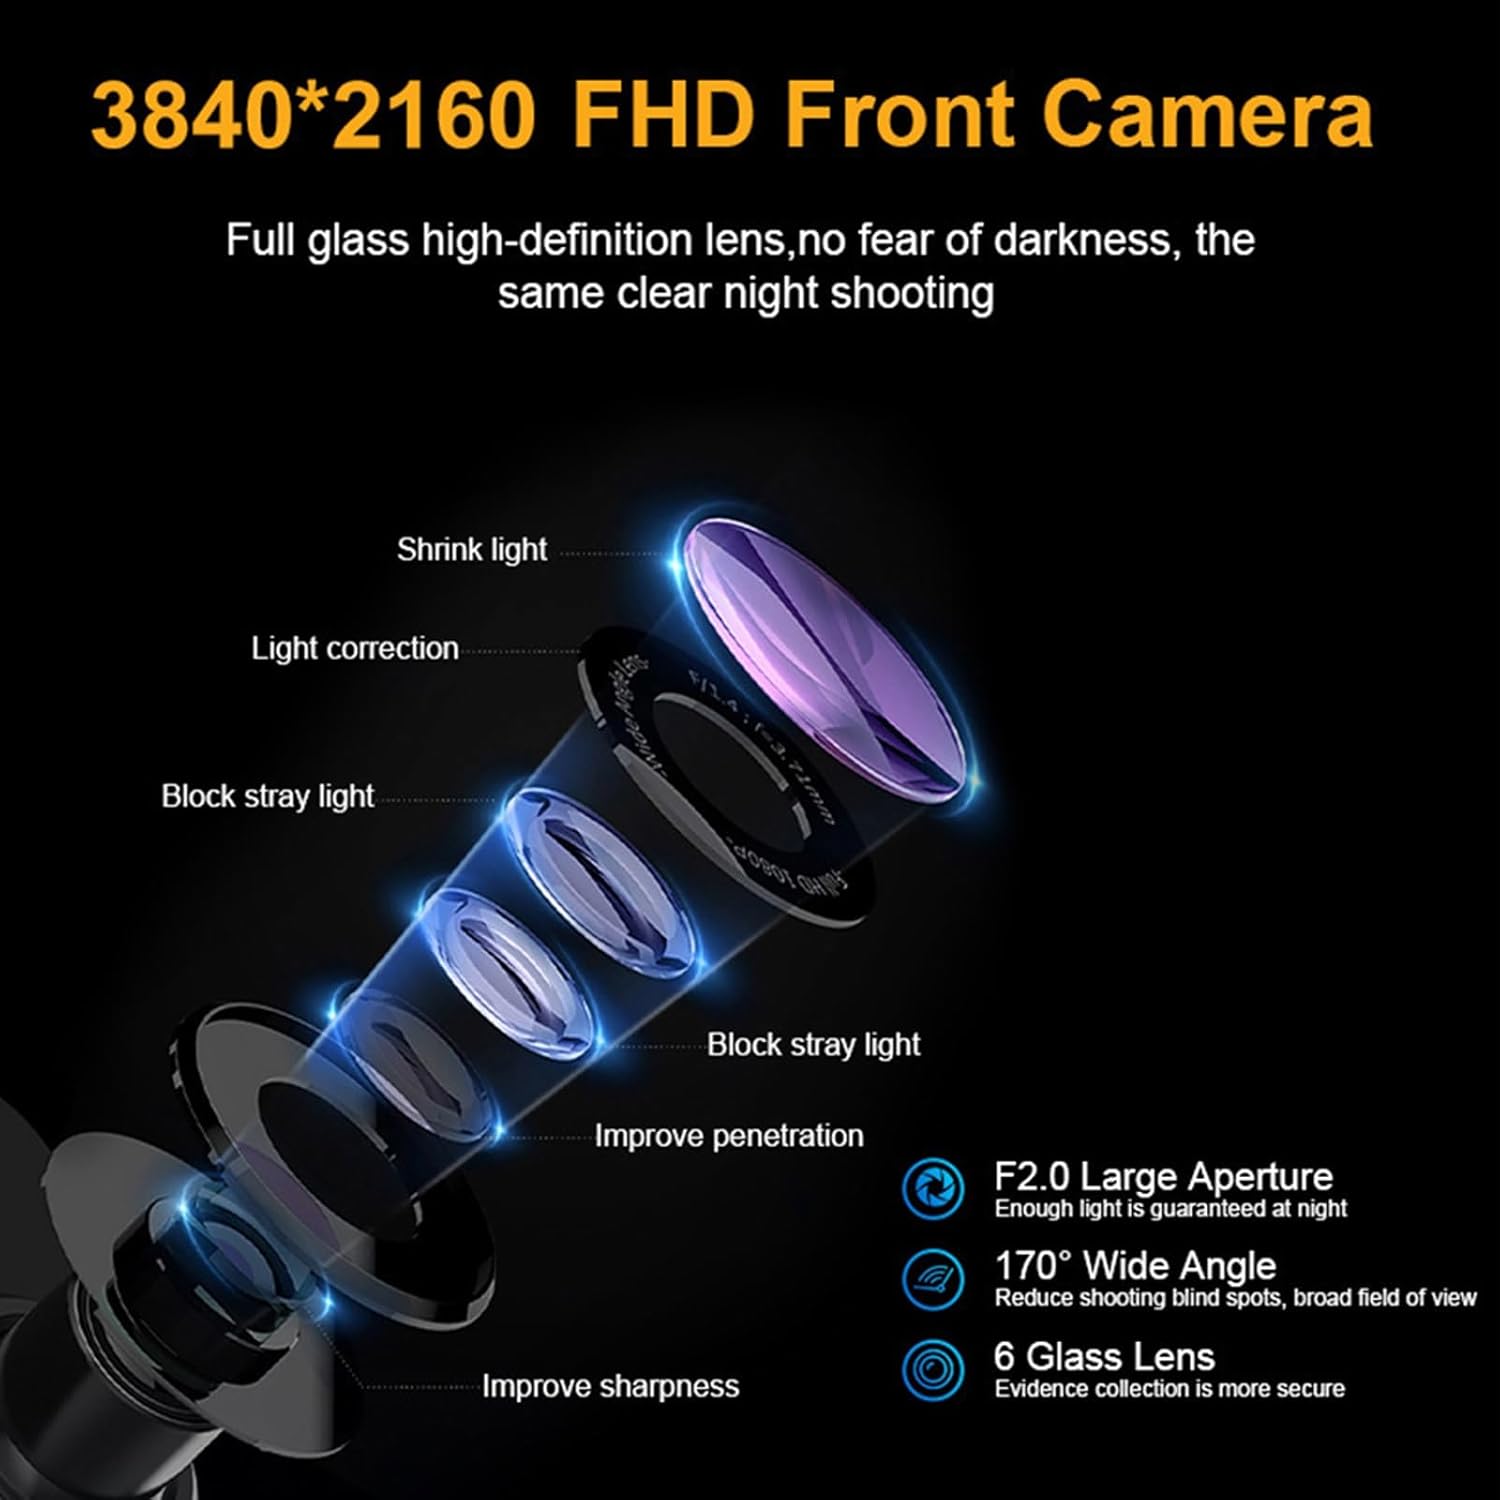
Figure 6.2: Detailed view of the 3840*2160 FHD Front Camera lens structure, showing its F2.0 large aperture and 6 glass lens design for improved clarity.
7. Wi-Fi and App Control
The integrated Wi-Fi allows you to connect your dashcam to a smartphone application for convenient management of your recordings.
- Download the App: Search for the recommended app (e.g., "Viidure" as seen in product images) on the App Store (iOS) or Google Play Store (Android).
- Connect to Wi-Fi: Enable Wi-Fi on your dashcam and connect your smartphone to the dashcam's Wi-Fi network. The network name and password will be displayed on the dashcam screen or found in the manual.
- App Functions: Through the app, you can:
- View live footage.
- Playback recorded videos.
- Download videos and photos to your phone.
- Adjust dashcam settings.
- Share footage directly from your phone.
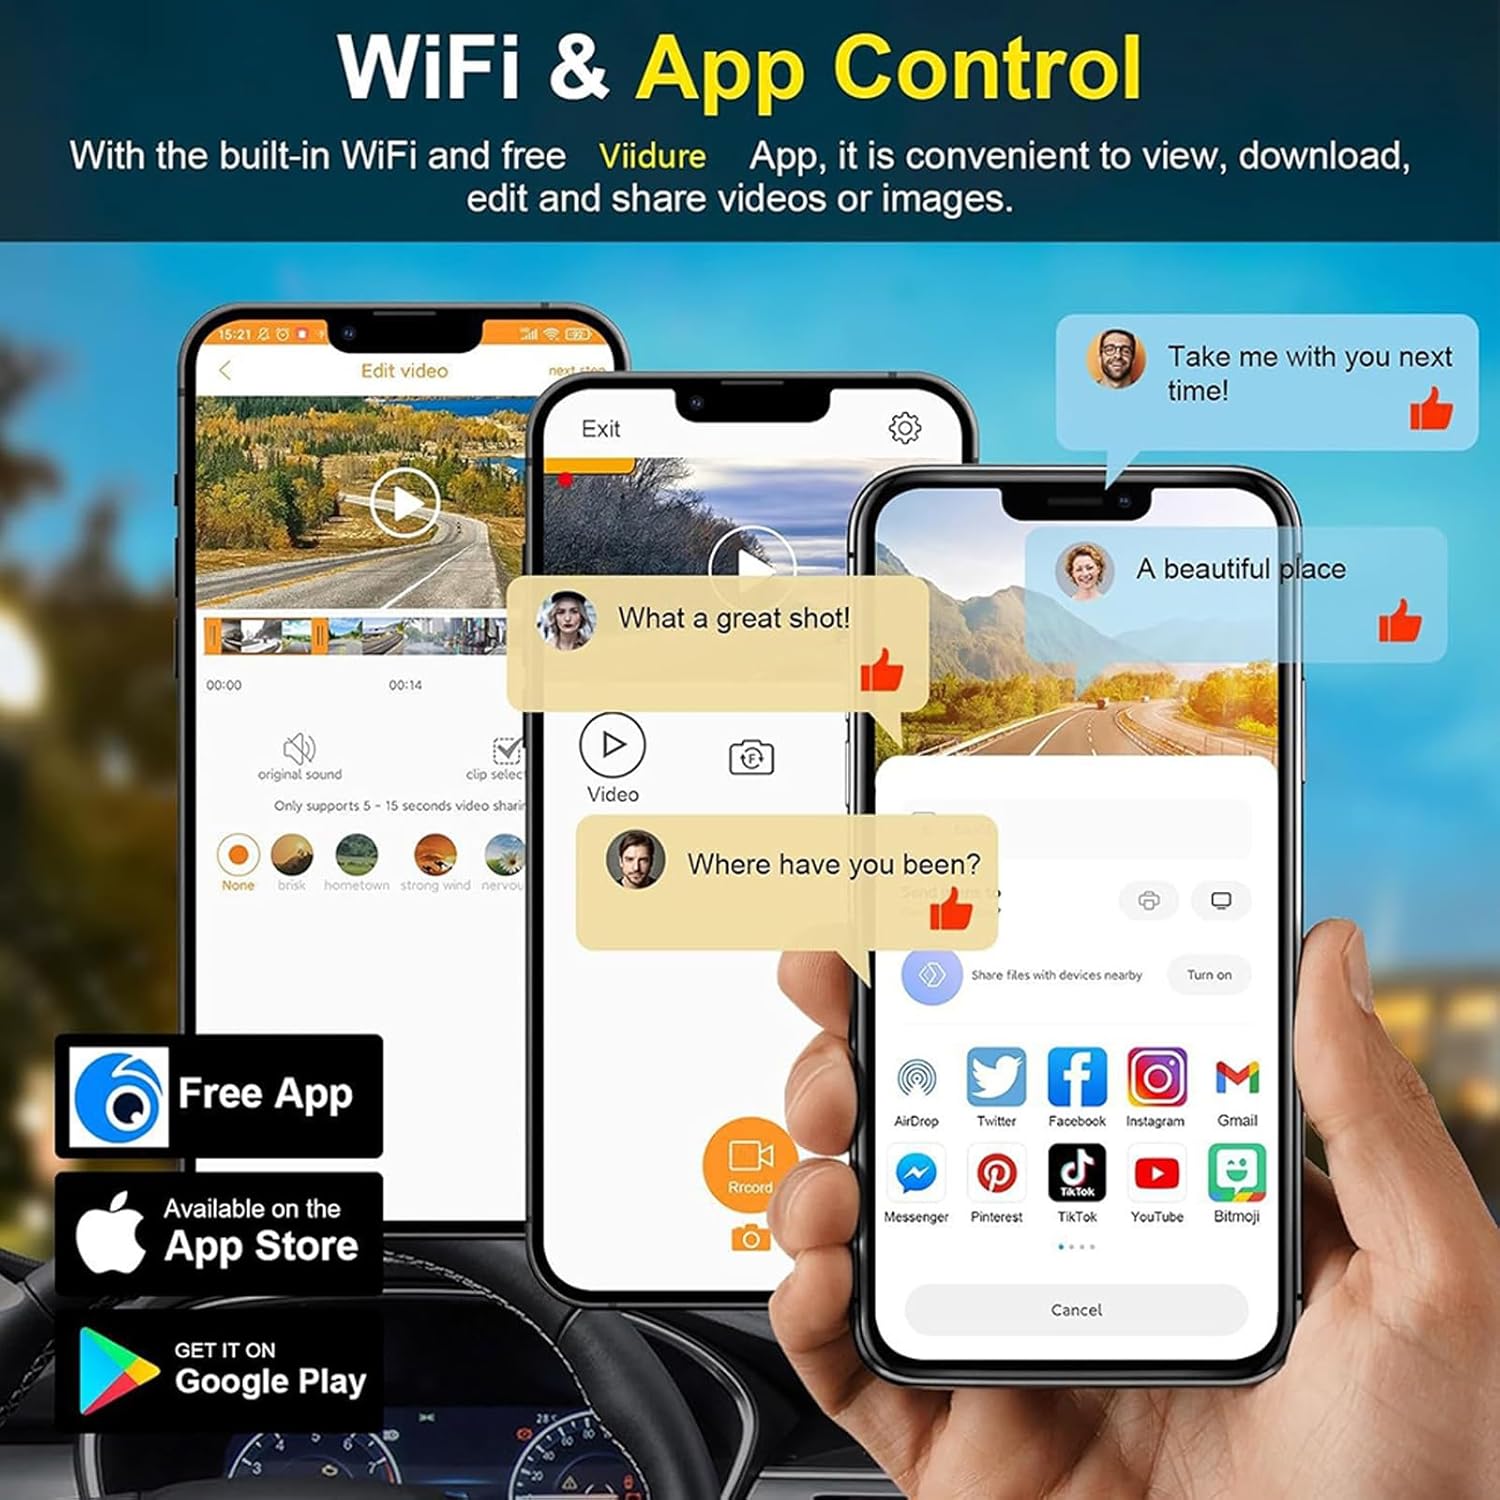
Figure 7.1: Illustration of the mobile application interface for Wi-Fi control, demonstrating video playback, editing, and sharing capabilities.
8. GPS Functionality
The built-in GPS module records important driving data, which can be crucial for insurance claims or incident reconstruction.
- Data Recorded: The GPS tracks your vehicle's speed, precise location, and driving route.
- Viewing Data: This data is embedded into the video files and can be viewed using the dedicated playback software on a computer or through the mobile app.
9. Parking Monitor
The 24-hour parking monitor feature provides continuous protection for your vehicle even when it's parked and turned off.
- Motion Detection: The dashcam automatically detects motion or impact around your parked vehicle and begins recording.
- Battery Protection: An automatic low-voltage cut-off mechanism prevents the dashcam from draining your car's battery, ensuring your vehicle can start.
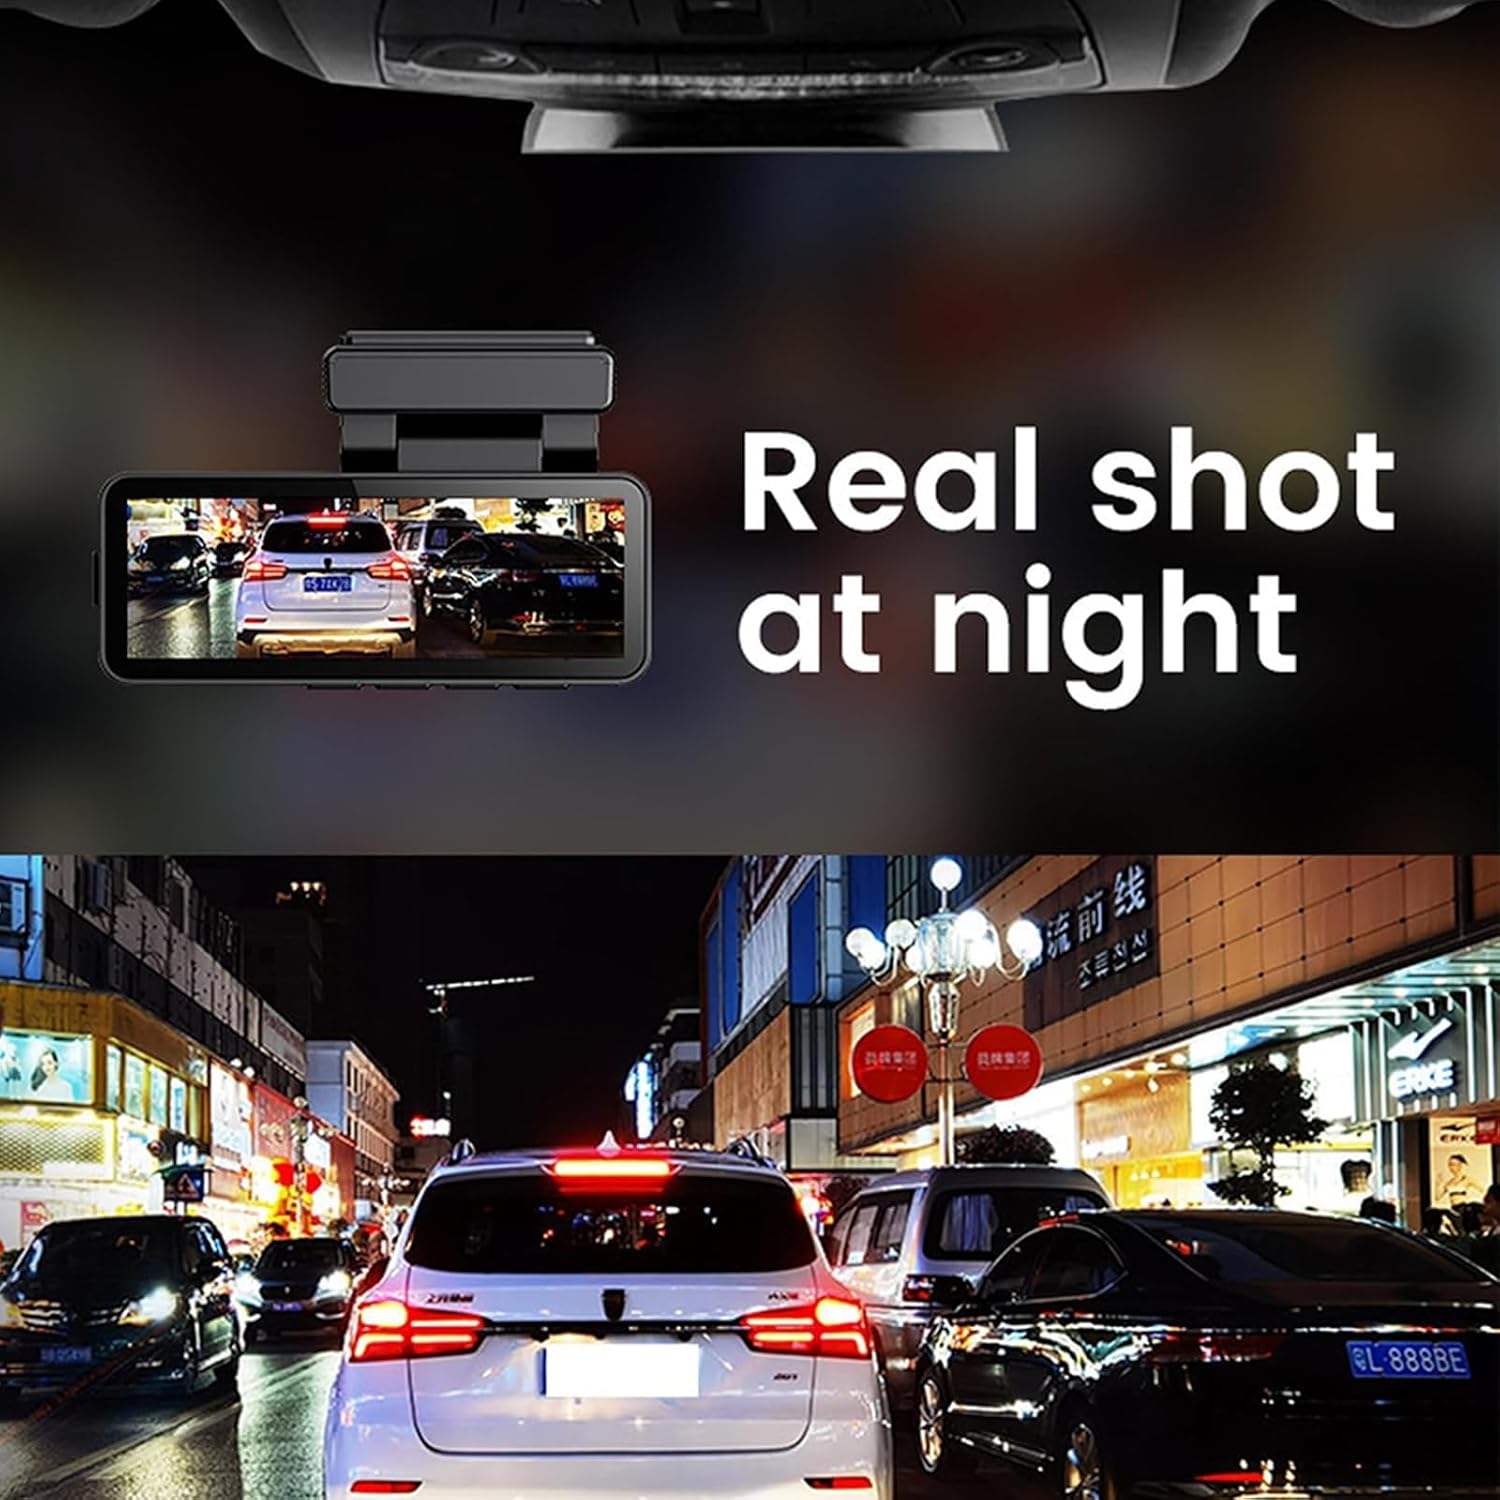
Figure 9.1: A real-time night shot from the dashcam, demonstrating its effectiveness in low-light parking surveillance.
10. Maintenance
- Clean Lenses: Regularly clean the front and rear camera lenses with a soft, lint-free cloth to ensure clear video quality.
- MicroSD Card: Format the MicroSD card periodically (e.g., once a month) to maintain optimal performance and prevent data corruption. Back up any important files before formatting.
- Firmware Updates: Check the manufacturer's website or app for any available firmware updates to ensure your dashcam has the latest features and bug fixes.
- Operating Temperature: Avoid exposing the dashcam to extreme temperatures for extended periods, as this can affect battery life and device performance.
11. Troubleshooting
- Dashcam not powering on:
- Check if the power cable is securely connected to both the dashcam and the car's power outlet.
- Ensure the car's power outlet is functioning.
- Recording issues (e.g., freezing, corrupted files):
- Ensure you are using a high-speed (Class 10 or U3) MicroSD card.
- Format the MicroSD card within the dashcam settings.
- Try a different MicroSD card.
- Wi-Fi connection problems:
- Ensure Wi-Fi is enabled on the dashcam and your smartphone.
- Check that you are entering the correct Wi-Fi password.
- Move your smartphone closer to the dashcam.
- GPS not tracking:
- Ensure the dashcam has a clear view of the sky for satellite reception.
- Allow a few minutes for the GPS to acquire a signal after powering on.
12. Specifications
- Model Name: Osmo Dashcam Pro
- Front Camera Resolution: 4K (3840x2160P)
- Rear Camera Resolution: 1080P
- Photo Pixels: 5MP
- Viewing Angle: 120 degrees
- Network Type: Wi-Fi
- Mounting Location: Front windshield
- Data Storage: Loop recording
- Dimensions: Approximately 16 x 11 x 8.5 cm (6.3 x 4.3 x 3.3 inches)
- Battery: Not included (operates via vehicle power)
13. Warranty and Support
For any questions or support inquiries regarding your Aosrioylt Osmo Dashcam Pro, please do not hesitate to contact us via email. We are committed to providing assistance and ensuring your satisfaction.


