
Introduction
This manual provides detailed instructions for the installation, operation, and maintenance of your GIGABYTE X870E AORUS Master X3D ICE Motherboard. This high-performance ATX motherboard is designed to support AMD Ryzen 9000, 8000, and 7000 Series Processors on the AM5 LGA 1718 socket. It features an enhanced power solution with a Digital Twin 18+2+2 Power Phase, advanced thermal armor, DDR5 memory support, multiple PCIe 5.0 and M.2 slots, WIFI7, and 10GbE connectivity.
Setup
Follow these steps for proper installation of your motherboard and its components.
1. CPU Installation
Carefully open the CPU socket lever. Align the triangular mark on your AMD Ryzen processor with the corresponding mark on the LGA 1718 socket. Gently place the CPU into the socket without forcing it. Close the lever to secure the CPU.
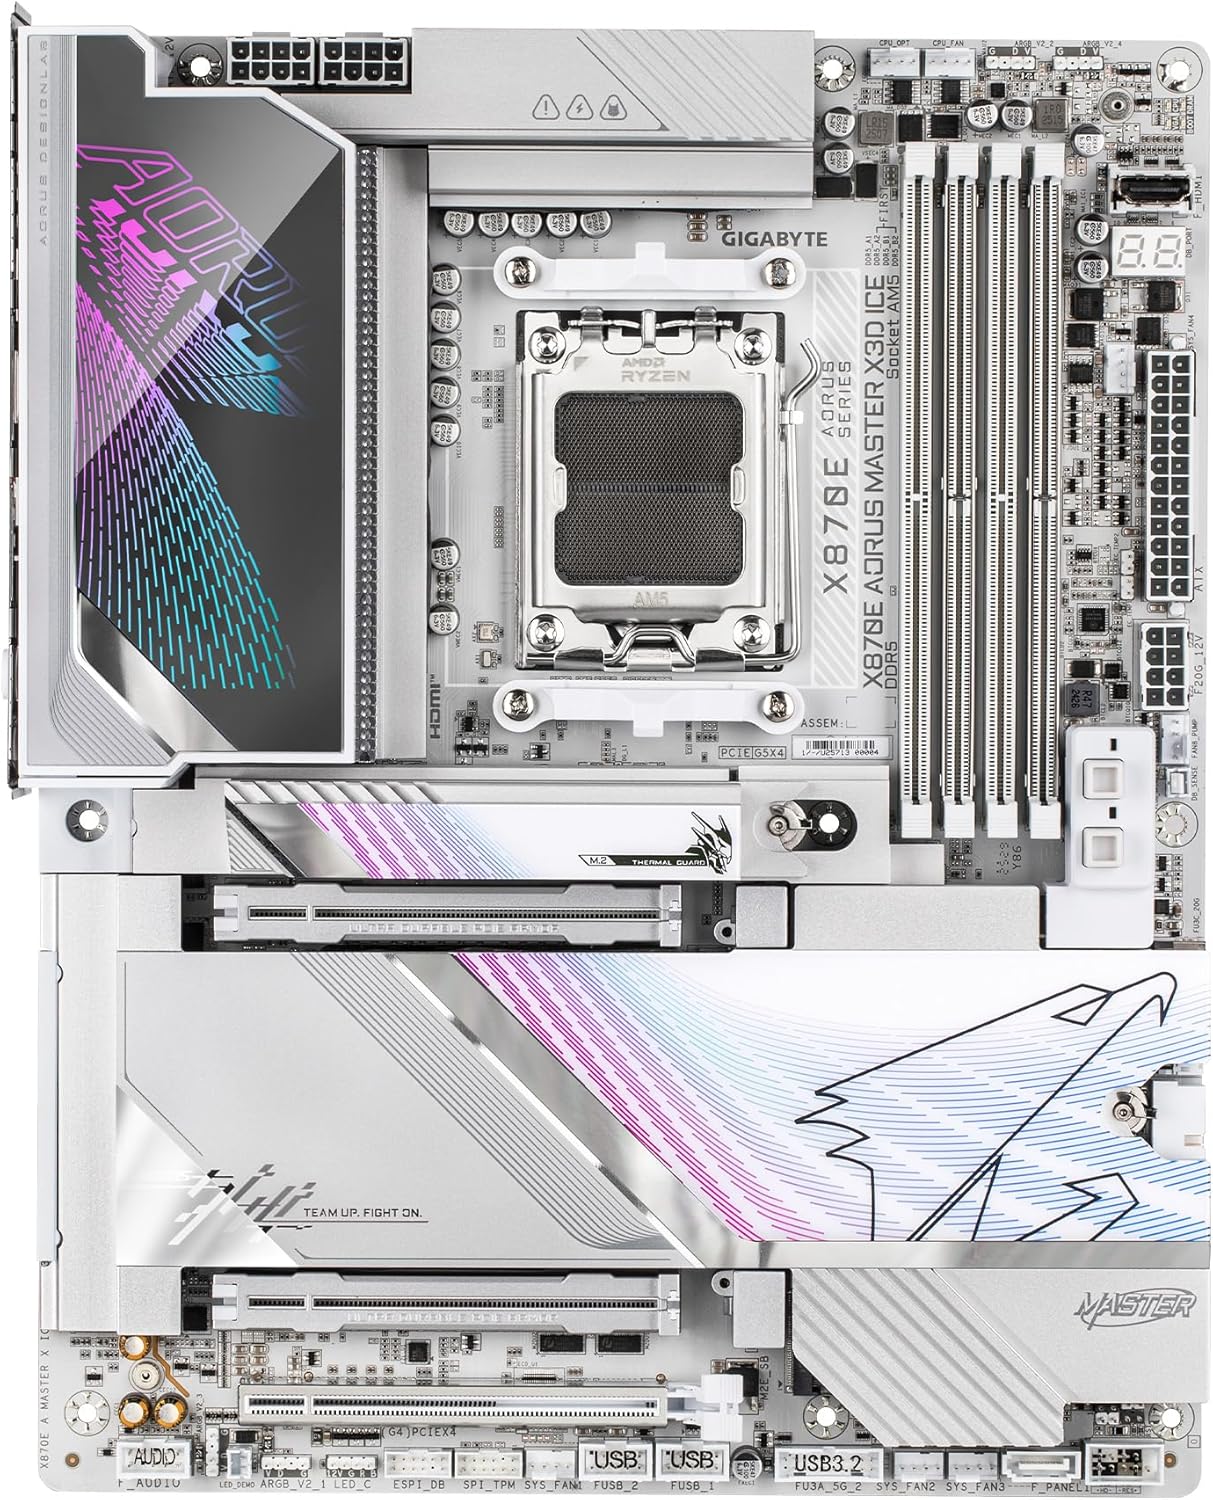
Image: AMD AM5 LGA 1718 CPU Socket
2. RAM (DDR5 Memory) Installation
Locate the four DDR5 DIMM slots. Open the clips on both ends of the memory slot. Align the notch on the DDR5 memory module with the key in the DIMM slot. Insert the memory module firmly until the clips snap into place. Ensure both clips are fully closed.

Image: DDR5 Memory Installation
3. M.2 SSD Installation
The motherboard features 2x PCIe 5.0 M.2 slots and 3x PCIe 4.0 M.2 slots. Remove the M.2 heatsink cover. Insert the M.2 SSD into the slot at an angle, then gently push it down and secure it with the M.2 EZ-Latch mechanism. Reattach the heatsink for optimal thermal performance.

Image: M.2 and PCIe Slots
4. PCIe Card Installation
This motherboard includes 2x PCIe Gen 5 x16 slots with reinforced PCIe UD armor. Open the retention clip on the PCIe slot. Align your graphics card or expansion card with the slot and press firmly until it clicks into place. Ensure the card is fully seated and secure the retention clip.

Image: PCIe and M.2 Slot Layout
5. Power Connections
Connect the 24-pin ATX main power connector and the 8-pin (or 8+4-pin) CPU power connectors from your power supply to the corresponding ports on the motherboard.
6. Front Panel and I/O Connections
Connect your case's front panel headers (power button, reset button, USB ports, audio jacks) to the appropriate pins on the motherboard. The motherboard features an integrated I/O Shield for simplified installation of external devices.

Image: Rear I/O Panel
For a visual overview of the motherboard's features and design, please refer to the official trailer below:
Video: GIGABYTE X870E X3D - Official Trailer. This video provides a general overview of the motherboard's design and key features.
Operating
1. BIOS/UEFI Setup
Upon first boot, press the designated key (usually DEL or F2) to enter the BIOS/UEFI setup. Here you can configure boot order, system time, and advanced settings. Refer to the on-screen instructions within the BIOS for navigation and specific options.
2. Driver Installation
After installing your operating system, install the latest drivers for the chipset, graphics, audio, LAN, and WIFI7 from the GIGABYTE official website. This ensures optimal performance and stability.
3. AI Overclocking (AORUS AI Snatch)
The motherboard supports AORUS AI Snatch for intelligent overclocking. Consult the GIGABYTE software utility manual for detailed instructions on how to utilize this feature to optimize your system's performance.
Maintenance
1. BIOS Updates
Regularly check the GIGABYTE website for BIOS updates. BIOS updates can improve system stability, compatibility, and performance. Follow the instructions provided by GIGABYTE carefully when performing a BIOS update to avoid system damage.
2. Cleaning
Periodically clean your computer's interior to prevent dust buildup, which can lead to overheating. Use compressed air to remove dust from heatsinks, fans, and other components. Ensure the system is powered off and unplugged before cleaning.
3. Component Checks
Occasionally inspect all cable connections (power, SATA, USB) to ensure they are secure. Verify that all expansion cards and memory modules are properly seated in their slots.
Troubleshooting
1. No Power/No Boot
- Ensure all power cables (24-pin ATX, CPU power) are securely connected to the motherboard and power supply.
- Verify that the power supply is switched on and functioning correctly.
- Check front panel connections for the power button.
2. Display Issues
- Confirm that your monitor is connected to the correct graphics output (either dedicated GPU or motherboard's integrated graphics if supported by CPU).
- Reseat your graphics card in its PCIe slot.
- Check monitor cables for secure connections.
3. Component Not Detected
- For RAM: Reseat memory modules. Try booting with one module at a time.
- For M.2 SSDs: Ensure they are properly seated and secured. Check BIOS settings to confirm M.2 slot detection.
- For PCIe cards: Reseat the card. Ensure necessary drivers are installed.
4. Error Code LED
The motherboard may feature a functional error code LED display. Consult the GIGABYTE user manual (available on their website) for a list of error codes and their corresponding troubleshooting steps.
Specifications
| Feature | Detail |
|---|---|
| Brand | GIGABYTE |
| Model Name | X870E AORUS MASTER X3D ICE |
| CPU Socket | LGA 1718 |
| Compatible Processors | AMD Ryzen 7000, 8000, 9000 series |
| Chipset Type | AMD X870E |
| RAM Memory Technology | DDR5 |
| Memory Clock Speed | 5200 MHz (Supports higher via EXPO) |
| Memory Slots Available | 4 |
| Ram Memory Maximum Size | 256 GB |
| Graphics Card Interface | PCI Express (2x PCIe Gen 5 x16 slots) |
| M.2 Slots | 2x PCIe 5.0 M.2, 3x PCIe 4.0 M.2 |
| Total SATA Ports | 2 |
| Total USB Ports | 11 (including USB4 Type-C, USB 3.2 Gen 2x2 Type-C) |
| Ethernet Ports | 2 (10GbE) |
| Wireless Connectivity | WIFI7 |
| Dimensions (L x W x H) | 12.01"L x 9.61"W x 1.75"H |
| Platform | Windows 11 |
Warranty Information
The GIGABYTE X870E AORUS Master X3D ICE Motherboard comes with a 5-Year Manufacturer Warranty. Please retain your proof of purchase for warranty claims. For detailed terms and conditions, refer to the official GIGABYTE warranty policy on their website.
Support
For further assistance, technical support, driver downloads, or updated manuals, please visit the official GIGABYTE support website:
You can also find additional resources and community forums on the GIGABYTE AORUS brand store:


