1. Introduction
This manual provides essential instructions for the safe and efficient operation of your Mecpow X1 Dual Laser Engraver. Please read this manual thoroughly before using the device and retain it for future reference. The Mecpow X1 integrates a 2W (1064nm) infrared laser and a 10W (455nm) diode laser, offering versatility for engraving and cutting a wide range of materials.
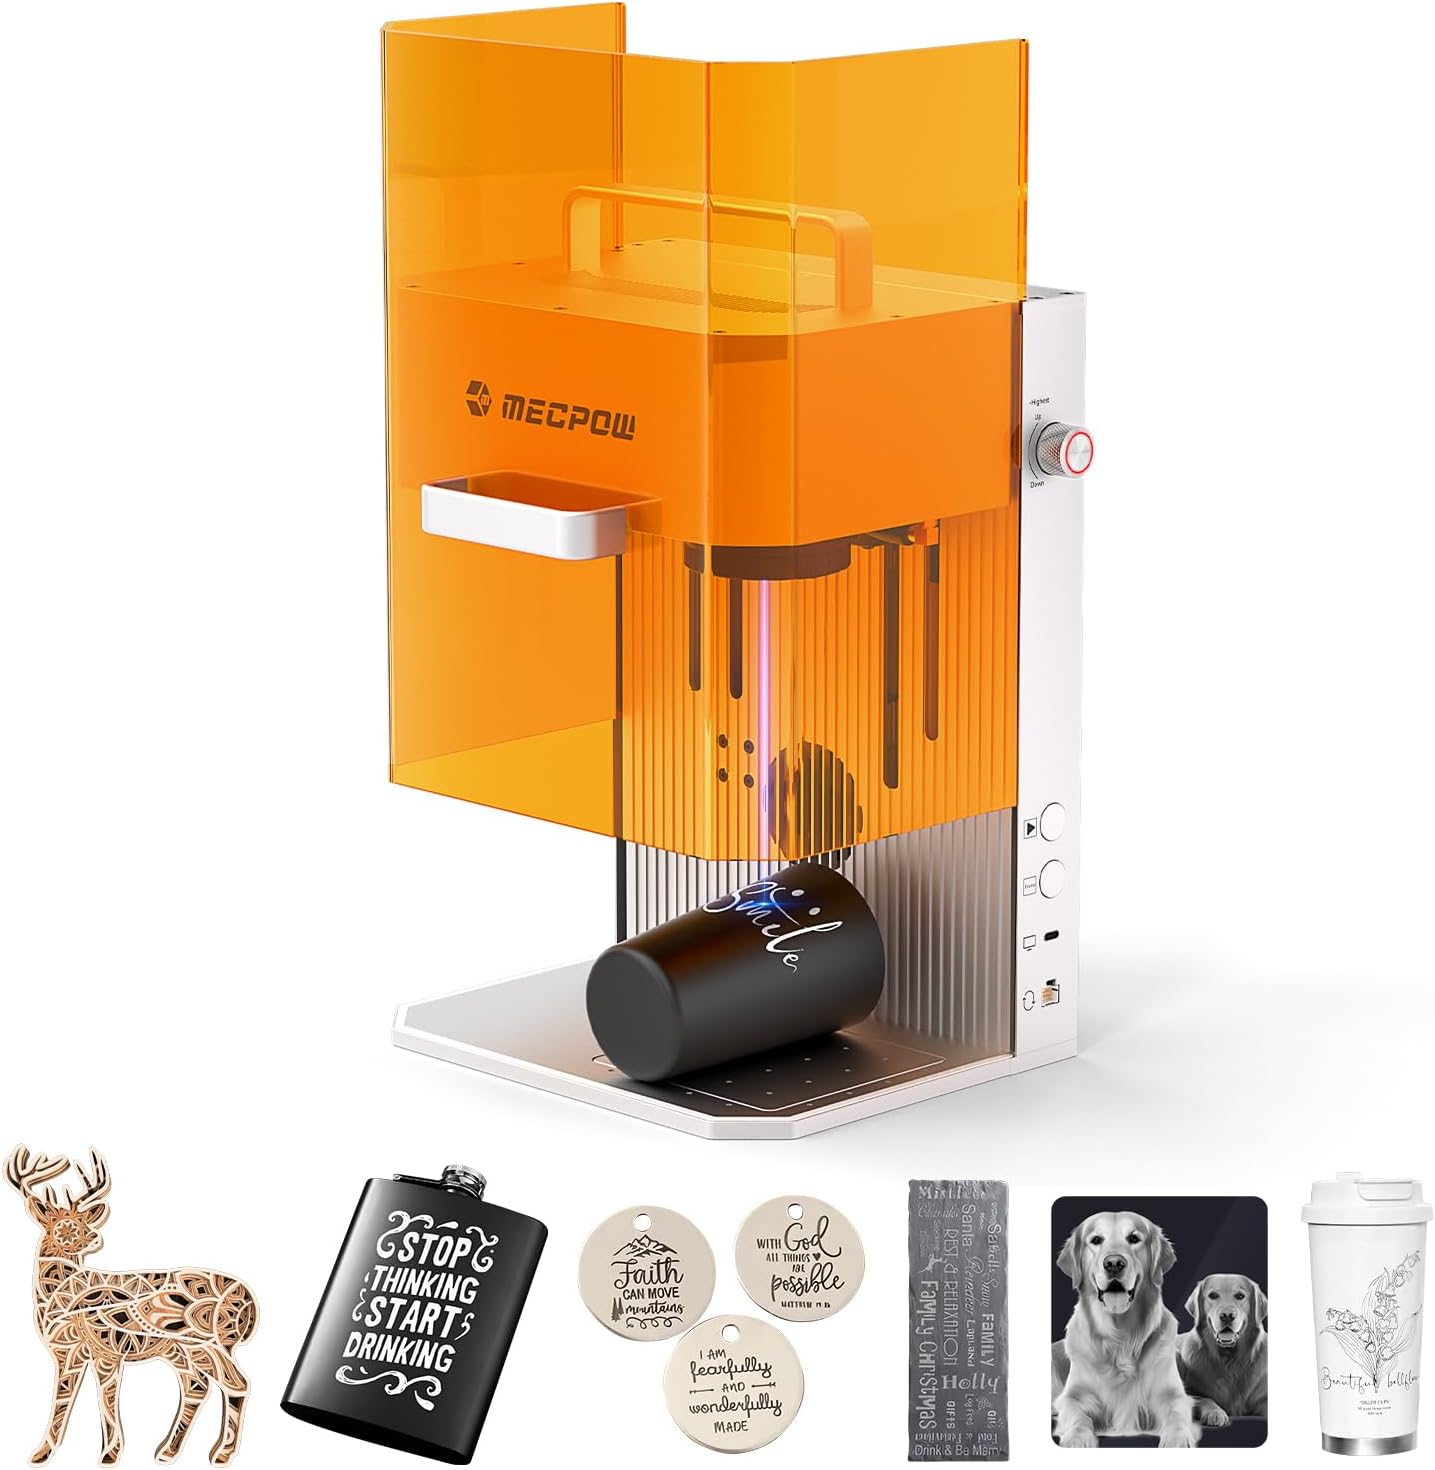
Image 1.1: Mecpow X1 Dual Laser Engraver with example projects.
2. Safety Information
Operating a laser engraver involves potential risks. Adhere to all safety guidelines to prevent injury or damage.
- Eye Protection: Always wear the provided protective glasses when the laser is active. The integrated protective cover filters laser radiation, but direct exposure to the laser beam can cause severe eye damage.
- Ventilation: Ensure adequate ventilation. The built-in exhaust fan and vent pipe should be properly installed and used to remove smoke and fumes generated during engraving. Operate in a well-ventilated area.
- Material Compatibility: Only engrave or cut materials specified as safe for laser processing. Certain materials can produce toxic fumes or catch fire. Refer to the material compatibility chart in the software or user guide.
- Fire Hazard: Never leave the machine unattended during operation. Keep a fire extinguisher nearby.
- Emergency Stop: Familiarize yourself with the emergency stop button. In case of any malfunction or emergency, press it immediately.
- Children and Pets: Keep children and pets away from the operating area.

Image 2.1: Fully enclosed design for safe operation, featuring a built-in exhaust fan and protective cover.
3. Package Contents
Verify that all items are present in the package:
- Mecpow X1 Laser Engraver
- User Manual
- Cutting Panel
- Power Cable & Power Adapter
- Type-C Cable
- Screwdriver
- Exhaust Pipe
- Cleaning Cloth
- Protective Goggles
- Engraved Cards (sample)
- Wood Boards (sample)
- Pet Tags (sample)
- Rule
- Metal Plates (sample)
- Throat Hoop
- USB Stick & USB Key
- Positioning Fixture
- Allen Keys
Video 3.1: Overview of Mecpow X1 package contents.
4. Product Overview
4.1 Dimensions

Image 4.1: Product dimensions of the Mecpow X1 engraver (284mm x 259mm x 331mm).
4.2 Dual Laser System
The Mecpow X1 features a dual-laser system for enhanced versatility:
- 2W (1064nm) Infrared Laser: Ideal for engraving metals and certain plastics.
- 10W (455nm) Diode Laser: Suitable for cutting and engraving wood, acrylic, leather, and other organic materials.

Image 4.2: Illustration of the Mecpow X1's dual laser system.
5. Setup
5.1 Initial Setup
- Remove Protective Cover: Pull up the protective cover and remove the laser head lid.
- Emergency Stop Button: Rotate the emergency stop button clockwise to reconnect the machine to your computer or mobile phone.
- Positioning Fixture: Place the positioning fixture in the corresponding hole of the engraving area as needed and tighten to secure.
- Power Connection: Plug the power adapter into the DC input port for power supply.
- Exhaust Pipe: Attach the exhaust pipe to the air guide and secure it with the throat hoop.
- Power On: Turn on the power switch and close the protective cover. Wait for the machine to complete initialization.
Video 5.1: Step-by-step guide for initial setup of the Mecpow X1.
5.2 Software and Connection
The Mecpow X1 supports Mecpow Laser and LightBurn software, compatible with Windows, macOS, Android, and iOS devices.
- Install Software: Download and install the appropriate software (Mecpow Laser or LightBurn) on your computer or mobile device.
- Connect Device: Connect the computer and the machine using the provided Type-C cable.
Video 5.2: Connecting the Mecpow X1 to a computer via Type-C cable.
6. Operating Instructions
6.1 Basic Engraving Process
- Place Material: Place the material to be engraved in the engraving area, ensuring it is tightly against the positioning fixture.
- Focus Adjustment: Turn the Z-axis adjustment knob to move the laser head up and down until the red and diode laser spots overlap, indicating proper focusing. Then, close the protective cover.
- Software Setup: In the software, select the file to be engraved, adjust the image size and properties, and set the operating parameters according to the material.
- Start Engraving: Click "Mark" in the software to begin engraving.
Video 6.1: Demonstrates placing material, focusing, and starting a basic engraving task on a sample card and wood board.
6.2 Using with G1 Slide Extension Kit (Optional Accessory)
For larger engraving areas, the G1 Slide Extension Kit can be used.
- Install Clamps: Place the material clamps on the slide extension kit one by one and tighten them securely.
- Place Materials: Place the materials (e.g., engraved cards) on the slide extension, ensuring edges are tight against the clamps.
- Position Extension: Place the G1 on the X1 working platform, ensuring the reset button on G1 is on the same side as the emergency stop switch on X1.
- Connect Cable: Connect the G1 with the X1 using the provided connection cable (4-pin to 8-pin). Turn on the machine after completing the connection.
- Adjust Focus: Open the protective cover and turn the Z-axis adjustment knob to adjust the laser head until the red and diode light spots overlap.
- Reset Slide: Press the reset button to return the slide extension to its original position before starting the engraving process.
- Software Setup: Select the file to be engraved in the software, adjust the image size and properties, set the operation parameters (ensure "Expanded engraving" mode is selected), and click "Mark" to begin engraving.
Video 6.2: Instructions for setting up and using the G1 Slide Extension Kit for expanded engraving.
6.3 Using with G5 Rotary Roller (Optional Accessory)
For engraving cylindrical objects, the G5 Rotary Roller can be used.
- Connect Rotary Roller: Connect the rotary roller with the machine via a 4-pin to 8-pin cable. Plug the 4-pin connector into the rotary roller and the 8-pin connector into the machine's designated port.
- Measure Diameter: Measure the diameter of the item to be engraved.
- Secure Item: Secure the item to the rotary roller and place it on the X1 working platform.
- Adjust Focus: Adjust the laser head until the red and diode light spots overlap on the cylindrical surface.
- Software Setup: Select the file to be engraved in the software, set the dimensions and relevant parameters (ensure "Roller engraving" mode is selected and workpiece diameter is entered), and click "Mark" to begin engraving.
Video 6.3: Guide on connecting and using the G5 Rotary Roller for cylindrical object engraving.
7. Maintenance
Regular maintenance ensures optimal performance and longevity of your Mecpow X1.
- Cleaning the Lens: Use the provided cleaning cloth and a suitable lens cleaner (not included) to gently clean the laser lens. Ensure the machine is powered off before cleaning.
- Cleaning the Engraving Area: Regularly remove debris and dust from the engraving platform and exhaust fan area.
- Exhaust System: Check the exhaust pipe for blockages and ensure it is securely attached to maintain efficient smoke removal.
- General Cleaning: Wipe down the exterior of the machine with a soft, dry cloth. Avoid using abrasive cleaners or solvents.
8. Troubleshooting
| Problem | Possible Cause | Solution |
|---|---|---|
| Laser not firing or weak output |
|
|
| Machine not connecting to computer/app |
|
|
| Engraving results are blurry or inaccurate |
|
|
9. Specifications
| Feature | Detail |
|---|---|
| Model | Mecpow X1 Dual Laser Engraver |
| Laser Type | 2W (1064nm) Infrared Laser, 10W (455nm) Diode Laser |
| Engraving Speed | Up to 5000mm/s |
| Engraving Area | 105x105mm (expandable with G1 Slide Extension Kit) |
| Spot Size | 0.01mm |
| Positioning Accuracy | 0.0001mm |
| Cutting Capability (Diode Laser) | Up to 8mm wood boards, 5mm black acrylic |
| Supported Materials | 300+ materials including jewelry, metal, wood, leather, acrylic, stone, ceramic, glass, cardboard, plastic. |
| Focus Methods | Automatic and Manual |
| Software Compatibility | Mecpow Laser, LightBurn |
| OS Compatibility | Windows, macOS, Android, iOS |
| Connectivity | USB, Wi-Fi |
| Dimensions (L×W×H) | 284mm × 259mm × 331mm |
| Weight | 6.5kg |
10. Warranty and Support
Mecpow offers a 1-year warranty for the X1 Dual Laser Engraver. For technical support, troubleshooting assistance, or warranty claims, please contact Mecpow customer service. Refer to the official Mecpow website or your purchase documentation for contact details and the most up-to-date support information.
Mecpow is committed to providing 24-hour service to its users.


