
1. Introduction
This manual provides essential information for the safe and efficient operation of your SCULPFUN iCube Ultra Dual Laser Engraver. Please read this manual thoroughly before using the device to ensure proper setup, operation, and maintenance. Retain this manual for future reference.
2. Safety Information
The SCULPFUN iCube Ultra Dual Laser Engraver is designed with multiple safety features to ensure user protection. It complies with FDA Class 1 laser safety standards.
- Fully Enclosed Design: The machine features a fully enclosed structure that instantly stops laser operation when the door is opened, preventing accidental exposure.
- Emergency Stop Button: A prominent emergency stop button is provided for immediate shutdown in critical situations.
- Temperature Sensor: Equipped with a temperature sensor that triggers an alarm and stops operation if the internal temperature exceeds safe limits.
- USB Security Key: A USB security key is required for operation, adding an extra layer of security.
- Removable Acrylic Cover: The fully enclosed acrylic protective cover is removable and includes a small integrated door for convenient material access while maintaining safety.
- Protective Glasses: Always wear the provided safety glasses during operation, even with the enclosed design, as an additional precaution.

Image: The SCULPFUN iCube Ultra Dual Laser Engraver highlighting its Class 1 Safety certification.

Image: Detailed view of the laser engraver's safety features, including the temperature sensor, USB security key, safety door mechanism, and auto-focus capability.
3. Product Overview
3.1 Included Components
The following items are included in your SCULPFUN iCube Ultra Dual package:
- 1 x iCube Ultra Engraver Unit
- 1 x 12W Blue Laser Module
- 1 x 1.2W Infrared Laser Module
- 1 x Data Cable
- 1 x Power Adapter
- 1 x Tool Kit
- 1 x Lens Repair Kit
- 1 x Safety Glasses
- 1 x Wooden Board (for testing)
- 1 x MDF Panel (for testing)
- 1 x Smoke Exhaust Pipe
- 1 x Flange
- 1 x Hose Clamp

Image: A comprehensive display of all components included in the SCULPFUN iCube Ultra Dual Laser Engraver package.
3.2 Machine Parts and Ports
Familiarize yourself with the various parts and connection ports of your engraver:
- RGB Indicator Light: Provides status feedback.
- Temperature Alarm Sensor: Monitors internal temperature.
- RA Mini Rotary Attachment Port: For connecting optional rotary accessories.
- Multi-Function Button: For various operational controls.
- Auto Focus Button: Initiates the automatic focus function.
- Power Port: For connecting the power adapter.
- Camera Port: For connecting an optional positioning camera.
- Type-C PC Port: For connecting to a computer.
- Power Switch: To turn the device on/off.
- Air Assist Hose Hole: For connecting an optional air assist pump.
- USB Dongle Port: For the security key.
- Automatic Air Pump Port: For connecting an automatic air pump.
- Emergency Stop Switch: For immediate power cut-off.
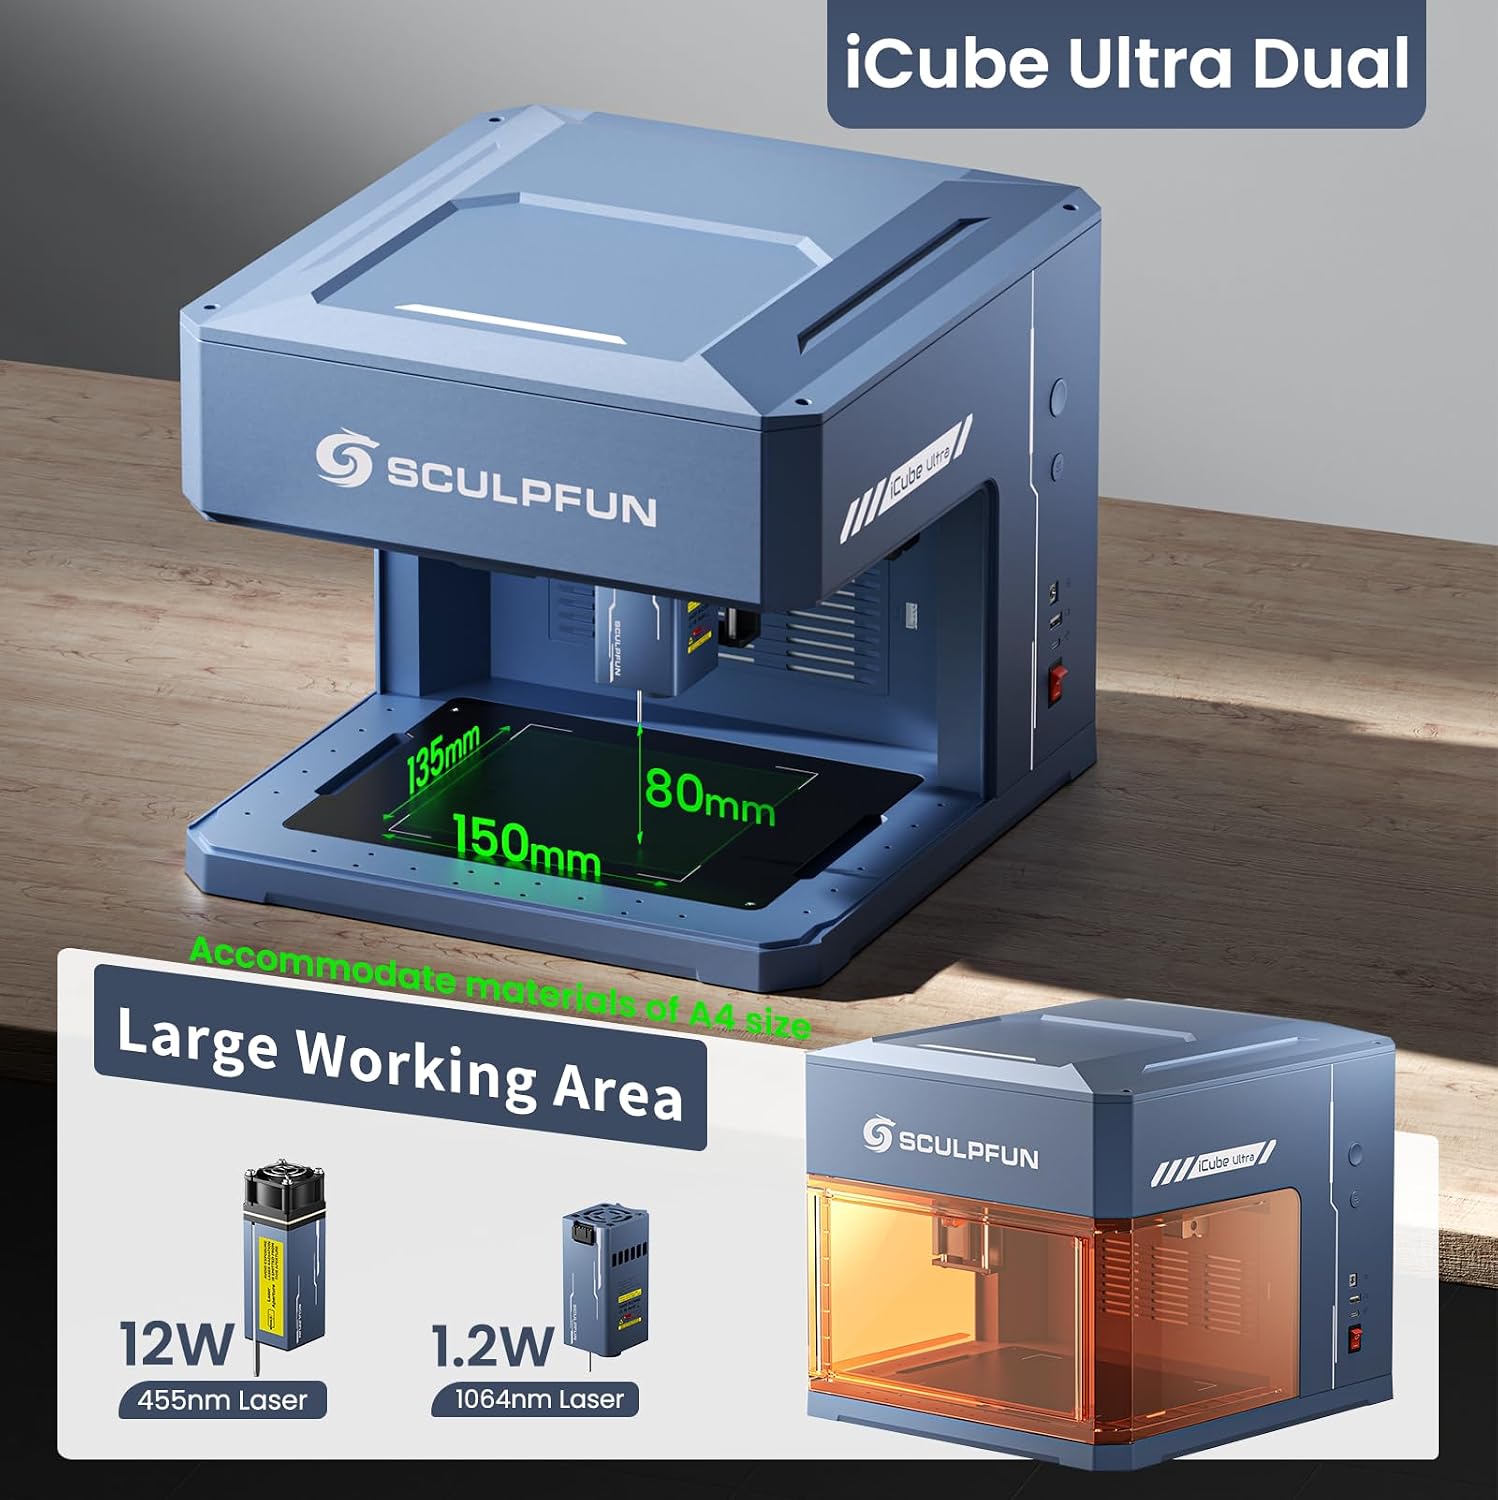
Image: A diagram illustrating the labeled external parts and connection ports of the SCULPFUN iCube Ultra Dual Laser Engraver.
4. Setup Guide
The SCULPFUN iCube Ultra Dual is designed for easy setup, making it suitable for beginners.
- Unpacking: Carefully remove all components from the packaging. Inspect for any damage during transit.
- Placement: Place the engraver on a stable, level surface in a well-ventilated area. Ensure adequate space around the machine for operation and heat dissipation.
- Laser Module Installation: Install the desired laser module (12W blue or 1.2W infrared) into the designated slot according to the quick start guide.
- Power Connection: Connect the power adapter to the engraver's power port and then plug it into a suitable power outlet.
- USB Connection: Connect the data cable from the engraver's Type-C PC port to your computer. Insert the USB security key into its dedicated port.
- Software Installation: Download and install the recommended laser engraving software (e.g., LightBurn) or the SCULPFUN App on your computer or mobile device. Follow the software's installation instructions.
- Exhaust System: Connect the smoke exhaust pipe to the machine's exhaust port using the flange and hose clamp. Direct the pipe to an outdoor vent or a suitable air filtration system to ensure proper smoke and fume extraction.

Image: The laser engraver shown with a laptop running LightBurn software and a smartphone running the SCULPFUN App, demonstrating broad compatibility across Windows, MacOS, Android, and iOS platforms.
5. Operating Instructions
5.1 Basic Operation
- Power On: Ensure all connections are secure, then turn on the engraver using the power switch. The RGB indicator light will show the device status.
- Software Connection: Launch your chosen engraving software (LightBurn or SCULPFUN App) and connect it to the engraver.
- Material Placement: Place your material within the working area. The maximum working area is 150 x 135 mm, with a maximum working height of 80 mm.
- Auto Focus: Press the Auto Focus button or use the software function to automatically adjust the laser focus for optimal engraving or cutting.
- Design and Settings: Load your design in the software. Adjust laser power, speed, and passes according to the material type and desired effect.
- Start Engraving/Cutting: Initiate the process from the software. Monitor the operation through the transparent cover.
- Power Off: Once the task is complete, power off the machine and disconnect it from the power source.
5.2 Key Features and Capabilities
- Dual Laser System: Equipped with a 12W blue diode laser for cutting and engraving various materials, and a 1.2W infrared laser for specialized engraving on metals and plastics.
- High-Speed Engraving: The 32-bit high-speed motherboard enables engraving speeds of up to 10,000 mm/min, enhancing efficiency.
- High Precision: Linear guides ensure movement precision up to 0.1 mm for detailed results.
- Semi-Open Design: The unique semi-open design allows for engraving both inside the enclosure and directly on larger objects that may not fit entirely within the machine.
- Built-in Smoke Filter System: A high-efficiency smoke filtering system is integrated to manage fumes during operation.
- Accessory Compatibility: The device supports optional accessories such as a positioning camera, air pump, and rotary roller (sold separately) to expand functionality.

Image: The SCULPFUN iCube Ultra Dual Laser Engraver illustrating its generous working area dimensions (150x135mm with 80mm height) and the presence of both 12W and 1.2W laser modules.

Image: A collage highlighting key features such as Class 1 Safety, Laser Auto Focus, Operation Status Indicator, Built-in Smoke Filter System, Large Working Area, and Compact Size.

Image: An illustration detailing various optional accessories compatible with the SCULPFUN iCube Ultra Dual, such as the RA Mini Rotary Roller, Air Pump, Air Purifier, and Positioning Camera.
6. Maintenance
Regular maintenance ensures optimal performance and extends the lifespan of your laser engraver.
- Replaceable Laser Lens: The iCube Ultra series features an innovative laser head with replaceable lenses. If the lens becomes damaged or dirty after prolonged use, it can be replaced using the provided lens repair kit to restore cutting and engraving performance.
- Smoke Filter Cleaning: Periodically inspect and clean or replace the built-in smoke filter to maintain effective fume extraction. Refer to the quick start guide for filter access instructions.
- General Cleaning: Keep the interior and exterior of the machine clean. Use a soft, dry cloth to wipe surfaces. Avoid using abrasive cleaners or solvents. Ensure no debris accumulates in the working area or around the laser module.
- Lubrication: Check the linear guides for smooth movement. If necessary, apply a small amount of appropriate lubricant as per manufacturer recommendations (refer to the quick start guide).
7. Troubleshooting
This section addresses common issues you might encounter. For more complex problems, contact customer support.
- Device Not Powering On:
- Ensure the power adapter is securely connected to both the engraver and a working power outlet.
- Check if the power switch is in the 'ON' position.
- Verify the USB security key is properly inserted.
- Software Not Connecting:
- Confirm the USB data cable is securely connected to both the engraver and your computer.
- Restart the software and the engraver.
- Check your computer's device manager to ensure the engraver is recognized. Reinstall drivers if necessary.
- Poor Engraving/Cutting Quality:
- Ensure the laser is properly focused. Use the auto-focus function.
- Verify that the laser lens is clean and free from debris. Replace if damaged.
- Adjust laser power and speed settings in the software according to the material being used.
- Check for any material warping or unevenness.
- Smoke/Fume Issues:
- Ensure the smoke exhaust pipe is properly connected and vented.
- Clean or replace the internal smoke filter.
- Ensure the work area is well-ventilated.
- Temperature Alarm:
- If the temperature alarm activates, allow the machine to cool down.
- Ensure the machine is in a well-ventilated area and that cooling vents are not obstructed.
8. Specifications
| Feature | Specification |
|---|---|
| Product Name | SCULPFUN iCube Ultra Dual Desktop Laser Engraver |
| Model Number | TT-ICUSG |
| Manufacturer | SCULPFUN |
| Machine Dimensions | 330 x 360 x 290 mm |
| Laser Power (Blue Diode) | 12 W (455nm) |
| Laser Power (Infrared) | 1.2 W (1064nm) |
| Operating Voltage | 12 V |
| Operating Current | 6 A |
| Engraving Area | 150 x 135 mm |
| Max Working Height | 80 mm |
| Engraving Speed | Up to 10,000 mm/min |
| Movement Precision | 0.1 mm |
| Power Type | AC |
| Package Dimensions | 43.9 x 40.9 x 35.79 cm |
| Package Weight | 8.87 kg |
| Batteries Included/Required | No |
9. Warranty and Support
For warranty information, please refer to the documentation provided with your purchase or contact your retailer. For technical support, product inquiries, or spare parts, please visit the official SCULPFUN website or contact their customer service department. Ensure you have your model number (TT-ICUSG) and purchase details ready when seeking support.