
1. Introduction
Thank you for choosing the Mengshen MS-TH11 Digital Hygrometer Thermometer. This device provides real-time indoor temperature and humidity readings, along with a clock, date, and alarm function. It is designed for easy monitoring of environmental conditions in various indoor settings.

Image 1.1: The Mengshen MS-TH11 Digital Hygrometer Thermometer showing its main display with time, temperature, humidity, and comfort level indicators.
2. Product Features
- Accurate Monitoring: Measures temperature from -10°C to 65°C (14°F to 149°F) with an accuracy of ±1°C, and humidity from 10% to 99% RH with an accuracy of ±5% RH.
- Large LED Display: A clear 11.3 x 4.3 cm screen displays time, temperature, humidity, weekday, date, weather icons, and comfort indicators.
- Multiple Functions: Includes a clock with alarm function, date display, and weather forecast icons.
- User-Friendly Design: Features one-touch °C/°F conversion, 12/24-hour time display mode, and records maximum/minimum temperature and humidity readings.
- Versatile Placement: Designed for both freestanding desk placement and wall mounting.
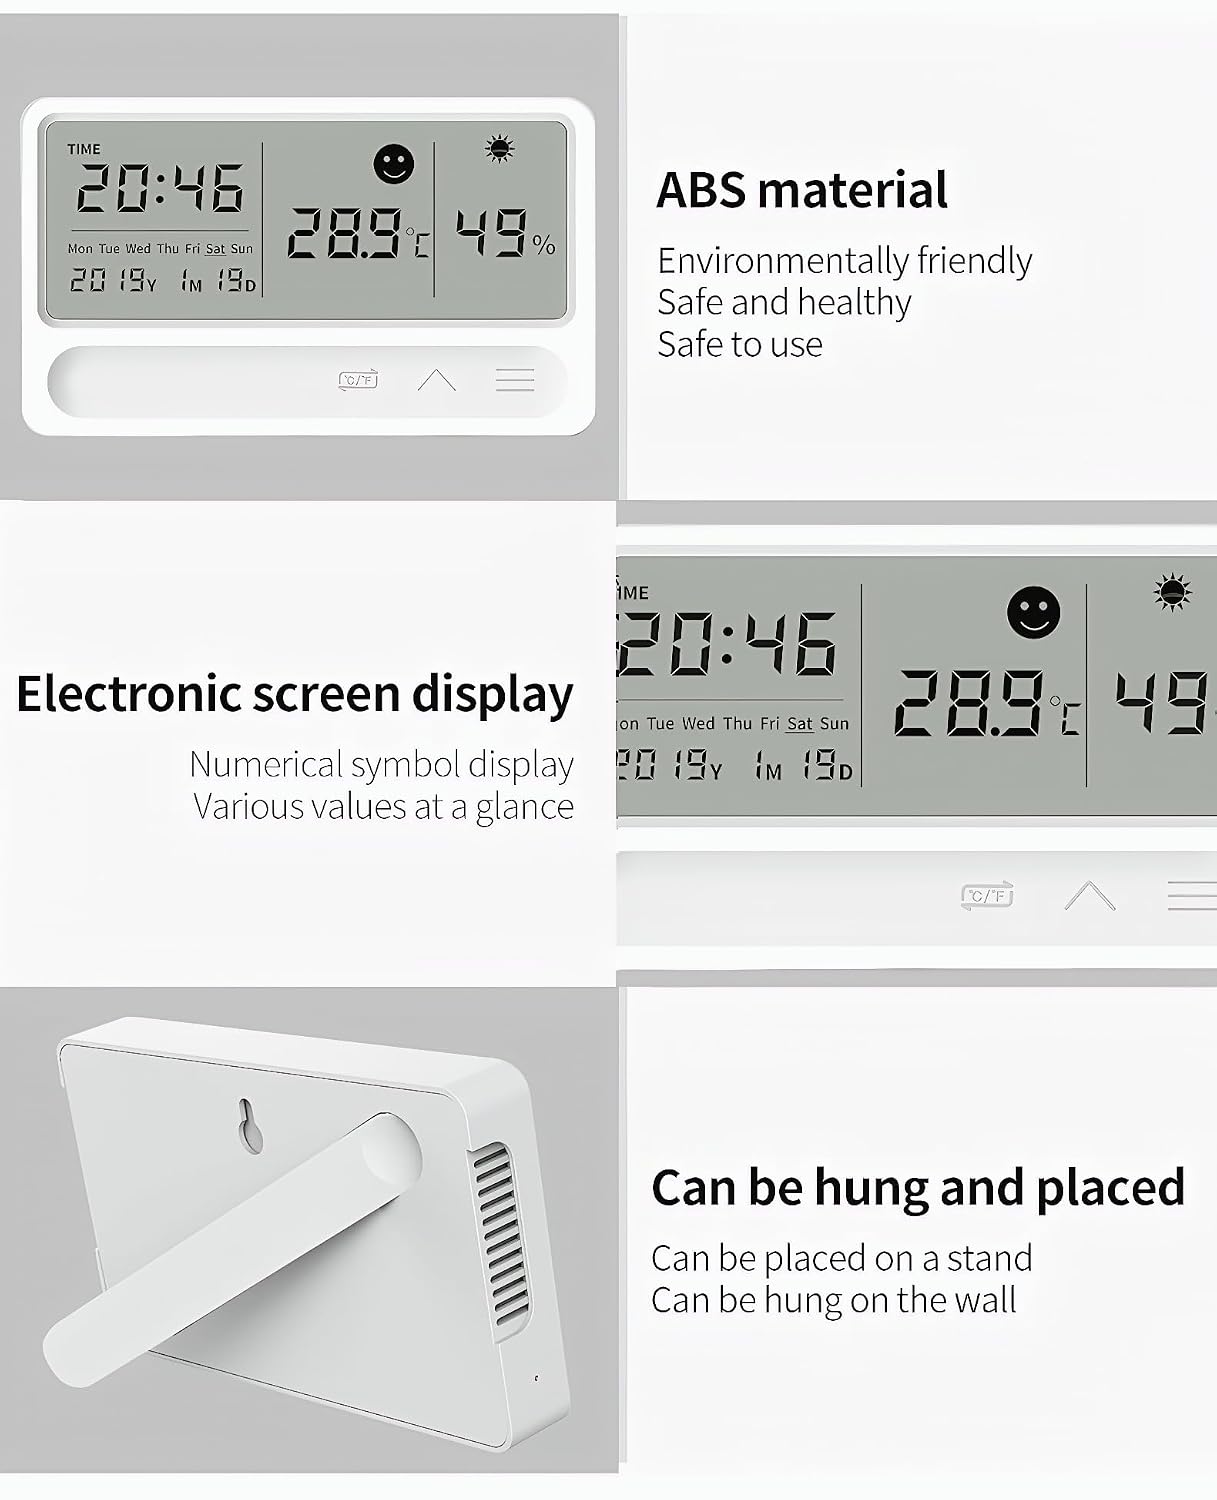
Image 2.1: The device features durable ABS material, a clear electronic screen, and can be placed on a stand or hung on a wall.
3. Setup
3.1 Unpacking
Carefully remove the hygrometer from its packaging. Ensure all components are present:
- Mengshen MS-TH11 Digital Hygrometer Thermometer
- User Manual (this document)
- Charging Cable
3.2 Powering On and Charging
The device is powered by a rechargeable battery. Before first use, connect the provided charging cable to the device and a suitable USB power source (e.g., computer USB port, USB wall adapter). The device will automatically power on once connected or when sufficiently charged.
3.3 Placement
The MS-TH11 offers two placement options:
- Desk Placement: Use the integrated stand on the back of the device to place it on any flat surface.
- Wall Mounting: Utilize the hanging hole on the back of the device to mount it on a wall using a suitable screw (not included).
4. Operating Instructions
Familiarize yourself with the display and control buttons:

Image 4.1: Overview of the display and control buttons.
- Time Display: Shows the current time.
- Temperature Display: Shows the current temperature.
- Comfort Level Display: An emoticon indicates the comfort level based on temperature and humidity.
- Humidity Display: Shows the current relative humidity.
- Weather Display: Icons indicate current weather conditions (e.g., sunny, rainy).
- Week Display: Shows the current day of the week.
- Date Display: Shows the current date.
- Unit Conversion Button (°C/°F): Press to switch between Celsius and Fahrenheit temperature units.
- Maximum and Minimum Value Buttons (Up/Down Arrows): Press to view recorded maximum and minimum temperature/humidity values. Long press to reset these values.
- Alarm Button (Three Horizontal Lines): Press to enter alarm setting mode or to activate/deactivate the alarm.
4.1 Setting Time and Date
Specific instructions for setting time and date are typically found in the full user manual. Generally, this involves pressing and holding a "SET" or "MODE" button (often combined with the Alarm button or a dedicated button not explicitly labeled in the diagram) to enter setting mode, then using the Up/Down arrow buttons to adjust values, and pressing the "SET" or "MODE" button again to confirm and move to the next setting.
4.2 Setting the Alarm
To set the alarm:
- Press the Alarm Button (10) once to display the current alarm time.
- Press and hold the Alarm Button (10) to enter alarm setting mode. The hour digits will flash.
- Use the Up/Down Arrow Buttons (9) to adjust the hour.
- Press the Alarm Button (10) again to confirm the hour and move to minute setting. The minute digits will flash.
- Use the Up/Down Arrow Buttons (9) to adjust the minutes.
- Press the Alarm Button (10) again to confirm and exit alarm setting mode.
- To activate or deactivate the alarm, press the Alarm Button (10) briefly when not in setting mode. An alarm icon will appear/disappear on the display.
4.3 Switching Temperature Units (°C/°F)
To switch between Celsius and Fahrenheit, simply press the Unit Conversion Button (8) located below the display. The temperature unit will change instantly.

Image 4.2: The device supports both Celsius and Fahrenheit temperature displays.
4.4 Viewing and Resetting Max/Min Records
The device automatically records the maximum and minimum temperature and humidity values since the last reset.
- Press the Up/Down Arrow Buttons (9) briefly to cycle through current, maximum (MAX), and minimum (MIN) readings for temperature and humidity.
- To reset the MAX/MIN records, press and hold the Up/Down Arrow Buttons (9) for a few seconds while viewing the MAX or MIN values. The display will flash, indicating the values have been reset.
5. Maintenance
- Cleaning: Wipe the device with a soft, dry cloth. Do not use abrasive cleaners or immerse the device in water.
- Storage: Store the device in a cool, dry place when not in use for extended periods.
- Battery Care: Recharge the device when the battery indicator shows low power. Avoid fully depleting the battery frequently to prolong its lifespan.
- Environmental Conditions: Avoid exposing the device to extreme temperatures, direct sunlight, or high humidity, which can affect accuracy and lifespan.
6. Troubleshooting
| Problem | Possible Cause | Solution |
|---|---|---|
| Display is blank or dim. | Low battery or device is off. | Connect the device to the charging cable. Ensure it is fully charged. |
| Incorrect temperature/humidity readings. | Device placed near heat/cold sources or in direct sunlight/drafts. | Relocate the device to a stable indoor environment away from extreme temperature fluctuations. Allow 30 minutes for readings to stabilize. |
| Alarm does not sound. | Alarm is not activated or set incorrectly. | Verify the alarm is activated (alarm icon visible). Re-set the alarm time as per section 4.2. |
| Buttons are unresponsive. | Temporary software glitch. | Try restarting the device by disconnecting and reconnecting the power source after a few seconds. |
7. Specifications
- Model: MS-TH11
- Material: ABS
- Screen Type: LED
- Temperature Range: -10°C to 65°C (14°F to 149°F)
- Temperature Accuracy: ±1°C
- Humidity Measurement Range: 10% RH to 99% RH
- Humidity Accuracy: ±5% RH
- Product Dimensions: 12.5 x 7.5 x 1.7 cm (4.9 x 2.9 x 0.6 inches)
- Screen Dimensions: 11.3 x 4.3 cm (4.4 x 1.7 inches)
- Power Supply: Rechargeable (via Charging Cable)

Image 7.1: Dimensions of the Mengshen MS-TH11 Digital Hygrometer Thermometer.
8. Warranty Information
Specific warranty details for the Mengshen MS-TH11 Digital Hygrometer Thermometer are not provided in this manual. Please refer to the product packaging or contact the retailer/manufacturer for warranty terms and conditions.
9. Support
For further assistance or technical support, please contact Mengshen customer service through the retailer's platform or the official Mengshen website. Please have your product model number (MS-TH11) and purchase details ready when contacting support.