
1. Introduction
This manual provides essential instructions for the safe and effective operation, setup, and maintenance of your ARCCAPTAIN 250A MIG Welder and accompanying welding helmet. Please read this manual thoroughly before operating the equipment to ensure proper use and to prevent injury or damage.
The ARCCAPTAIN 250A MIG Welder is a versatile 6-in-1 welding machine designed for various welding processes, including Gas MIG, Gasless MIG, Lift TIG, MMA (Stick), Spot Welding, and Spool Gun applications. It is suitable for welding mild steel, carbon steel, stainless steel, and aluminum.
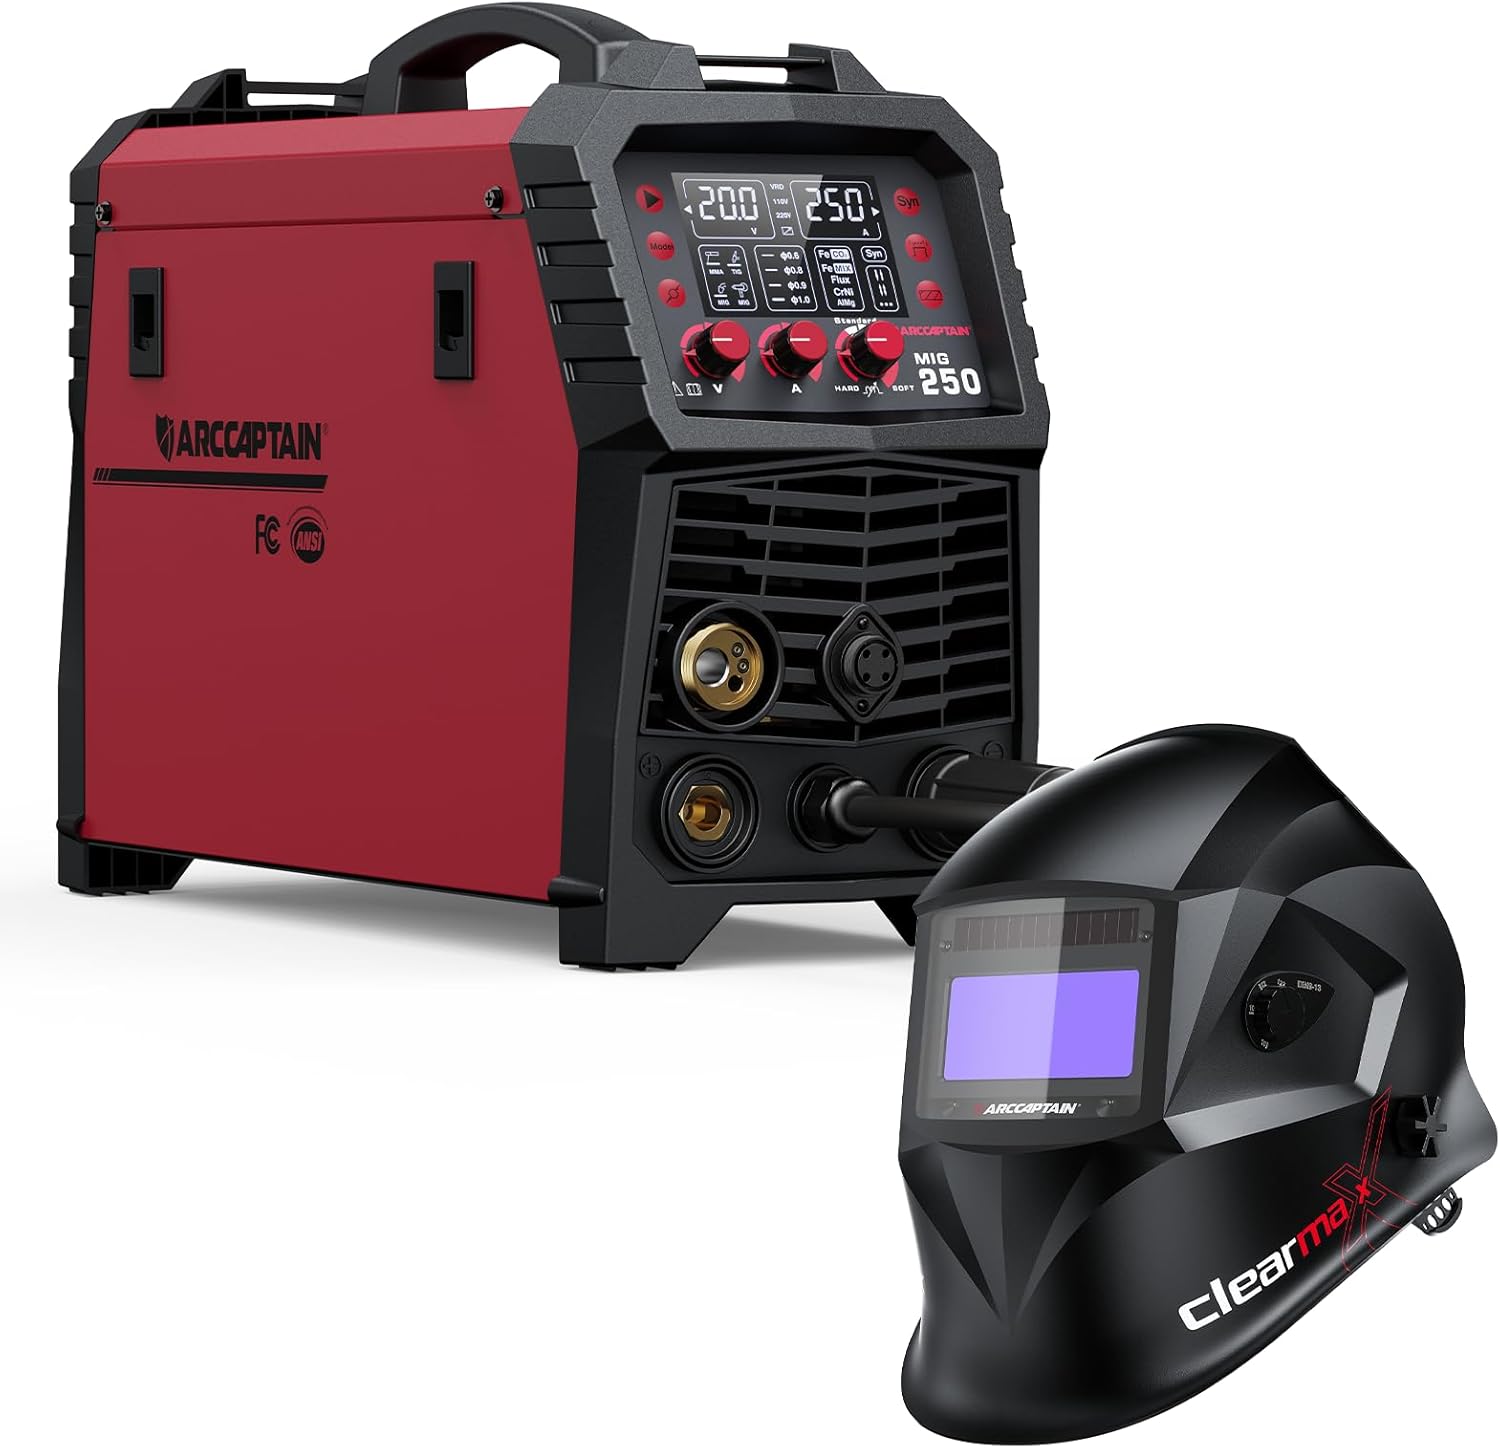
Image 1.1: The ARCCAPTAIN 250A MIG Welder and the included ARCCAPTAIN Large Viewing Screen Welding Helmet.
2. Safety Information
WARNING: Welding can be dangerous. Always follow safety precautions to prevent serious injury or death.
- Electric Shock: Welding current can cause fatal electric shock. Ensure proper grounding and insulation. Never touch live electrical parts.
- Fumes and Gases: Welding fumes and gases can be hazardous to your health. Work in a well-ventilated area. Use an exhaust fan or fume extractor if necessary.
- Arc Rays: Arc rays can injure eyes and burn skin. Always wear a welding helmet with appropriate shade settings and protective clothing.
- Fire and Explosion: Welding sparks and hot metal can cause fires or explosions. Keep flammable materials away from the welding area. Have a fire extinguisher readily available.
- Burns: Hot metal and sparks can cause severe burns. Wear protective gloves, long sleeves, and other appropriate clothing.
- Machine Protection: The welder is equipped with VRD (Voltage Reduction Device), over-current, over-voltage, over-load, and overheating protection functions. Do not power on the machine until the screen turns off and the fan stops working after shutdown, indicating the internal components have cooled.
- Always ensure the machine is turned off and unplugged before performing any maintenance or changing accessories.
3. Package Contents
Upon unpacking, verify that all items listed below are present and undamaged. If any items are missing or damaged, contact ARCCAPTAIN customer support immediately.
- 1 × ARCCAPTAIN MIG250 MIG Welder Machine
- 1 × 10 ft MIG Torch
- 1 × 10 ft Earth Clamp
- 1 × 10 ft Stick Holder
- 2 × Contact Tips (.030" & .035")
- 3 × Wire Feed Rollers (K & V types)
- 1 × 10 ft Gas Hose
- 1 × 220V to 110V Wire Adapter
- 1 × User Manual (this document)
- 1 × ARCCAPTAIN Large Viewing Screen Welding Helmet (if purchased as a bundle)
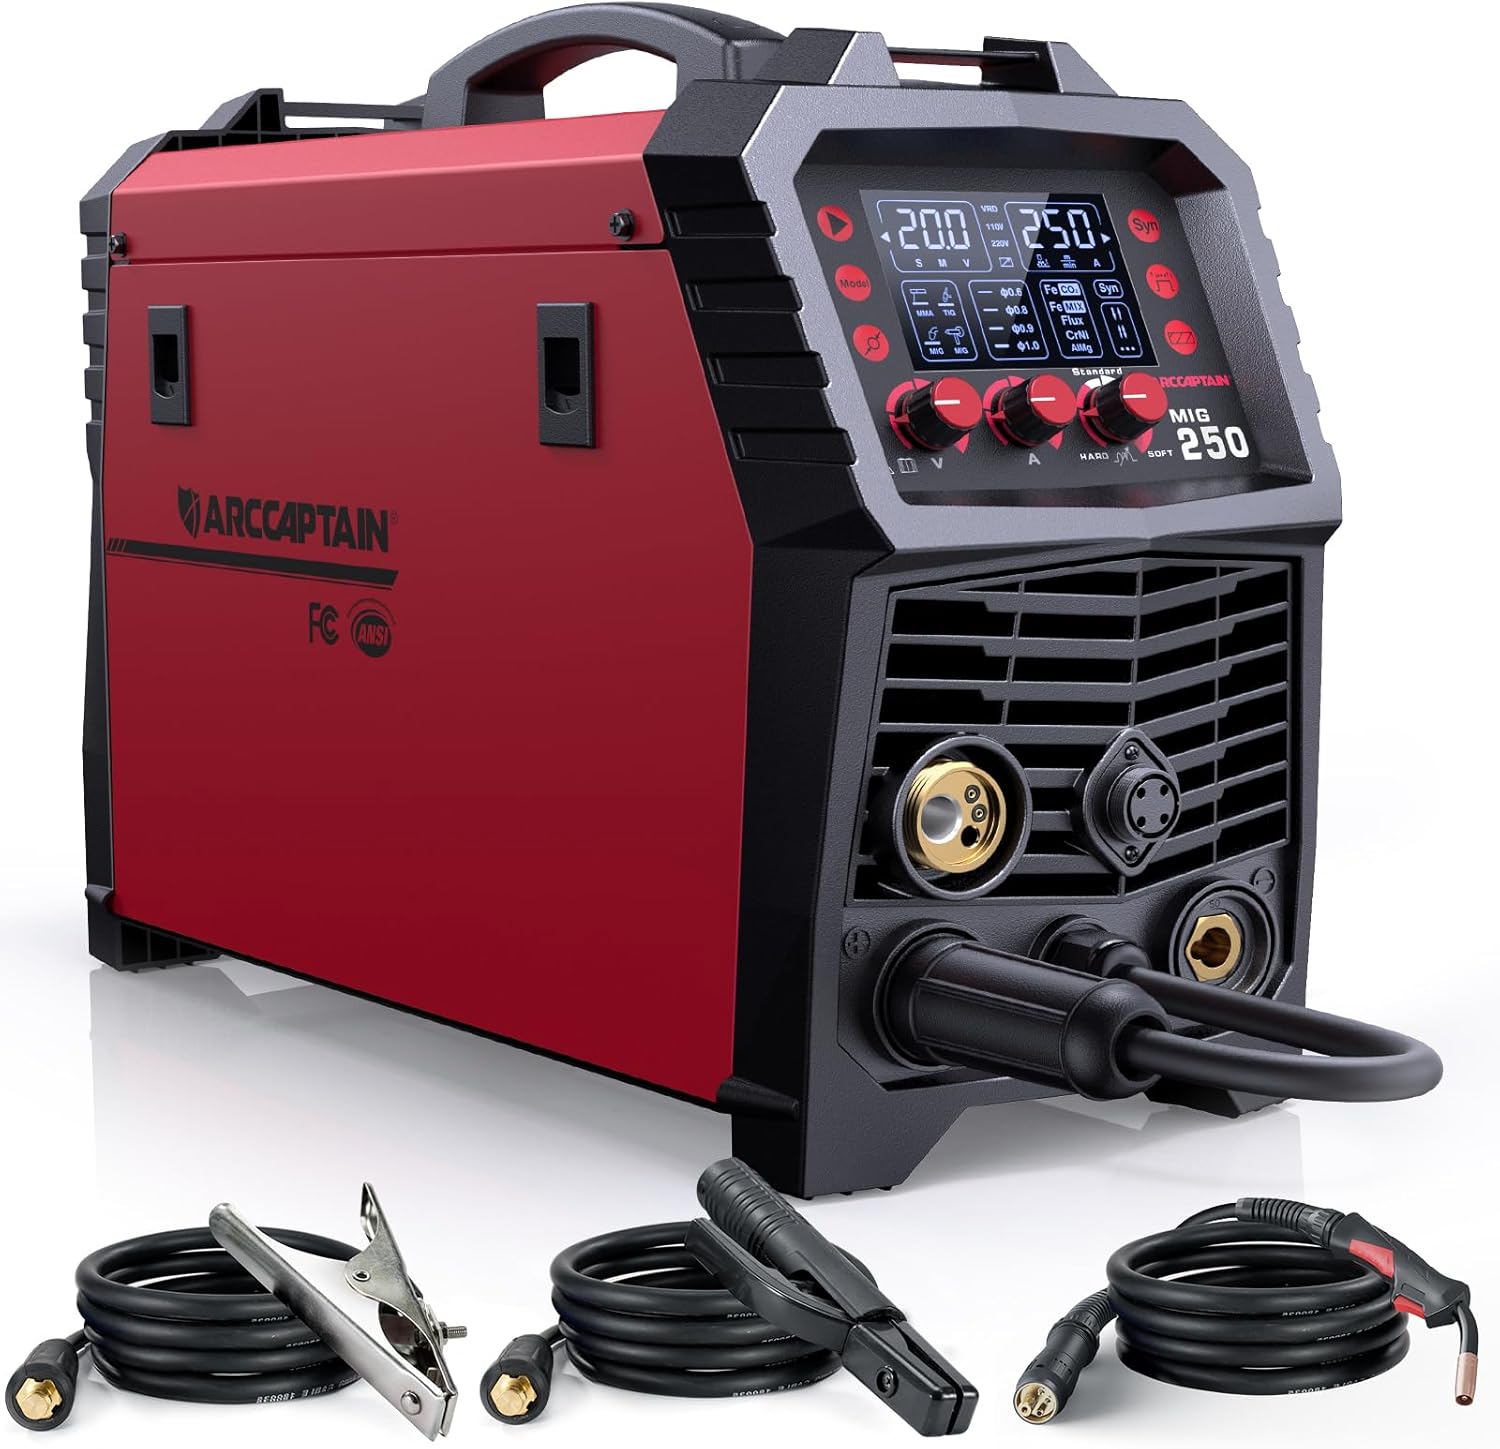
Image 3.1: The ARCCAPTAIN 250A MIG Welder shown with its standard accessories, including the MIG torch, earth clamp, and stick holder.
4. Setup
4.1 Power Connection
The ARCCAPTAIN 250A MIG Welder supports both 110V and 220V power inputs. Use the provided 220V to 110V wire adapter if operating on a 110V circuit. Ensure the power source is stable and capable of supplying the required amperage for welding.
4.2 Connecting Welding Cables
- MIG Torch: Connect the MIG torch to the designated MIG output terminal on the front panel. Ensure it is securely fastened.
- Earth Clamp: Connect the earth clamp cable to the ground terminal. Attach the earth clamp securely to the workpiece or welding table, ensuring good electrical contact.
- Stick Holder (for MMA): If performing MMA welding, connect the stick holder cable to the appropriate terminal.
- Gas Hose (for Gas MIG): For Gas MIG welding, connect the gas hose from your shielding gas cylinder regulator to the gas inlet on the welder.
- Spool Gun (Optional): If using a spool gun for aluminum welding, connect it to the dedicated spool gun port. Note that the spool gun is typically purchased separately.
4.3 Wire Feed Roller Installation
Select the appropriate wire feed roller (K or V type) based on your welding wire type and diameter. Install it into the wire feed mechanism according to the instructions inside the wire compartment. Ensure the wire is properly seated in the groove and tensioned correctly.
4.4 Welding Helmet Setup
The ARCCAPTAIN Large Viewing Screen Welding Helmet requires minimal setup. Adjust the headgear for a comfortable and secure fit. Ensure the shade setting is appropriate for your welding process and amperage. Refer to the helmet's separate manual for detailed instructions on battery installation (if applicable) and shade adjustment.

Image 4.1: The ARCCAPTAIN Large Viewing Screen Welding Helmet highlighting its features such as True Color, PA Durable Material, 1/25000s Darkening, 4 Premium Sensors, and Optical Class 1/1/1/1.
5. Operation
The ARCCAPTAIN 250A MIG Welder offers six distinct welding modes. Select the appropriate mode for your application using the control panel.

Image 5.1: Overview of the six welding processes supported by the ARCCAPTAIN 250A MIG Welder.
5.1 Welding Modes
- Gas MIG (GMAW): Uses a shielding gas (e.g., CO2, Argon, or Argon/CO2 mix) to protect the weld puddle from atmospheric contamination. Ideal for clean, high-quality welds on various metals.
- Gasless MIG (FCAW - Flux-Cored Arc Welding): Uses flux-cored wire that produces its own shielding gas, eliminating the need for an external gas cylinder. Suitable for outdoor welding and thicker materials.
- Lift TIG (GTAW): A precise welding process for thin materials and high-quality welds. Requires an additional Lift TIG torch (not included) and shielding gas. The arc is initiated by gently touching the tungsten electrode to the workpiece and lifting.
- MMA (SMAW - Shielded Metal Arc Welding / Stick Welding): Uses a consumable electrode coated in flux. Versatile for various metals and conditions, often used for heavy fabrication and outdoor repairs.
- Spot Welding: A specialized function for joining two pieces of sheet metal at specific points. Consult the welder's interface for specific spot welding settings.
- Spool Gun: Primarily used for welding aluminum, which requires a dedicated spool gun to feed softer aluminum wire reliably. The spool gun is purchased separately.

Image 5.2: An operator using the ARCCAPTAIN 250A MIG Welder with a spool gun for aluminum welding. The spool gun is an optional accessory.
5.2 Synergic MIG Welding
The ARCCAPTAIN 250A features a synergic MIG function that automatically matches wire feed speed and voltage based on your selected wire diameter, gas type, and material. This simplifies setup and optimizes welding parameters.
- Press the "SYN" button on the control panel.
- Choose the desired wire diameter.
- Select the appropriate gas/material combination.
The machine will then suggest optimal settings, which can be fine-tuned if needed.

Image 5.3: The digital display of the ARCCAPTAIN 250A MIG Welder illustrating the steps for synergic MIG welding setup.
5.3 Advanced Digital Functions
The welder incorporates a fully digital MCU and high-integrity circuit design for enhanced stability and performance. Key advanced functions include:
- Adaptive Crater: Helps fill the weld crater at the end of a weld, reducing defects.
- Burn-back Adjustment: Controls how much wire burns back after the arc is extinguished, preventing the wire from sticking in the contact tip.
- Pre-flow/Post-flow: Controls the flow of shielding gas before and after welding, protecting the weld puddle and electrode.
6. Maintenance
Regular maintenance ensures the longevity and optimal performance of your welding machine.
- Cleaning: Periodically clean the welder's exterior with a dry, soft cloth. Use compressed air to clear dust from internal components, ensuring the machine is unplugged.
- Wire Feed System: Inspect the wire feed rollers and contact tips regularly for wear. Replace worn parts to ensure consistent wire feeding.
- Cables and Connections: Check all welding cables, torch, and earth clamp for damage or loose connections. Repair or replace as needed.
- Cooling Fan: Ensure the cooling fan vents are clear of obstructions to allow for efficient heat dissipation. The intelligent fan system helps extend machine life.
- Welding Helmet: Clean the helmet's viewing screen with a soft cloth. Replace outer and inner protective lenses as they become scratched or pitted.
7. Troubleshooting
This section addresses common issues you might encounter. For problems not listed here, contact ARCCAPTAIN customer support.
| Problem | Possible Cause | Solution |
|---|---|---|
| No power to the machine | Power cord unplugged, circuit breaker tripped, faulty power switch. | Check power connections, reset circuit breaker, contact service if switch is faulty. |
| No arc / Weak arc | Poor earth clamp connection, incorrect settings, worn contact tip, wire feed issue. | Ensure good earth connection, verify settings, replace contact tip, check wire feed path. |
| Wire feeding inconsistently | Incorrect wire tension, wrong wire feed roller, clogged liner, bent wire. | Adjust tension, use correct roller, clean/replace liner, straighten wire. |
| Overheating protection activated | Exceeded duty cycle, blocked cooling vents, high ambient temperature. | Allow machine to cool down, clear vents, operate in a cooler environment. |
| Welding helmet not darkening | Low battery, sensors blocked, incorrect sensitivity setting. | Replace battery, ensure sensors are clear, adjust sensitivity. |
8. Specifications
| Feature | Detail |
|---|---|
| Model | MIG250 |
| Input Voltage | 110V / 220V (Dual Voltage) |
| Max Amperage | 250 Amps |
| Welding Processes | Gas MIG, Gasless MIG, Lift TIG, MMA (Stick), Spot, Spool Gun |
| Suitable Materials | Mild Steel, Carbon Steel, Stainless Steel, Aluminum |
| Control System | Fully Digital MCU |
| Protection Functions | VRD, Over-current, Over-voltage, Over-load, Overheating |
| Welding Helmet Optical Class | 1/1/1/1 (for included helmet) |
| Welding Helmet Darkening Speed | 1/25000s (for included helmet) |
9. Warranty and Support
For warranty information, technical support, or service inquiries, please refer to the warranty card included with your product or visit the official ARCCAPTAIN website. Keep your purchase receipt as proof of purchase.
ARCCAPTAIN Official Website: Visit the ARCCAPTAIN Store on Amazon


