
LVWIT HY-DLB01-12
Contents
LVWIT 4-Inch 5CCT LED Recessed Lights with Night Light
Instruction Manual
Model: HY-DLB01-12
1. Introduction
Thank you for choosing LVWIT 4-Inch 5CCT LED Recessed Lights with Night Light. This product is designed to provide versatile lighting solutions for your home, featuring both a main downlight mode with selectable color temperatures and a soft amber night light mode. Please read this manual carefully before installation and use to ensure proper operation and safety.
What's in the Box:
- LVWIT 4-Inch 5CCT LED Recessed Lights (6 units)
- E26 Screw Base Adapters (6 units)
- Instruction Manual (this document)

Figure 1.1: LVWIT 4-inch recessed lights demonstrating both the warm amber night light mode and the bright main light mode in a modern living space and kitchen.
2. Important Safety Information
Please read and understand all safety instructions before installing or using this product. Failure to do so may result in electric shock, fire, or other injuries.
- WARNING: Risk of electric shock. Disconnect power at the fuse or circuit breaker before installation or servicing.
- This product must be installed in accordance with the applicable installation code by a person familiar with the construction and operation of the product and the hazards involved.
- Do not use with dimmers other than those specified as compatible. Refer to the operating instructions for compatible dimmer types.
- Do not modify the fixture or its components.
- Ensure the supply voltage is 120V AC.
- Suitable for damp locations. Not suitable for direct exposure to water.
- IC Rated: Suitable for direct contact with insulation.
- Consult a qualified electrician if you are unsure about the installation process.
3. Product Features
- 2-in-1 Lighting with Night Light: Features two distinct modes controlled by a standard wall switch: a 2000K amber night light mode for a soft glow and a 5CCT downlight mode for everyday illumination.
- 5CCT Selectable: Choose from five color temperatures (2700K, 3000K, 4000K, 5000K, 6000K) to suit any environment or preference.
- Smooth Dimming (5%-100%): Both downlight and night light modes are fully dimmable with most standard LED dimmers, allowing for adjustable brightness.
- Easy Retrofit Installation: Designed to fit standard 4-inch recessed housings with an E26 screw base for quick, tool-free installation.
- Synchronization Reset: If multiple lights become out of sync, turn off power for over 10 seconds, then turn on again to reset and synchronize all units to the default downlight mode.
- Energy Efficient: 7W LED provides 700 lumens, equivalent to a 60W incandescent bulb.
- Certifications: ETL Listed and IC Rated for safety and energy efficiency.

Figure 3.1: Examples of LVWIT recessed lights providing different ambiances with 5CCT options and night light mode in various room settings.
4. Setup and Installation
Before you begin: Ensure power is turned off at the circuit breaker or fuse box to avoid electric shock.
- Turn Off Power: Locate the circuit breaker controlling the light fixture and switch it to the OFF position.
- Screw in E26 Adapter: Screw the provided E26 adapter into the existing light socket of your 4-inch recessed can housing.
- Select Color Temperature: On the side of the LED light fixture, locate the CCT selector switch. Choose your desired color temperature (2700K, 3000K, 4000K, 5000K, or 6000K) before installation.
- Connect TP24 Connector: Connect the TP24 connector from the E26 adapter to the connector on the LED light assembly. Ensure a secure connection.
- Insert Light Assembly: Gently push the LED light assembly into the recessed can, tucking any excess wires neatly inside. The torsion springs or clips on the light fixture will secure it in place.
- Restore Power: Turn the power back on at the circuit breaker. Test the light by flipping your wall switch.

Figure 4.1: Visual guide illustrating the installation process: 1. Screw adapter, 2. Set color switch, 3. Connect TP24, 4. Push light into can, 5. Restore power.

Figure 4.2: Simplified installation steps: 1. Screw E26 adapter, 2. Select color temperature, 3. Connect can light and adapter, 4. Push into wall.
5. Operating Instructions
5.1 Switching Between Main Light and Night Light Modes
The LVWIT recessed light features two modes: the main downlight mode and the night light mode. These modes are controlled by your standard wall switch.
- To activate Main Light Mode: Turn the wall switch ON. The light will default to the main downlight mode.
- To activate Night Light Mode: With the light ON (in main light mode), quickly flip the wall switch OFF and then ON again within 3 seconds. The light will switch to the 2000K amber night light mode.
- To return to Main Light Mode: If the light is in night light mode, quickly flip the wall switch OFF and then ON again within 3 seconds. The light will return to the main downlight mode.
Note: If the light is turned off for more than 10 seconds, it will reset to the main light mode when turned back on.

Figure 5.1: Instructions for mode switching: Turn On (main light), Turn Off, Turn On (within 3s for night light).
5.2 Dimming Function
Both the main downlight mode and the night light mode are dimmable from 5% to 100% with compatible LED dimmers. Ensure you are using a dimmer designed for LED lighting.

Figure 5.2: Dimming range from 5% to 100% for both light modes, with examples of compatible dimmer models from Lutron, Leviton, and Eaton.
5.3 Synchronization Reset
If you have multiple LVWIT recessed lights and they become out of sync (e.g., some are in main light mode while others are in night light mode), you can reset them:
- Turn off the power to all affected lights at the wall switch or circuit breaker.
- Wait for at least 10 seconds.
- Turn the power back on. All lights will reset to the default main downlight mode, ensuring they are synchronized.
6. Maintenance
The LVWIT LED recessed lights require minimal maintenance.
- Cleaning: Ensure power is off before cleaning. Wipe the fixture with a soft, dry, or slightly damp cloth. Do not use abrasive cleaners or solvents, as they may damage the finish or electrical components.
- No User-Serviceable Parts: There are no user-serviceable parts inside the fixture. Do not attempt to open or repair the unit.
7. Troubleshooting
| Problem | Possible Cause | Solution |
|---|---|---|
| Light does not turn on. | No power to the fixture. Loose wiring connection. Faulty light fixture. | Check circuit breaker/fuse. Ensure wall switch is ON. Verify all connections are secure (power off first). If problem persists, contact customer support. |
| Light flickers or dims improperly. | Incompatible dimmer switch. Loose wiring connection. | Ensure dimmer is LED compatible and meets specifications. Check wiring connections (power off first). |
| Lights are out of sync. | Individual lights switched modes at different times. | Perform a synchronization reset (see Section 5.3). |
| Cannot switch modes. | Switching too slowly. Faulty wall switch. | Ensure wall switch is flipped OFF-ON within 3 seconds. Test with another switch if possible. |
8. Specifications
| Feature | Detail |
|---|---|
| Model Number | HY-DLB01-12 |
| Size | 4-inch |
| Power Consumption | 7W |
| Equivalent Wattage | 60W |
| Brightness | 700 Lumens |
| Color Temperature (CCT) | 2700K, 3000K, 4000K, 5000K, 6000K (Selectable) |
| Night Light Color Temperature | 2000K Amber |
| Dimmability | 5%-100% (with compatible LED dimmers) |
| Input Voltage | 120V AC |
| Bulb Base | E26 |
| Material | Plastic |
| Indoor/Outdoor Usage | Indoor |
| Water Resistance Level | Not Water Resistant (Suitable for Damp Locations) |
| Certifications | ETL Listed, IC Rated |
| Item Dimensions (L x W x H) | 5.2"L x 5.2"W x 1.3"H |
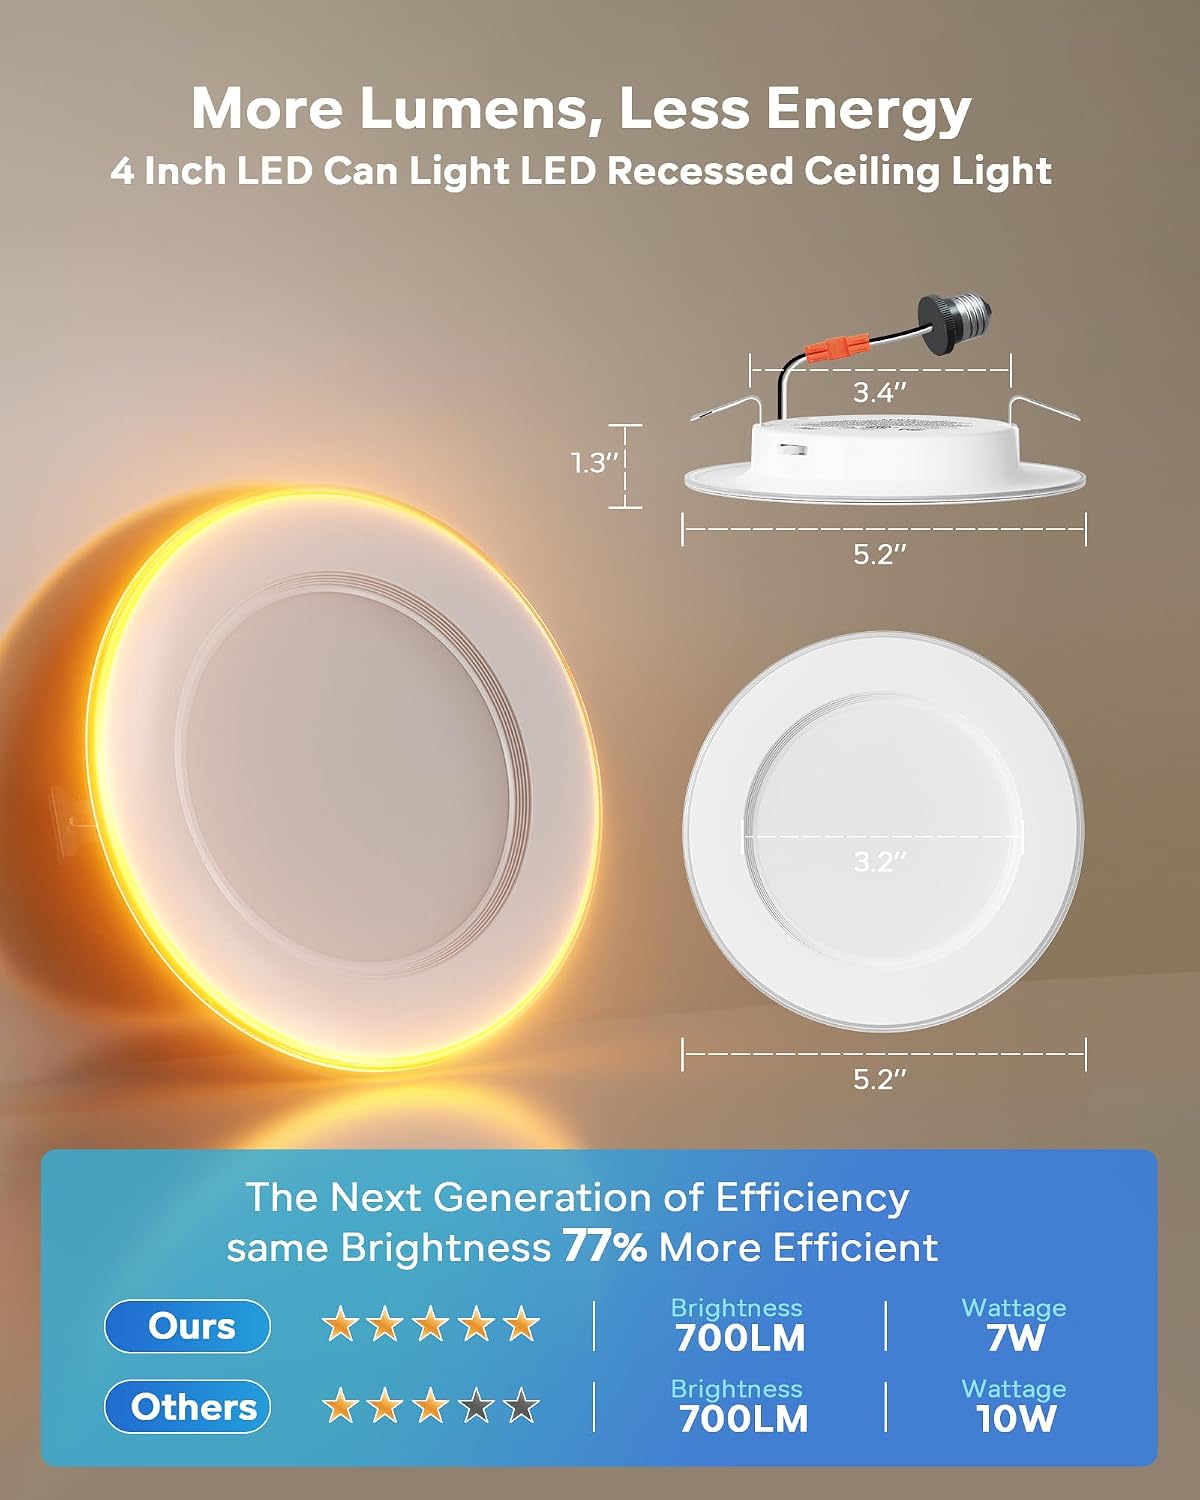
Figure 8.1: Product dimensions and efficiency comparison, highlighting 7W for 700LM output.
9. Warranty and Support
9.1 Manufacturer's Warranty
This LVWIT product is covered by a 3-year manufacturer's warranty from the date of purchase. This warranty covers defects in materials and workmanship under normal use. It does not cover damage caused by improper installation, misuse, abuse, accidents, or unauthorized modifications.
Please retain your proof of purchase for warranty claims.
9.2 Customer Support
If you have any questions, require technical assistance, or need to make a warranty claim, please contact LVWIT customer support through the retailer where the product was purchased or visit the official LVWIT website for contact information.
Ask a question about this manual
Ask about setup, troubleshooting, compatibility, parts, safety, or missing instructions. Manuals+ will review the question and use this page’s manual context to help answer it.