
1. Safety Information
Please read all instructions carefully before installation and use. Failure to follow these instructions may result in electric shock, fire, or other hazards.
- Always disconnect power at the circuit breaker before installing, servicing, or cleaning the unit.
- All electrical wiring must be performed by a qualified electrician in accordance with all applicable local codes and standards.
- Wear safety glasses and gloves during installation.
- Ensure the fan is properly grounded.
- Do not install this fan in a ceiling with insulation that exceeds the fan's rated temperature.
- This fan is intended for general ventilating use only. Do not use to exhaust hazardous or explosive materials and vapors.
2. Package Contents
Verify that all components are present and undamaged before proceeding with installation.
- LUMLLSAJI 10-inch Bathroom Exhaust Fan Unit with Integrated LED Light
- Aluminum Foil Tube (Ducting)
- Clamps (for securing ducting)
- Instruction Manual

Image: Overview of the product components, including the exhaust fan unit, aluminum foil tube for ducting, and metal clamps.
3. Specifications
| Feature | Specification |
|---|---|
| Brand | LUMLLSAJI |
| Model Number | 000151al250916um |
| Air Flow Capacity | 110 CFM |
| Noise Level | 1.0 Sones |
| Lighting | 5-Color Temperature Adjustable LED (2700K-6500K), 1000 Lumens, CRI >80 |
| Total Power | 35W (23W Motor, 12W Lighting) |
| Input Voltage | 100-120V AC, 50/60Hz |
| Product Dimensions (D x W x H) | 10" x 10" x 6.9" |
| Mounting Opening (Suggested) | 8.5 inches (actual unit fits 8"x8" opening) |
| Installation Type | Ceiling Mount |
| Recommended Use | Bathroom, Kitchen, Laundry Room, Utility Room, Garage |

Image: Visual representation of product dimensions and key specifications, including the aluminum foil tube and clamp.
4. Installation
Follow these steps for proper installation of your exhaust fan. Ensure power is disconnected before starting.
- Prepare Ceiling Opening: Ensure the ceiling opening is approximately 8.5 inches for optimal fit. The fan unit itself requires an 8x8 inch opening.
- Mount the Fan Unit: Position the fan unit into the ceiling opening. Use screws to fix the unit to the mounting arm or ceiling joists in the reserved positions.
- Connect Ducting: Attach the provided aluminum foil tube to the fan's exhaust port. Route the ducting to an exterior vent. Secure the ducting to the fan and the exterior vent using the provided clamps to ensure an airtight seal.
- Electrical Wiring: Connect the household electrical wires (Live, Neutral, Ground) to the corresponding terminals on the fan unit. Ensure all connections are secure and comply with local electrical codes.
- Set Light Color Temperature: Before attaching the light panel, locate the 5CCT toggle switch on the back of the light cover. Select your desired color temperature (2700K, 3500K, 4000K, 5000K, or 6000K).
- Install Light Panel: Once wiring is complete and the color temperature is set, attach the light panel to the fan unit.
- Test Operation: Restore power at the circuit breaker and test the fan and light functions.

Image: Diagram illustrating the required ceiling opening dimensions for installation.
Video: An official product video from LUMLLSAJI demonstrating the features and providing a general overview of the bathroom exhaust fan with light. This video can provide visual context for the installation process.
5. Operating Instructions
Your LUMLLSAJI exhaust fan with light is designed for simple operation.
- Fan Operation: The exhaust fan is typically controlled by a standard wall switch connected to the fan's power supply. Flip the switch to turn the fan ON or OFF.
- Light Operation: The integrated LED light is also controlled by a standard wall switch, often separate from the fan switch if wired independently. Flip the switch to turn the light ON or OFF.
- Adjusting Light Color Temperature (CCT): The light features 5 adjustable color temperatures. To change the CCT, you must access the toggle switch located on the back of the light cover. This adjustment is usually made during installation or maintenance. Once set, the light will operate at the chosen CCT until manually changed again.
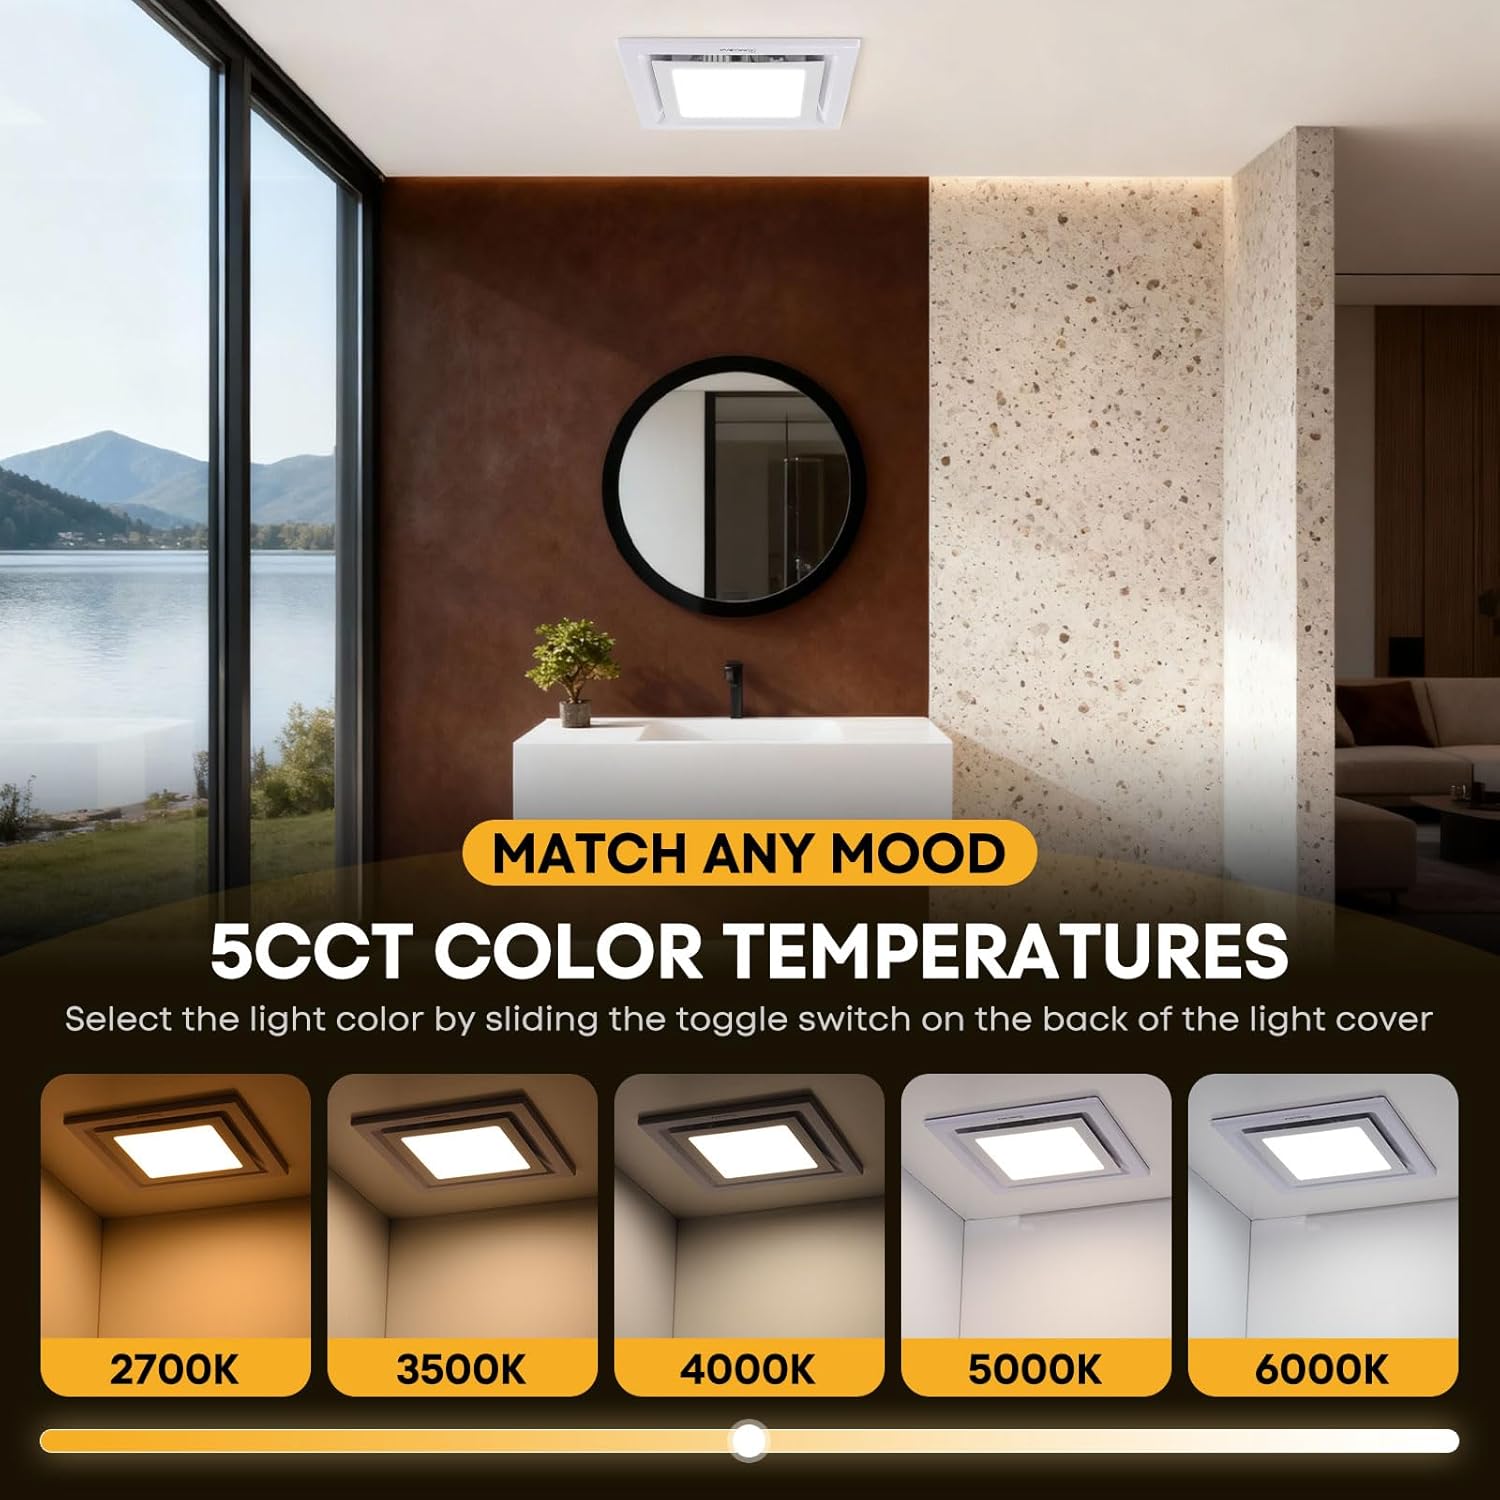
Image: Visual guide to the 5 CCT (Correlated Color Temperature) options available for the integrated LED light.

Image: Illustration of the fan's effectiveness in quickly clearing steam and odors from a bathroom environment.
6. Maintenance
Regular maintenance ensures optimal performance and longevity of your exhaust fan.
- Disconnect Power: Always turn off power at the circuit breaker before performing any maintenance.
- Clean Light Cover and Grille: Gently remove the light cover and grille. Wash with mild soap and water, rinse thoroughly, and dry completely before reattaching.
- Clean Fan Blades and Housing: Using a soft cloth or brush, carefully clean any dust or debris from the fan blades and the interior of the fan housing. Avoid using abrasive cleaners or solvents.
- Inspect Ducting: Periodically check the ducting for any obstructions, kinks, or damage that could impede airflow.
- Reassemble: Once clean and dry, reattach the fan grille and light cover. Restore power.

Image: The fan unit installed in a bathroom, emphasizing its bright light and the 'Easy to Clean' feature of the internal components.
7. Troubleshooting
If you encounter issues with your exhaust fan, refer to the following common problems and solutions:
| Problem | Possible Cause | Solution |
|---|---|---|
| Fan does not operate | No power supply Loose wiring Faulty wall switch | Check circuit breaker and wall switch. Ensure all electrical connections are secure. Consult a qualified electrician if necessary. |
| Light does not turn on | No power supply Loose wiring Faulty wall switch Incorrect CCT switch setting | Check circuit breaker and wall switch. Verify wiring connections. Ensure the CCT toggle switch on the light cover is set to a valid position. |
| Excessive noise during operation | Obstruction in fan or ducting Loose mounting screws Damaged fan blades | Disconnect power and inspect fan blades and ducting for obstructions. Tighten all mounting screws. If fan blades are damaged, contact customer support. |
| Poor ventilation/steam not clearing | Ducting obstruction or leak Improper ducting size Fan unit not operating at full capacity | Check ducting for blockages or leaks. Ensure ducting is correctly sized and installed. Verify fan is running properly. |
8. Warranty and Support
For warranty information, technical assistance, or any questions regarding your LUMLLSAJI Bathroom Exhaust Fan with Light, please contact LUMLLSAJI customer support through the retailer's platform or the contact information provided with your purchase. Please have your model number (000151al250916um) and purchase date available when contacting support.