Introduction
The Peplink MAX BR1 Pro 5G (HW3) is a rugged, enterprise-grade 5G router designed to provide high-speed, reliable internet connectivity in various environments. Featuring an X65 5G modem, Wi-Fi 6, and advanced networking capabilities like SpeedFusion, this device ensures consistent performance for business-critical applications, vehicles, and remote sites. This manual provides essential information for setting up, operating, and maintaining your router.
Package Contents
Verify that all items listed below are included in your package:
- 1x BR1 Pro 5G (HW3) Router
- 4x LTE/5G Antennas
- 2x Dual Band Wi-Fi Antennas
- 1x GPS Active Antenna
- 1x 12V 2A 4 Pin DC Power Supply

Product Overview
The Peplink MAX BR1 Pro 5G (HW3) features a robust design with multiple connectivity options and indicators.
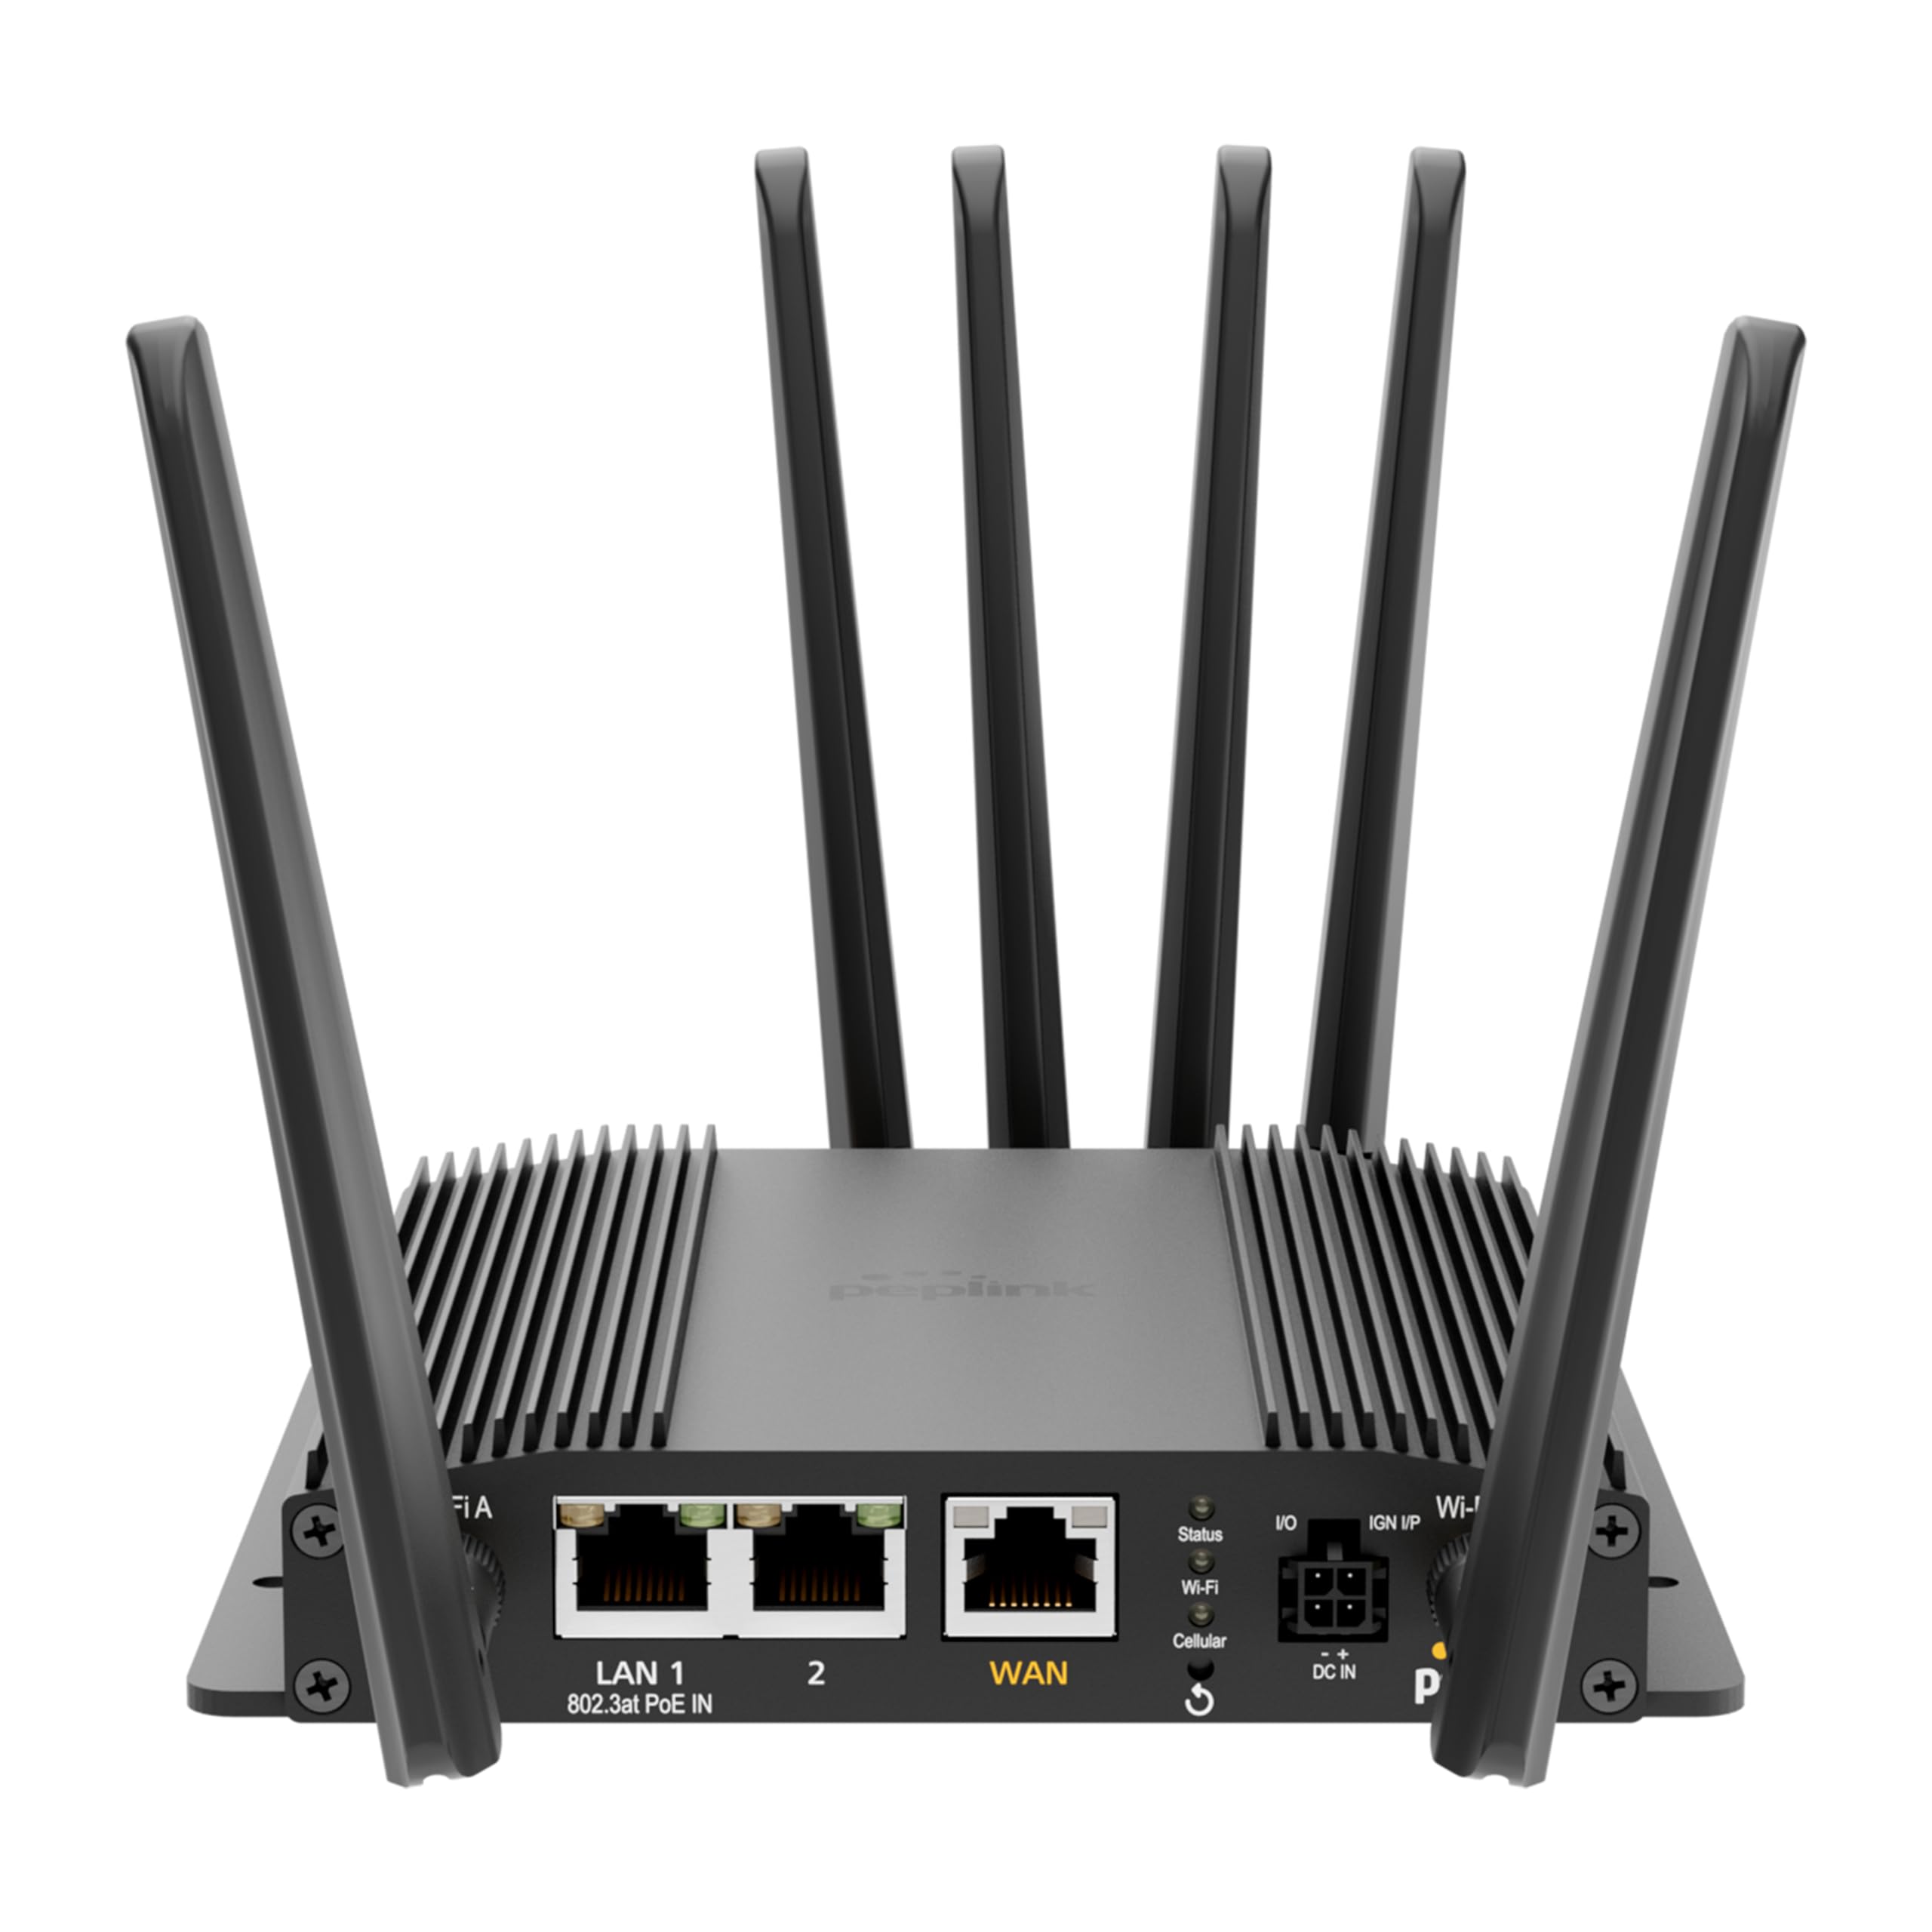
Front Panel

- LAN 1 (802.3at PoE IN): Gigabit Ethernet port with Power over Ethernet input capability.
- LAN 2: Gigabit Ethernet port.
- WAN: Gigabit Ethernet port for primary internet connection.
- Wi-Fi Antenna A & B: Connectors for dual-band Wi-Fi antennas.
- Status LED: Indicates device operational status.
- Wi-Fi LED: Indicates Wi-Fi activity.
- Cellular LED: Indicates cellular signal strength and connection status.
- I/O & IGN I/P: Input/Output and Ignition Input ports for specialized applications.
- DC IN: Power input port.
Rear Panel
- Cellular A, B, C, D: Connectors for LTE/5G cellular antennas.
- GPS: Connector for the GPS active antenna.
- Cellular SIM: Redundant SIM slots for 5G/LTE connectivity.
Setup
1. SIM Card Installation
- Ensure the router is powered off.
- Locate the Cellular SIM slots on the rear panel.
- Insert your activated Nano-SIM cards into the designated slots until they click into place. The router supports redundant SIM slots for failover.
2. Antenna Connection
- Connect the 4 LTE/5G antennas to the Cellular A, B, C, and D ports on the rear panel.
- Attach the 2 Dual Band Wi-Fi antennas to the Wi-Fi Antenna A and B ports on the front panel.
- Connect the GPS Active Antenna to the GPS port on the rear panel.
- Ensure all antenna connections are finger-tight.
3. Power Connection
- Connect the 12V 2A 4 Pin DC Power Supply to the DC IN port on the front panel.
- Alternatively, if using Power over Ethernet, connect an 802.3at PoE-compliant power source to the LAN 1 port.
4. Initial Configuration
- Power on the router. Wait for the Status LED to indicate readiness.
- Connect a computer to one of the LAN ports or connect to the default Wi-Fi network (SSID and password usually found on a label on the device).
- Open a web browser and navigate to the router's default IP address (e.g., http://192.168.50.1).
- Follow the on-screen wizard to set up your administrative password, time zone, and initial WAN connections.
Operating Instructions
Network Connectivity
- 5G/LTE Cellular: The router automatically detects and connects to available 5G or LTE networks via the installed SIM cards. It supports major US carriers (AT&T, Verizon, T-Mobile, FirstNet) and global bands.
- Wi-Fi 6: The built-in Wi-Fi 6 (802.11ax) supports 2x2 MU-MIMO technology, operating in both Wi-Fi WAN and/or AP Mode for fast wireless connections.
- Ethernet WAN: Connect a wired internet source to the WAN port for primary or backup connectivity.
Advanced Features
- SpeedFusion: Utilize Peplink's SpeedFusion bonding and Hot Failover technologies to ensure unbreakable connections and maintain uptime for critical applications.
- GPS & Fleet Ready: Integrated GPS with InControl 2 provides real-time location tracking and remote management capabilities, ideal for mobile deployments.
- Edge Intelligence: Run lightweight applications and diagnostics directly on the router, leveraging its Docker support and 8GB storage.
- PoE-in Power: Supports Power over Ethernet input for flexible deployment in locations with limited power outlets.

Maintenance
Firmware Updates
Regularly check for and install firmware updates through the router's web administration interface. Firmware updates provide new features, security enhancements, and bug fixes. Refer to the Peplink official website for the latest firmware and update instructions.
Cleaning
Use a soft, dry cloth to clean the exterior of the router. Avoid using liquid cleaners or aerosols, which may damage the device. Ensure ventilation slots are clear of dust and debris to prevent overheating.
Troubleshooting
If you encounter issues with your Peplink MAX BR1 Pro 5G (HW3) router, consider the following:
- No Internet Connection: Check the Cellular LED for signal strength. Ensure SIM cards are properly inserted and activated. Verify WAN cable connection if using Ethernet.
- Slow Speeds: Check cellular signal strength. Ensure antennas are correctly positioned. Consider network congestion or data plan limits.
- Wi-Fi Issues: Verify Wi-Fi antennas are connected. Check Wi-Fi LED. Ensure devices are within range and connected to the correct SSID.
- Power Issues: Ensure the power adapter is securely connected or PoE is active on LAN 1.
- Factory Reset: If problems persist, a factory reset may resolve configuration issues. Refer to the device's web interface or the official Peplink documentation for instructions on performing a factory reset.
Specifications
| Feature | Detail |
|---|---|
| Brand | Peplink |
| Model Name | MAX BR1 Pro 5G (HW3) |
| Connectivity Technology | 5G, Ethernet, Wi-Fi |
| Wireless Communication Standard | 802.11ax (Wi-Fi 6) |
| Frequency Band Class | Dual-Band |
| Data Transfer Rate | 1 Gigabits Per Second (LAN), up to 4.1 Gbps (5G downlink) |
| Maximum Upstream Data Transfer Rate | 900 Megabits Per Second |
| Number of Ports | 3 (LAN 1, LAN 2, WAN) |
| PoE Input | 802.3at PoE IN on LAN 1 |
| SIM Slots | Redundant Cellular SIM slots |
| GPS | Integrated GPS with Active Antenna support |
| Edge Computing | Docker support, 8GB storage |
| Security Protocol | WPA2-Enterprise, WPA2-PSK, WPA3 |
| Item Weight | 0.43 Kilograms |
| Item Dimensions L x W x H | 5.78"L x 5.68"W x 1.15"H |
Warranty and Support
The Peplink MAX BR1 Pro 5G (HW3) comes with a 1 Year PrimeCare Warranty. For detailed warranty terms, technical support, and additional resources, please visit the official Peplink website or contact their customer service. Keep your purchase receipt for warranty claims.
For further assistance, refer to the comprehensive documentation available on the Peplink Official Website.