1. Introduction
Thank you for choosing the JOYDEEM Electric Dough Maker HMJ-A351. This appliance is designed to simplify the dough-making process, offering both mixing and fermentation functions for a variety of baked goods. Its intuitive controls and durable construction ensure consistent results and ease of use.

Image 1: The JOYDEEM Electric Dough Maker on a kitchen counter, surrounded by freshly made bread, pizza, and pasta, showcasing its versatile applications.
2. Important Safety Instructions
Please read all instructions carefully before using the appliance to ensure safe operation and prevent damage. Keep this manual for future reference.
- Always unplug the appliance from the power outlet before cleaning or when not in use.
- Do not immerse the motor base in water or any other liquid. Clean with a damp cloth only.
- Keep hands and utensils away from moving parts during operation to prevent injury.
- Ensure the appliance is placed on a stable, flat, and dry surface. The silicone suction cups on the base provide stability.
- Do not operate the appliance with a damaged cord or plug. Contact customer support for assistance.
- This appliance is for household use only.
3. Product Overview
The JOYDEEM Electric Dough Maker HMJ-A351 features a compact vertical design with a user-friendly control panel.
Components:
- Motor Base: Contains the 150W motor and control panel. Equipped with four silicone suction cups for stability.
- Mixing Bowl: 3.7-quart capacity, made of durable 304 stainless steel. Capable of handling 200g to 1100g of flour (max 900g for fermented dough).
- Kneading Blade: Made of 304 stainless steel, designed for efficient dough mixing.
- Lid: Transparent lid with a small top window for adding ingredients during operation.
- Control Panel: Touch-sensitive buttons for mixing, fermentation, time adjustment, and start/stop.
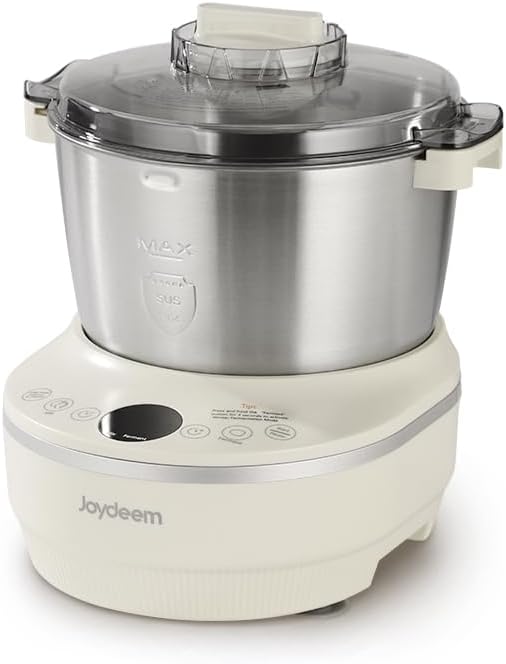
Image 2: The main unit of the JOYDEEM Electric Dough Maker, highlighting its compact design and key components.

Image 3: The interior of the mixing bowl, showing the durable 304 stainless steel construction of both the bowl and the kneading blade.
4. Setup
- Unpack all components and remove any packaging materials.
- Place the motor base on a clean, dry, and stable countertop. Ensure the silicone suction cups are firmly attached to the surface.
- Insert the kneading blade into the center shaft at the bottom of the stainless steel mixing bowl.
- Place the assembled mixing bowl onto the motor base, ensuring it is securely seated.
- Place the transparent lid onto the mixing bowl and twist to lock it in place.
- Plug the power cord into a standard electrical outlet. The display will light up, indicating the appliance is ready for use.
5. Operating Instructions
The JOYDEEM Electric Dough Maker offers three primary modes: dough mixing, dough fermentation, and mixing followed by fermentation.
5.1 Control Panel Overview

Image 4: The intuitive control panel of the dough maker, showing various function buttons and the digital display for time settings.
- Mix Button: Initiates the dough mixing process.
- Ferment Button: Activates the fermentation function. Short press for Summer Mode, long press for Winter Mode.
- Time Adjustment Buttons (+/-): Adjusts mixing or fermentation time in 5-minute intervals.
- Start/Pause Button: Starts or pauses the selected operation.
- Long Press to Cancel: Resets the current operation.
5.2 Dough Mixing
- Add your desired ingredients (flour, water, yeast, etc.) into the mixing bowl. Ensure the total flour weight is between 200g and 1100g.
- Secure the lid on the mixing bowl.
- Press the 'Mix' button. The default mixing time is 15 minutes.
- Use the '+' or '-' buttons to adjust the mixing time between 5 and 40 minutes.
- Press the 'Start/Pause' button to begin mixing. The machine will perform intermittent kneading motions.
- If needed, use the small top window to add additional liquids or ingredients during mixing without stopping the machine.
- The machine will automatically stop once the set time is complete.
5.3 Dough Fermentation
The dough maker features a built-in heating unit and dual fermentation modes for optimal results.
- After mixing, or if you wish to ferment pre-mixed dough, ensure the dough is in the mixing bowl with the lid securely closed.
- Summer Mode: Short press the 'Ferment' button. The temperature will be maintained at 35-40℃ (95-104℉). The default time is 90 minutes.
- Winter Mode: Long press the 'Ferment' button. The temperature will be maintained at 40-45℃ (104-113℉). The default time is 120 minutes.
- Adjust the fermentation time using the '+' or '-' buttons (5-90 minutes for Summer Mode, 5-120 minutes for Winter Mode).
- Press the 'Start/Pause' button to begin fermentation.
- The machine will automatically stop once the set time is complete.

Image 5: Perfectly risen dough inside the mixing bowl, demonstrating the effectiveness of the fermentation function.
5.4 Mixing Followed by Fermentation
You can program the machine to perform both mixing and fermentation in sequence.
- Add all ingredients to the mixing bowl and secure the lid.
- Set the desired mixing time (5-40 minutes) using the 'Mix' and '+/-' buttons.
- Then, select the desired fermentation mode (Summer/Winter) and time (5-90/120 minutes) using the 'Ferment' and '+/-' buttons.
- Press 'Start/Pause'. The machine will first complete the mixing cycle, then automatically proceed to the fermentation cycle.
5.5 Official Product Videos
Video 1: A demonstration of making Korean rolls using the Joydeem Dough Maker, showcasing its mixing and dough preparation capabilities.
Video 2: A detailed review of the Joydeem Electric Dough Maker, highlighting its features and performance in a home kitchen setting.
Video 3: An honest review of the Joydeem Electric Dough Maker, providing insights into its practical use and benefits for dough preparation.
Video 4: A festive demonstration of using Joydeem Dough Makers to prepare dough for various Christmas recipes.
6. Cleaning and Maintenance
Proper cleaning and maintenance will ensure the longevity and optimal performance of your dough maker.
- Always unplug the appliance before cleaning.
- The mixing bowl and kneading blade are made of 304 stainless steel and are detachable for easy cleaning. They can be washed with warm, soapy water.
- Wipe the motor base with a damp cloth. Do not immerse it in water.
- Ensure all parts are thoroughly dried before reassembling or storing the appliance.
7. Troubleshooting
If you encounter any issues with your JOYDEEM Electric Dough Maker, please refer to the following common solutions:
- Appliance does not turn on: Ensure the power cord is securely plugged into a working outlet. Check if the lid is properly closed and locked.
- Dough is too sticky/dry: Adjust the flour-to-water ratio. A recommended ratio is 100:50/60, but this can vary based on flour type and desired consistency. Use the top window to add small amounts of liquid or flour during mixing.
- Dough does not rise: Verify that the correct fermentation mode (Summer/Winter) and time are selected. Ensure the room temperature is not excessively cold, which might affect yeast activity.
- Unusual noise during operation: Ensure the mixing bowl and kneading blade are correctly installed. The machine performs intermittent kneading, which may involve slight variations in sound.
8. Specifications
| Feature | Detail |
|---|---|
| Brand | JOYDEEM |
| Model | HMJ-A351 |
| Capacity | 3.7 Quarts (for mixing flour 200g-1100g, max 900g for fermented dough) |
| Wattage | 150W (for kneading motion) / 200W (general) |
| Material | 304 Stainless Steel (mixing bowl & blade), Plastic (housing) |
| Product Dimensions | 13.2"D x 12"W x 12.5"H |
| Special Features | Dual Seasonal Fermentation Function, Intermittent Kneading Motion, Time Setting Function, Silicone Suction Cups |

Image 6: Product dimensions for the JOYDEEM Electric Dough Maker.
9. Warranty and Support
JOYDEEM offers a 1-year replacement warranty for parts that break under normal use (for home use only). For any questions, technical support, or warranty claims, please contact the seller, FUNKITCHEN, through your purchase platform.


