1. Introduction
Thank you for choosing the REVASRI Mini5-1000 Golf Rangefinder. This device is designed to provide accurate distance measurements for golf, enhancing your game with advanced features such as slope compensation, flag locking with vibration, and 6X magnification. Please read this manual thoroughly before using the product to ensure proper operation and to maximize its performance and longevity.

Image 1.1: The REVASRI Mini5-1000 Golf Rangefinder. This image shows the compact, black rangefinder with its objective and eyepiece lenses, control buttons, and textured grip.
2. Product Features
- Accurate Measurement: Measures distances from 5 to 1000 yards with an accuracy of ±1 yard.
- High-Definition Display: Equipped with an LCD display for clear readings, even in bright conditions.
- 6X Magnification: Provides clear and detailed views of your target.
- Slope Compensation: Calculates adjusted distances based on elevation changes, providing a more accurate 'play as' distance.
- Flag Locking with Vibration: Confirms target acquisition with a short vibration, ensuring you've locked onto the flagstick.
- Scanning Mode: Allows for continuous measurement of multiple targets.
- Magnetic Strip: Conveniently attaches the rangefinder to metal surfaces, such as a golf cart frame.
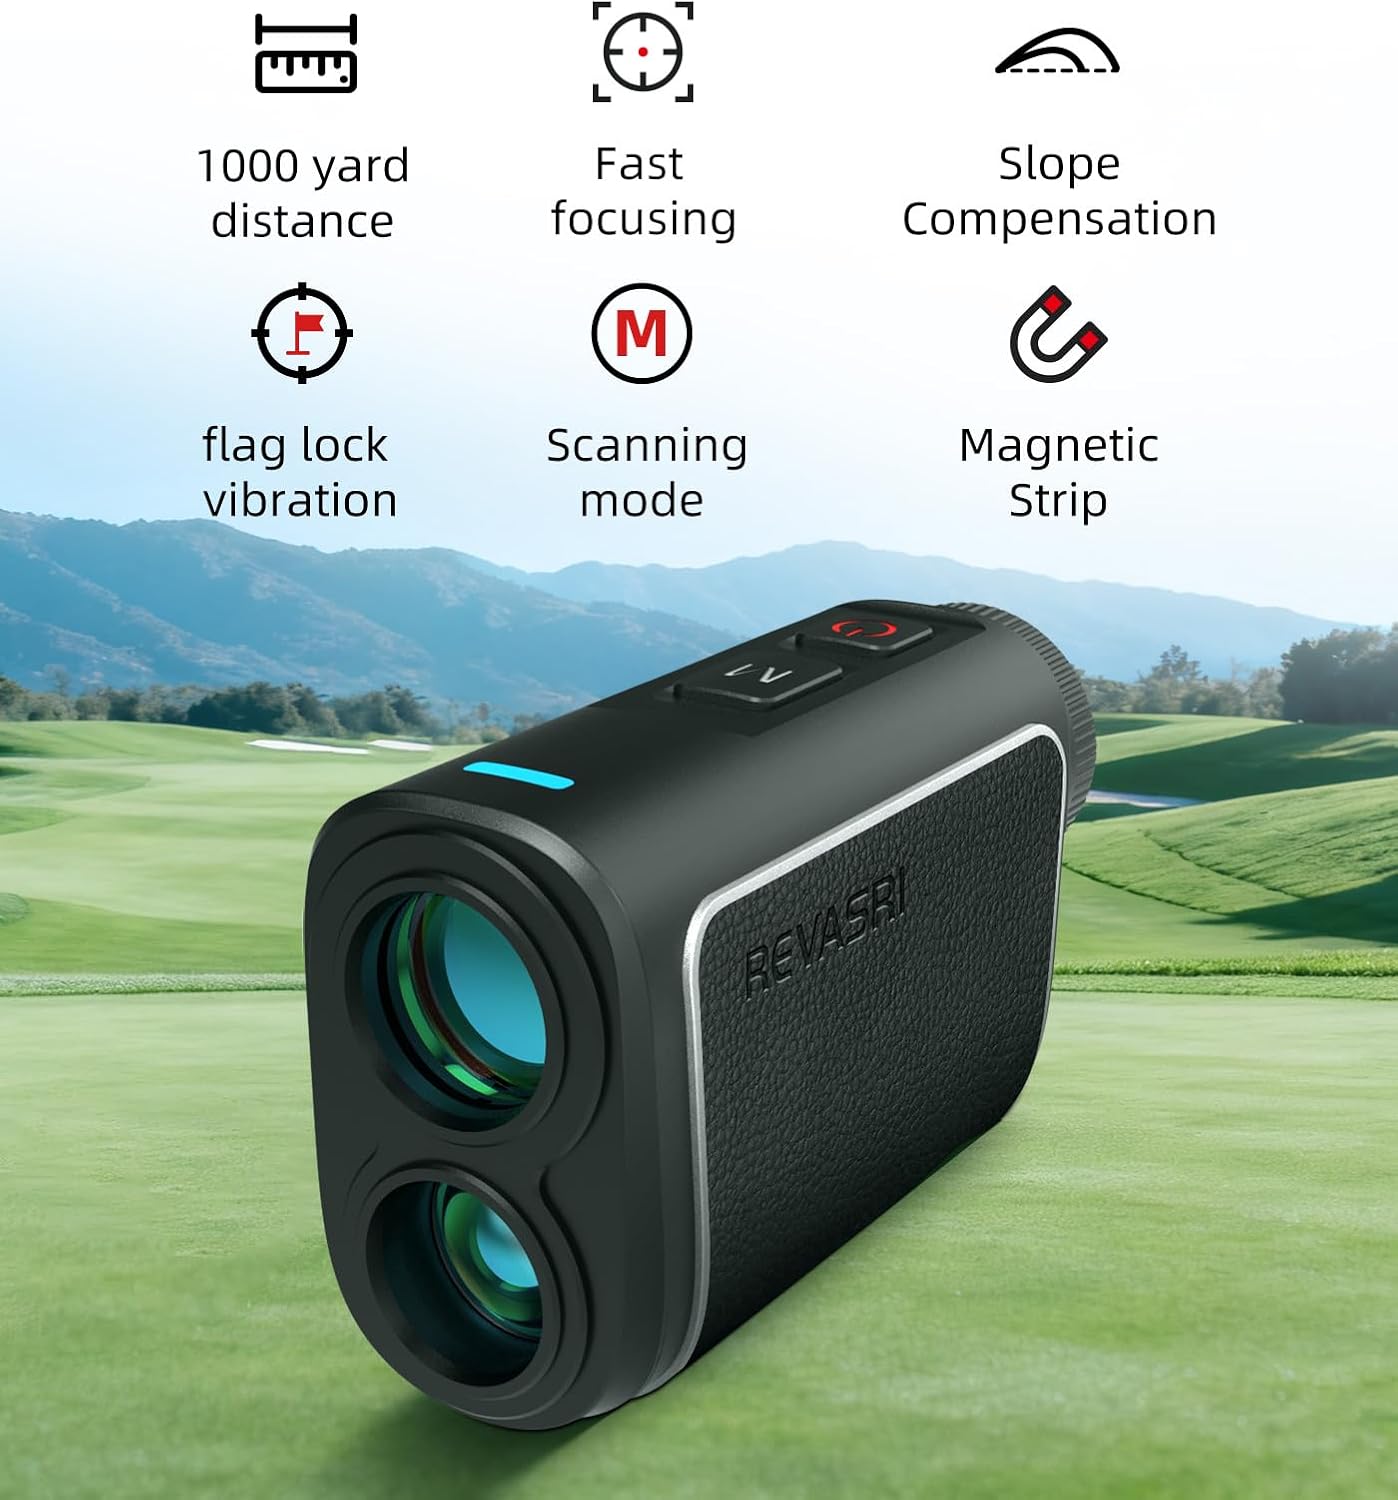
Image 2.1: An overview of the REVASRI rangefinder's key features. Icons represent 1000-yard distance, fast focusing, slope compensation, flag lock vibration, scanning mode, and magnetic strip, displayed above the rangefinder on a golf course background.
3. Package Contents
Please check the package contents upon receipt to ensure all items are present:
- REVASRI Golf Rangefinder (Mini5-1000)
- Zipper Bag
- Cleaning Cloth
- User Manual (this document)
- Packing Box
- Charge Cable

Image 3.1: Visual representation of the items included in the REVASRI Mini5-1000 package. It shows the rangefinder, a white zipper bag, a gray cleaning cloth, a user manual, a packing box, and a charge cable.
4. Setup
4.1 Charging the Device
The rangefinder comes with a built-in rechargeable battery. Before first use, or if the battery indicator shows low power, connect the provided charge cable to the charging port on the device and to a standard USB power source. The indicator light will show charging status and turn off when fully charged.
4.2 Powering On/Off
To power on the device, press the Power button (usually marked with a red circle or power symbol). The display will activate. To power off, press and hold the Power button, or the device will automatically shut down after a period of inactivity to conserve battery.
5. Operating Instructions
5.1 Basic Distance Measurement
- Look through the eyepiece.
- Aim the reticle (crosshairs) at your desired target.
- Press the Power/Measure button once. The distance to the target will be displayed on the LCD screen.

Image 5.1: A golfer on a course using the REVASRI rangefinder to measure distance to a flag. The image highlights the 1000-yard measurement capability and 6X zoom with ±0.5Y accuracy.

Image 5.2: A close-up view through the rangefinder's eyepiece, showing the digital display with distance (51.5m), angle (44.4°), and slope-adjusted distance (-13.5°), focused on a golf flag.
5.2 Mode Selection
Press the Mode button (often marked 'M' or with a mode icon) to cycle through available measurement modes. The active mode will be indicated on the display.
5.3 Slope Compensation
The slope compensation feature adjusts the measured distance based on the incline or decline to the target, providing a 'play as' distance. To activate or deactivate this feature, locate the slope switch or button on the device. A blue indicator light typically signifies that slope compensation is active.

Image 5.3: A diagram illustrating accurate slope measurement, showing the ballistic curve, measured distance, and ballistic distance on a golf course. Below, two rangefinders demonstrate the visual difference between slope compensation OFF (red indicator) and ON (blue indicator).
5.4 Flag Locking with Vibration
In Flag Locking mode, the rangefinder prioritizes the closest target, typically the flagstick, ignoring background objects. Once the flag is locked, the device will vibrate briefly to confirm the measurement.
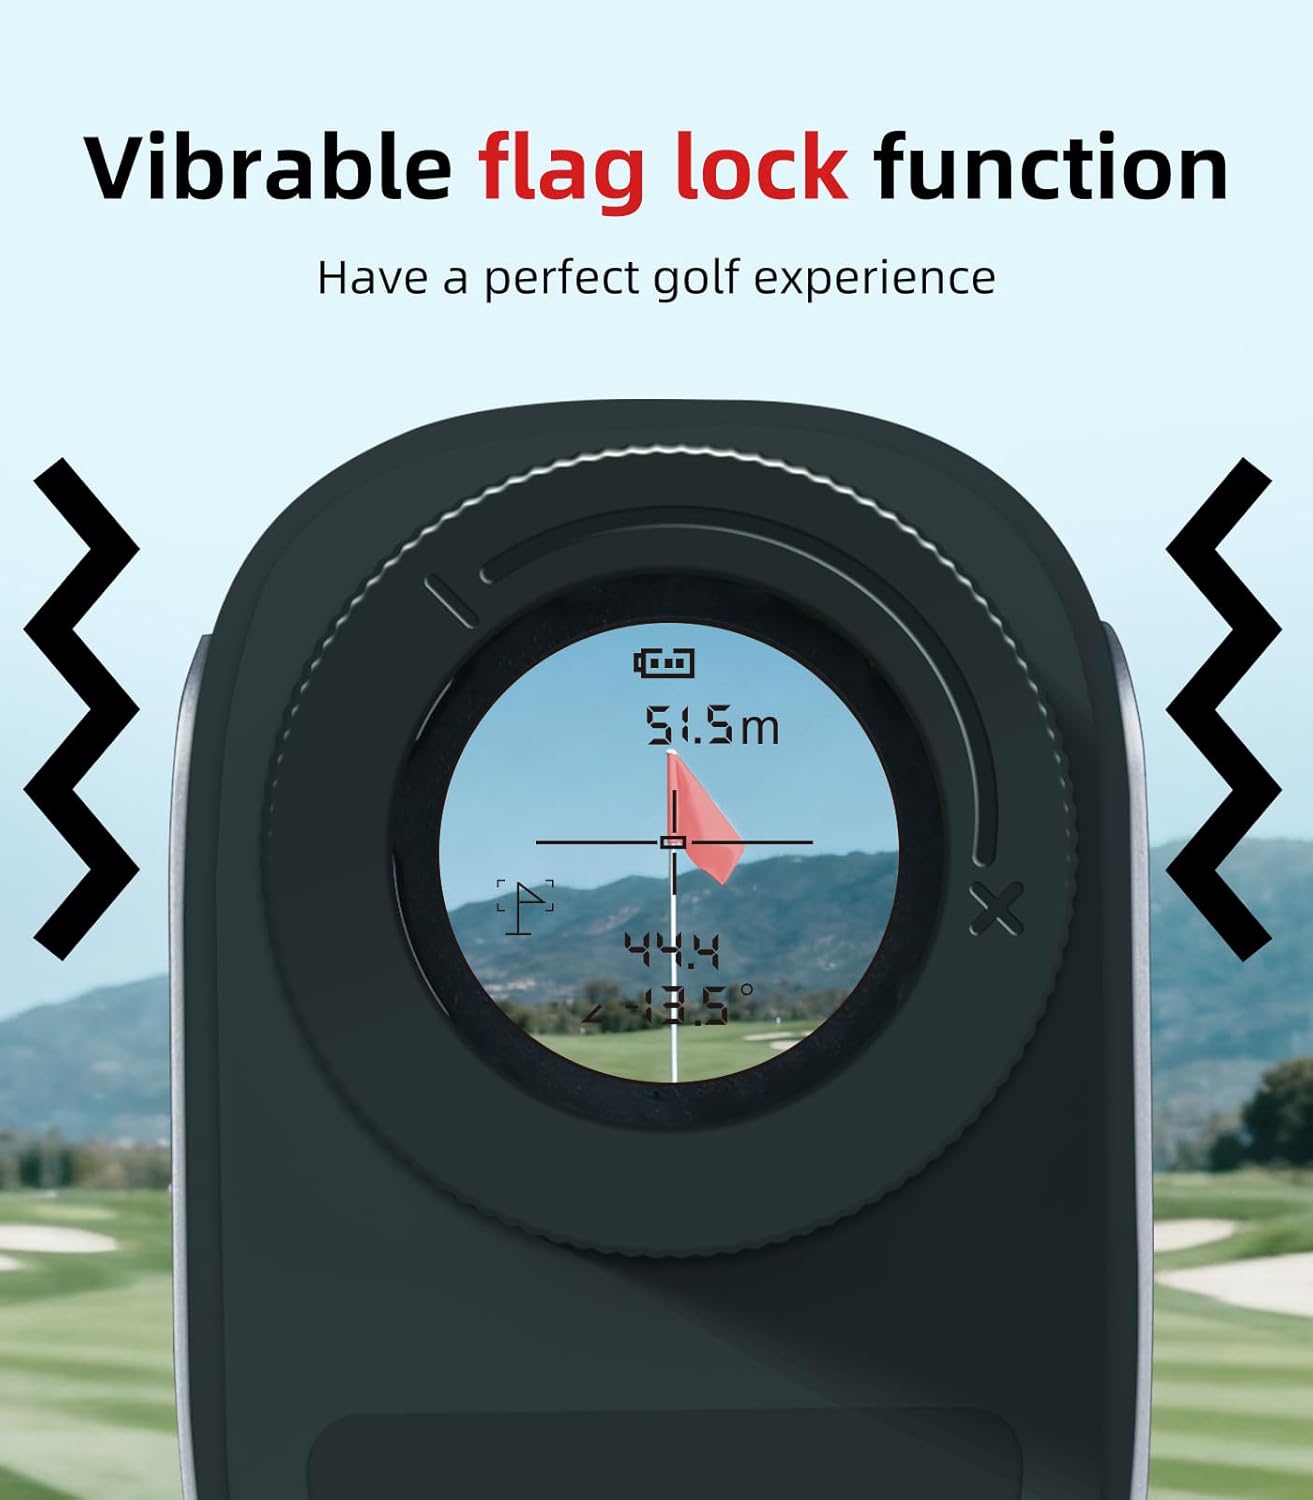
Image 5.4: A close-up of the rangefinder's eyepiece display, showing a flagstick targeted with distance and angle readings. Wavy lines on either side indicate the vibration feedback for the flag lock function.
5.5 Scanning Mode
To use scanning mode, press and hold the Power/Measure button while sweeping the rangefinder across multiple targets. The display will continuously update with distances to different objects in your field of view.
5.6 Unit Switching (Yards/Meters)
To switch between yards (Y) and meters (M), press and hold the Mode button for a few seconds, or refer to the specific instructions for your model's button combination. The unit displayed on the screen will change accordingly.
5.7 Magnetic Feature
The integrated magnetic strip allows for convenient attachment of the rangefinder to metal surfaces, such as the frame of a golf cart, for easy access during play.

Image 5.5: A collage demonstrating the strong magnetic force of the REVASRI rangefinder. It shows the device attached to a golf cart frame, being held by hand, and clipped to a golf bag, illustrating its portability and ease of use.
6. Maintenance
6.1 Cleaning
- Use the provided cleaning cloth or a soft, lint-free cloth to gently wipe the lenses and the body of the rangefinder.
- Do not use abrasive materials, alcohol, or organic solvents, as these can damage the lenses and coatings.
- For stubborn dirt on lenses, a small amount of lens cleaning fluid designed for optical instruments can be applied to the cloth, not directly to the lens.
6.2 Storage
- Store the rangefinder in its protective zipper bag when not in use.
- Keep the device in a cool, dry place, away from direct sunlight and extreme temperatures.
- Avoid storing in areas with high humidity.
7. Troubleshooting
- No Display/Device Not Turning On: Ensure the battery is charged. Connect the charge cable and allow it to charge for at least 30 minutes before attempting to power on again.
- Inaccurate Readings: Ensure the lens is clean and free from smudges. Make sure you are targeting a clear object and not through obstructions like thick fog or heavy rain, which can affect accuracy.
- Display Unclear/Blurry: Adjust the diopter (focus ring) near the eyepiece to match your vision. Clean the eyepiece and objective lenses.
- No Vibration Feedback: Check if the flag locking mode is active. Ensure the target is clearly acquired.
8. Specifications
| Feature | Specification |
|---|---|
| Brand | REVASRI |
| Model Name | Mini5-1000 |
| Measurement Range | 5-1000 Yards |
| Accuracy | ±1 Yard |
| Magnification | 6X |
| Color | Black |
| Material | Plastic |
| Item Weight | 4.7 Ounces |
| Product Dimensions (LxWxH) | 3.74" x 1.48" x 2.32" |
| Batteries Included | Yes |
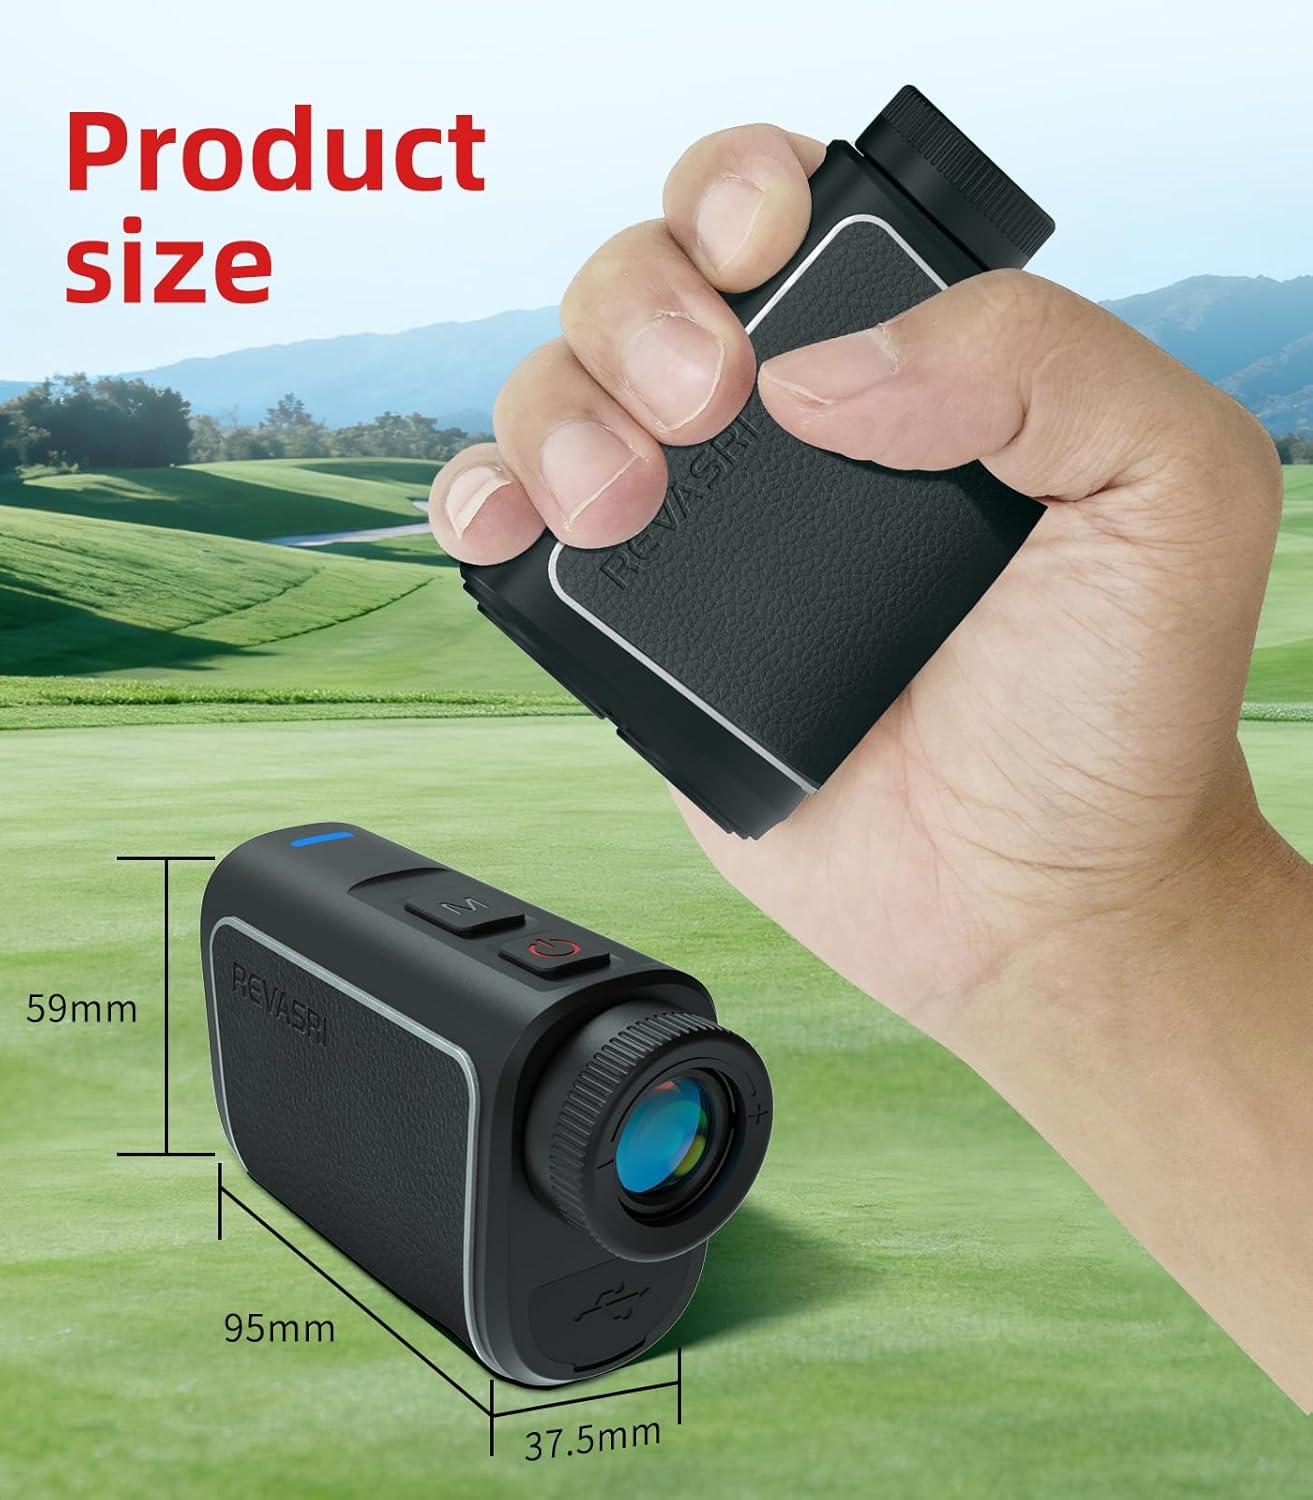
Image 8.1: An image illustrating the physical dimensions of the REVASRI rangefinder, showing its length (95mm), width (37.5mm), and height (59mm) in relation to a human hand.
9. Warranty and Support
9.1 Warranty Information
The REVASRI Mini5-1000 Golf Rangefinder comes with a 1-Year Limited Warranty from the date of purchase. This warranty covers manufacturing defects and workmanship under normal use. It does not cover damage caused by misuse, accidents, unauthorized modifications, or improper maintenance.
9.2 Customer Support
For technical assistance, warranty claims, or any questions regarding your REVASRI Mini5-1000 Golf Rangefinder, please contact REVASRI customer support through the retailer's platform or the official REVASRI website. Please have your purchase receipt and product model information ready when contacting support.


