
Introduction
Thank you for purchasing the HOMCOM Stand Up Desk. This manual provides important information regarding the assembly, operation, maintenance, and safety of your new desk. Please read it thoroughly before use and retain it for future reference.
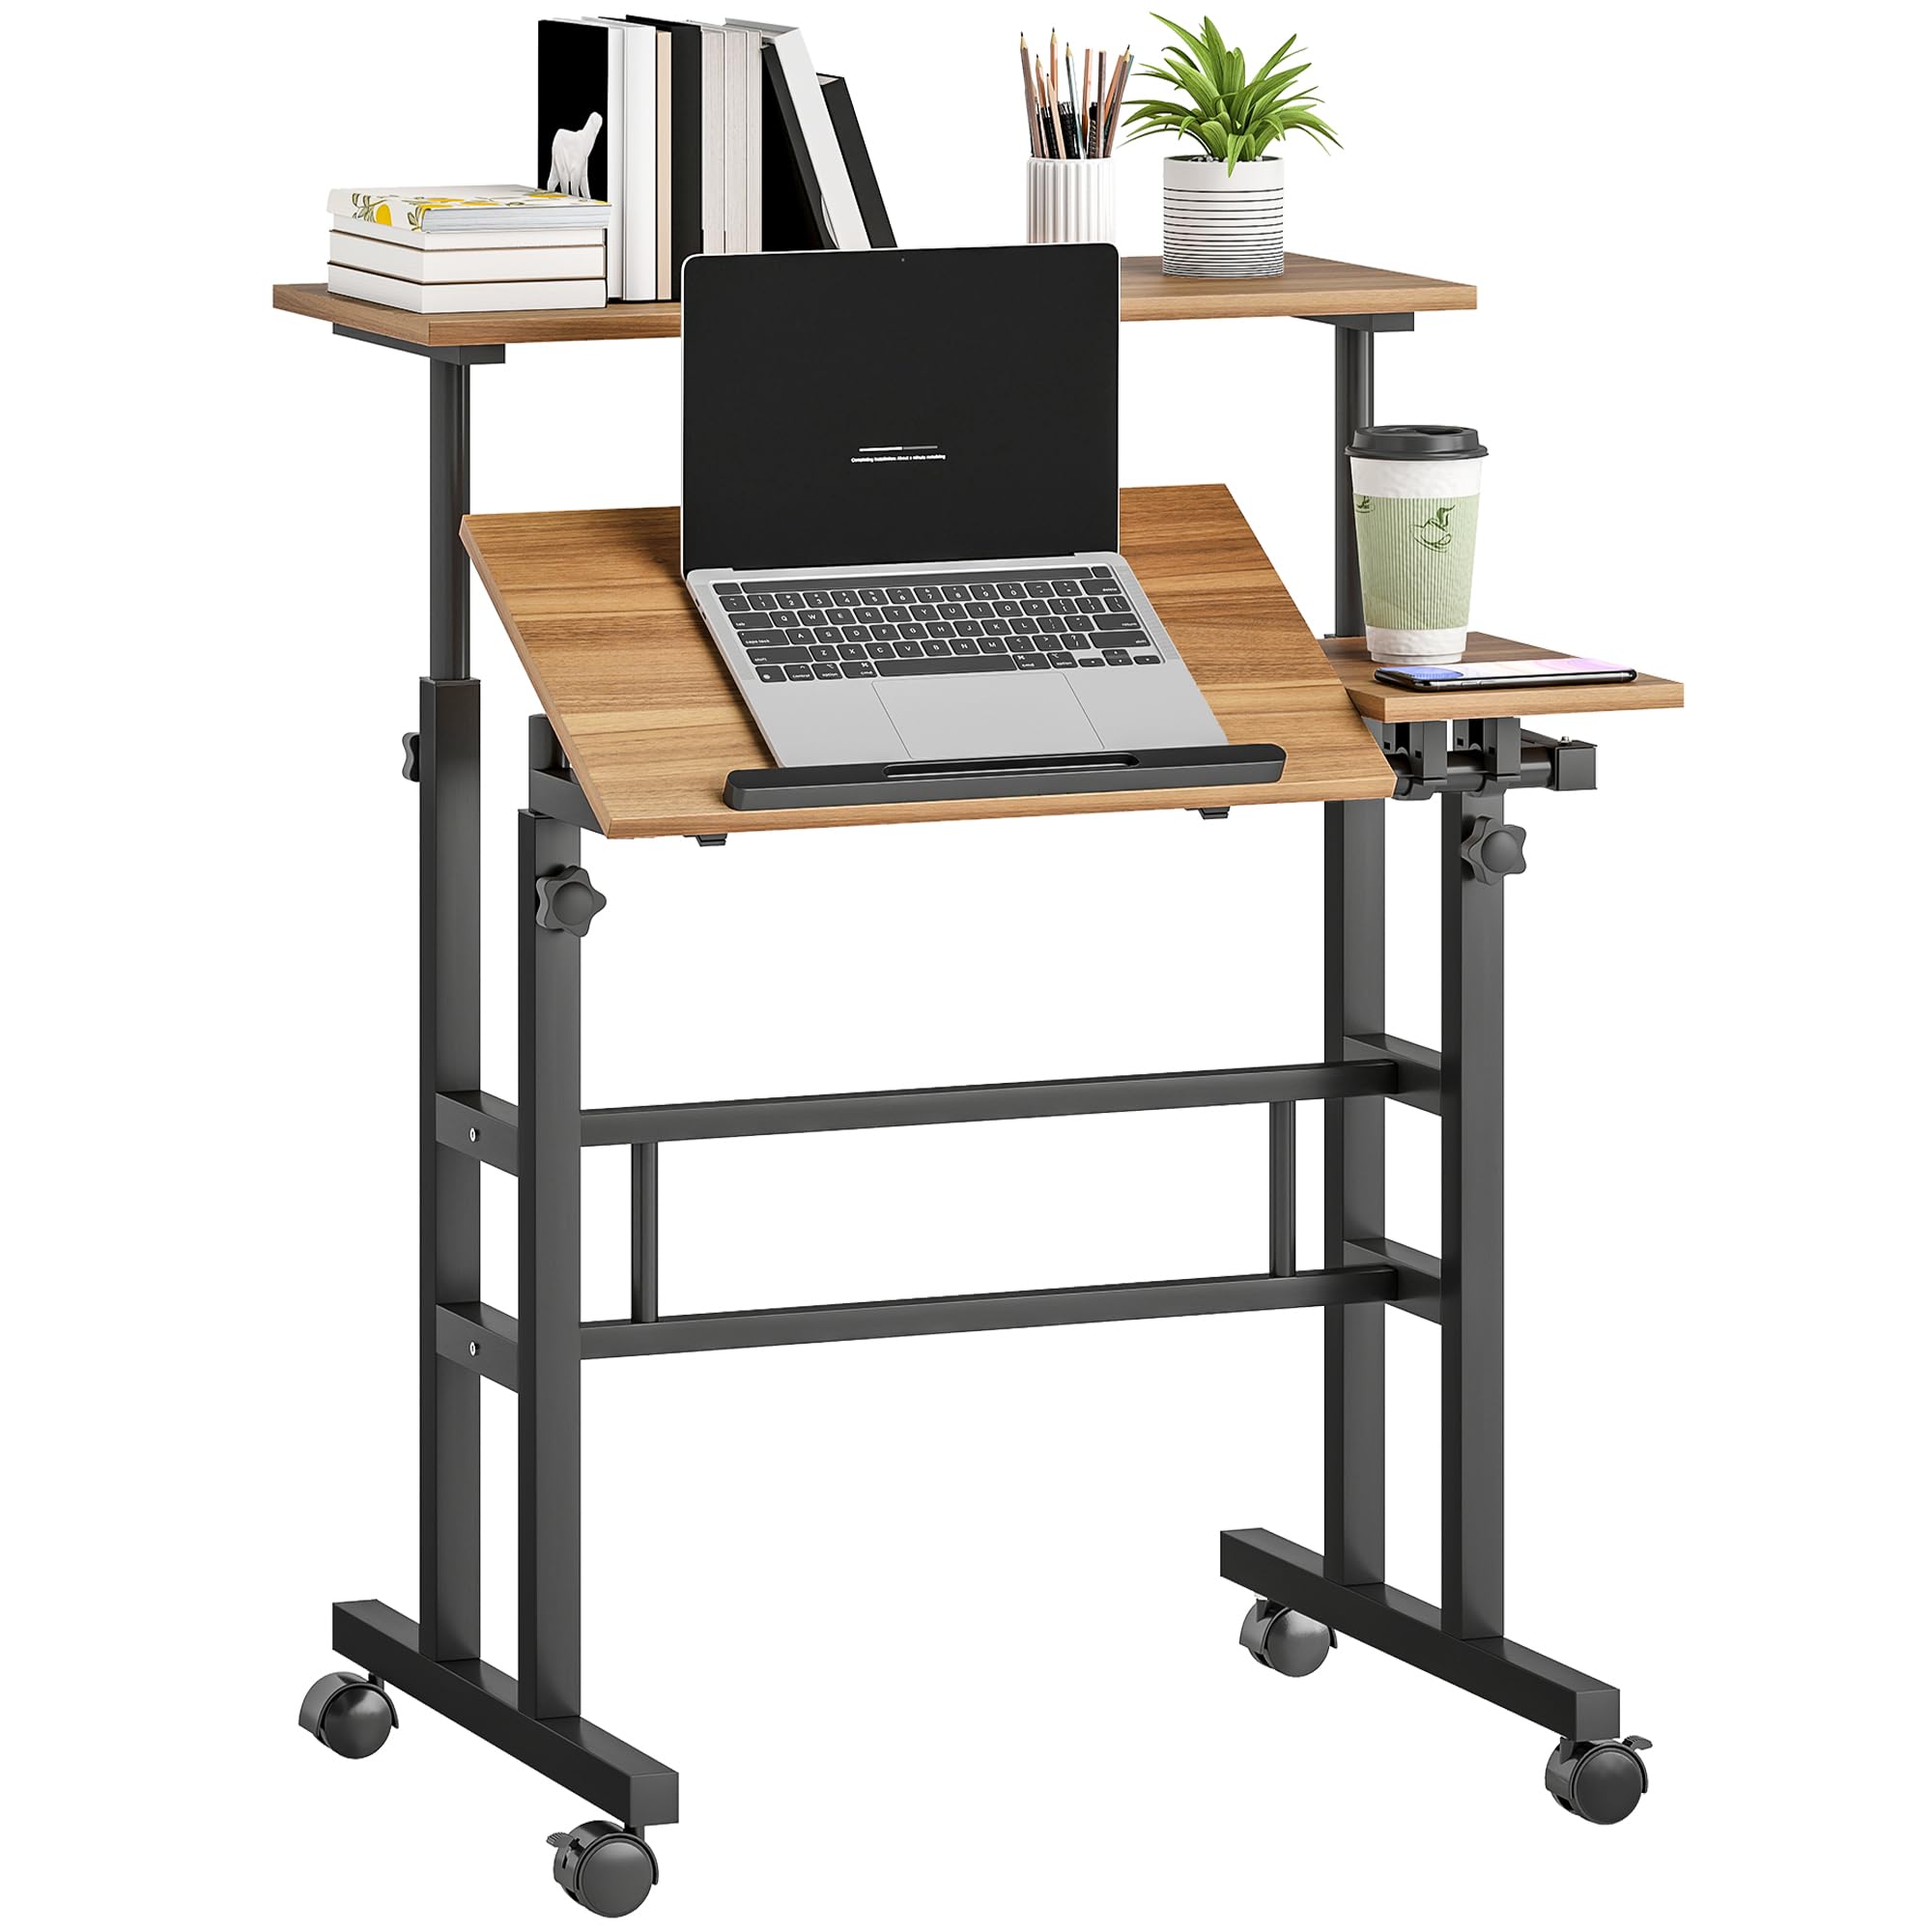
Image: The HOMCOM Stand Up Desk, brown finish, with a laptop and accessories, positioned in a home office environment.
Safety Information
- Always follow the assembly instructions carefully.
- Do not exceed the maximum weight limit of 220 lbs (100 kg) to ensure the desk's stability and safety.
- Ensure all screws and fasteners are securely tightened before use. Periodically check and re-tighten as necessary.
- Keep children and pets away during assembly. Small parts may pose a choking hazard.
- Place the desk on a level surface to prevent tipping.
- Avoid placing hot items directly on the desk surface without protection.
- Do not stand or sit on the desk.
- When adjusting height or tilt, ensure no objects are obstructing the movement and that hands are clear of pinch points.
Specifications
| Model Number | 836-648V80BN |
| Overall Dimensions (L x W x H) | 70 cm x 60 cm x 70.5-120 cm (27.6" L x 23.6" W x 27.8"-47.2" H) |
| Height Adjustment Range | 70.5 cm - 120 cm (27.8" - 47.2") |
| Tilting Desktop Angle | 0° - 45° |
| Weight Capacity | 100 kg (220 lbs) |
| Materials | Engineered Wood (Desktop), Steel (Frame), Nylon (Casters) |
| Casters | 4 nylon casters (2 lockable) |
| Assembly Required | Yes |

Image: Detailed diagram illustrating the dimensions and weight capacity of the HOMCOM Stand Up Desk.
Package Contents
Please verify that all components are present and undamaged before beginning assembly. Refer to the included parts list in your packaging for specific item counts.
- Desktop Panels (Main tilting panel, fixed panel, upper shelf)
- Steel Frame Components
- Casters (4 total, 2 with locking mechanism)
- Blocking Plate for tilting desktop
- Assembly Hardware (Screws, bolts, wrenches, etc.)
- Instruction Manual
Assembly Instructions
Assembly typically requires two people. Follow the step-by-step guide provided in the separate assembly leaflet included with your package. Ensure all parts are correctly oriented and fasteners are tightened securely at each step.
- Unpack Components: Carefully remove all parts from the packaging and lay them out on a clean, soft surface to prevent scratches.
- Attach Casters: Secure the four casters to the base of the steel frame. Ensure the two lockable casters are positioned as indicated in the assembly diagram for easy access.
- Assemble Frame: Connect the vertical and horizontal steel frame components using the provided screws and tools. Do not fully tighten screws until all frame parts are loosely assembled.
- Install Desktop Panels: Attach the main tilting desktop panel, the fixed mouse pad area, and the upper shelf to the assembled frame. Pay attention to the orientation of the tilting mechanism.
- Secure Blocking Plate: Install the blocking plate on the lower edge of the tilting desktop to prevent items from sliding off when tilted.
- Final Tightening: Once all components are in place, systematically tighten all screws and bolts. Do not overtighten.
For detailed visual steps, refer to the diagrams in your product's dedicated assembly guide.
Operating Instructions
1. Height Adjustment
The desk features an ergonomic height adjustment mechanism, allowing you to switch between sitting and standing positions. The height can be adjusted from 27.8 inches (70.5 cm) to 47.2 inches (120 cm).
- Unlock Adjustment Knobs: Locate the adjustment knobs on the vertical support poles of the desk. Turn them counter-clockwise to loosen.
- Adjust Height: Carefully raise or lower the desktop to your desired height. Ensure the desk remains stable during adjustment.
- Lock Adjustment Knobs: Once the desired height is reached, turn the adjustment knobs clockwise to securely lock the desk in position. Verify that the desk is stable before placing items on it.

Image: A visual representation of the desk's height adjustment feature, demonstrating its use for both sitting and standing postures.
2. Tilting Desktop Adjustment
The front panel of the desktop can be tilted from 0° to 45° to provide an optimal angle for typing, reading, or writing, reducing wrist pressure.
- Unlock Tilt Mechanism: Locate the tilt locking mechanism beneath the tilting desktop panel. Loosen it to allow movement.
- Adjust Tilt Angle: Carefully adjust the desktop to your preferred angle. The integrated blocking plate will prevent items from sliding off.
- Lock Tilt Mechanism: Once the desired angle is set, tighten the locking mechanism to secure the desktop in place.

Image: The desk's front desktop panel tilted at an angle, with a laptop and the blocking plate visible, illustrating its ergonomic design.

Image: A close-up view of the fixed section of the desktop, designed as a mouse pad area, also suitable for holding beverages or mobile devices.
3. Mobility and Locking Casters
The desk is equipped with four nylon casters for easy movement. Two of these casters are lockable to secure the desk in position.
- To Move the Desk: Ensure the two lockable casters are in the unlocked position. Gently push the desk to your desired location.
- To Lock the Desk: Once the desk is in its desired position, press down on the locking levers of the two lockable casters until they click into place. This will prevent the desk from rolling.
- To Unlock the Desk: Lift the locking levers on the two lockable casters to release the brakes.

Image: A detailed view of the desk's casters, highlighting the locking mechanism for stability.
Maintenance
- Cleaning: Wipe the desk surfaces with a dry, soft cloth. For stubborn marks, a slightly damp cloth can be used, followed immediately by a dry cloth. Avoid abrasive cleaners or harsh chemicals.
- Fastener Check: Periodically inspect all screws and bolts to ensure they remain tight. Re-tighten as needed to maintain stability.
- Caster Care: Keep casters free of debris to ensure smooth movement.
- Weight Distribution: Distribute weight evenly across the desktop to prevent strain on the frame and ensure stability.
Troubleshooting
| Problem | Possible Cause | Solution |
|---|---|---|
| Desk is wobbly or unstable. | Loose fasteners; uneven floor; overloaded. | Check and tighten all screws and bolts. Ensure the desk is on a level surface. Reduce weight if exceeding capacity. |
| Height adjustment is difficult or stuck. | Adjustment knobs not fully loosened; obstruction in mechanism. | Ensure adjustment knobs are completely loosened. Check for any obstructions in the height adjustment poles. |
| Tilting desktop does not hold position. | Tilt locking mechanism is loose. | Tighten the tilt locking mechanism firmly. |
| Casters do not roll smoothly or lock. | Debris in casters; locking mechanism jammed. | Clean any debris from the caster wheels. Ensure the locking mechanism is fully engaged or disengaged. |
Warranty and Support
This HOMCOM Stand Up Desk comes with a 90-day warranty against manufacturer defects. Please retain your proof of purchase for warranty claims.
For technical support, missing parts, or warranty inquiries, please contact Aosom Canada:
- Manufacturer: Aosom Canada
- Location: Markham, Ontario, CA
- Telephone: 1-416-792-6088
Please have your model number (836-648V80BN) and purchase date ready when contacting support.