
1. Introduction
Thank you for choosing the ANDELI Automatic Darkening Welding Helmet, OPTIM LED Series PRO. This helmet is designed to provide superior eye and face protection during various welding, cutting, and grinding operations. It features advanced digital controls, a panoramic true color view, and integrated LED lighting for enhanced visibility and safety. Please read this manual thoroughly before use to ensure proper operation and maintenance.

Figure 1: ANDELI Automatic Darkening Welding Helmet, OPTIM LED Series PRO.
2. Safety Information
Always prioritize safety when performing welding or grinding tasks. Failure to follow these safety guidelines can result in serious injury.
- Eye Protection: This helmet provides protection against harmful UV/IR radiation, sparks, and spatter. Ensure the auto-darkening function is active and tested before each use.
- Respiratory Protection: Welding fumes and gases can be hazardous. Always use appropriate respiratory protection in conjunction with this helmet.
- Ventilation: Work in a well-ventilated area to disperse fumes and gases.
- Inspect Before Use: Before each use, inspect the helmet for any damage, cracks, or loose parts. Replace any damaged components immediately.
- Temperature Limits: Do not use the helmet outside its specified operating temperature range (-50°C to +55°C / -23°F to 131°F).
- Avoid Contact with Hot Surfaces: Do not place the helmet on hot surfaces or expose it to open flames.
- Cleaning: Use only recommended cleaning methods and materials to avoid damaging the lens or helmet components.
3. Product Features
- Panoramic True Color View: Features an innovative 3-lens system with a main lens (11.7 x 8.1 cm) and two side lenses (3.3 x 6.4 cm each), providing a 180° panoramic field of view. Optical clarity rating of 1/1/1/1 ensures natural color reproduction and reduced eye strain.
- Ultra-Fast Darkening: Equipped with 4 highly sensitive arc sensors for reliable arc detection. Reaction time of 1/30,000 seconds protects eyes instantly.
- Integrated LED Lights: Two powerful LED lights provide optimal illumination in dark environments. A smart motion sensor allows hands-free control (on/off, 2 brightness levels) with a simple hand movement.
- Dual Power System: Powered by a 1000mAh Li-ion battery with integrated solar charging. A separate 500mAh battery powers the LED lights, extending main battery life.
- USB-C Fast Charging: The 1000mAh battery fully charges in 2.5 to 3 hours via a modern USB-C port.
- Digital Precision Control: An internal digital control panel allows precise adjustment of shade level (DIN4-13), sensitivity, and delay time.
- Premium 3-Layer Lens System: Consists of two auto-darkening LCD glass layers and one integrated optical filter, offering UV/IR protection up to DIN16.
- Comfortable Headband: Ergonomic 6-point pivot headband design distributes weight evenly, reducing pressure points for all-day comfort.
4. Setup
4.1 Initial Charging
Before first use, fully charge the helmet's main battery using the provided USB-C cable. Connect the cable to the USB-C port on the helmet and a compatible power source (charger, power bank, or laptop).
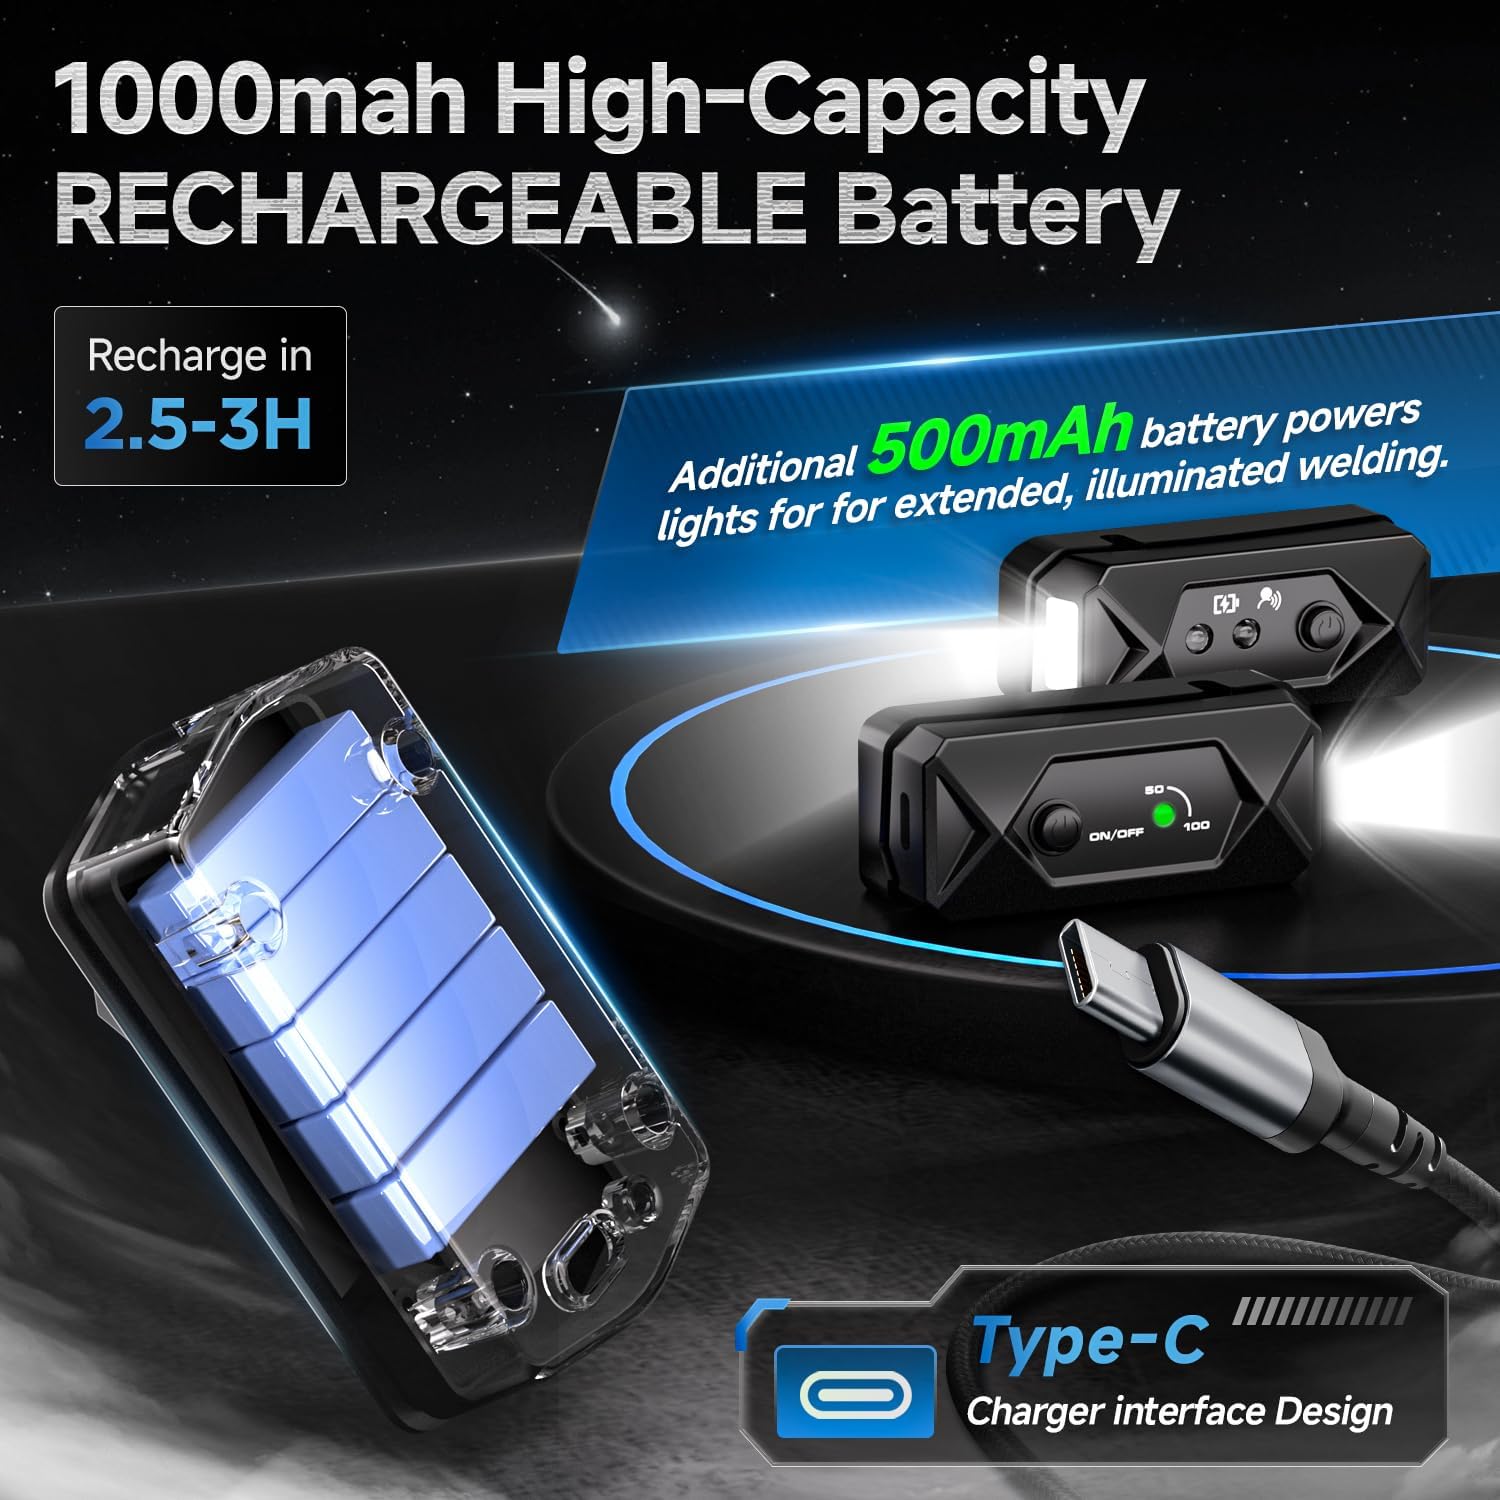
Figure 2: USB-C Charging Port and Battery.
4.2 Headband Adjustment
Adjust the headband for a secure and comfortable fit. The 6-point pivot design allows for multiple adjustments:
- Tightness: Use the knob at the back to adjust the overall tightness around your head.
- Angle Adjustment: Adjust the angle of the helmet relative to your face using the side knobs.
- Front/Back Adjustment: Use the 3-level adjustment to position the helmet closer or further from your face.
- Detachable Knobs: The left/right knobs are detachable for customization.

Figure 3: Headband Adjustment Points.
4.3 Pre-Operation Check
Before each welding session, perform a quick check:
- Ensure the helmet is clean and free of damage.
- Press the 'TEST' button on the digital control panel to verify the auto-darkening function. The lens should darken momentarily.
- Confirm the battery indicator shows sufficient charge.
5. Operating Instructions
5.1 Power On/Off and Mode Selection
The helmet features a digital control panel for various settings.

Figure 4: Digital Control Panel.
- Power On/Off: Long press the 'MODE' button to power the helmet on or off.
- Mode Switching: Short press the 'MODE' button to cycle through the operating modes: GRIND, CUT, WELD, and LOCK. The selected mode will be displayed on the digital screen.
5.2 Adjusting Shade, Sensitivity, and Delay
Use the digital controls to fine-tune your welding experience.
- Shade Level: In WELD mode, use the '+' and '-' buttons to adjust the shade level from DIN4 to DIN13. In CUT mode, the shade range is DIN5-9.
- Sensitivity: Press the 'SENSI.' button to adjust the sensitivity of the arc sensors (5 adjustable levels). Higher sensitivity is suitable for low amperage welding.
- Delay Time: Press the 'DELAY' button to adjust the time the lens remains darkened after the arc stops (5 adjustable levels).

Figure 5: Arc Sensors and Photosensitivity.
5.3 Using the LED Lights
The integrated LED lights provide additional illumination.

Figure 6: LED Lights in Operation.
- Manual Control: Long press the LED power button to turn the lights on/off. Short press to cycle between two brightness levels.
- Motion Sensor Control: Activate the motion sensor by pressing the right LED switch. Once activated, a simple hand movement in front of the sensor will turn the lights on/off or adjust brightness.
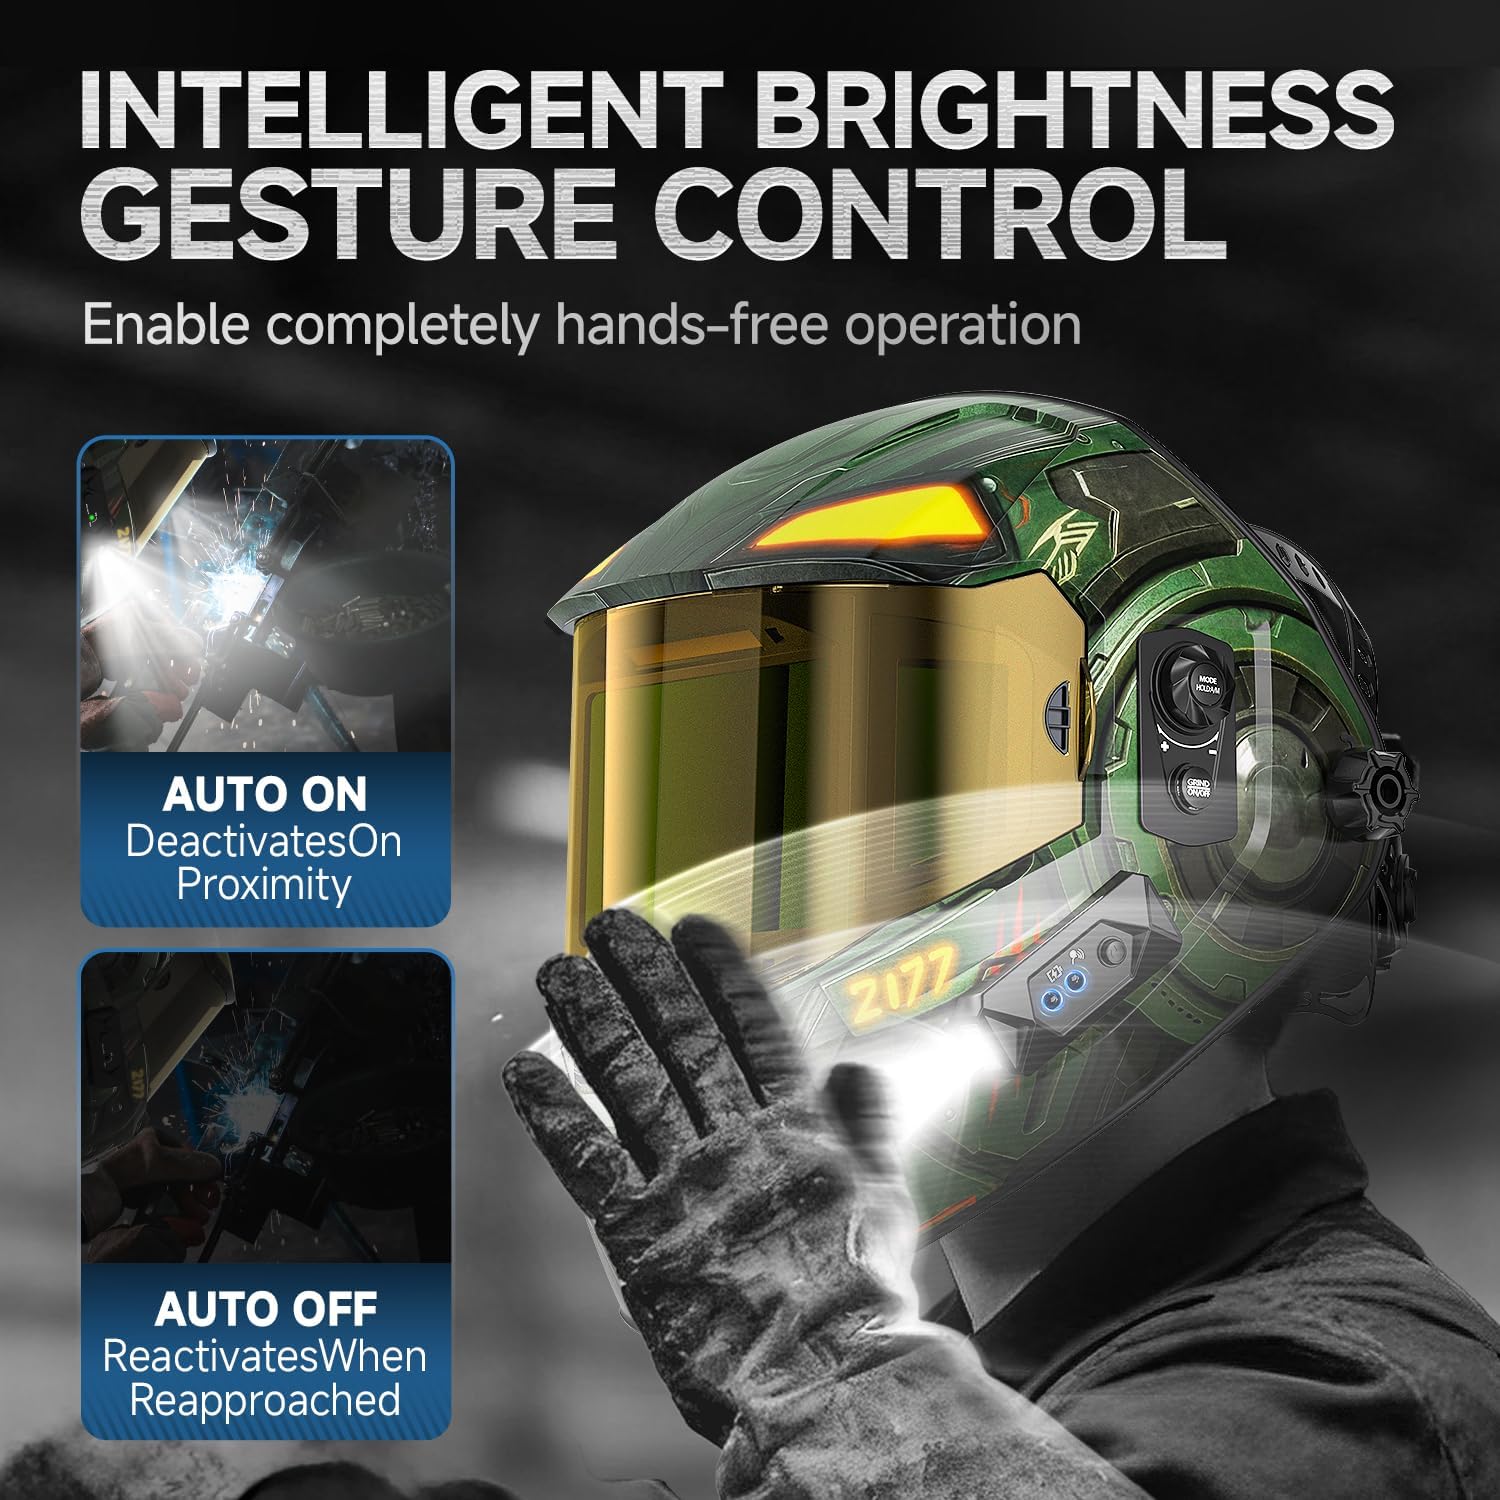
Figure 7: Intelligent Brightness Gesture Control.
5.4 Application Modes
The helmet supports various applications:
- WELD Mode: For MIG/MAG, TIG, and electrode welding. Adjustable shade DIN4-13.
- GRIND Mode: For grinding operations. The lens remains in a light state (DIN3.0).
- CUT Mode: For plasma cutting and oxy-fuel cutting. Adjustable shade DIN5-9.
- LOCK Mode: Locks the shade level for repetitive tasks.

Figure 8: Multiple Application Modes.
6. Maintenance
6.1 Cleaning
- Helmet Shell: Clean with a mild soap and water solution. Avoid harsh chemicals or solvents.
- Lenses: Use a soft, lint-free cloth and a specialized lens cleaning solution. Do not use abrasive materials or scratch the lens surface.
- Sensors: Keep the arc sensors clean and unobstructed for optimal performance.
6.2 Battery Care
- Recharge the battery regularly, especially if the helmet will be stored for an extended period.
- Avoid fully discharging the battery frequently to prolong its lifespan.
- The solar cells help maintain battery charge during use in well-lit conditions.
6.3 Storage
Store the helmet in a dry, cool place, away from direct sunlight and extreme temperatures. Use the provided storage bag to protect it from dust and scratches.
7. Troubleshooting
| Problem | Possible Cause | Solution |
|---|---|---|
| Lens does not darken | Low battery; Sensors obstructed; Incorrect sensitivity setting; Helmet in GRIND mode. | Charge battery; Clean sensors; Adjust sensitivity; Switch to WELD or CUT mode. |
| Poor visibility through lens | Lens dirty or scratched; Incorrect shade setting. | Clean lens; Replace scratched lens; Adjust shade level. |
| LED lights not working | LED battery low; Motion sensor off or obstructed. | Charge LED battery; Activate motion sensor; Clear sensor path. |
| Helmet feels uncomfortable | Headband not properly adjusted. | Re-adjust all 6 points of the headband for a custom fit. |
8. Specifications

Figure 9: Technical Specifications and Package Contents.
| Feature | Detail |
|---|---|
| Brand | ANDELI |
| Model Number | OPTIM LED SERIES PRO |
| Material | Plastic |
| Color | Black |
| Field of View (Main Lens) | 4.53" x 3.23" (11.7 x 8.1 cm) |
| Side Lenses | 2 x 1.3" x 2.5" (3.3 x 6.4 cm) - Non-auto-darkening |
| True Color | Yes, Optical Class 1/1/1/1 |
| Light State | DIN 3.0 |
| Dark State | DIN 4/5-9/13 |
| Switching Time (Light to Dark) | 0.08 ms (1/30,000 s) |
| Delay Time (Dark to Light) | 0.1 - 1.0 s (Adjustable) |
| UV/IR Protection | Up to DIN16 at all times |
| Power Source | 1000mAh Li-ion Battery + Solar Cell, Type-C Charging |
| LED Battery | Separate 500mAh battery for LED lights |
| Operating Temperature | -50°C to +55°C (-23°F to 131°F) |
| Weight | Approx. 600g / 1.32 lbs |
| Included Items | 1 x Helmet, 2 x Batteries (integrated), 1 x USB-C Cable, 1 x Manual, 3 x Replacement Lenses, 1 x Storage Bag |
9. Warranty and Support
The ANDELI Automatic Darkening Welding Helmet, OPTIM LED Series PRO, comes with a 1-year warranty from the date of purchase, covering manufacturing defects. Please retain your proof of purchase for warranty claims.
For technical support, troubleshooting assistance, or warranty inquiries, please contact ANDELI customer service through the retailer where the product was purchased or visit the official ANDELI website for contact information.