
1. Introduction
The GODOX X3 PRO S is a TTL wireless flash trigger designed for Sony camera systems. It integrates advanced features such as a vibrant touchscreen interface, Bluetooth connectivity for app control, and a robust 2.4GHz Wireless X System. This manual provides detailed instructions for setting up, operating, and maintaining your X3 PRO S flash trigger to ensure optimal performance and creative control over your lighting setups.
2. Key Features
- Intuitive Touchscreen Interface: Features a vibrant display for real-time monitoring of up to four lighting groups simultaneously. Allows control of up to 16 groups with unified or fine-tuned parameters.
- Seamless Connectivity & App Control: Utilizes the Godox 2.4GHz Wireless X system for wide transmission range. Integrated Bluetooth enables remote control via the Godox Flash App for power and group adjustments.
- Advanced Creative & Precision Tools: Includes Creative Shutter Control for single-shot, time-lapse, and long-exposure sequences. Features HSS Delay for precise high-speed sync and a built-in AF Assist Lamp for low-light focusing.
- Enhanced Workflow & Ergonomics: Offers a Half-Press for Autofocus function in Shutter Release Mode and direct control of modeling lamp zoom in single-group view.
- Pro Performance, All-Day Power: Compact and lightweight design with industrial-grade durability. Powered by a built-in, high-capacity lithium battery offering up to one month of standby time and a 2-hour USB-C full recharge.
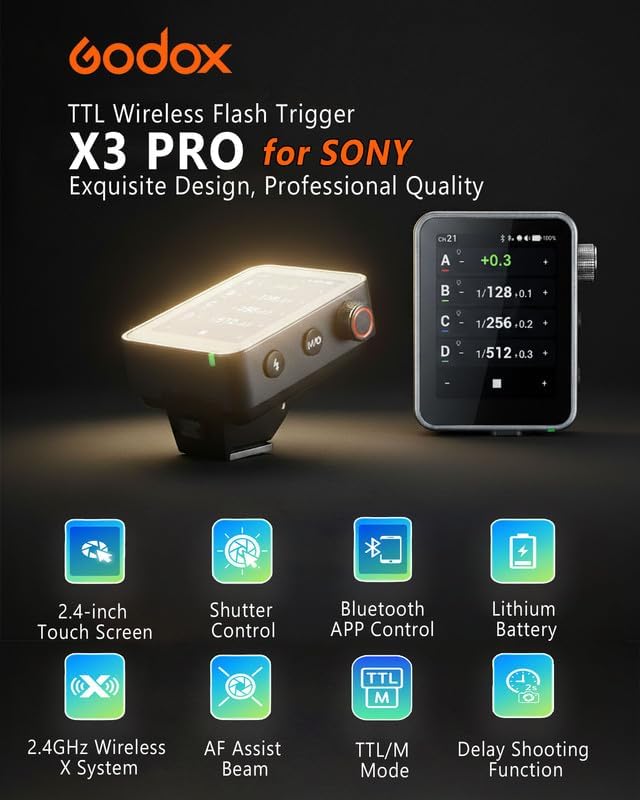
Image: Overview of the GODOX X3 PRO S highlighting its main features including 2.4-inch touch screen, shutter control, Bluetooth app control, lithium battery, 2.4GHz Wireless X System, AF assist beam, TTL/M mode, and delay shooting function.

Image: A comparison chart detailing the differences between the GODOX X3 Pro and the standard X3, focusing on screen size, battery capacity, and advanced features.
3. Setup
3.1 Mounting the Trigger
- Ensure your camera is powered off.
- Slide the GODOX X3 PRO S onto your camera's hot shoe until it clicks securely into place.
- To remove, press the detaching button (if present) and slide the trigger off.
3.2 Powering On/Off
- Press and hold the Menu/Power Button to turn the device on or off.
3.3 Initial Pairing with Flashes
The X3 PRO S uses the Godox 2.4GHz Wireless X System. Ensure your Godox flashes are set to the same channel and group as the X3 PRO S for proper communication. Refer to your flash unit's manual for specific pairing instructions.
3.4 Bluetooth Pairing with Godox Flash App
- Download the Godox Flash App from your device's app store.
- On the X3 PRO S, navigate to the Bluetooth settings and ensure Bluetooth is enabled.
- Open the Godox Flash App on your smartphone or tablet and search for available devices.
- Select your X3 PRO S from the list to pair. The default password for initial connection is 000000.
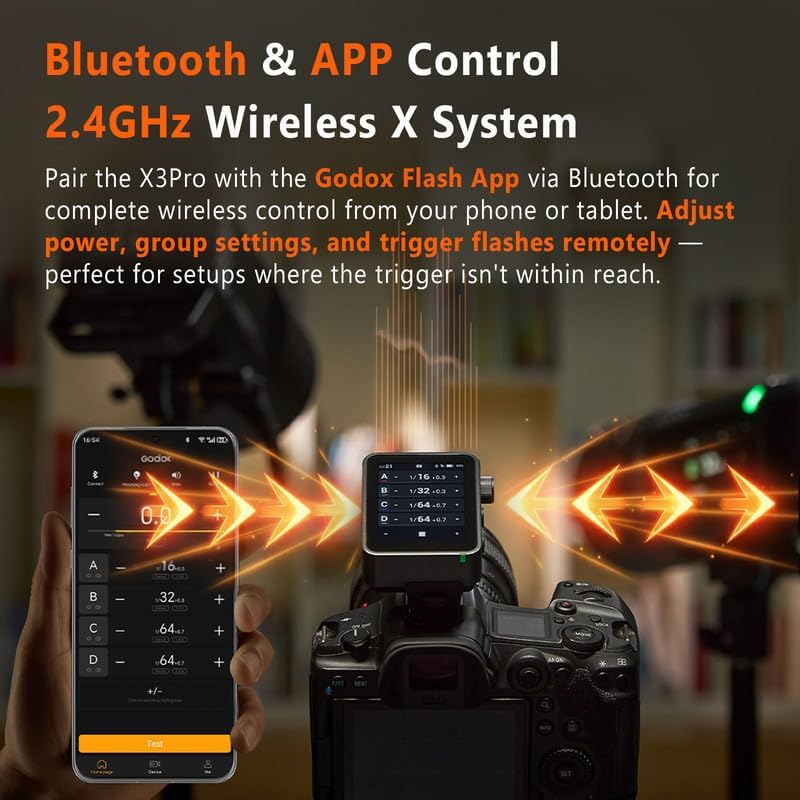
Image: The GODOX X3 PRO S mounted on a camera, with a smartphone displaying the Godox Flash App interface for remote control via Bluetooth.
4. Operating Instructions
4.1 Touchscreen Interface Navigation
The 2.4-inch LCD touch screen allows for intuitive control. You can view up to four lighting groups simultaneously. Tap on a group to adjust its parameters individually or apply unified settings across multiple groups.

Image: A detailed diagram illustrating the user interface and physical controls of the GODOX X3 PRO S, including the touch screen, select dial, buttons, and ports.
4.2 Group Control and Adjustments
- Power Adjustment: Tap on a group and use the on-screen controls or the Select Dial to adjust flash power.
- Modeling Lamp: Adjust the modeling lamp's intensity or zoom directly from the single-group view.
- Zoom Value: Control the zoom of compatible flash heads.
- TCM Function: Utilize the TTL Convert Manual (TCM) function to quickly convert TTL exposure values to manual power settings.
- Preset Saving/Recall: Save and recall up to 8 group presets for quick setup replication.

Image: A photographer using the GODOX X3 PRO S to control multiple off-camera flash units, demonstrating precise, independent control for each lighting group.
4.3 Creative Shutter Control
The X3 PRO S allows you to program various shutter sequences directly from the touchscreen:
- Single-Shot: Standard photo capture.
- Time-Lapse: Set intervals and shot counts for automated sequences.
- Long-Exposure: Program specific exposure durations.
These functions can be triggered via the PC Sync Port or with optional Godox XR/TR-RX receivers to minimize camera shake.

Image: The GODOX X3 PRO S display showing the Creative Shutter Control settings for delay, long exposure, and interval, with a cityscape background.
4.4 HSS Delay Function
The HSS Delay function provides granular control for high-speed sync shots, allowing you to fine-tune the timing for optimal results.
4.5 AF Assist Lamp
The built-in AF Assist Lamp helps your camera achieve swift and accurate autofocus in challenging low-light conditions.
4.6 Specialized Modes
The X3 PRO S offers three specialized modes for various scenarios:
- One-Shoot: Trigger signal only, for simple setups.
- All-Shoot: Settings and trigger signals, for groups or multiple photographers.
- L-858 Mode: Seamlessly syncs with Sekonic L-858 light meters for precise flash control.

Image: The GODOX X3 PRO S screen showing the selection for three specialized modes: One-Shoot, All-Shoot, and L-858 Mode, with studio lighting setups in the background.
5. Maintenance
5.1 Cleaning
Use a soft, dry microfiber cloth to clean the touchscreen and body of the trigger. Avoid using harsh chemicals or abrasive materials.
5.2 Battery Charging
The X3 PRO S features a built-in lithium battery. Charge the device using the universal USB-C port. A full charge typically takes approximately 2 hours.

Image: The GODOX X3 PRO S connected to a USB-C charging cable, with icons indicating fast charging, long standby time, and battery capacity.
5.3 Firmware Updates
Firmware updates can be performed via the USB-C port. Visit the official GODOX website for the latest firmware and instructions.
6. Troubleshooting
- Trigger Not Firing:
- Check if the trigger and flash units are powered on.
- Ensure the trigger is securely mounted on the camera's hot shoe.
- Verify that the channel and group settings on the trigger and flashes match.
- Check battery levels on both the trigger and flash units.
- Connectivity Issues (Bluetooth/Wireless X):
- Restart both the trigger and the connected device (smartphone/flash).
- Ensure no strong interference sources are nearby.
- For app control, ensure Bluetooth is enabled on both devices and the app has necessary permissions.
- Touchscreen Unresponsive:
- Restart the device.
- Ensure the screen is clean and free from moisture or debris.
7. Specifications
| Package Dimensions | 4.13 x 3.94 x 2.32 inches |
| Item Weight | 9.9 ounces |
| ASIN | B0FQW6FX52 |
| Item Model Number | X3 PRO S |
| Batteries | 1 D battery required (internal, rechargeable) |
| Manufacturer | GODOX |
8. Warranty and Support
For warranty information and technical support, please refer to the official GODOX website or contact your authorized GODOX dealer. Keep your purchase receipt as proof of purchase for warranty claims.