1. Introduction
Thank you for choosing the SUNVIVI Portable Countertop Dishwasher Model ZDW002. This compact and efficient appliance is designed to simplify your dishwashing tasks in small kitchens, dorms, RVs, and apartments. Featuring a dual water supply system, six smart wash modes, and energy-saving capabilities, this dishwasher offers convenience and powerful cleaning performance. Please read this manual thoroughly before operating your dishwasher to ensure safe and optimal use.
2. Important Safety Instructions
To reduce the risk of fire, electric shock, or injury when using your dishwasher, follow these basic precautions:
- Read all instructions before using the appliance.
- Ensure the dishwasher is properly grounded. Connect only to a properly grounded outlet.
- Do not operate any appliance with a damaged cord or plug.
- Keep children away from the dishwasher, especially when it is operating.
- Use only detergents or rinse aids recommended for dishwashers.
- Do not block the air vent on the right side of the dishwasher. Be careful of high-temperature steam burns.
- Do not open the glass door while washing, as the hot water may scald you. If you need to open the door, touch the door release button first, and then slowly open the door.
- Unplug the appliance before cleaning or performing any maintenance.
3. Package Contents
Verify that all items are included in your package:
- SUNVIVI Portable Countertop Dishwasher Unit
- Dish Rack x 1
- Cutlery Basket x 1
- Pitcher x 1
- Fruit Basket x 1
- Inlet Hose (61") x 1
- Drain Hose (61") x 1

Figure 3.1: All components included in the SUNVIVI Portable Countertop Dishwasher package.
4. Product Specifications
| Specification | Value |
|---|---|
| Model Name | ZDW002 |
| Item Weight | 29.8 Pounds |
| Voltage | 120 Volts |
| Cycle Options | Standard, Quick, Intensive, Eco, Fruit, Dry |
| Number of Settings | 6 |
| Water Consumption | 1.25 Gallons per Hour (approx. 152 oz per wash) |
| Product Dimensions (D x W x H) | 17.72 x 18.03 x 17.32 inches |
| Annual Energy Consumption | 112 Watts |
| Special Features | 6 Preset Modes, 12-hour Delay Start, High-temp Drying |
| Noise Level | 48 Decibels |
| Capacity | Fits up to 12-inch plates |
5. Product Overview
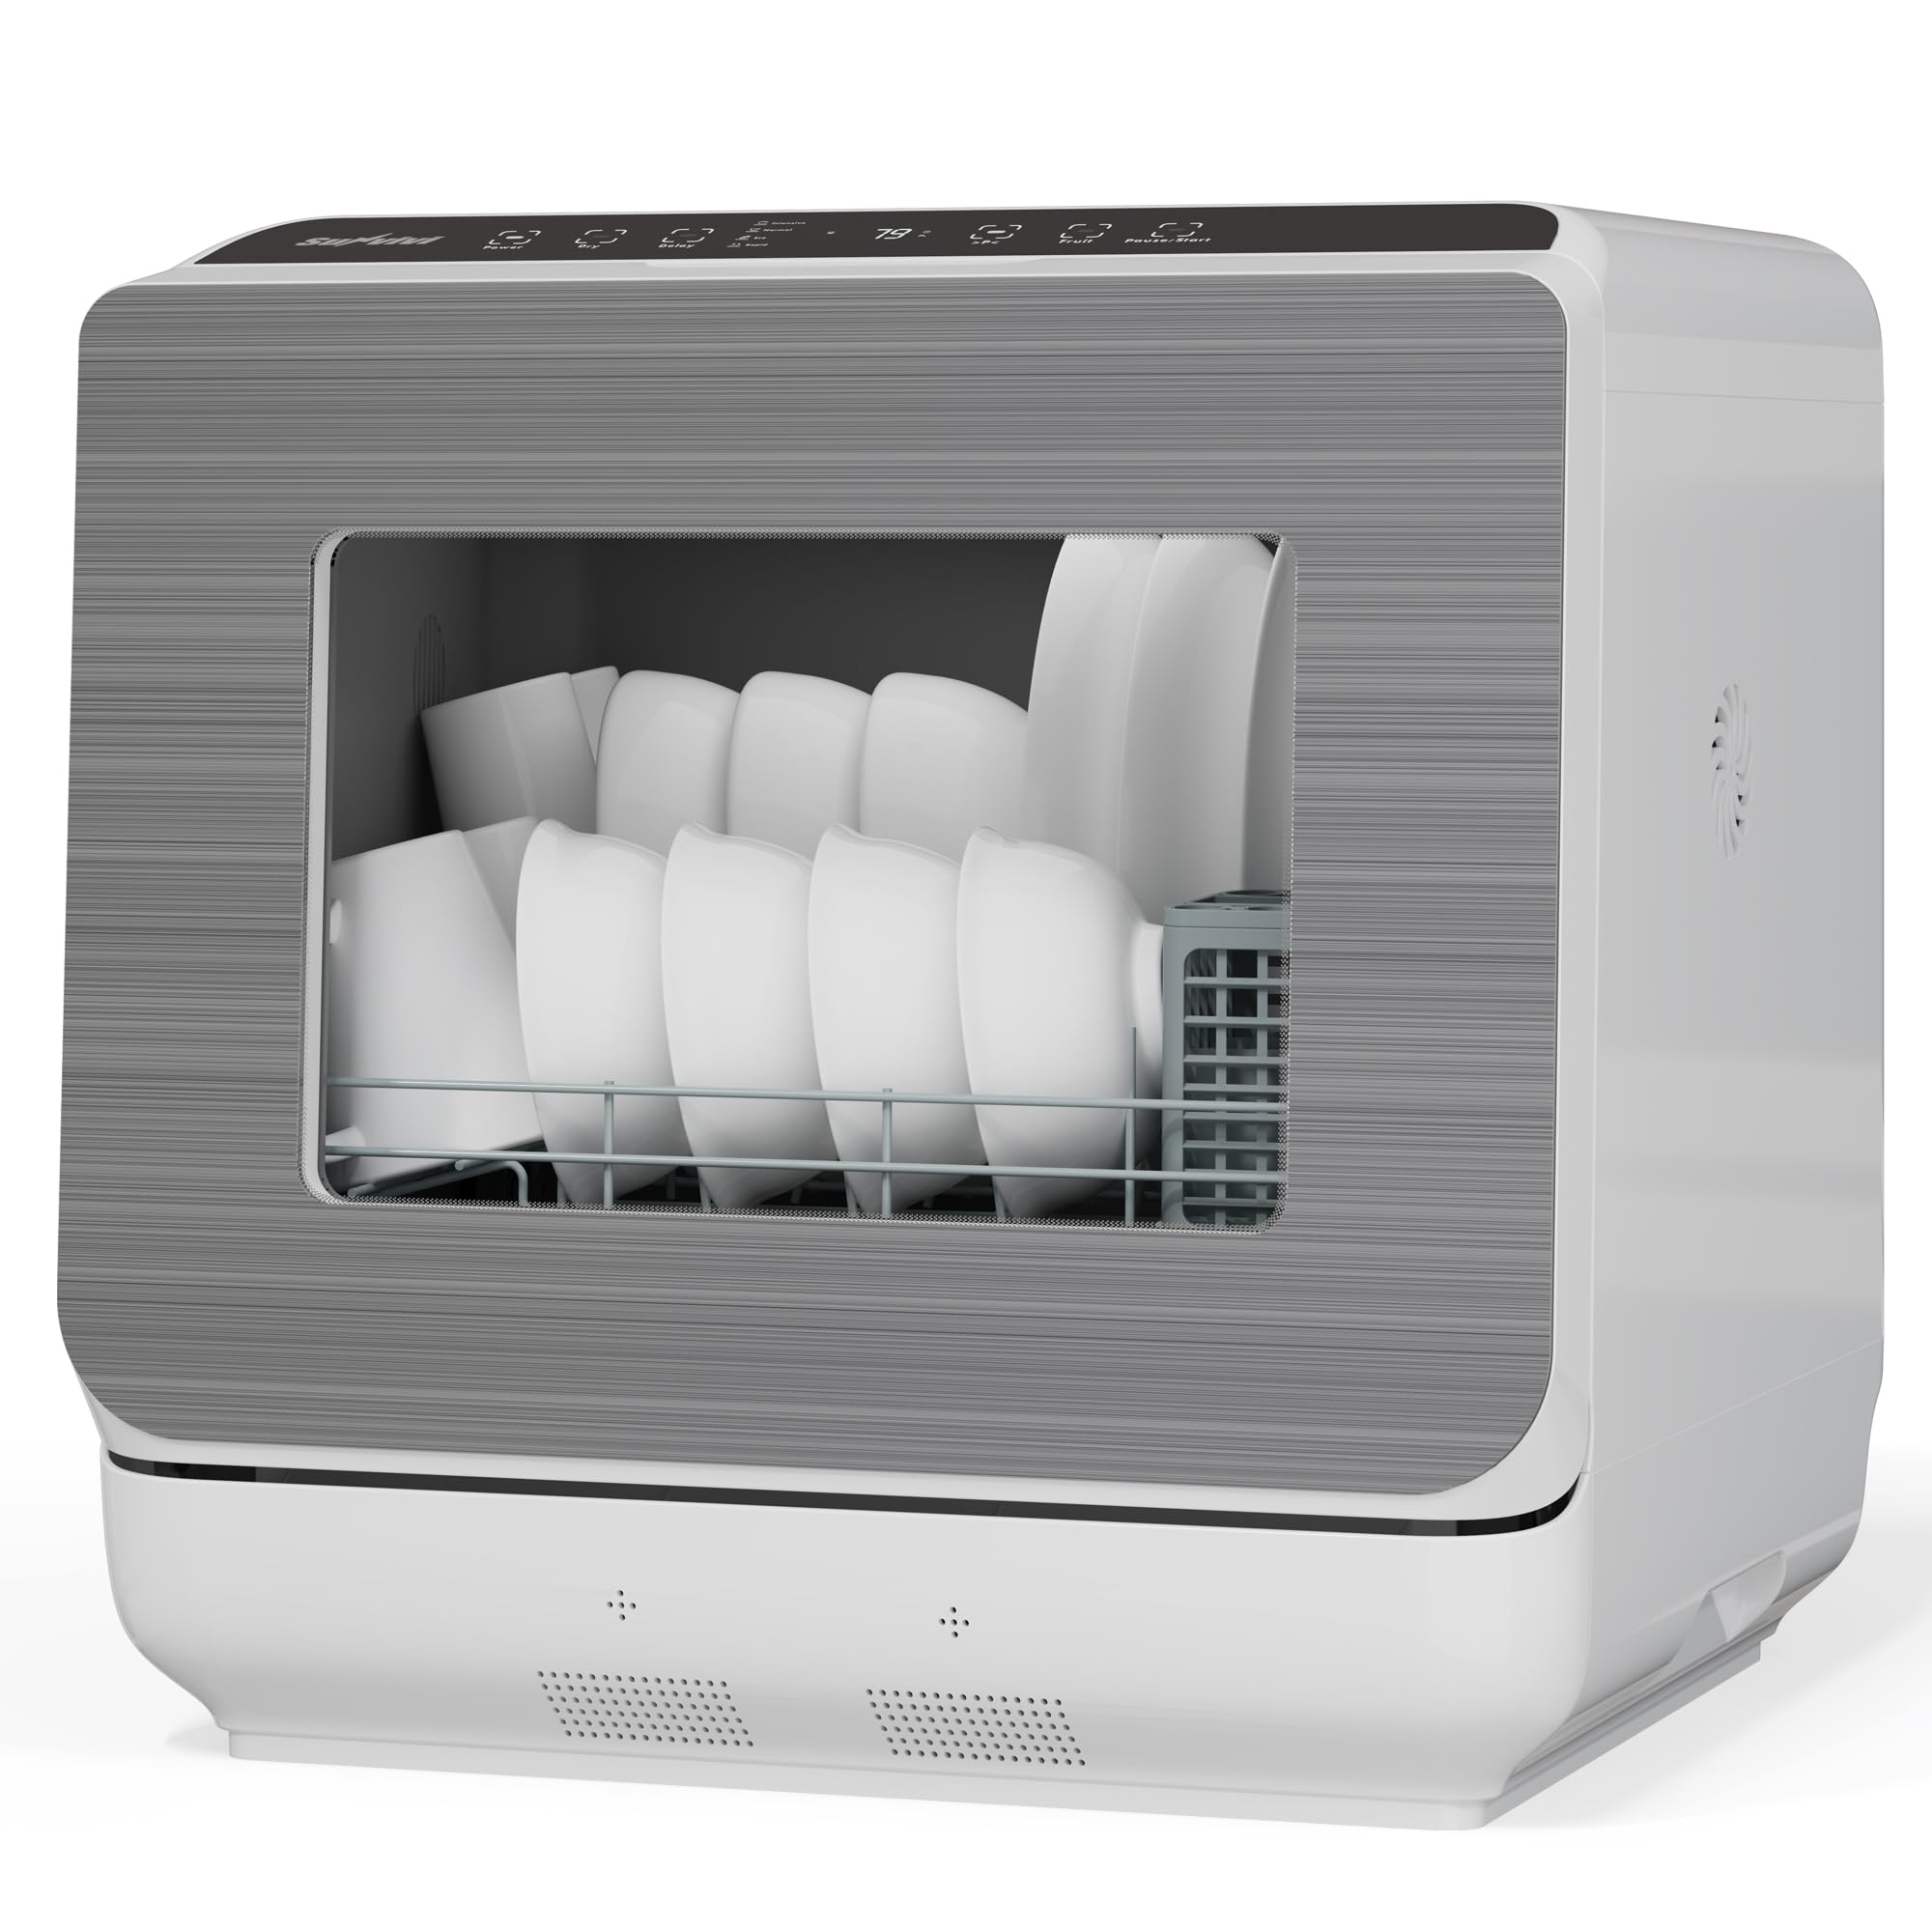
Figure 5.1: Front view of the SUNVIVI Portable Countertop Dishwasher.

Figure 5.2: Dimensions and interior capacity of the dishwasher.
6. Setup and Installation
6.1 Placement
Place the dishwasher on a stable, level countertop. Ensure there is adequate space around the unit for ventilation and to access the water tank and drain hose connections. The compact design makes it suitable for various locations.

Figure 6.1: The dishwasher is ideal for multiple locations due to its portable design.
6.2 Water Supply Options
Your dishwasher offers two convenient ways to supply water:
- Built-in 152 oz Water Tank: Manually fill the removable water tank located on top of the unit using the provided pitcher. The dishwasher will emit a buzzer alert when the tank is full. This option requires no permanent plumbing connection.
- Direct Faucet Connection: Connect the inlet hose directly to a kitchen faucet for automatic water intake. This method provides a continuous water supply without manual refilling.

Figure 6.2: Illustrates the dual water supply options: manual tank fill and direct faucet connection.
6.3 Connecting the Drain Hose
Connect the drain hose to the designated outlet at the back of the dishwasher. Secure the other end of the drain hose into a sink or a suitable drainage area. Ensure the drain hose is properly installed to prevent leaks.
7. Operating Instructions
7.1 Control Panel Overview
The dishwasher features an easy-to-use LED touch panel for intuitive control. The panel includes buttons for various wash modes, delay start, and power.

Figure 7.1: The LED touch control panel with 6 wash modes.

Figure 7.2: The HD LED Touchscreen provides clear control.
7.2 Loading the Dishwasher
Arrange dishes in the rack, ensuring they do not block the spray arms. Place larger items and plates on the bottom rack, and smaller items, cups, and cutlery in the designated baskets. The dishwasher is designed to fit up to 12-inch plates.

Figure 7.3: Properly loaded dishwasher interior.
7.3 Adding Detergent
Use professional dishwasher detergent (no need to add rinse aid in the Fruit mode). Add the recommended amount of detergent to the dispenser located on the inside of the door. Close the dispenser cover securely.
7.4 Selecting a Wash Cycle
Choose one of the six available wash modes based on your needs:
- Standard: For daily tableware washing.
- Quick: For dishes with slight oil stains, completes in 29 minutes.
- Intensive: For dishes with strong oil stains, includes cleaning and drying.
- Eco: Energy-efficient mode for cleaning and drying.
- Fruit: Specifically designed for washing fruits and vegetables.
- Dry: A 60-minute high-temp 167°F drying cycle with circulating fresh air for 13.5 hours to ensure dry results and prevent odors.
7.5 Starting a Cycle
To start a wash cycle:
- Touch and hold the Power button for 3 seconds to turn on the dishwasher.
- Touch the corresponding icon to choose your desired wash cycle.
- Press the Start/Pause button to begin the wash cycle.
7.6 Delay Start Function
The 12-hour delay start feature allows you to program the dishwasher to start at a later time, which can be useful for running cycles during off-peak hours or when it's most convenient for you.

Figure 7.4: The 12-hour delay start feature.
8. Wash Cycles Explained
The dishwasher utilizes advanced cleaning technology to ensure thorough results for all cycles.

Figure 8.1: High-temperature 167°F hygiene care for effective cleaning.

Figure 8.2: The 360° full coverage with 2 spray arms ensures comprehensive cleaning.
The Eco mode is designed for water and energy efficiency, using only 152 oz of water per wash, significantly less than handwashing.
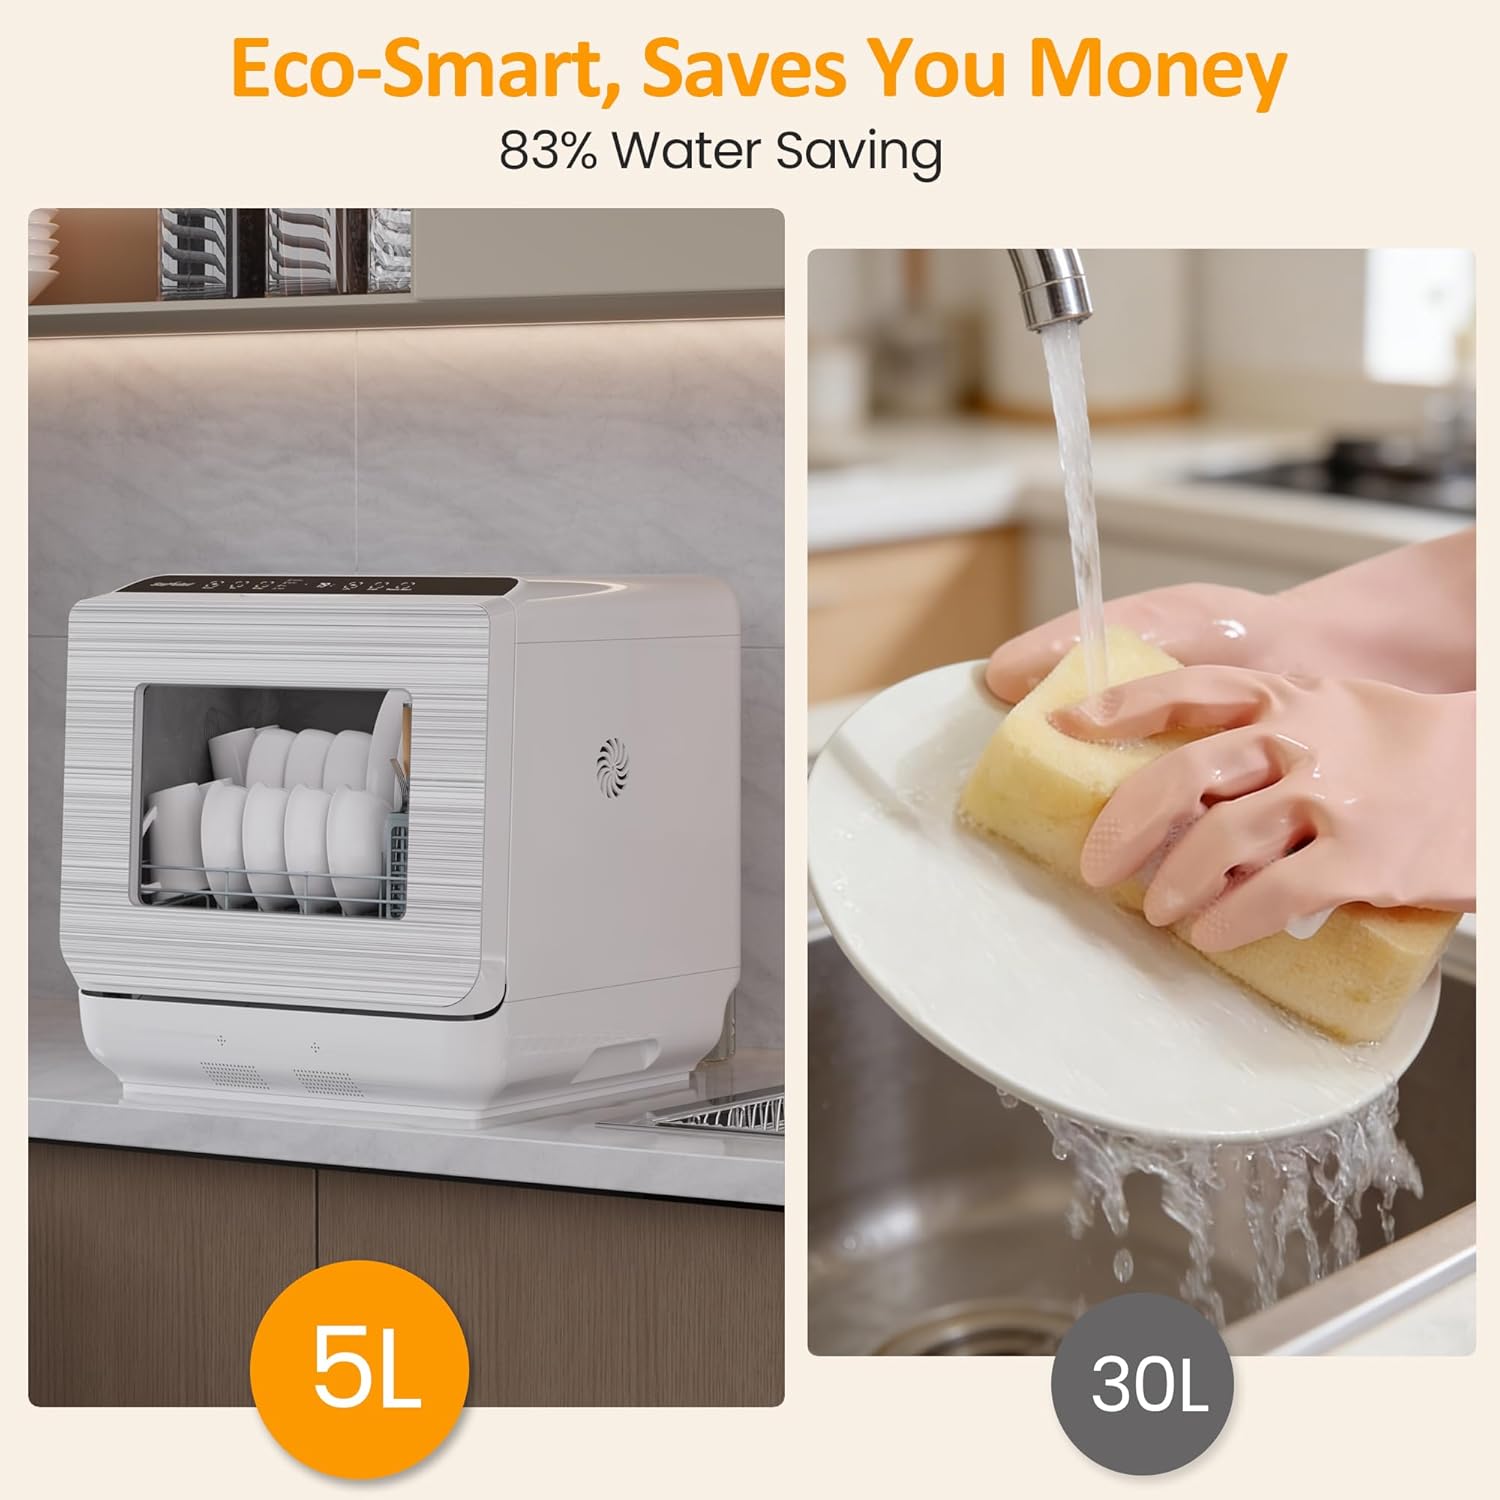
Figure 8.3: Water and energy saving benefits of the dishwasher.
9. Maintenance and Care
9.1 Cleaning the Filter
Regularly clean the filter to ensure optimal performance. Remove the filter by twisting and lifting it out. Rinse it under running water to remove any food particles. Reinsert the filter securely after cleaning.
9.2 Exterior Cleaning
Wipe the exterior of the dishwasher with a soft, damp cloth. Avoid using abrasive cleaners or solvents that could damage the surface.
10. Troubleshooting
If you encounter any issues with your dishwasher, refer to the following common problems and solutions:
- Dishwasher does not start: Ensure the power cord is securely plugged in and the door is fully closed. Check if a wash cycle is selected and the Start/Pause button is pressed.
- Water not filling: If using the built-in tank, ensure it is filled to the maximum level. If using faucet connection, ensure the inlet hose is properly connected and the water supply is turned on.
- Dishes not clean: Check if dishes are loaded correctly and not blocking spray arms. Ensure sufficient detergent is used. Clean the filter if it is clogged.
- Excessive noise: Ensure the dishwasher is placed on a level surface. Check for any foreign objects inside the dishwasher.
- Water leaks: Check all hose connections for tightness. Ensure the drain hose is properly positioned in the sink.
For further assistance, please contact customer support.
11. Warranty and Customer Support
Your SUNVIVI Portable Countertop Dishwasher is covered by a manufacturer's warranty. For detailed warranty information, including terms and conditions, please refer to the warranty card included with your product or visit the official SUNVIVI website. If you have any questions, require technical support, or need to claim warranty service, please contact our customer support team through the contact information provided on our website or in your product documentation. Please have your model number (ZDW002) and purchase date ready when contacting support.


