
Introduction
This manual provides detailed instructions for assembling and operating your Spilay DIY Miniature House Kit, model L2502, also known as the Fairyland Miniature Dollhouse. This kit is designed for adults and teens aged 14 and above, offering a rewarding hands-on craft experience. The finished product features intricate details, LED lighting, and a music box, making it a unique decorative piece.
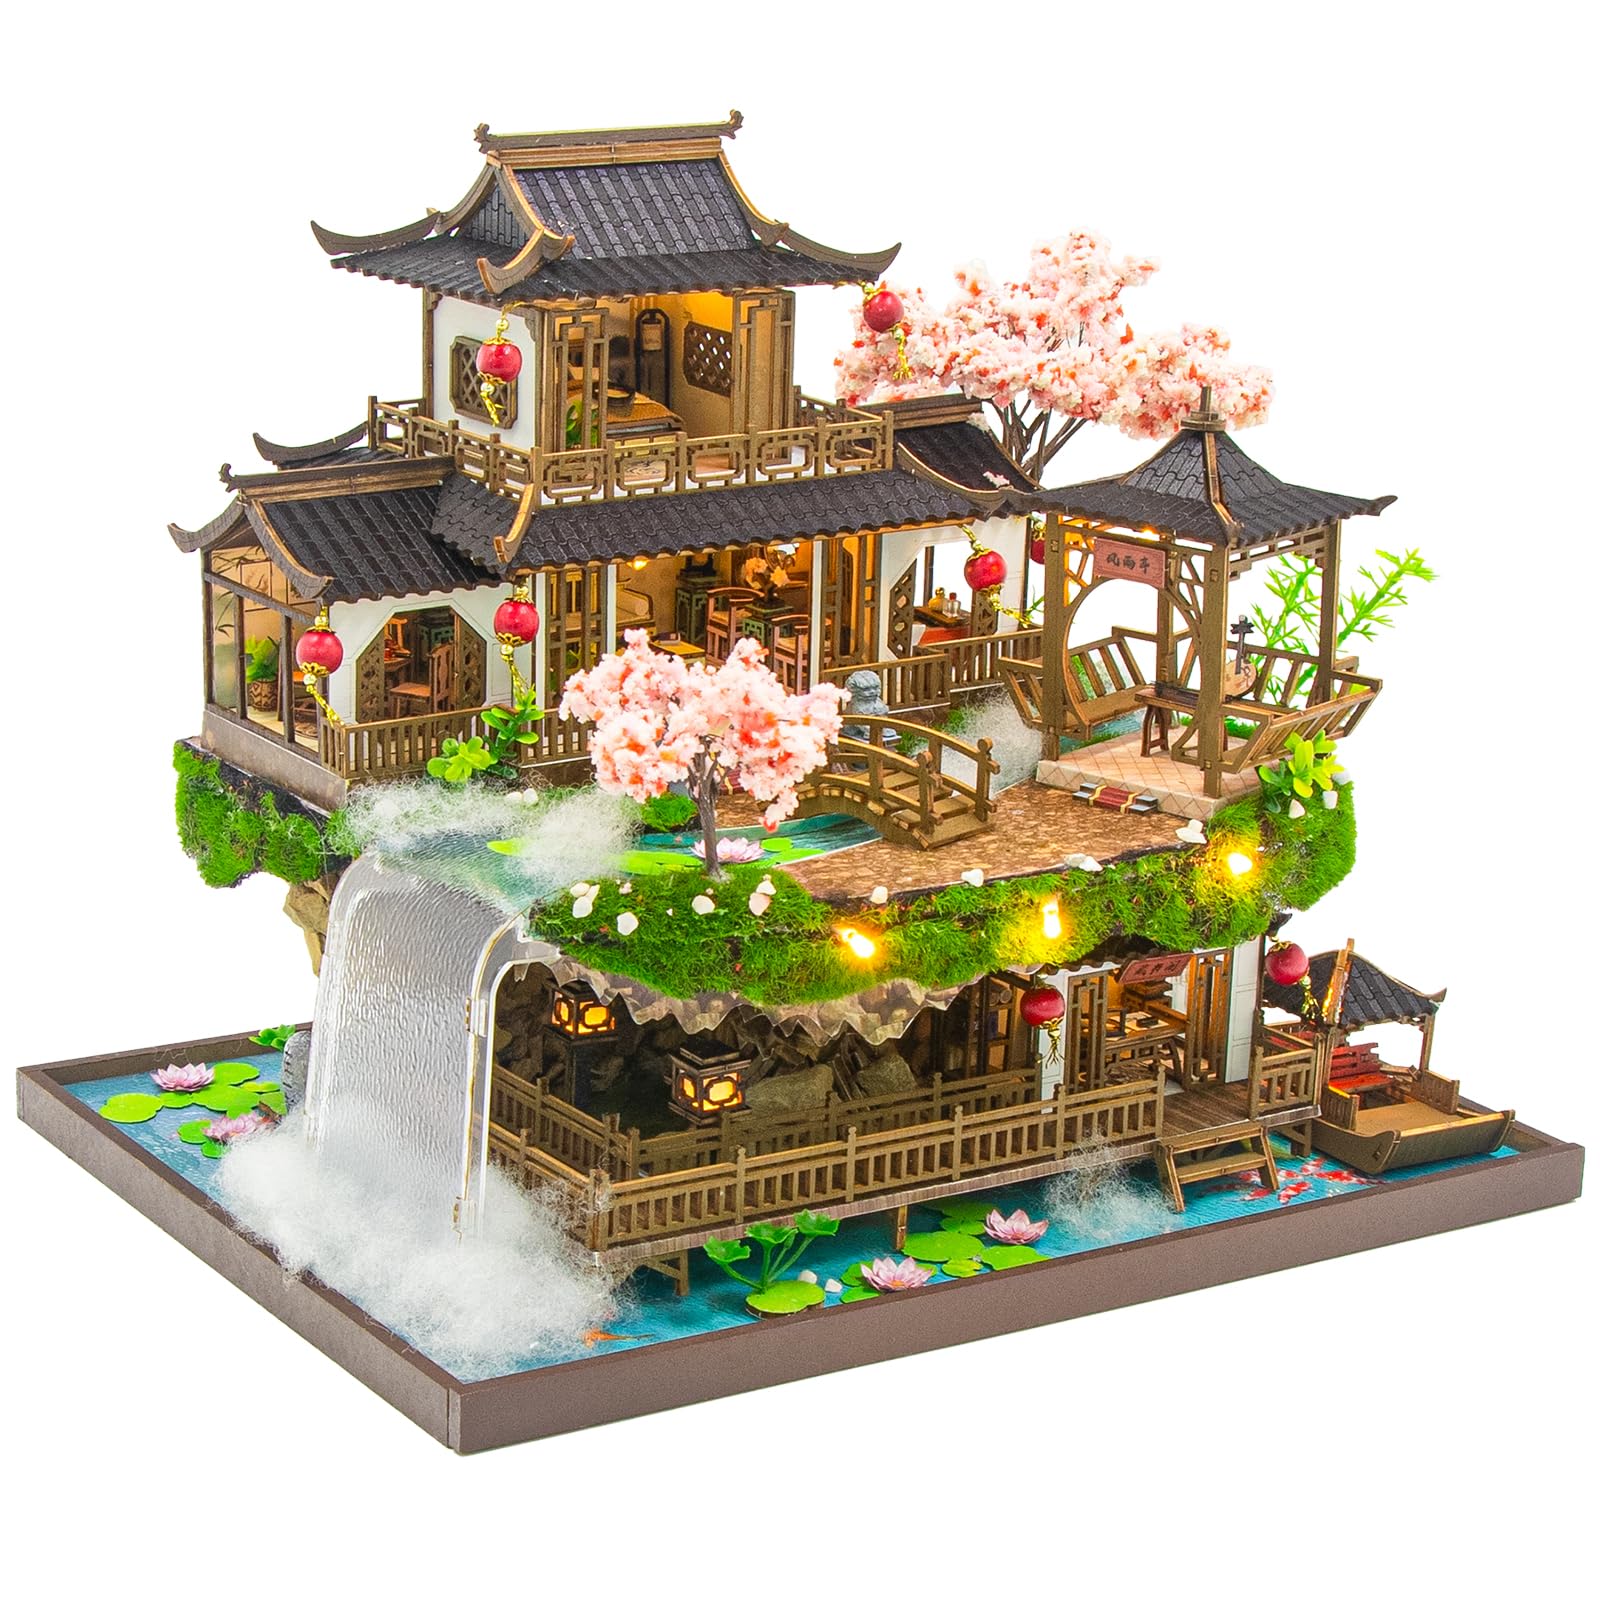
Image: The fully assembled Spilay Fairyland Miniature House Kit, showcasing its intricate design and warm LED lighting.
Setup and Assembly
The Spilay Fairyland Miniature House Kit requires complete assembly. Please follow the included step-by-step English instruction manual carefully. All necessary components and basic tools are provided within the kit.
Included Components:
- Pre-cut wooden pieces for structural elements and furniture.
- LED light components.
- Music box mechanism.
- Various decorative elements (e.g., fabric, paper, plastic).
- Essential assembly tools: tweezers, sanding stick.
- Detailed English instruction manual.
Recommended Additional Tools (Not Included):
- Craft Glue: A quick-drying, strong craft glue suitable for wood, paper, and fabric.
- Precision Knife/Scalpel: For fine cutting and trimming.
- Small Scissors: For cutting paper and fabric.
- Ruler: For accurate measurements.
- Batteries: For LED lights (typically AAA, check manual for specifics).
Assembly Steps Overview:
- Unpack and Organize: Carefully unpack all components and organize them according to the instruction manual. Verify all parts are present.
- Follow Manual: Adhere strictly to the step-by-step instructions provided in the English manual. Each step is typically accompanied by diagrams.
- Glue Application: Apply glue sparingly and precisely. Allow sufficient drying time between steps to ensure structural integrity.
- Wiring LED Lights: Follow the wiring diagrams for the LED lights. Ensure connections are secure before concealing wires.
- Music Box Installation: Integrate the music box as directed in the manual.
- Detailing: Attach all miniature furniture and decorative elements to complete the scene.

Image: Individuals engaged in the assembly process of the miniature house kit, demonstrating the hands-on nature of the project.
Video: An official Spilay video demonstrating the assembly process and various components of the L2502 Dollhouse Kit.
Operating Instructions
LED Lights:
The miniature house features built-in LED lights. Once assembly is complete and batteries are installed (refer to the specific battery type and installation instructions in your manual), the lights can be activated. The kit includes a touch-sensitive switch for convenient operation. Locate the switch, typically integrated into the base or a discreet part of the structure, and touch it to turn the lights on or off.

Image: The miniature house kit illuminated by its LED lights, serving as a decorative nightlight on a bedside table.
Music Box:
Your kit includes a music box. To operate, locate the winding key or mechanism, usually on the side or bottom of the base. Gently turn the key clockwise until you feel slight resistance. Do not over-wind. Release the key to play the melody. The music box operates independently of the LED lights.
Maintenance
- Cleaning: Use a soft, dry cloth or a small, soft brush to gently remove dust from the miniature house. Avoid using water or cleaning solutions, as they may damage the wood and paper components.
- Battery Replacement: When the LED lights dim or stop working, replace the batteries. Refer to your instruction manual for the correct battery type (e.g., AAA batteries are commonly used) and proper installation.
- Storage: If storing the miniature house, place it in a dry, cool environment away from direct sunlight and extreme temperatures to prevent warping or fading of materials.
- Handling: Handle the assembled kit with care to avoid damaging delicate components.
Troubleshooting
| Problem | Possible Cause | Solution |
|---|---|---|
| LED lights do not turn on. |
|
|
| Music box does not play. |
|
|
| Parts are missing or damaged upon arrival. | Manufacturing or shipping error. | Refer to the warranty section and contact Spilay customer support for replacement parts. |
| Difficulty understanding assembly steps. | Instructions may be complex for certain sections. | Review the diagrams carefully. Online tutorials or community forums for similar kits may offer additional visual guidance. |
Product Specifications
| Brand | Spilay |
| Model Number | L2502 |
| Product Name | Fairyland Miniature Dollhouse (Upgraded Version) |
| Scale | 1:24 |
| Dimensions (L x W x H) | 12.20" x 9.05" x 9.64" (31cm x 23cm x 24.5cm) |
| Weight | 1.5 kg |
| Material Type | Acrylic, Wood |
| Included Components | LED Light, Music Box, all furniture pieces, assembly tools (tweezers, sanding stick) |
| Recommended Age | 14+ (Adult) |
Warranty and Support
Spilay provides reliable 24-month after-sales support for your miniature house kit. If you encounter any missing or damaged parts upon opening your kit, please contact customer support immediately for assistance.
This warranty covers manufacturing defects and transit damage for a period of 24 months from the date of purchase. It does not cover damage resulting from improper assembly, misuse, or normal wear and tear.
Customer Support
For any questions, concerns, or to report missing/damaged parts, please contact Spilay customer support. Refer to the contact information provided in your product packaging or visit the official Spilay website for the most up-to-date support channels.
Online Resources:
- Official Spilay Store: Spilay DIY Dollhouse Miniature Store