1. Introduction
Thank you for purchasing the REACHER CR7WL Digital FM Radio Alarm Clock. This device combines an alarm clock, FM radio, white noise machine, and a night light into one compact unit. This manual provides detailed instructions for setup, operation, and maintenance to ensure optimal performance and user satisfaction. Please read this manual thoroughly before using the product and retain it for future reference.
2. Safety Instructions
To prevent damage or injury, please observe the following safety precautions:
- Ensure the power adapter is compatible with your local power supply (100-240V, 50/60Hz).
- Do not expose the device to water, moisture, or extreme temperatures.
- Avoid placing the device near heat sources or in direct sunlight.
- Do not attempt to disassemble, repair, or modify the device yourself. Contact qualified service personnel for assistance.
- Keep the device away from children and pets.
- Clean the device only with a soft, dry cloth. Do not use liquid cleaners or aerosols.
- This device is designed for indoor use only.
3. Package Contents
Verify that all items are present in the package:
- REACHER CR7WL Digital FM Radio Alarm Clock
- Power Adapter
- User Manual
4. Product Overview
Familiarize yourself with the components and controls of your alarm clock.
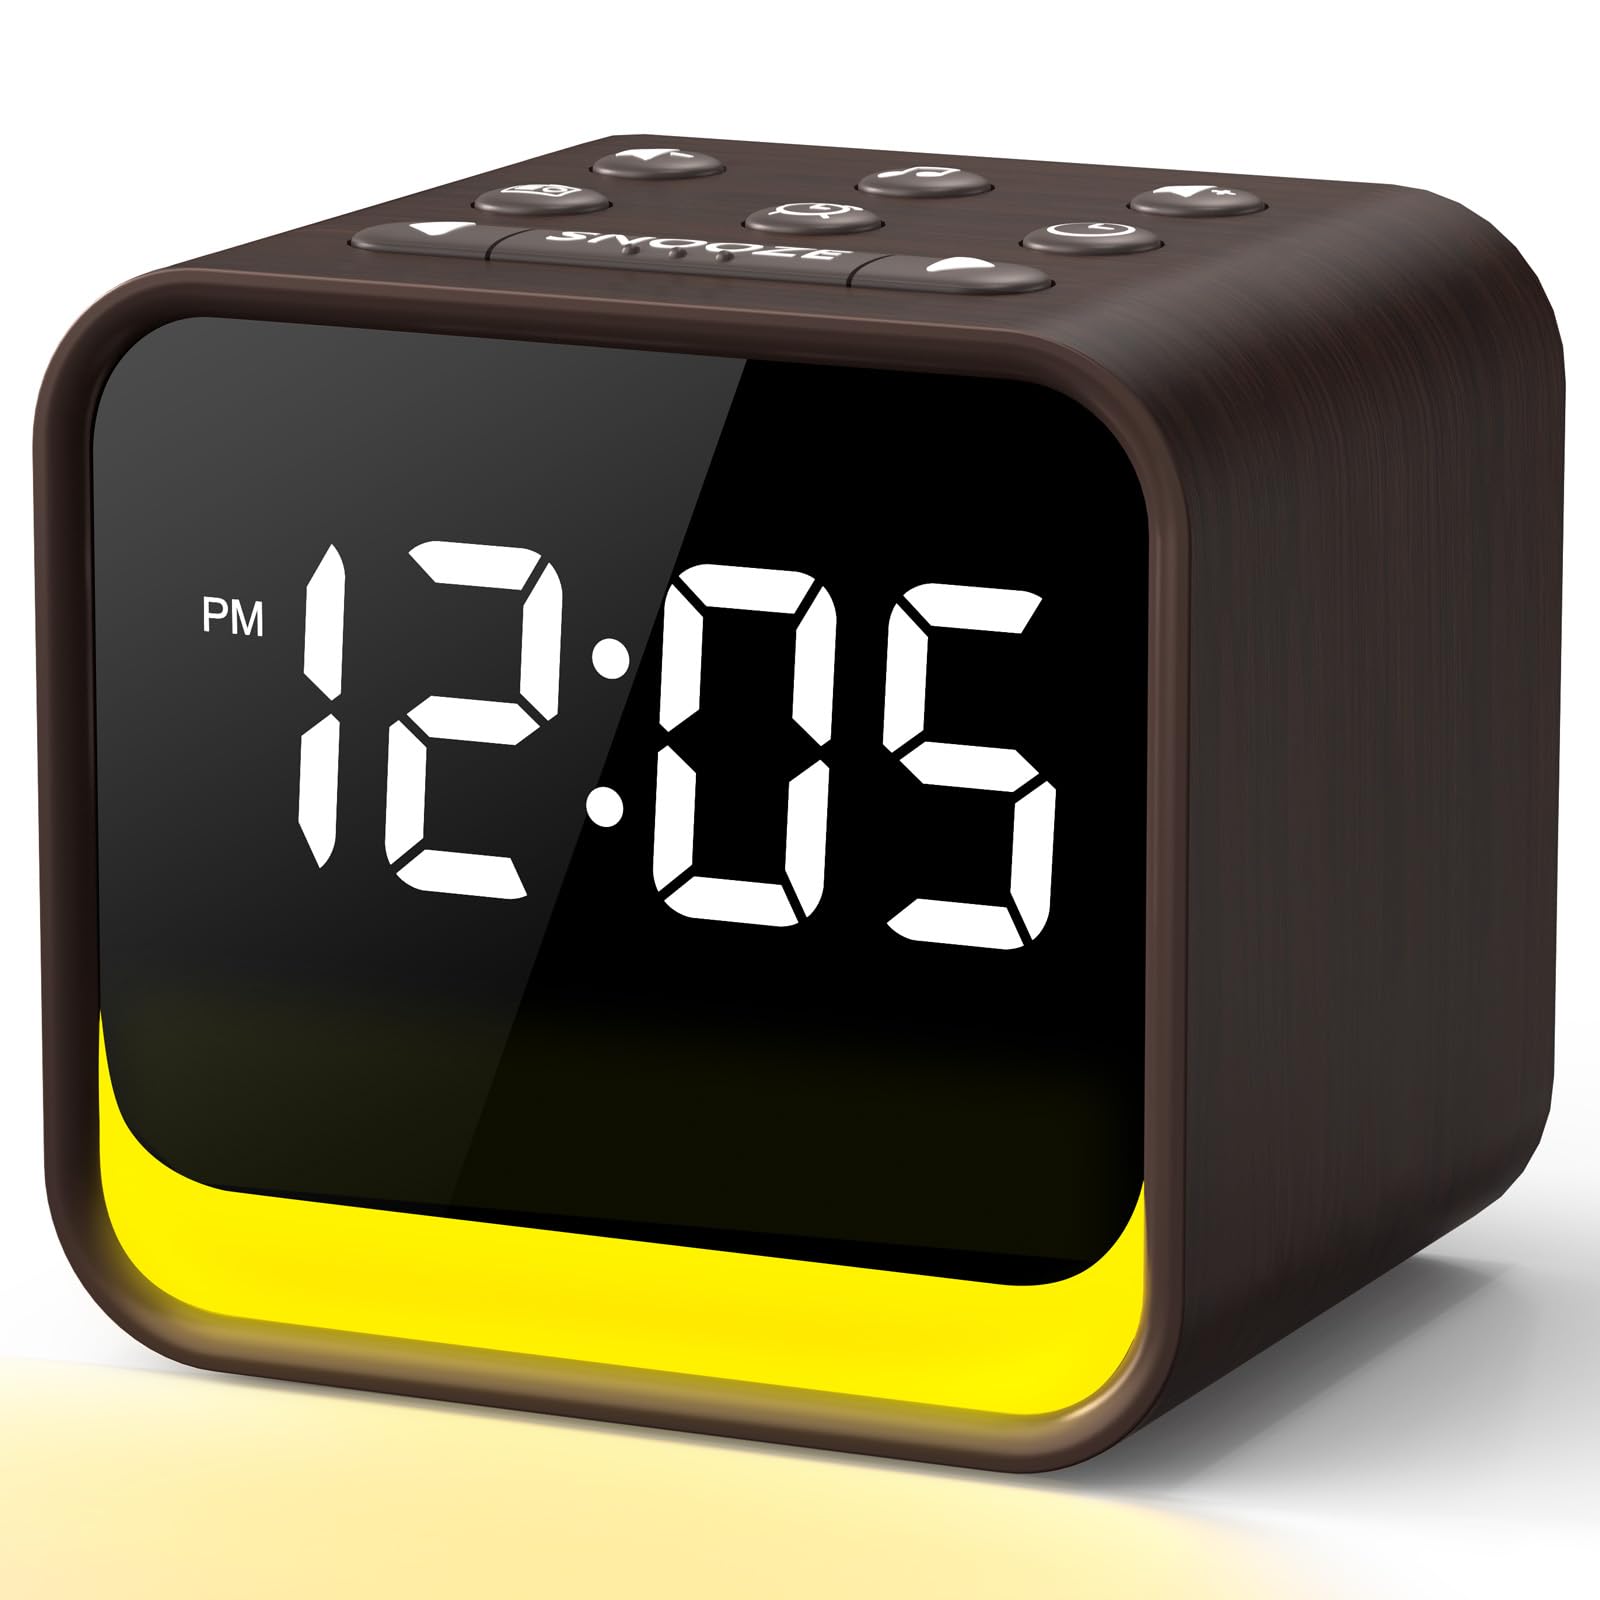
Figure 1: Front view of the REACHER CR7WL Digital FM Radio Alarm Clock, showing the digital display and control buttons.
Control Buttons (Typical Layout):
- TIME SET: To set the current time.
- ALARM 1 / ALARM 2: To set and activate alarms.
- FM / RADIO: To switch to FM radio mode and scan stations.
- SOUND / WHITE NOISE: To select and activate soothing sounds.
- LIGHT / COLOR: To control the night light and change colors.
- VOLUME +/-: To adjust sound volume.
- SNOOZE / DIMMER: To temporarily silence an alarm or adjust display brightness.
- SLEEP: To activate the sleep timer function.
5. Setup
5.1 Power Connection
- Unpack the alarm clock and power adapter.
- Connect the power adapter cable to the DC input port on the back of the alarm clock.
- Plug the power adapter into a standard electrical outlet. The display will light up, indicating the device is powered on.
5.2 Initial Time Setting
- Press and hold the TIME SET button until the hour digits begin to flash.
- Use the VOLUME +/- buttons to adjust the hour.
- Press TIME SET again to confirm the hour and move to minute adjustment.
- Use the VOLUME +/- buttons to adjust the minutes.
- Press TIME SET once more to save the time.
6. Operating Instructions
6.1 Setting Alarms
The device supports two independent alarms (Alarm 1 and Alarm 2).
- Press and hold the ALARM 1 (or ALARM 2) button until the alarm hour digits flash.
- Use the VOLUME +/- buttons to set the desired alarm hour.
- Press ALARM 1 (or ALARM 2) again to confirm the hour and move to minute adjustment.
- Use the VOLUME +/- buttons to set the desired alarm minutes.
- Press ALARM 1 (or ALARM 2) again to select the alarm sound. Choose from 8 natural sounds or FM radio.
- Press ALARM 1 (or ALARM 2) one last time to save the alarm settings. The alarm icon will appear on the display.
- To activate/deactivate an alarm, short press the corresponding ALARM 1 or ALARM 2 button. The alarm icon will appear/disappear.
6.2 Snooze Function
When an alarm sounds, press the SNOOZE / DIMMER button to temporarily silence it for 9 minutes. The alarm will sound again after 9 minutes. To turn off the alarm completely, press any other button.
6.3 FM Radio Operation
- Press the FM / RADIO button to enter FM radio mode. The frequency will be displayed.
- Auto-Scan: Press and hold the FM / RADIO button to automatically scan and save available stations.
- Manual Tuning: Use the VOLUME +/- buttons to manually tune to a specific frequency.
- Preset Stations: After auto-scanning, use the ALARM 1 / ALARM 2 buttons to cycle through saved preset stations.
- To adjust radio volume, use the VOLUME +/- buttons.
- Press FM / RADIO again to turn off the radio.
6.4 White Noise & Soothing Sounds
The device offers 24 soothing sounds, including nature sounds and various white noise types (white, brown, pink, blue noise).
- Press the SOUND / WHITE NOISE button to activate the soothing sound mode.
- Repeatedly press the SOUND / WHITE NOISE button to cycle through the 24 available sounds.
- Use the VOLUME +/- buttons to adjust the sound volume (20-105 dB range).
- To turn off the soothing sound, press and hold the SOUND / WHITE NOISE button.
6.5 Night Light Function
The integrated night light offers 7 different colors.
- Press the LIGHT / COLOR button to turn on the night light.
- Repeatedly press the LIGHT / COLOR button to cycle through the 7 colors.
- To turn off the night light, press the LIGHT / COLOR button until the light turns off.
6.6 Display Dimmer
The display brightness can be adjusted from 0% to 100%.
- Short press the SNOOZE / DIMMER button (when no alarm is sounding) to cycle through different brightness levels.
- Continue pressing until you reach your desired brightness or turn off the display completely.
6.7 Sleep Timer
The sleep timer allows the radio or white noise to play for a set duration before automatically turning off.
- While FM radio or soothing sounds are playing, press the SLEEP button.
- Repeatedly press the SLEEP button to cycle through available sleep timer durations (e.g., 15, 30, 60, 90 minutes, or OFF).
- The selected duration will be displayed briefly. The device will automatically turn off the audio after the set time.
7. Maintenance
- Cleaning: Disconnect the power before cleaning. Use a soft, dry, lint-free cloth to wipe the surface of the device. Do not use abrasive cleaners, waxes, or solvents.
- Storage: If not using the device for an extended period, unplug it and store it in a cool, dry place.
8. Troubleshooting
| Problem | Possible Cause | Solution |
|---|---|---|
| Device does not power on. | Power adapter not connected or faulty outlet. | Ensure the power adapter is securely plugged into the device and a working electrical outlet. Try a different outlet. |
| Alarm does not sound. | Alarm not activated or volume too low. | Check if the alarm icon is displayed. Ensure alarm volume is set to an audible level. |
| Poor FM radio reception. | Weak signal or interference. | Extend the FM antenna fully. Reposition the device to improve reception. Avoid placing near other electronic devices. |
| Display is too bright/dim. | Incorrect dimmer setting. | Short press the SNOOZE / DIMMER button to adjust brightness levels. |
9. Specifications
- Brand: REACHER
- Model: CR7WL
- Power Source: Corded Electric
- Display Type: Digital
- Alarm Sounds: 9 (8 natural sounds + FM radio)
- Soothing Sounds: 24 (nature sounds, white/brown/pink/blue noise)
- Night Light: 7 colors, adjustable
- Display Dimmer: 0-100% adjustable
- Snooze Duration: 9 minutes
- Alarm Volume Range: 20-105 dB
- Product Dimensions: 9 x 3.81 x 8 cm
- Item Weight: 480 grams
- Material: Wood look finish (not solid wood)
- Room Type: Bedroom
- Indoor/Outdoor Use: Indoor
10. Warranty and Support
REACHER products are designed for reliability and performance. For warranty information or technical support, please refer to the warranty card included with your purchase or visit the official REACHER website. Do not attempt to repair the device yourself, as this may void your warranty.


