
Introduction
This manual provides essential information for setting up and operating your Vivitar Kidztech Purple Panda Digital Video Camera. Designed for young photographers aged 3 to 9, this camera captures high-definition photos and videos, offering a fun and durable tool for creative expression. Please read through these instructions carefully to ensure proper use and to maximize your enjoyment of the product.
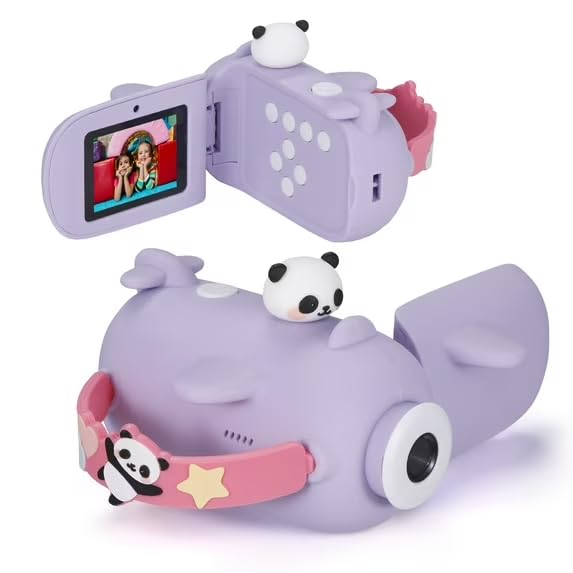
Image: Vivitar Kidztech Purple Panda Digital Video Camera, showcasing its compact and kid-friendly design.
What's in the Box
Upon unboxing your Vivitar Kidztech Purple Panda Digital Video Camera, please ensure all the following items are present:
- Camera Body: The main digital video camera unit.
- Battery: Integrated 750mAh lithium polymer battery.
- USB Cable: For charging and data transfer.
- MicroSD Card: A preinstalled 32GB MicroSD card for storage.
- Lanyard: An innovative lanyard that also functions as a charging and data transfer cable.
Setup
- Charging the Camera: Connect the camera to a USB power source using the provided USB cable. The camera features a robust 750mAh lithium polymer battery designed for extended use.
- MicroSD Card: The camera comes with a preinstalled 32GB MicroSD card. Ensure it is securely inserted into the designated slot.
- Attaching the Lanyard: Secure the innovative lanyard to the camera. This lanyard is designed for easy carrying and also doubles as a charging and data transfer cable.
Operating Instructions
- Power On/Off: Press and hold the power button (usually located on the side or top) for a few seconds until the screen illuminates or turns off.
- Navigation: Use the directional buttons (up, down, left, right) to navigate through the camera's menu options and settings. The 'OK' button typically confirms selections.
- Photo Mode: Select the camera icon from the main menu. Press the shutter button to capture photos. The camera supports up to 16MP photos.
- Video Mode: Select the video camera icon from the main menu. Press the shutter button to start and stop video recording. The camera records in 1920 x 1080 resolution.
- Digital Zoom: In photo mode, use the zoom buttons (often integrated with directional buttons) to digitally zoom in or out.
- Selfie Camera: The camera features a built-in selfie camera. To activate, rotate the lens to face the user. This allows children to easily capture their own adventures.
- Games: The camera includes built-in games for entertainment. Navigate to the 'Games' icon in the menu to access them.
- Settings: Access the 'Settings' menu (often represented by a gear icon) to adjust various camera parameters such as resolution, date/time, and other preferences.
Transferring Files
To transfer photos and videos from your camera to a computer or other compatible device:
- Using the USB Cable: Connect the camera directly to your computer using the provided USB cable. The camera should appear as a removable drive, allowing you to copy files.
- Using the MicroSD Card: Alternatively, you can remove the MicroSD card from the camera and insert it into a compatible card reader connected to your computer.
Maintenance
- Cleaning: Use a soft, dry cloth to clean the camera body and lens. Avoid using harsh chemicals or abrasive materials.
- Storage: Store the camera in a cool, dry place away from direct sunlight and extreme temperatures when not in use.
- Durability: The camera is made from safe, durable ABS plastic and food-grade silicone to withstand everyday play. However, avoid intentional drops or impacts.
Troubleshooting
- Camera Not Turning On: Ensure the battery is fully charged. Connect the camera to a power source and allow it to charge for at least 30 minutes before attempting to power on again.