1. Product Overview
The CCGIRU 28-Inch Propane Fire Pit Table (Model KLD4001SPA1) is a versatile outdoor appliance designed to provide both warmth and a functional surface for gatherings. This 2-in-1 unit operates as a 50,000 BTU fire pit and can be converted into a dining table. It features a durable steel tabletop, adjustable flame control, and is CSA certified for safety.
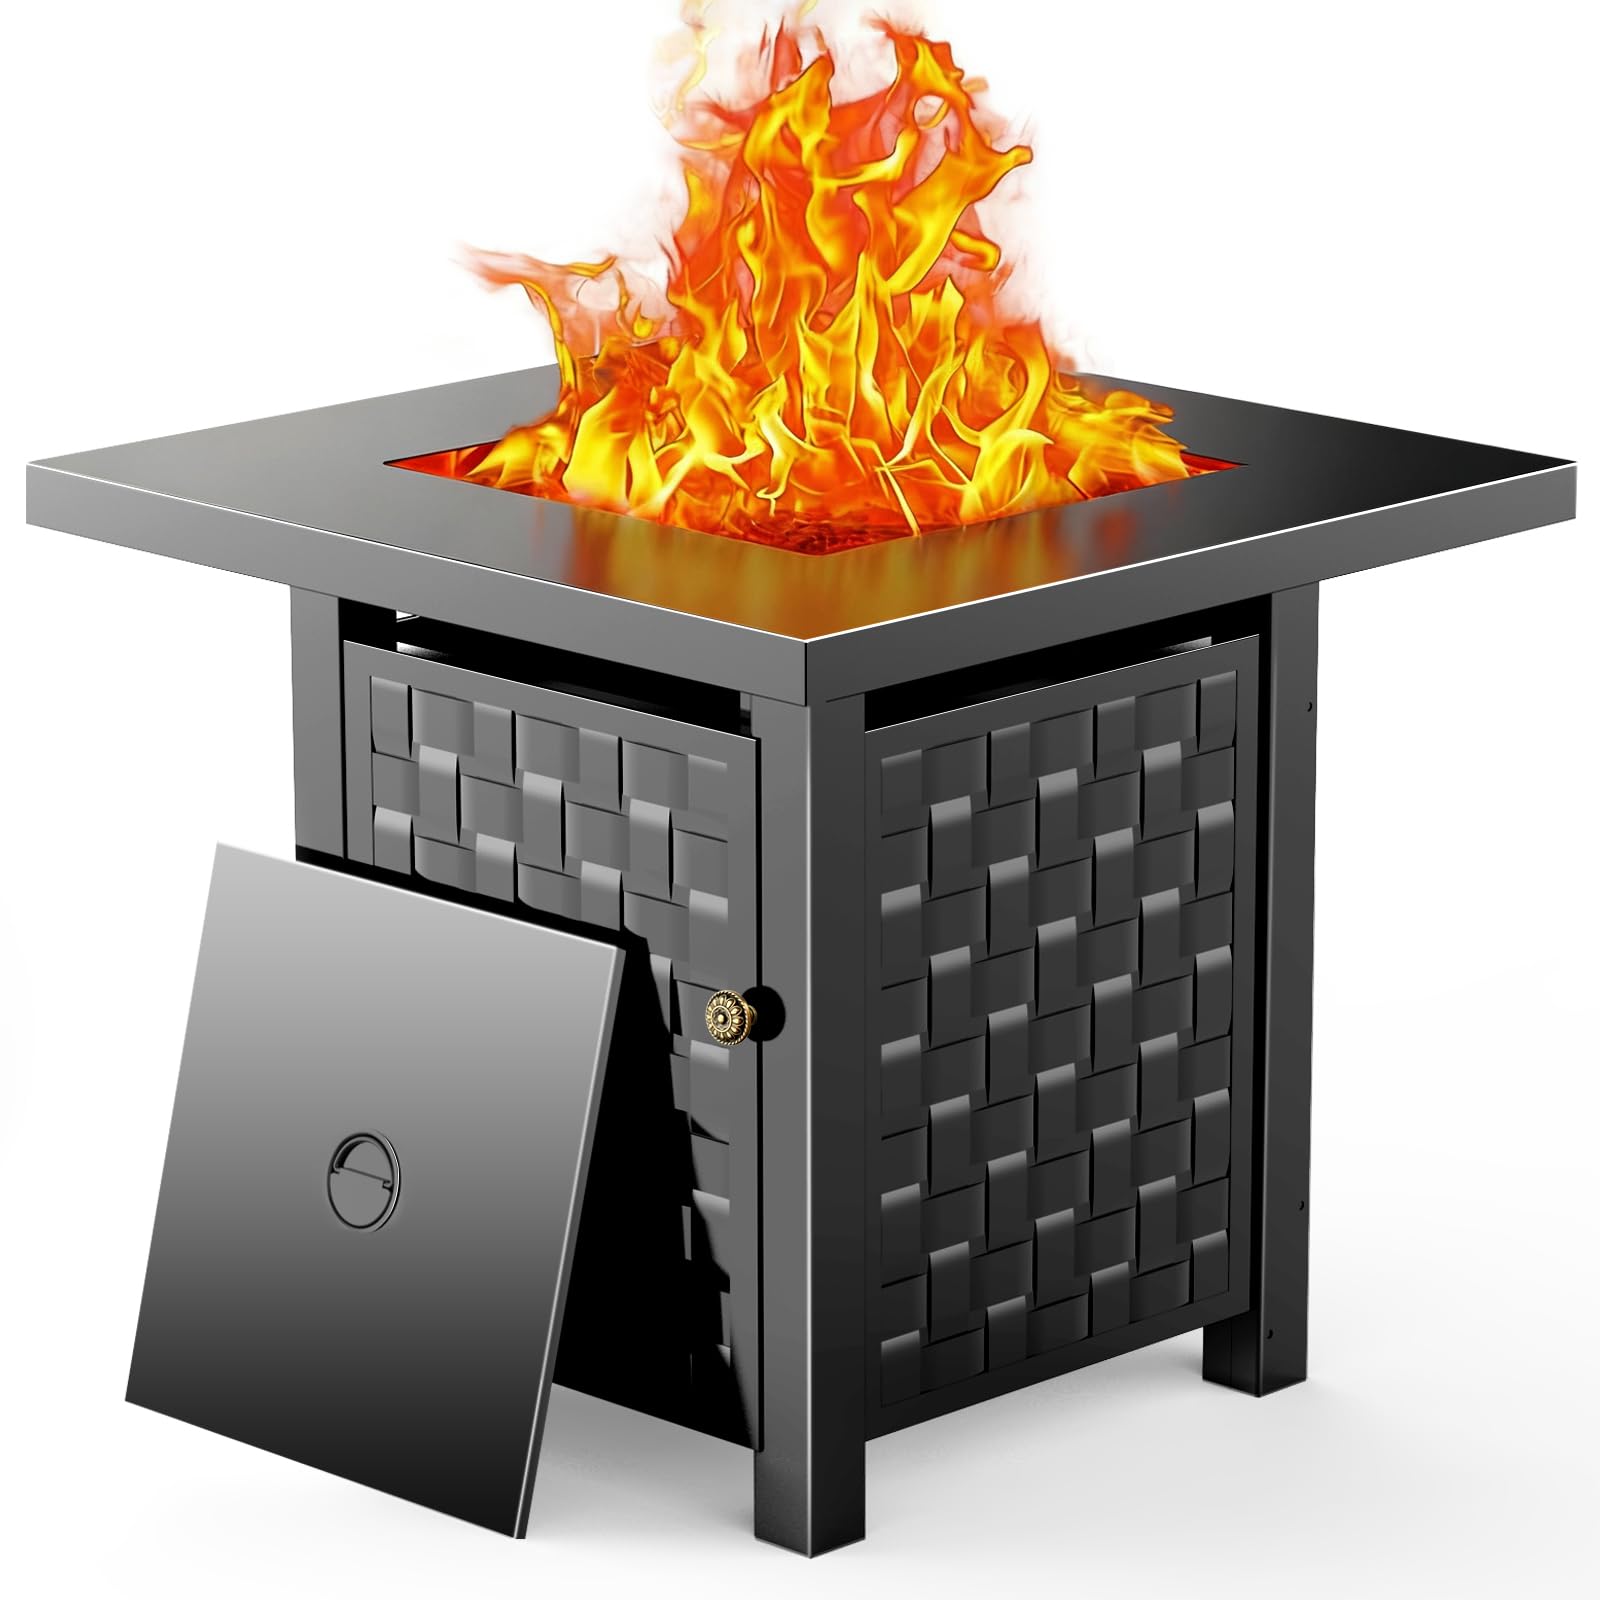
Image 1.1: The CCGIRU fire pit table providing 50,000 BTU heat output, certified by CSA, ETL, and Intertek, shown in an outdoor setting.
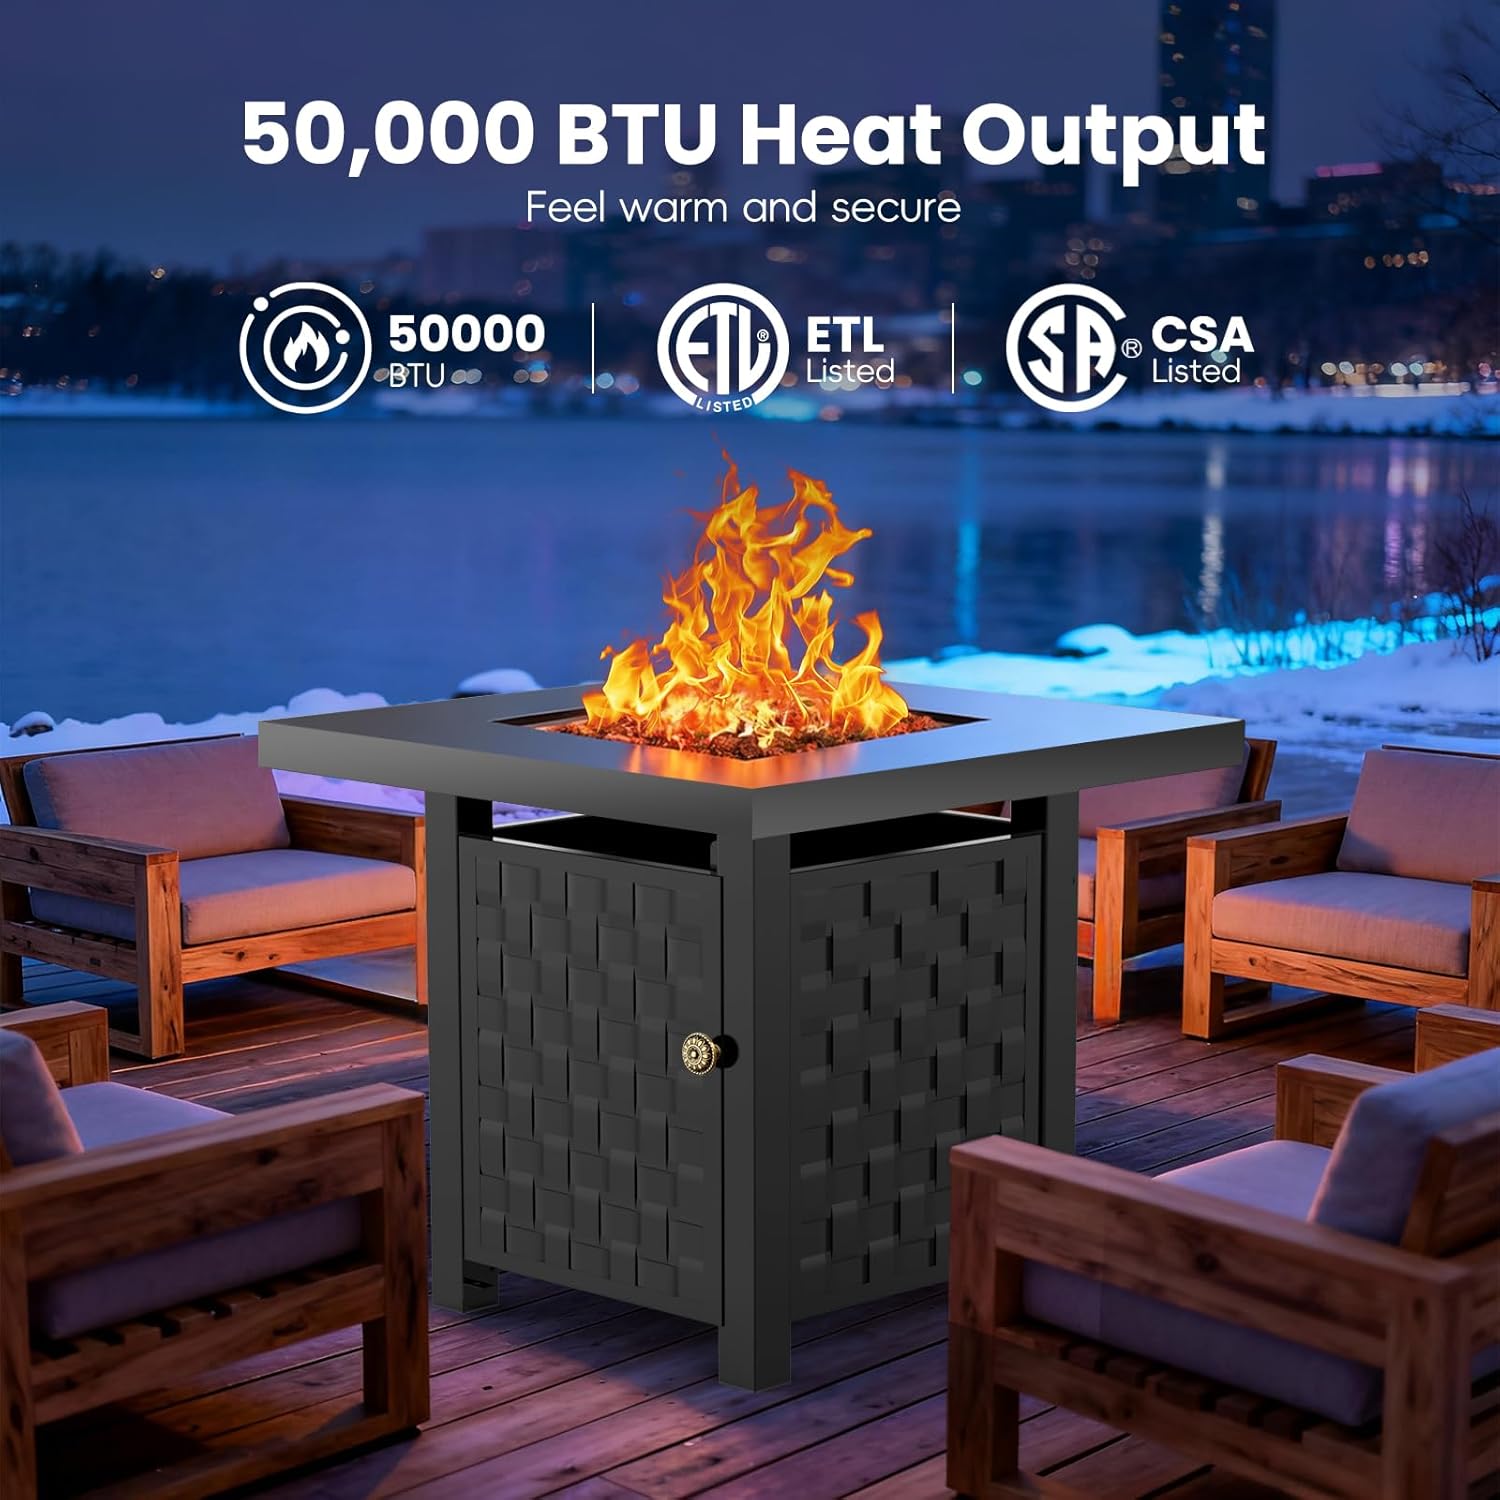
Image 1.2: Illustration of the 2-in-1 functionality, serving as both a fire pit and a dining table.
Key Features:
- Dual Functionality: Serves as a warm fire pit and a practical table for drinks and snacks.
- Spacious 28-Inch Tabletop: Offers ample space around the fire for convenience.
- Powerful 50,000 BTU Heat Output: Provides significant warmth for outdoor gatherings.
- Durable Construction: Built with heavy-duty steel and a stainless steel burner.
- CSA Certified: Ensures safety during use.
- Easy Assembly: Designed for quick and straightforward setup.
2. Safety Information
WARNING: Failure to follow these safety instructions could result in fire, explosion, or carbon monoxide poisoning, which could cause property damage, personal injury, or death.
- Outdoor Use Only: This appliance is for outdoor use only. Do not use indoors or in an enclosed area.
- Clearance: Maintain a minimum distance of 3 feet (0.91 meters) from combustible materials (e.g., walls, furniture, dry leaves).
- Children and Pets: Keep children and pets away from the fire pit at all times.
- Fuel Type: Use only Liquefied Petroleum Gas (propane). Do not use solid fuels or other flammable liquids.
- Leak Check: Before each use, perform a leak check using soapy water on all gas connections. Refer to the 'Setup' section for detailed instructions.
- Ventilation: Ensure adequate ventilation around the propane tank compartment.
- Hot Surfaces: The fire pit and surrounding surfaces will become hot during operation. Avoid direct contact.
- Supervision: Never leave the fire pit unattended when in use.
- Lava Rocks: Only use the provided lava rocks. Do not overfill the burner pan.
- CSA Certified: This product is CSA certified, indicating it meets applicable safety standards.
3. Setup and Assembly
The CCGIRU fire pit table is designed for easy assembly, typically requiring one person and approximately 15 minutes. Ensure all components are present and undamaged before beginning.
Package Contents:

Image 3.1: Contents included in the package: fire pit table, square lid, lava rocks, and user manual.
Assembly Steps:
- Unpack all components and verify against the parts list in the included manual.
- Assemble the legs and base structure according to the detailed diagrams in the physical instruction manual. A Phillips head screwdriver is typically required (not included).
- Carefully place the main tabletop unit onto the assembled base and secure it with the provided hardware.
- Open the access door to the propane tank compartment.
- Place a standard 20 lb propane tank (not included) inside the compartment.
- Connect the regulator hose from the fire pit to the propane tank valve. Ensure the connection is tight.
- Distribute the lava rocks evenly over the burner pan, ensuring not to block the igniter or burner holes.
Leak Check Procedure:
Crucial Safety Step: Always perform a leak check before the first use and after any tank replacement or disconnection.
- Mix a solution of equal parts liquid dish soap and water.
- Ensure the fire pit control knob is in the 'OFF' position.
- Slowly open the propane tank valve.
- Apply the soapy solution to all gas connections (regulator to tank, hose to burner inlet).
- Observe for bubbles. If bubbles appear, there is a leak. Immediately close the propane tank valve and tighten the connection. Repeat the leak check. If bubbles persist, do not use the fire pit and contact customer support.
- If no bubbles appear, the connections are secure. Close the propane tank valve until ready to operate.
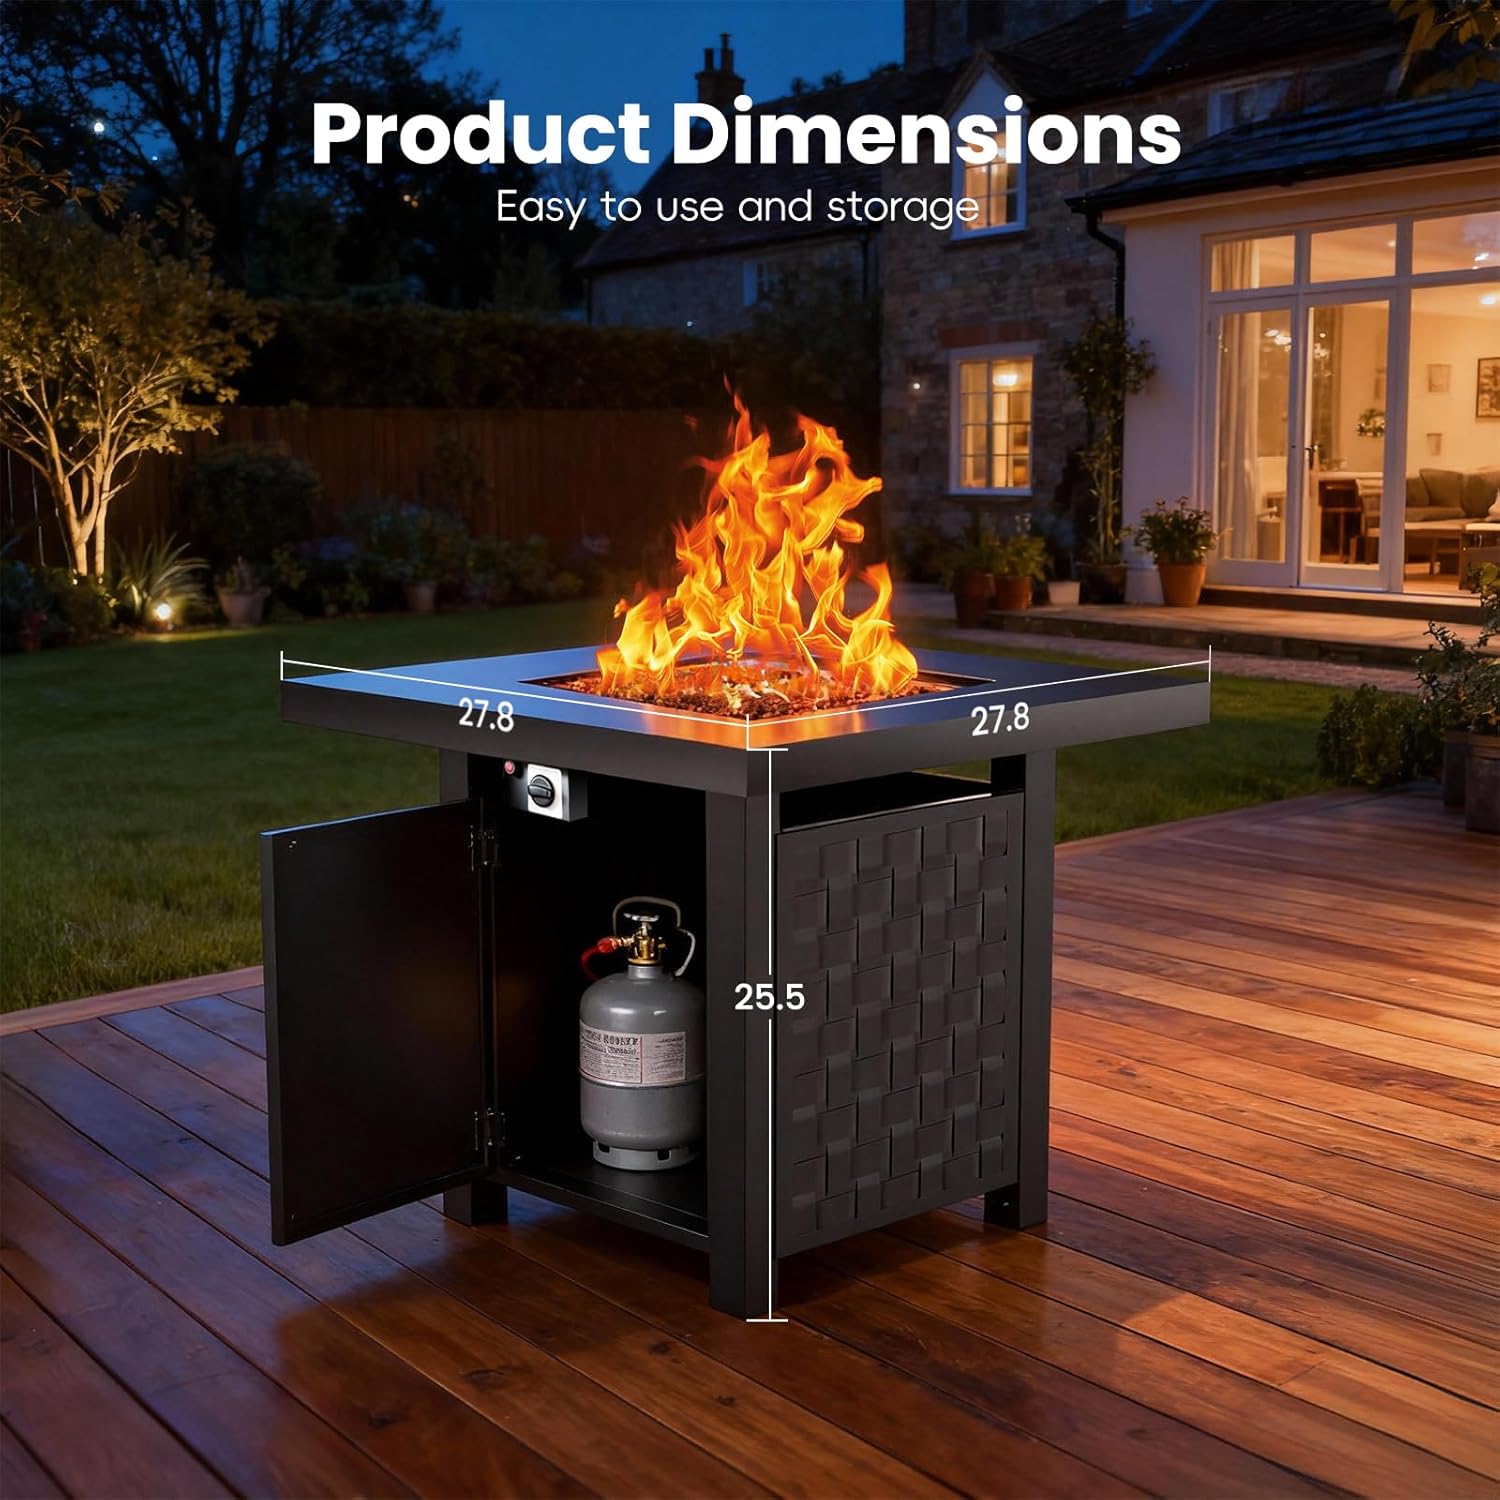
Image 3.2: Product dimensions and internal storage for a standard propane tank.
4. Operating Instructions
Follow these steps to safely light and operate your fire pit table.
Lighting the Fire Pit:
- Ensure the fire pit is in a safe, well-ventilated outdoor area, away from combustibles.
- Confirm the propane tank is connected and the valve is fully open.
- Locate the control knob, typically behind an access door on the side of the fire pit.
- Push and Turn: Push the control knob in and slowly turn it to the 'LOW' or 'IGNITE' position.
- Ignite: While holding the knob in, press the electronic igniter button repeatedly until the burner lights. You should hear a clicking sound.
- Hold: Once lit, continue to hold the control knob in for 10-15 seconds to allow the thermocouple to heat up and engage the safety valve.
- Release: Release the control knob. If the flame extinguishes, repeat steps 4-6.
Adjusting the Flame:
Once the fire pit is lit, you can adjust the flame height and heat output using the control knob.
- Turn the control knob towards 'HIGH' for a larger flame and more heat.
- Turn the control knob towards 'LOW' for a smaller flame and less heat.

Image 4.1: Adjustable flame settings from minimum to maximum.

Image 4.2: Details of the control knob, stainless steel burner, and lava rocks.
Turning Off the Fire Pit:
- Push the control knob in and turn it clockwise to the 'OFF' position.
- Once the flame is extinguished, close the valve on the propane tank.
- Allow the fire pit to cool completely before covering or moving.
5. Maintenance
Regular maintenance ensures the longevity and safe operation of your fire pit table.
- Cleaning: Wipe the tabletop and exterior surfaces with a soft, damp cloth. Avoid abrasive cleaners or harsh chemicals.
- Burner Maintenance: Periodically inspect the burner and lava rocks for debris or blockages. Clean as needed.
- Gas Connections: Regularly check all gas connections for tightness and signs of wear. Perform a leak check if any connections are disturbed.
- Storage: When not in use, especially during inclement weather or off-season, cover the fire pit with a protective cover (often sold separately) to shield it from rain and debris. Store the propane tank in a well-ventilated area, away from direct sunlight and heat sources.
6. Troubleshooting
If you encounter issues with your fire pit, refer to the following common troubleshooting steps:
| Problem | Possible Cause | Solution |
|---|---|---|
| Fire pit will not light |
|
|
| Flame is low or inconsistent |
|
|
| Smell of gas |
|
|
| Flame goes out after releasing control knob |
|
|
If troubleshooting steps do not resolve the issue, please contact CCGIRU customer support.
7. Specifications
| Attribute | Detail |
|---|---|
| Brand | CCGIRU |
| Model Number | KLD4001SPA1 |
| Product Dimensions | 2.54 x 2.54 x 2.54 cm (approx. 28 x 28 x 25.5 inches based on product images); 24.95 kg |
| Heat Output | 50,000 BTU |
| Fuel Type | Liquefied Petroleum Gas (Propane) |
| Material | Heavy-duty Steel, Stainless Steel Burner |
| Certifications | CSA Certified |
| Shape | Rectangular (Square tabletop) |
| Finish Type | Polished |
8. Warranty and Support
For warranty information or technical assistance, please refer to the contact details provided in your product packaging or visit the official CCGIRU website. Keep your purchase receipt for any warranty claims.
For general inquiries or customer support, you may also refer to the customer support options available where you purchased the product.


