
1. Introduction
This instruction manual provides detailed guidance for the assembly, operation, and maintenance of your chartustriable 68-inch Tall Farmhouse Corner Cabinet, Model SQL-666. Please read all instructions carefully before beginning assembly and retain this manual for future reference. This cabinet is designed to provide efficient storage in various rooms such as kitchens, bathrooms, living rooms, and dining rooms, utilizing corner spaces effectively.

Image 1.1: The chartustriable 68-inch Tall Farmhouse Corner Cabinet, fully assembled and placed in a kitchen setting.
2. Safety Information
WARNING: Failure to follow these safety instructions may result in injury or damage to the product.
- Always secure the cabinet to the wall using the provided anti-tip device to prevent tipping and potential injury.
- Do not overload the cabinet as it may cause instability or tipping.
- Ensure all screws and fasteners are tightened securely during assembly. Periodically check for tightness.
- Keep small parts away from children during assembly to prevent choking hazards.
- Assemble the cabinet on a soft, clean surface to prevent scratches.

Image 2.1: Detail view highlighting the anti-falling accessory for wall mounting, adjustable shelves, and metal handles.
3. Package Contents
Before beginning assembly, verify that all parts and hardware are present. The package includes all necessary tools and accessories for assembly. If any parts are missing or damaged, please contact customer support.
- Cabinet panels (numbered)
- Hardware pack (screws, dowels, hinges, handles, anti-tip kit)
- Assembly instructions manual
4. Setup and Assembly Instructions
Assembly is required for this product. It is recommended to have two people for certain steps. Each part and accessory is marked with a number. Follow the provided illustrations in the included manual for precise assembly. A Phillips head screwdriver (not included) is required.
4.1 Pre-Assembly Checks
- Clear a spacious area for assembly.
- Lay out all components on a soft, clean surface to prevent damage.
- Identify all numbered parts and hardware according to the parts list.

Image 4.1: Dimensional diagram of the cabinet, showing overall height (68 inches) and width (28.3 inches).
4.2 Assembly Steps (General Overview)
- Assemble the Base: Connect the bottom panels and side supports using the designated hardware.
- Attach Back Panels: Secure the back panels to the assembled base.
- Install Shelves: Insert the fixed shelves into their respective slots.
- Assemble Upper Section: Construct the upper cabinet section similarly to the base.
- Join Sections: Carefully align and secure the upper section onto the lower section.
- Attach Doors: Mount the four barn-style doors using the provided hinges. Ensure proper alignment for smooth operation.
- Install Handles: Attach the metal handles to the doors.
- Secure Anti-Tip Device: Fasten the anti-tip device to the top rear of the cabinet and then to a wall stud. This step is crucial for safety.

Image 4.2: Illustration of the four barn-style doors, indicating their placement on the cabinet.
5. Operating Instructions
5.1 Adjustable Shelves
The cabinet features adjustable shelves to accommodate items of various heights. To adjust a shelf:
- Empty the shelf of all contents.
- Carefully lift the shelf and remove the shelf pins from their current holes.
- Reinsert the shelf pins into the desired new holes, ensuring they are level.
- Place the shelf back onto the pins, ensuring it is stable before placing items on it.
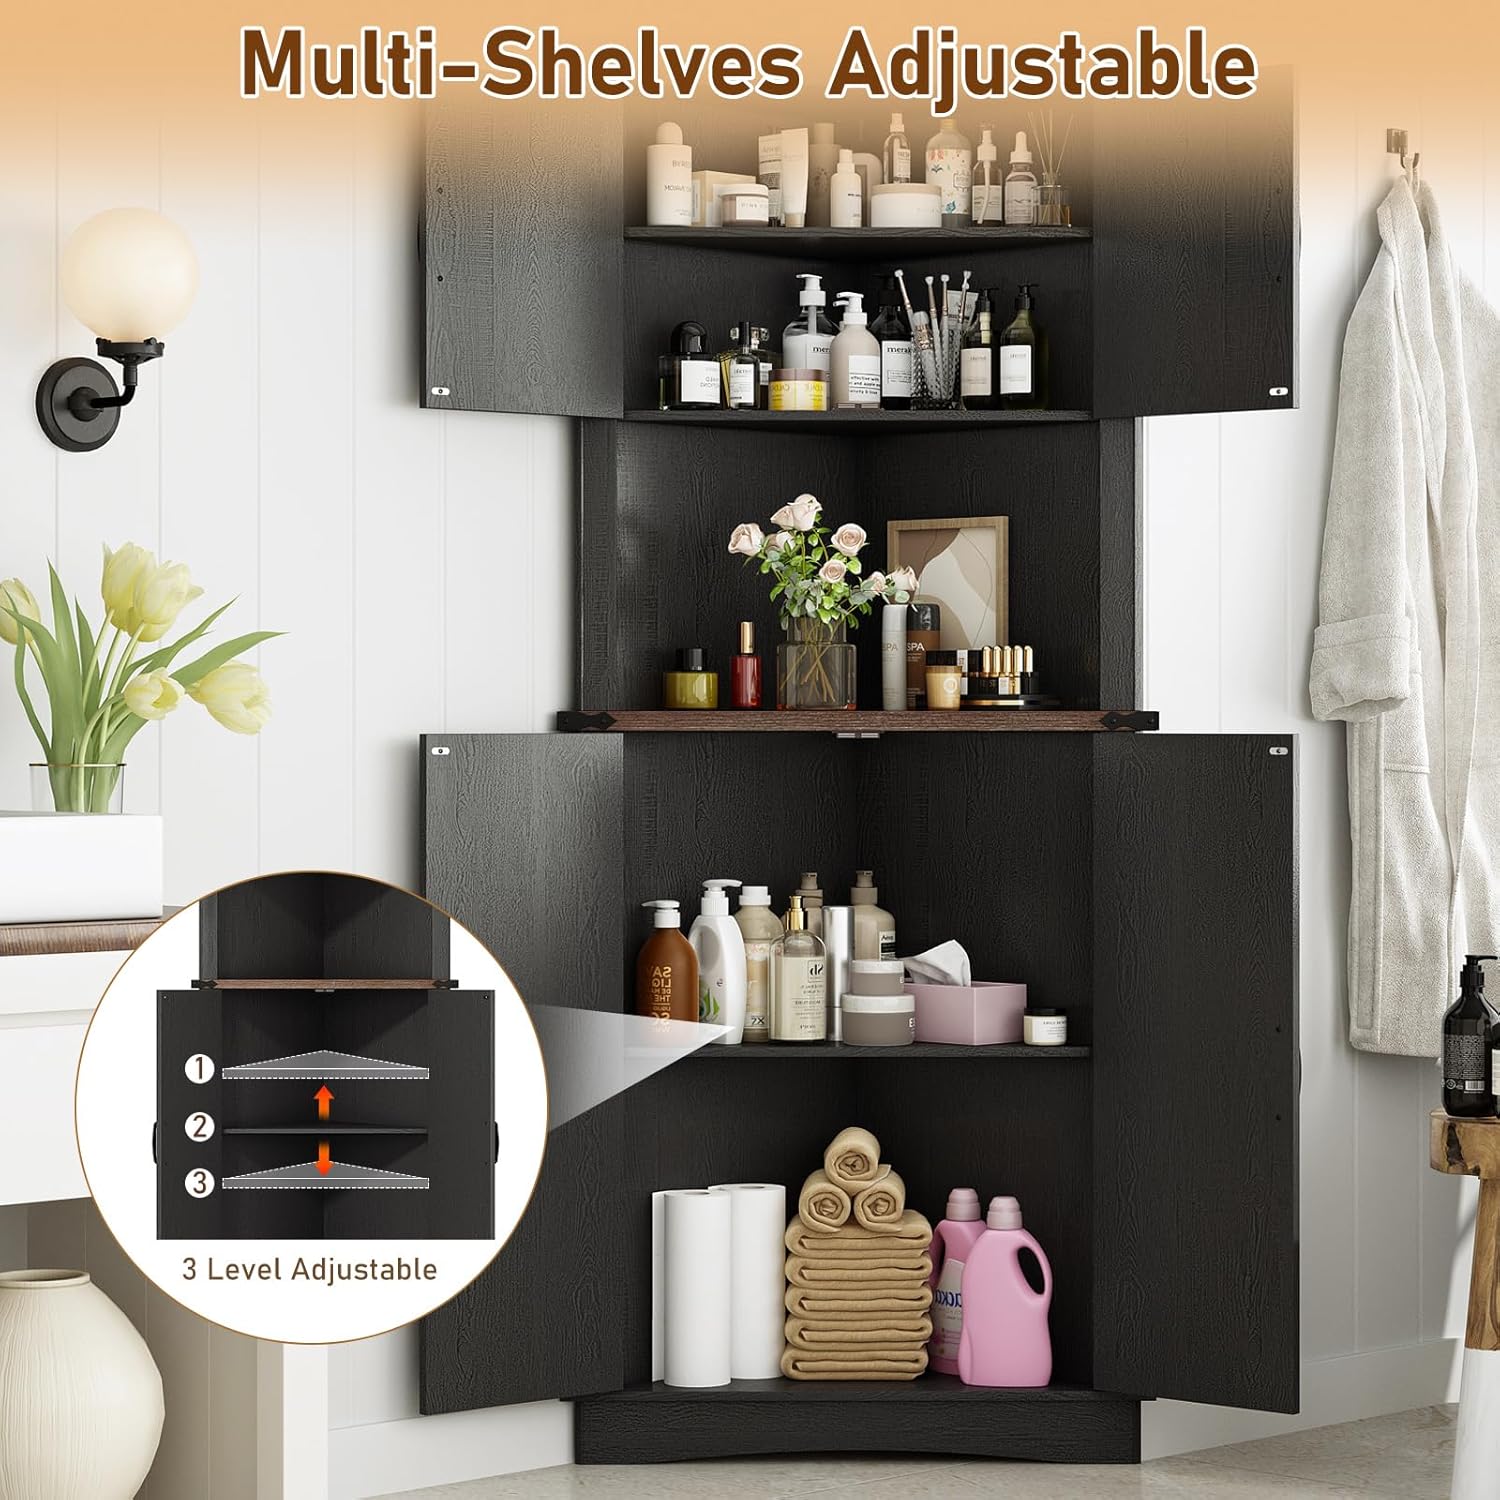
Image 5.1: The adjustable shelves feature, demonstrating how to change shelf height for customized storage.
5.2 Door Operation
The barn-style doors open and close smoothly. Use the metal handles to open and close the doors. Avoid forcing the doors if they feel stiff; check hinges for any obstructions or misalignment.
6. Maintenance
- Cleaning: Wipe surfaces with a soft, damp cloth. Avoid abrasive cleaners or harsh chemicals that could damage the finish.
- Hardware: Periodically check all screws and fasteners to ensure they remain tight. Tighten as necessary to maintain stability.
- Environment: Avoid placing the cabinet in direct sunlight or near heat sources to prevent material warping or discoloration. Maintain a stable humidity level.
7. Troubleshooting
- Wobbly Cabinet: Ensure all screws are fully tightened. Verify the cabinet is placed on a level surface. Adjust leg levelers if applicable.
- Doors Not Aligning: Check hinge adjustments. Loosen hinge screws slightly, adjust door position, and re-tighten. Ensure the cabinet itself is level.
- Missing Parts: If any parts were missing upon unboxing, refer to the contact information in Section 9 for assistance.
8. Specifications
| Feature | Detail |
|---|---|
| Brand | chartustriable |
| Model Name | SQL-666 |
| Product Dimensions | 20"D x 28.3"W x 68"H |
| Color | Black |
| Material | Engineered Wood |
| Special Feature | Adjustable Shelf |
| Mounting Type | Wall Mount (with anti-tip device) |
| Number of Shelves | 5 (including 1 open compartment and 4 hidden) |
| Item Weight | 60 Pounds |
| Assembly Required | Yes |
9. Warranty and Support
For warranty information or customer support, please refer to the documentation included with your purchase or contact chartustriable directly through their official website or the retailer where the product was purchased. Please have your model number (SQL-666) and purchase date available when contacting support.
For additional assistance, you may visit the chartustriable store online: chartustriable Store