1. Product Overview
The Kensington Pro Fit Ergo TB450 Trackball Mouse combines ergonomic design with versatile wireless connectivity for enhanced comfort and productivity. It features both Bluetooth Low Energy (LE) and 2.4GHz wireless options, allowing connection to up to three devices. Constructed with 50% recycled plastic, this trackball mouse offers a long battery life, a patented ball ejection system for easy cleaning, and precise optical tracking with four adjustable DPI settings.

Figure 1: Kensington TB450 mouse showing 45-degree ergonomic tilt for natural hand positioning, which helps improve wrist and forearm alignment.
Video 1: This video provides a brief overview of the Kensington Pro Fit Ergo TB450 Wireless Trackball Mouse, highlighting its ergonomic design, dual wireless connectivity, and key features.
2. What's in the Box
- Pro Fit® Ergo TB450 Trackball Mouse
- USB-A Receiver
- Quick Start Guide
- Compliance Sheet
- Warranty Card
- Welcome Card
- 1 x AA Alkaline Battery
3. Setup
3.1 Powering On and Battery Installation
- Locate the battery compartment on the underside of the trackball mouse.
- Insert the provided 1 x AA alkaline battery, ensuring correct polarity.
- Turn the On/Off switch (located on the underside) to the 'On' position.
3.2 Connecting Your Device
The TB450 offers dual wireless connectivity: 2.4GHz via USB-A receiver or Bluetooth Low Energy (LE). You can connect up to three devices (one 2.4GHz, two Bluetooth).

Figure 2: Kensington TB450 mouse on a desk with a keyboard, illustrating dual wireless connection compatibility with Windows, macOS, and Chrome OS.
2.4GHz Wireless Connection:
- Remove the USB-A receiver from its storage slot on the underside of the mouse.
- Plug the USB-A receiver into an available USB-A port on your computer.
- Switch the channel selector button (located on the underside) to Channel 1 (indicated by a solid light). The mouse should automatically connect.
Bluetooth LE Connection:
- Switch the channel selector button (located on the underside) to Channel 2 or 3. The corresponding LED will blink.
- On your computer or device, go to Bluetooth settings and search for new devices.
- Select 'Kensington TB450' from the list of available devices to pair. The LED will turn solid once connected.
4. Operating Instructions
4.1 Button Functions
The TB450 features multiple buttons for enhanced control:
- Left Click: Standard primary click function.
- Right Click: Standard secondary click function.
- Scroll Wheel: For vertical scrolling.
- Forward/Backward Buttons: For navigating web pages or documents.
- Thumb-Operated Trackball: For precise cursor control.

Figure 3: Diagram illustrating the various button functions and indicators on the Kensington TB450 mouse.
4.2 DPI Adjustment
The TB450 offers four DPI (Dots Per Inch) options to adjust cursor speed and precision:
- 400 DPI
- 800 DPI
- 1200 DPI
- 1600 DPI
To change the DPI setting, press the DPI switch button located on the underside of the mouse. The indicator lights will show the current DPI level.
4.3 Ergonomic Design
The sculpted ergonomic design with a unique 45° tilt promotes natural hand positioning, helping to improve wrist and forearm alignment for all-day comfort.

Figure 4: Kensington TB450 mouse in a professional workspace setup, demonstrating comfortable use.
5. Maintenance
5.1 Cleaning the Trackball
If you experience issues such as stickiness, slowness, or scrolling problems with your trackball mouse, it likely needs cleaning. Follow these steps to clean and lubricate your trackball for optimal functionality:
- Remove the trackball from its socket using the eject button on the bottom of the trackball frame.
- Clean the trackball and the trackball frame with a damp cloth or rubbing alcohol. Allow them to dry completely.
- Lightly lubricate the trackball with a non-acidic lotion. An oil-based lotion like Vaseline is recommended for best results. Evenly rub a pea-sized amount of lotion into the palms of your hands and roll the trackball across the lotion until it is evenly lubricated.
- Gently push the trackball back into the socket. If it feels slightly sticky, roll it around in the socket until it moves freely.
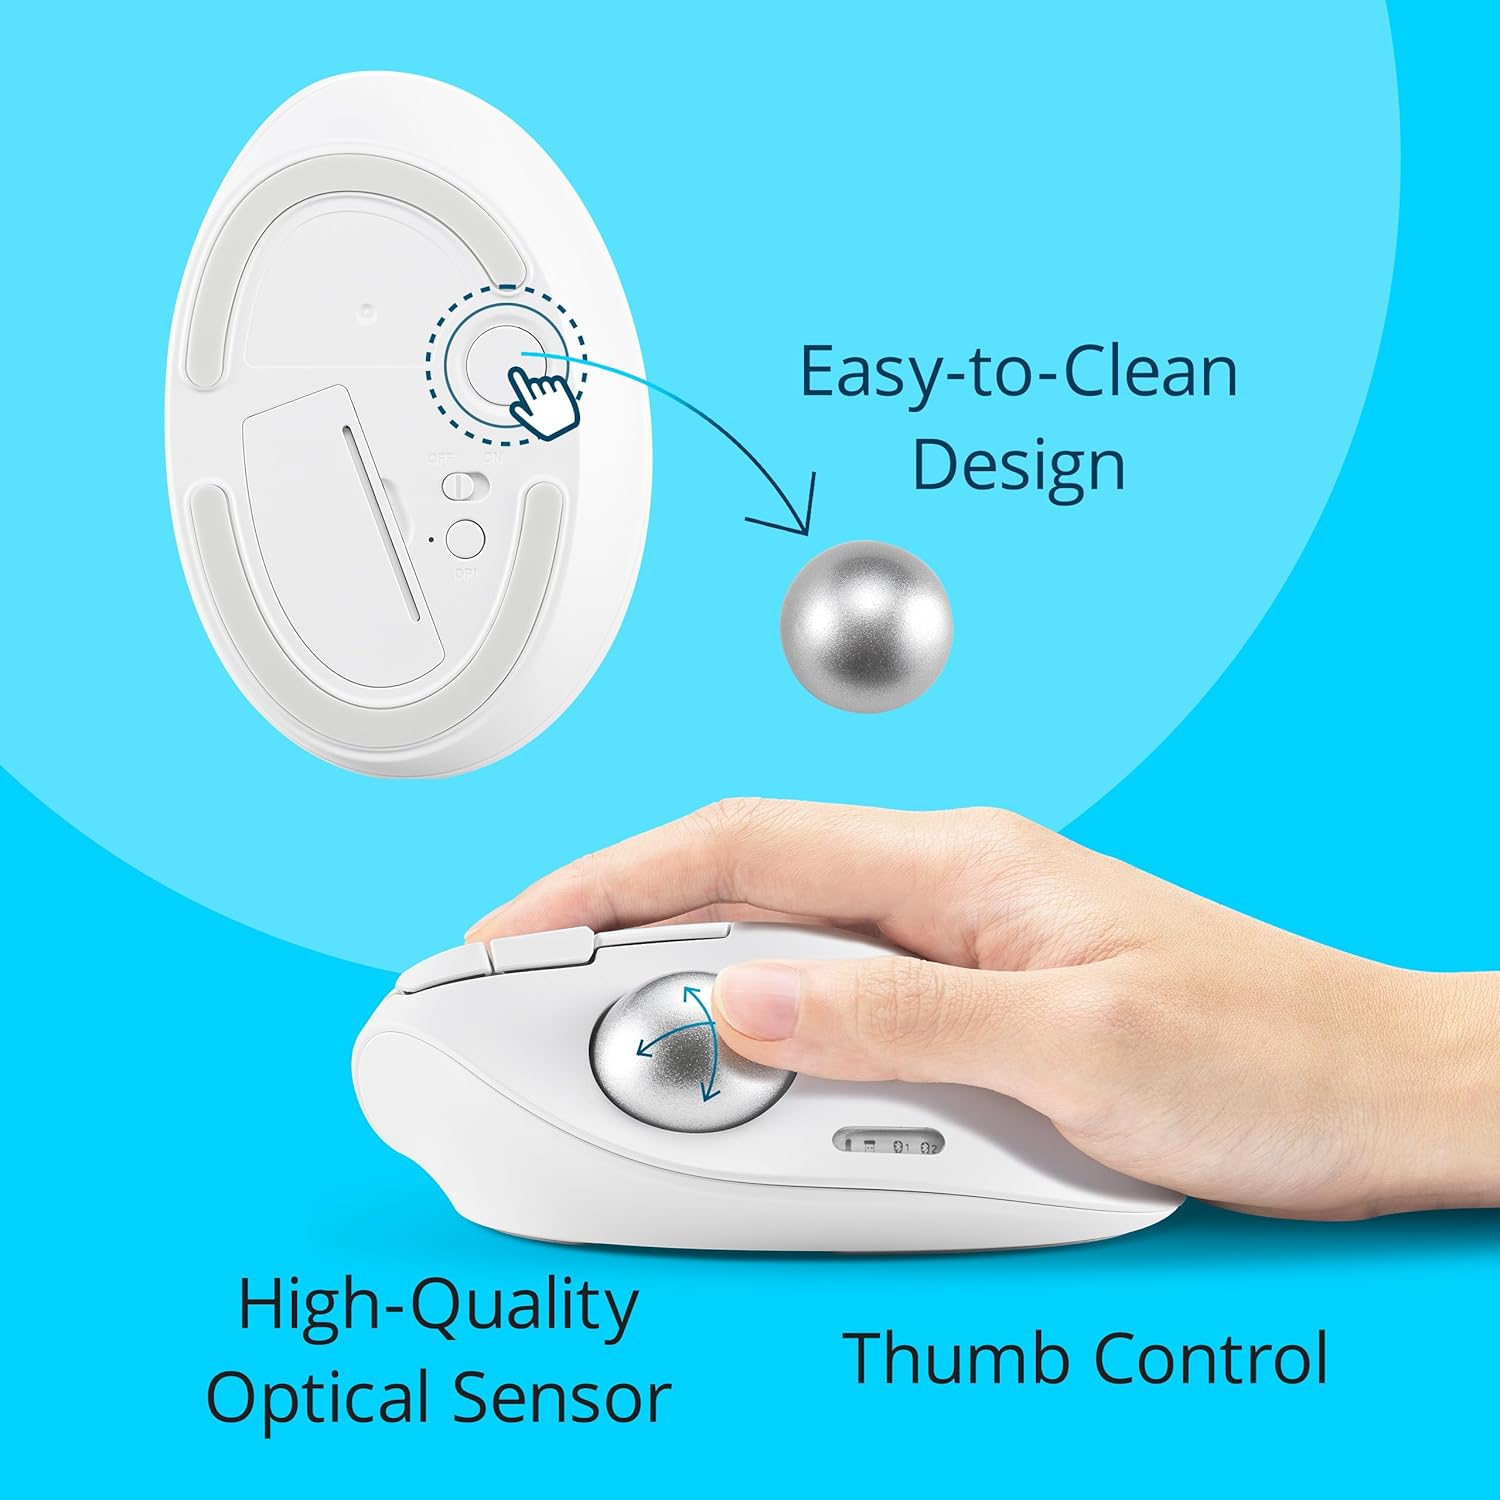
Figure 5: Underside of Kensington TB450 mouse showing the ball eject button for easy cleaning.
6. Troubleshooting
If you encounter issues with your Kensington TB450 Trackball Mouse, consider the following:
- Connectivity Issues: Ensure the mouse is turned on and the correct channel (2.4GHz, Bluetooth 1, or Bluetooth 2) is selected. For Bluetooth, verify your device's Bluetooth is enabled and the mouse is paired. For 2.4GHz, try plugging the USB receiver into a different port.
- Cursor Movement Problems (Sticky, Slow, Erratic): This is often due to dirt or debris on the trackball or inside the socket. Refer to Section 5.1 for detailed cleaning instructions.
- Battery Life: If the mouse is unresponsive, the battery may be low. Replace the AA battery. The mouse offers up to 18 months with 2.4GHz and 15 months with Bluetooth.
- DPI Sensitivity: If the cursor speed is not as desired, adjust the DPI setting using the DPI switch button on the underside of the mouse.
7. Specifications
| Brand | Kensington |
| Model | TB450 |
| Connectivity Technology | 2.4Ghz wireless, Bluetooth LE |
| Movement Detection Technology | Trackball |
| DPI Options | 400, 800, 1200, 1600 |
| Battery Type | 1 x AA Alkaline Battery (included) |
| Average Battery Life | Up to 18 months (2.4GHz), Up to 15 months (Bluetooth) |
| Hardware Platform | Mac, PC |
| Operating System | Windows, macOS |
| Item Weight | 8.6 ounces |
| Package Dimensions | 6.85 x 4.13 x 2.48 inches |
| Color | White |
| Special Features | Ergonomic Design, Lightweight, Programmable Buttons, Wireless, 128-bit AES Encryption |
8. Warranty and Support
Your Kensington Pro Fit Ergo TB450 Trackball Mouse comes with a limited warranty. Please refer to the included Warranty Card and Welcome Card for specific terms, conditions, and contact information for technical support.
For further assistance, visit the official Kensington support website or contact their customer service as detailed in your product documentation.


