Product Overview
The AdaLov CPE882 is a high-performance WiFi 6 Wireless Bridge designed for extending network connectivity over long distances. It operates on dual bands (2.4GHz and 5.8GHz) and features Gigabit Ethernet ports, making it suitable for various outdoor and remote applications.
- Dual-Band WiFi 6: Supports 2.4GHz and 5.8GHz frequencies for stable, high-speed connections.
- Gigabit Wired Ports: Two 1000Mbps Ethernet ports for high-bandwidth devices.
- Long-Range Coverage: Built-in 14dBi high-gain antenna provides stable transmission up to 5 kilometers.
- POE Support: Compatible with standard 48V and non-standard 24V POE for flexible power options.
- Starlink Compatible: Seamlessly extends Starlink internet to remote locations.
- IP65 Weatherproof: Durable enclosure with TVS lightning protection for harsh outdoor environments.
- Pre-Configured Plug & Play: Simplifies setup for immediate use without complex technical expertise.
Package Contents
The AdaLov CPE882 package includes the following items:
- 2 x Gigabit WiFi Bridges (1 x User Manual)
- 2 x PoE Injectors (24V)
- 2 x Network Cable (1m)
- 2 x Tube Clamp for Bridge
- 2 x Wall Hole Bushings
Setup
The AdaLov CPE882 wireless bridges come pre-configured for point-to-point operation, simplifying the initial setup. Follow these steps for installation:
- Mounting: Securely mount each bridge in a location that provides a clear line of sight to the other bridge. Use the provided tube clamps for pole mounting or wall hole bushings for wall mounting.
- Power Connection: Connect each bridge to its respective PoE injector using an Ethernet cable. Plug the PoE injector into a power outlet.
- Network Connection: Connect the LAN port of the primary PoE injector to your router or network switch. Connect the LAN port of the secondary PoE injector to your end device (e.g., PC, IP camera, secondary router).
- Verification: Once powered on, the bridges will automatically attempt to pair. Check the LED indicators on the side of the bridges to confirm a successful connection and signal strength.
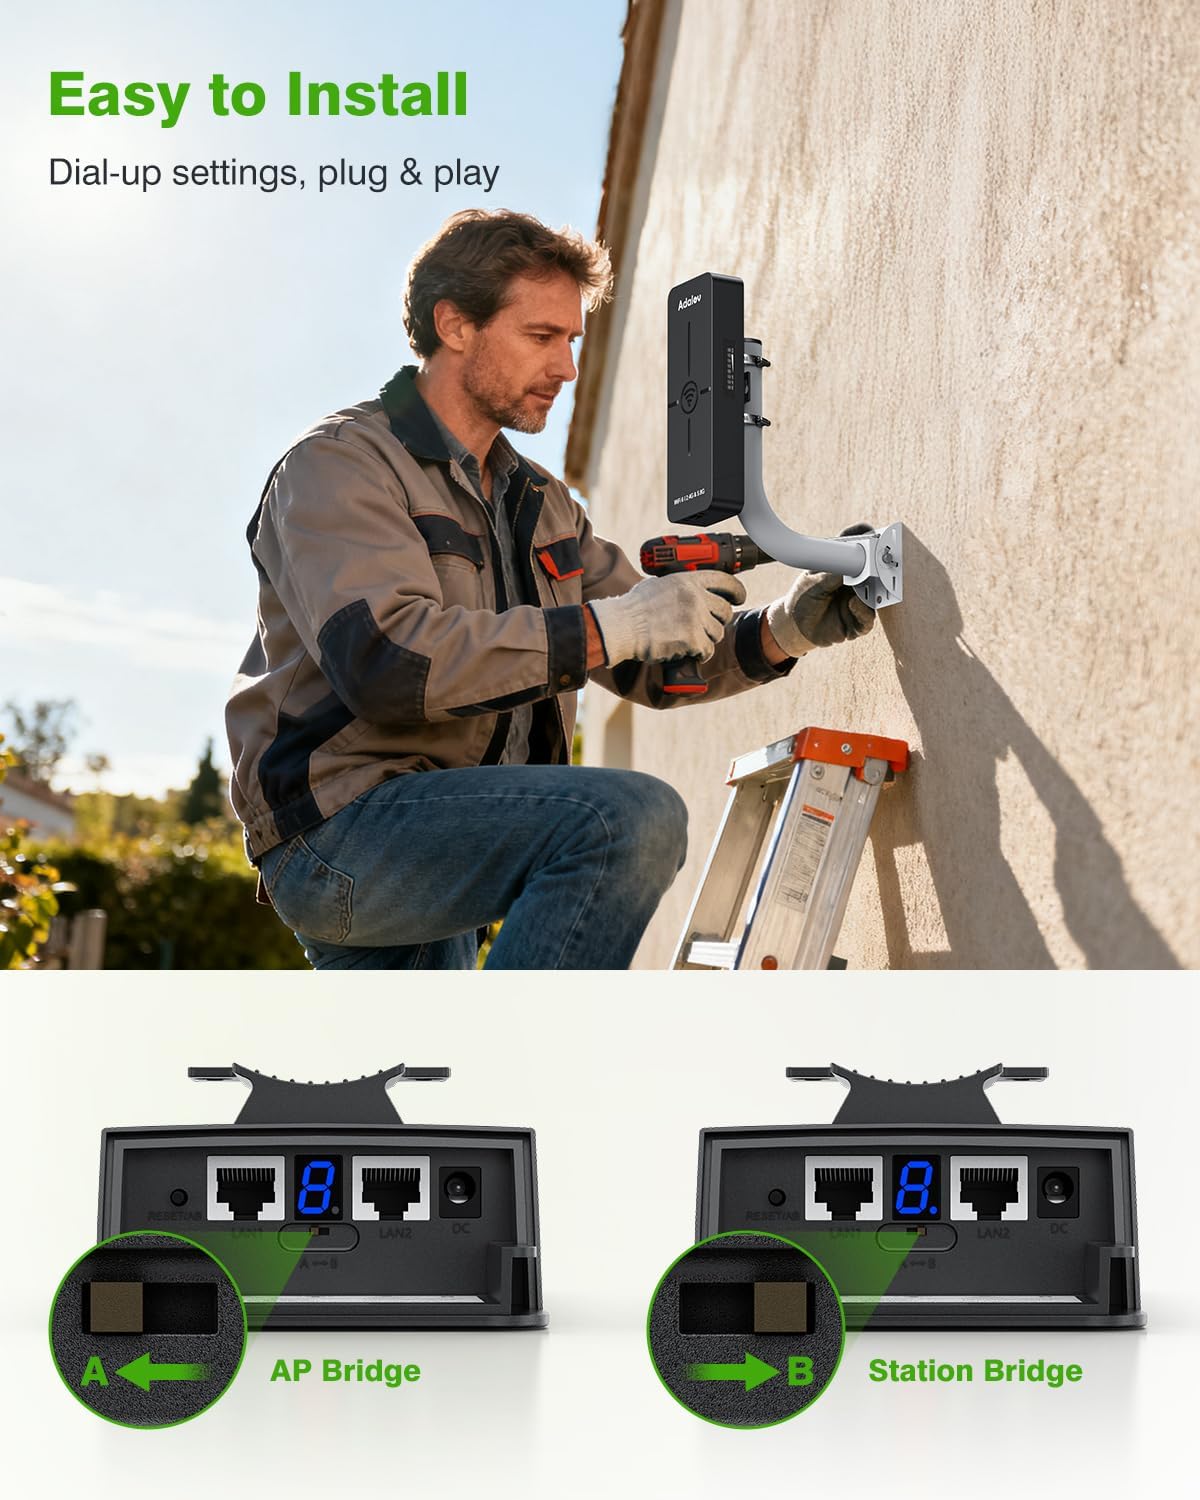
Image: A man installing the AdaLov WiFi 6 Wireless Bridge on the exterior wall of a building.
Video: A seller-provided video demonstrating how to set up the bridges for network extension and security cameras.

Image: Diagram illustrating a Point-to-Point network extension setup using two AdaLov wireless bridges to connect a router to a network switch and computer.

Image: Diagram illustrating a Point-to-Point setup for a single security camera using two AdaLov wireless bridges.

Image: Diagram illustrating a Point-to-Point setup for multiple IP cameras connected via a switch to AdaLov wireless bridges.

Image: Diagram illustrating a Point to Multi-Point setup where one AP Bridge connects to multiple Station Bridges for IP cameras.

Image: Diagram illustrating how AdaLov wireless bridges can extend a Starlink network to other buildings.
Operating Modes
The CPE882 bridges can operate in different modes to suit your network extension needs:
- AP Bridge Mode: One bridge acts as an Access Point (AP), transmitting the network signal.
- Station Bridge Mode: The other bridge acts as a Station, receiving the network signal.
The devices are pre-configured for a simple point-to-point connection. They support dual-band WiFi 6, utilizing both 2.4GHz for longer range and 5.8GHz for higher speeds.
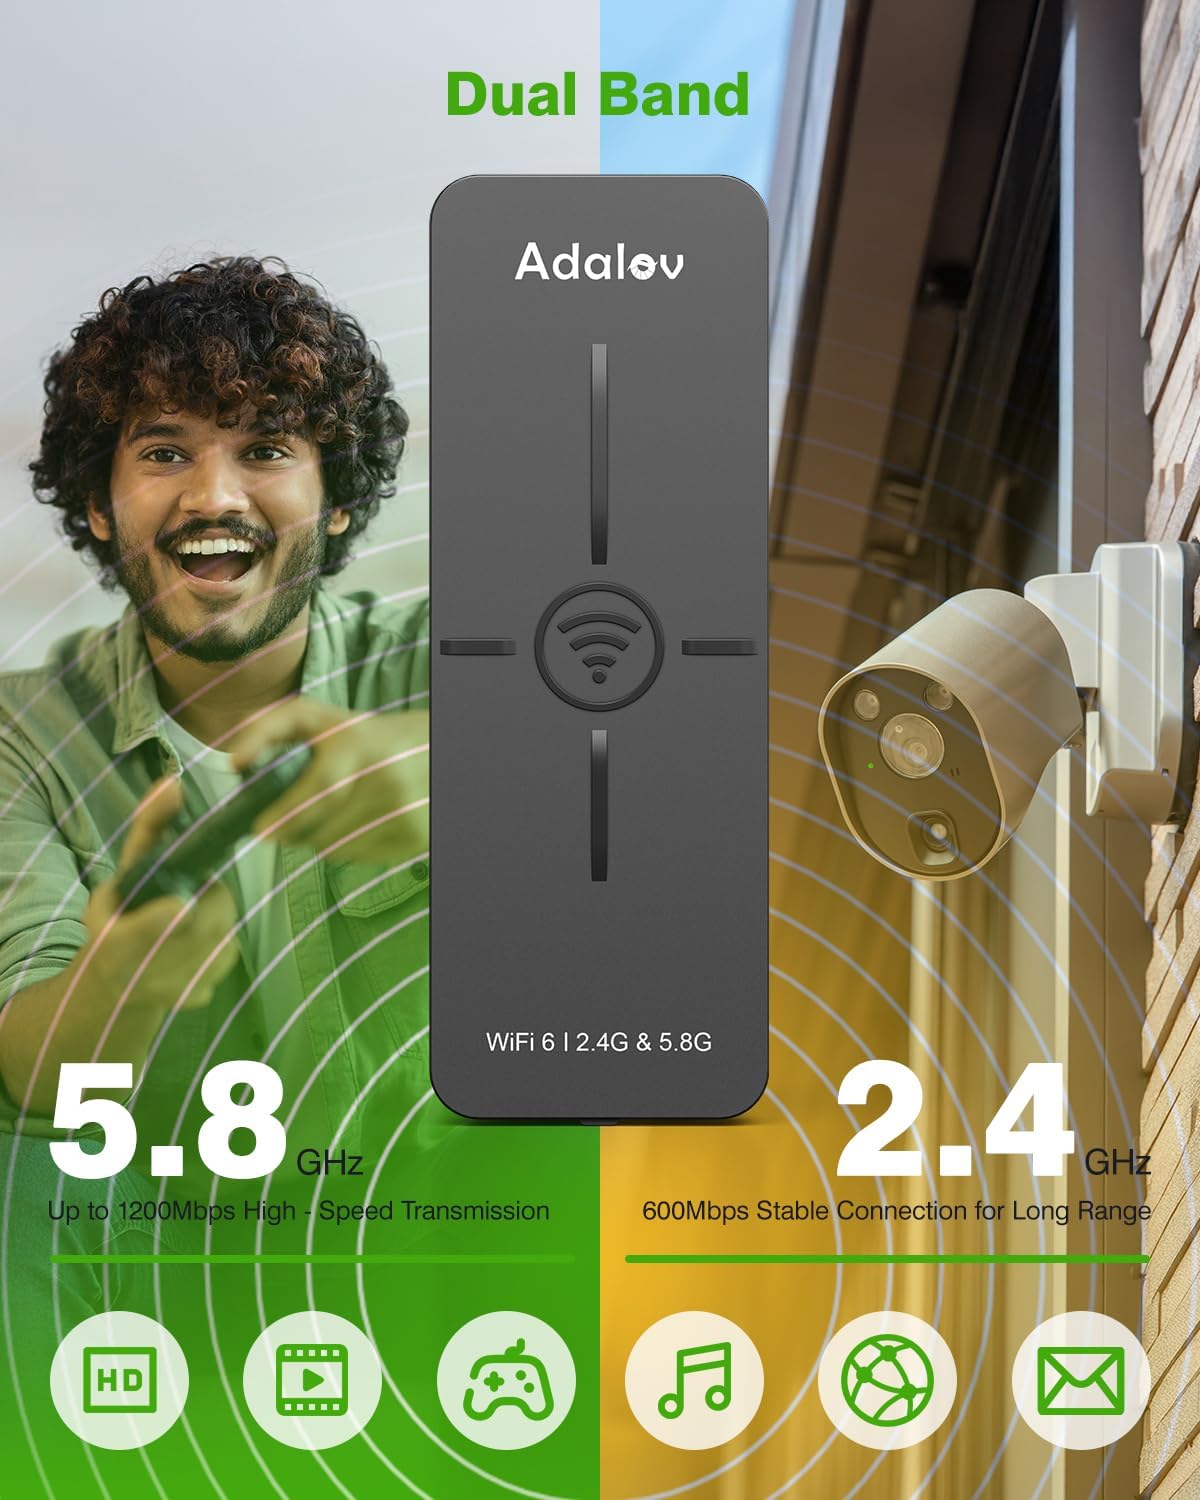
Image: The AdaLov WiFi 6 Wireless Bridge showcasing its dual-band capabilities (2.4GHz and 5.8GHz) for different speed and range requirements.

Image: The AdaLov WiFi 6 Wireless Bridge emphasizing faster, smoother, and more stable performance compared to older WiFi standards.

Image: The AdaLov WiFi 6 Wireless Bridge highlighting its dual Gigabit LAN ports for high-speed wired connections.
Maintenance
The AdaLov CPE882 is designed for minimal maintenance due to its robust construction.
- Regular Checks: Periodically inspect the physical connections and mounting for any signs of wear or damage.
- Cleaning: Keep the device's exterior clean from dust and debris to ensure optimal performance.
- Firmware Updates: Check the manufacturer's website for any available firmware updates to ensure optimal performance and security.
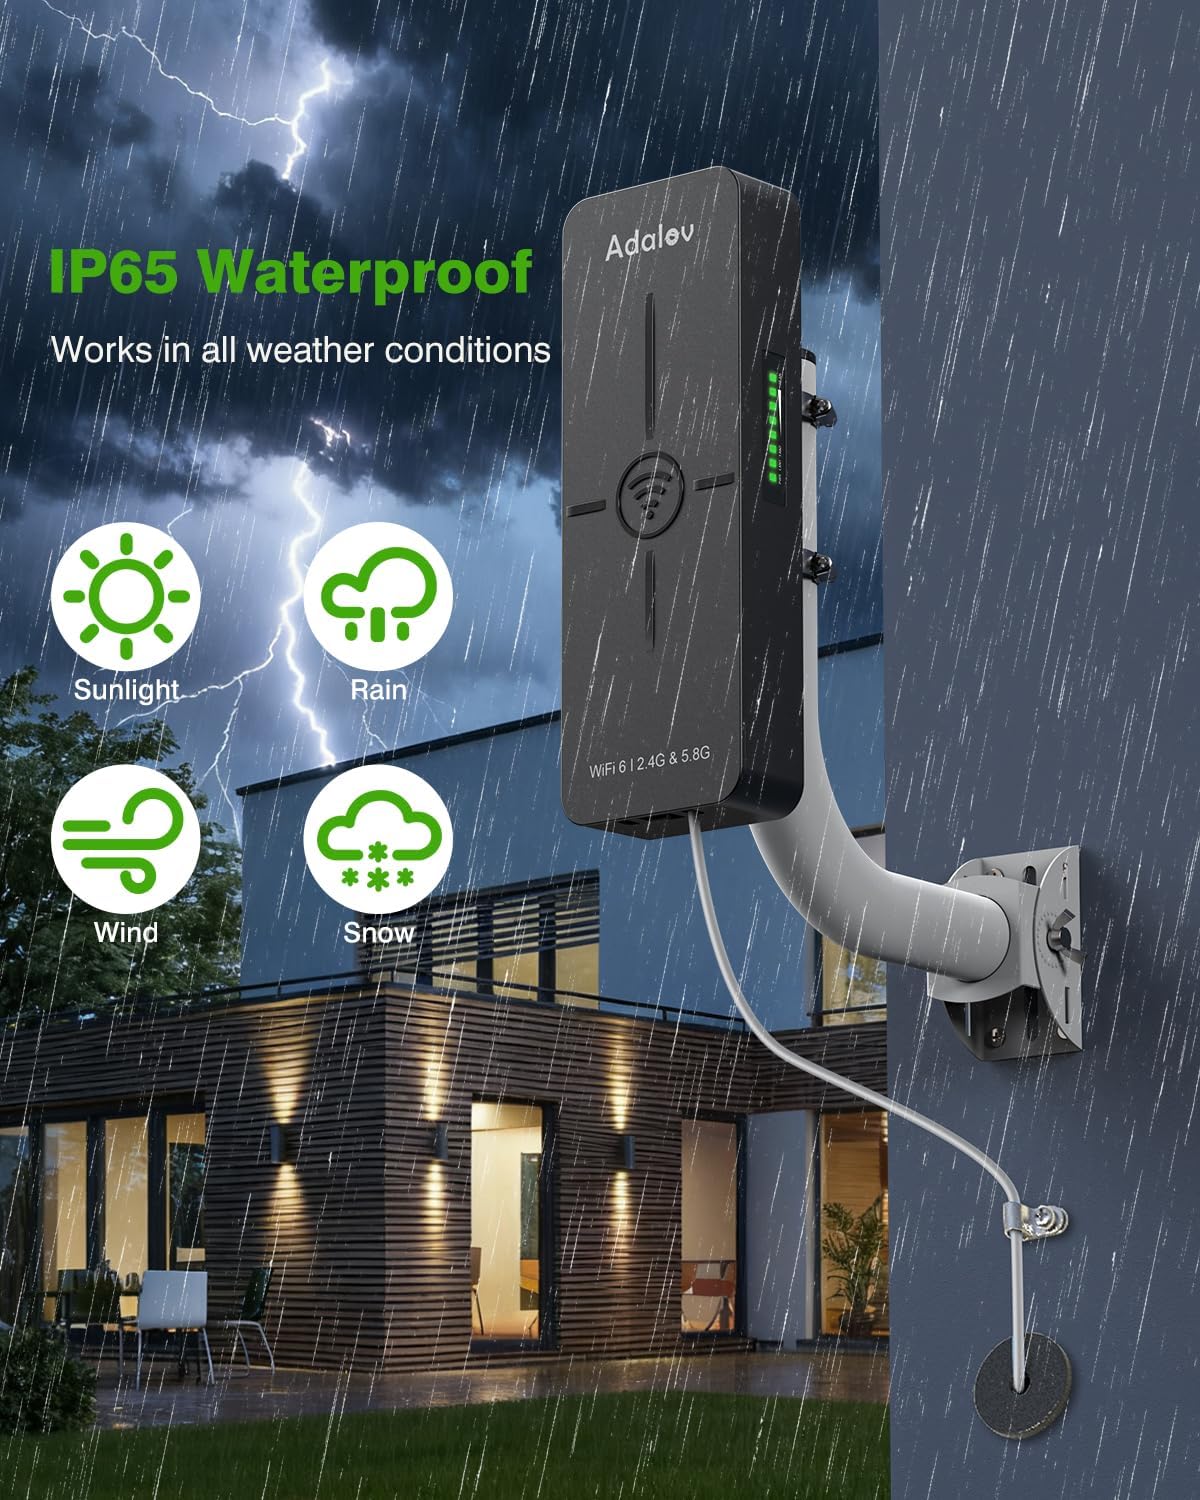
Image: The AdaLov WiFi 6 Wireless Bridge shown operating reliably in various weather conditions, emphasizing its IP65 weatherproof and lightning protection features.
Troubleshooting
If you encounter issues with your AdaLov CPE882 wireless bridge, consider the following:
- Power Check: Ensure both bridges and their PoE injectors are properly powered and connected.
- Cable Connections: Verify all Ethernet cables are securely plugged into the correct ports.
- Line of Sight: Confirm there is a clear, unobstructed line of sight between the two bridges for optimal signal transmission. Physical barriers like buildings or dense trees can degrade performance.
- LED Indicators: Refer to the LED indicators on the side of the bridges to diagnose connection status and signal strength.
- Reset: If issues persist, perform a factory reset on both devices (refer to the user manual for specific instructions).

Image: Diagram showing how signal can be blocked by obstructions like buildings or trees, leading to poor signal reception between AdaLov bridges.

Image: Diagram showing optimal signal transmission and throughput with a clear line of sight and proper aiming between two AdaLov wireless bridges.
Video: A seller-provided video reviewing the WiFi 6 Bridge, highlighting its 5KM range and plug-and-play setup, which can be useful for troubleshooting.
Specifications
| Brand | AdaLov |
| Model Name | CPE882 |
| Wireless Standard | WiFi 6 (802.11ax) |
| Frequency Band Class | Dual-Band (2.4GHz / 5.8GHz) |
| Wireless Speed | Up to 1800Mbps (Dual-band) |
| Ethernet Ports | 2 x 1000Mbps Gigabit LAN |
| PoE Support | Standard 48V and Non-standard 24V POE |
| Weatherproof Rating | IP65 |
| Special Features | Access Point Mode, Guest Mode, Internet Security, LED Indicator, Weatherproof |
| Item Weight | 15.8 ounces |

Image: A comparison table detailing the features of the CPE882 WiFi 6 Bridge against a generic Non-WiFi 6 Bridge, highlighting superior wireless standard, speed, Ethernet ports, PoE support, and WiFi broadcasting.
Warranty and Support
For warranty information or technical support, please refer to the official AdaLov website or contact their customer service directly. Keep your purchase receipt for any warranty claims.
The product typically includes a 30-day return/replacement policy. Extended protection plans may be available for purchase separately.